Archives For November 30, 1999

OBS Studio, the free and open-source software for video recording and live streaming, released version 27.0.0 a few days ago. Here’s how to install it in Ubuntu 18.04, Ubuntu 20.04, Ubuntu 21.04 via PPA.

OBS Studio 27.0.0 features native Wayland support, includes new PipeWire capture source for Ubuntu 21.04+. Also, it adds undo/redo support either from ‘Edit’ menu or via Ctrl+Z /Ctrl+Shift+Z keyboard shortcuts.

Other changes in the release include:

  • Display Capture on laptops now allows for capturing displays on different GPUs
  • Added a missing files warning when loading scene collections
  • Added service integration and browser dock support to macOS and Linux
  • (Windows only) Added support for NVIDIA Noise Removal in the Noise Suppression filter
  • Added a Track Matte mode to stinger transitions
  • Added support for SRGB texture formats

How to Install OBS Studio 27.0 via PPA:

The official Ubuntu PPA has made the packages for Ubuntu 18.04, Ubuntu 20.04, Ubuntu 20.10, Ubuntu 21.04, and their derivatives.

1. Open terminal either by pressing Ctrl+Alt+T on keyboard or by searching for “terminal” from app launcher. When it opens, run command to add the PPA:

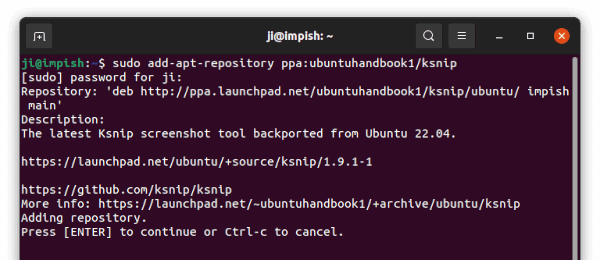
sudo add-apt-repository ppa:obsproject/obs-studio

Type user password (no asterisk feedback) when it prompts and hit Enter.


2. Then either upgrade OBS Studio from an existing version using Software Updater, or run command in terminal to install the software:

sudo apt-get update

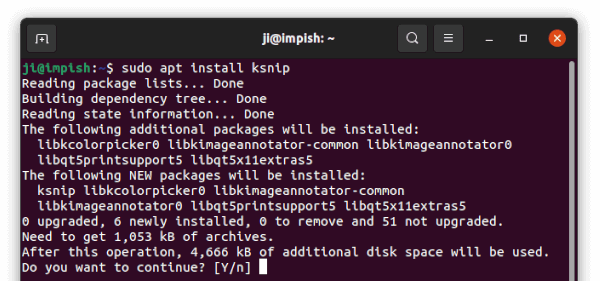
sudo apt-get install obs-studio

Once installed, launch the software from your system application launcher and enjoy!

Uninstall:

To remove the software, either use Synaptic package manager or run command in terminal:

sudo apt-get remove --autoremove obs-studio

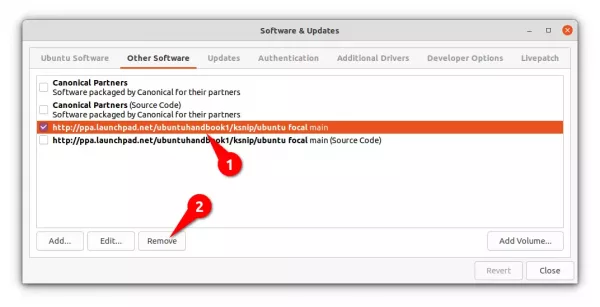
To remove PPA repositories, launch Software & Updates and navigate to ‘Other Software’ tab, then remove the relevant line from the list.

The font size of startup boot menu is too small or too large? It’s easy to fix by setting an appropriate screen resolution for the Grub boot-menu in Ubuntu.
1.) Tell which video modes your graphics card support.
Before starting to configure the Grub bootloader, you firstly need to know which video modes are supported.

a.) The hwinfo command has an option to display the information. It however show me nothing. You can try it by opening terminal (Ctrl+Alt+T) and run command:

sudo apt install hwinfo && hwinfo --framebuffer

b.) If howinfo does not work, use videoinfo instead which however runs in Grub command console.

Firstly restart your machine. When you’re at Grub boot-menu, press c to get into command console.

Next run command videoinfo to list supported video modes.

Take a picture of the output, or write down your desired resolution, e.g., 1024x768x32 and 1280x1024x32.

Finally run exit to get back boot menu.

2.) Set a custom screen resolution for Grub boot menu:

Now boot into Ubuntu, open terminal from system app launcher, and run command to edit the Grub configuration file:

sudo gedit /etc/default/grub

Next set a screen resolution by changing value of “GRUB_GFXMODE”. For instance, set 1024x768x32 (32 means 32-bit color) via:

GRUB_GFXMODE=1024x768x32,auto

Multiple resolutions can be specified, the default is auto.

Without running command, you can also set it via Grub Customizer under its ‘Appearance settings’ page.

3.) Update grub to apply change:

If changed the solution via Grub Customizer, simply click on “Save” button. Or, open terminal and run command to update grub:

sudo update-grub

That’s all. Enjoy!

Virtualbox

This tutorial shows how to mount the VirtualBox virtual disk image in Ubuntu, so you can access the Guest OS file system with read and write permission, if it does not boot.

After misconfigured my VirtualBox Guest OS, it does not longer work. I know how to correct the issue to make it boot again, but firstly accessing to the file system is required!

Since the VBox user manual does not work, here’s what I did in Ubuntu 20.04 host with VirtualBox 6.1.x:

Before getting started, make sure Guest OS is shutdown. And the disk image is not in use. Also UN-MOUNT the disk once the job done.

1.) Firstly open terminal from system application launcher. When it opens, run command:

vboximg-mount --list

vboximg-mount is a utility to make VBox disk images available to the host. With --list, it list all Disk Images as well as the UUID.

In the case, I have all Guest OSes on single Disk Image (.vdi). And the uuid is: “3db5fd91-fd56-46af-a2d2-98cd62b05ea3”

2.) Next perform a FUSE mount of the virtual disk image:

  • First create a folder as mount point, vbox_sysdisk for instance:
    mkdir vbox_sysdisk
  • Then mount it via command (remember to change the UUID to yours):
    vboximg-mount -i 3db5fd91-fd56-46af-a2d2-98cd62b05ea3 -o allow_root vbox_sysdisk

NOTE: You may need to edit the “/etc/fuse.conf” to make the -o allow_root flag work. To do so, run command sudo gedit /etc/fuse.conf and enable (remove # at its beginning) “user_allow_other” line.

3.) As the previous picture shows, I have 5 disk partitions: vol0, vol1, …, vol4. Now mount either partition (vol4 for instance) to /mnt via command:

sudo mount vbox_sysdis/vol4 /mnt

Finally go to /mnt directory and there you are.

Unmount:

To un-mount the guest os file system, run command:

sudo umount /mnt

To un-mount the VBox disk image, run command:

umount ~/vbox_sysdisk

And you may finally remove that folder either from file manager or by running command in terminal:

rm -r ~/vbox_sysdisk

Since Ubuntu replaced Chromium in its universe repository with Snap package, users are looking for deb package or apt method to install the browser.

The Linux Mint team has been maintaining the chromium deb package for a while. You can install the package in Ubuntu and keep updated. It’s stable and trustworthy, however the installing process is not as easy as an Ubuntu PPA does.

Another Ubuntu PPA now contains the latest packages (90.0.4430.212 at the moment) for Ubuntu 20.04 and Ubuntu 20.10. The PPA also contains most recent versions of other useful apps, e.g., avidemux, filezilla, youtube-dl, and more. And it’s also trusty.

Chromium package in the PPA is backported from Debian Unstable repository. So it’s marked as ‘Developer build’. If you don’t want to add Linux Mint repository, the PPA can be a good alternative.

1.) Add the Ubuntu PPA:

Firstly open terminal from system app launcher. When it opens, run command to add the PPA:

sudo add-apt-repository ppa:xtradeb/apps

2.) Install Chromium:

Same to Linux Mint, the package name has changed from chromium-browser to chromium. Simply run apt command in terminal to install it:

sudo apt install chromium

Add --install-suggests flag in the command if you want to enable minimal shell and WebDriver support.

Remove the PPA:

To remove the Ubuntu PPA, either open Software & Updates -> Other Software and remove the relevant line:

or run command:

sudo add-apt-repository --remove ppa:xtradeb/apps

Go For It To-Do List App

Want to run a command or a script daily, weekly, monthly, or on other given schedule? It’s easy to do this in Ubuntu via cron job.

Cron is a time-based job scheduler to run command or script periodically at fixed times, dates, or intervals. It’s typically used for system maintenance or administration, though it can be useful for general purpose, e.g., downloading file from internet at regular intervals.

1. Edit crontab files:

Users can set up a cron job easily by configuring crontab file by crontab command. It’s pre-installed in Ubuntu based systems. And each user has its own crontab config file.

b.) Schedule task for current user:

To run command or script by current user, simply open terminal from system app launcher and run command:

crontab -e

For the first time, it will prompt to select an editor to edit the config file. Choose one you prefer or press Enter to use the default nano text editor.

b.) If need root or sudo privilege:

For command or script need sudo or root user privilege, you may run following command instead:

sudo crontab -e

It will create (if not exit) or open the configuration file for root user.

c.) Specify a user to run the schedule task:

You can add -u <user_name> flag to specify the user, ji for instance.

sudo crontab -u ji -e

User can be root, so it will do the same to sudo crontab -e:

sudo crontab -u root -e

2. Set time interval, command or script to run periodically:

After running a command in step 1, it opens the configuration file in the terminal window (or command console).

Now scroll down and add a new line:

* * * * * <command or script>

The first 5 asterisks “*” specify the time and date, change them accordingly.

Examples:

a.) For example, to run a python3 script under my Documents folder at midnight (00:00) every Sunday, use:

0 0 * * 0 python3 /home/ji/Documents/script.py

Here:

  • the first 0 specifies the minute, use * for every minute.
  • the second 0 specifies the hour, use * for every hour.
  • the third flag * specifies the day of month, every day if week day not specified.
  • the forth flag * says every month.
  • the fifth flag (third 0) specifies the week day. From 0 to 6 mean Sunday to Saturday.

b.) Run echo "hello world!" command everyday at 16:30, add this line:

30 16 * * * echo "hello world!"

c.) You can use */n to run for every n-th interval of time. And use multiple specific time intervals with commas.

For instance, run the command every Friday at first, second, an third hour every 5th minute (01:00, 01:05, 01:10, …, 02:00, 02:05, 02:10, …, 03:55).

*/5 1,2,3 * * 5 echo "hello world!"

Finally, save the configuration file. If edited via nano, press Ctrl+X on keyboard, type y, and hit Enter to save it.

The 1Password password manager now adds officially Linux support. Here’s how to install it in Ubuntu 20.04 via its apt repository.

1Password is a password manager developed by AgileBits Inc. It provides a place for users to store various passwords, software licenses, and other sensitive information in a virtual vault that is locked with a PBKDF2-guarded master password. By default, this encrypted vault is stored on the company’s servers for a monthly fee.

1Password is available as the containerised Snap package. If you feel OK with snap, skip this tutorial and install the password manager from Ubuntu Software.

Download & install DEB package:

1Password for Linux was available for test last year. Now it’s finally goes stable. The .deb binary is available to download at the link below:

Just grab the .deb for Ubuntu based systems, and double-click to install it.

Manually add 1password apt repository:

Installing the .deb package should add its apt repository automatically. If not, you can run following commands one by one to add it manually.

1.) Firstly open terminal from system app launcher:

2.) When terminal opens, run command to install curl tool:

sudo apt install curl

3.) Then run curl command to install the key for the apt repository:

curl -sS https://downloads.1password.com/linux/keys/1password.asc | sudo gpg --dearmor --output /usr/share/keyrings/1password-archive-keyring.gpg

4.) And add the apt repository via command:

echo 'deb [arch=amd64 signed-by=/usr/share/keyrings/1password-archive-keyring.gpg] https://downloads.1password.com/linux/debian/amd64 stable main' | sudo tee /etc/apt/sources.list.d/1password.list

5.) Add the debsig-verify policy to verify signatures for the deb package:

sudo mkdir -p /etc/debsig/policies/AC2D62742012EA22/
curl -sS https://downloads.1password.com/linux/debian/debsig/1password.pol | sudo tee /etc/debsig/policies/AC2D62742012EA22/1password.pol

sudo mkdir -p /usr/share/debsig/keyrings/AC2D62742012EA22
curl -sS https://downloads.1password.com/linux/keys/1password.asc | sudo gpg --dearmor --output /usr/share/debsig/keyrings/AC2D62742012EA22/debsig.gpg

6.) Finally refresh package cache and install 1password:

sudo apt update && sudo apt install 1password

Uninstall 1password:

To remove 1password password manager, run command:

sudo apt remove --autoremove 1password

To remove the apt repository, simply remove the config file via command:

sudo rm /etc/apt/sources.list.d/1password.list

After a clean Ubuntu installation, you have to tweak the desktop appearance more or less to meet your needs.

Besides struggling with different system configuration tools, e.g., System Settings, Gnome Tweaks and Dconf Editor, ‘Ubuntu First Steps‘ is a handy tool with mostly used options to tweak your Ubuntu Desktop.

Update 2024: The project has NOT been updated for a few years. I MAY or MAY NOT work anymore!

It’s a free and open-source tool written in Python with ability to tweak the dock launcher:

  • Dock position.
  • Enable minimize on click action.
  • Reduce dock length.
  • Enable dock on multi monitors.
  • Show apps at top, and more.

It also offers options to change desktop icon size, show or hide home and trash icons, change date & time display, show battery percentage, and enable HiDPI Fractional Scaling.

With it, you can easily enable or disable camera, microphone, and sound output, and stop Ubuntu remembering application usage, recent, temporary, and trash files.

There’s also “Repositories” tab with a list of Ubuntu PPAs. It is however not recommended to use the feature as some are either obsolete (e.g., GIMP PPA, Audacity PPA) or useless (e.g., Grub Customizer, it’s available in main repository).

In addition, some useful apps e.g., VLC, GIMP, Blender, and FileZilla, can be installed from “Applications” tab via singe click.

NOTE to apply changes, you have to click the upper-left corner gear button!

How to install ‘Ubuntu First Steps’:

The software developer built the package with only Ubuntu 20.04 LTS and Ubuntu 22.04 LTS support.

Open terminal by pressing Ctrl+Alt+T on keyboard. When it opens, run following commands one by one to add the PPA and install the tool:

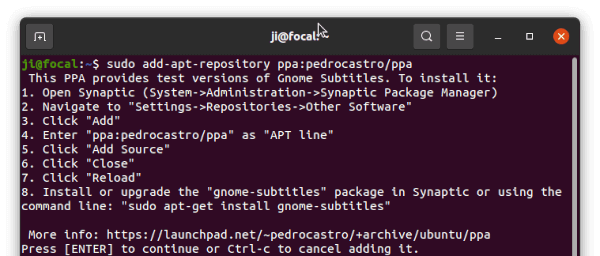
sudo add-apt-repository ppa:atareao/atareao
sudo apt install ubuntu-first-steps

Once installed, open it from system app launcher and enjoy!

How to Remove:

To remove the Ubuntu PPA, either go to Software & Updates -> Other Software or open terminal and run command:

sudo add-apt-repository --remove ppa:atareao/atareao

To remove the configuration tool, use command:

sudo apt remove --autoremove ubuntu-first-steps

Virtualbox

Running Ubuntu as virtual machine via VirtualBox? You may encounter permission issue to access the shared folder between host and guest.

Shared Folders is an useful feature for file sync between Virtualbox host and guest OSes. However, after you created one, the shared folder is marked with cross and lock icons. And it pops up an error dialog when you trying to open it:

Unhandled error message:
GDBus.Error:org.freedesktop.PolicyKit1.Error.Failed: Unix process subject does not have uid set.

Or it prompts permission issue while accessing from the left pane in file manager:

You do not have permissions necessary to view the contents of “xxx”

Fix shared folder permission issue:

The shared folder belongs to vboxsf group in the guest. All you need to do is add your user into this group.

There are a few ways to add an user to a group. Here I’m going to do it via a single command:

  1. Firstly, start the virtual machine and login.
  2. Open a terminal window from system app launcher.
  3. When terminal opens, run command to check your username in case you don’t remember:
    whoami
  4. Finally add user to vboxsf group (replace USER_NAME with what printed in last command.):
    sudo adduser USER_NAME vboxsf

Restart VM to apply change and enjoy!

FFMPEG

FFmpeg 4.4 “Rao” now can be installed in all current Ubuntu releases easily via an Ubuntu PPA.

FFmpeg is a free and open-source solution to record, convert and stream audio and video. The major 4.4 version was released almost a months ago with PGX decoder, AV1 encoding support SVT-AV1, AV1 decoder with hardware acceleration used only, AV1 VAAPI decoder, and so many other new features.

Thanks to Rob Savoury, an Ubuntu PPA is available contains the packages for all current Ubuntu releases.

Upgrading FFmpeg is not recommended for beginners unless you know what you’re going to do.

It may remove your applications or cause dependency issue for some multi-media apps that depends on specified version of a media library.

1.) Add the PPA:

Firstly open terminal either from system app launcher or by pressing Ctrl+Alt+T on keyboard. When it opens, run the command below to add the PPA:

sudo add-apt-repository ppa:savoury1/ffmpeg4

Type user password (no asterisk feedback) when it asks and hit Enter to continue.

2.) (Optional) Add optional PPAs:

For newest versions of graphics and multimedia dependencies, you can also add the following PPAs by running commands one by one:

sudo add-apt-repository ppa:savoury1/graphics
sudo add-apt-repository ppa:savoury1/multimedia

3.) Finally install / update FFmpeg:

As a widely used media library, it’s mostly installed on your system. So you can run command to upgrade it in terminal:

sudo apt full-upgrade

NOTE: using Software Updater is not recommended in the case. It may keep back FFmpeg since old libraries may be required for some apps, Pitivi in the case.

4.) Check FFmpeg version:

Once installed, run command to check software version:

ffmpeg -version

How to Restore Stock FFmpeg version:

You can purge the Ubuntu PPA which will also downgrade FFmpeg libraries to the stock version in Ubuntu. Also purging the FFmpeg PPA may also remove some apps for unknown reasons :(.

Firstly install ppa-purge tool via command:

sudo apt install ppa-purge

Then purge the PPAs one by one:

sudo ppa-purge ppa:savoury1/graphics
sudo ppa-purge ppa:savoury1/multimedia
sudo ppa-purge ppa:savoury1/ffmpeg4

UPDATE: for Ubuntu 22.04, see this new tutorial instead!

Want to try out the Pipewire sound server? It’s easy to do this in Ubuntu 21.10 / Ubuntu 21.04, and here’s how!

PipeWire is a server for handling multimedia on Linux. Its most common use is for Wayland and Flatpak apps to implement audio and video playback and capture with minimal latency. And it offers seamless support for PulseAudio, JACK, ALSA, and GStreamer based applications.

Don’t do this in production machine! Replacing existing audio service in Ubuntu is possible but the experience is currently not guaranteed to be perfect or free of issues and bugs.

Use Pipewire to replace PulseAudio in Ubuntu 21.10 & Ubuntu 21.04:

Ubuntu now has better Pipewire support in recent releases. The service is even running out-of-the-box in Ubuntu 21.10.

1.) Update system

Firstly, press Ctrl+Alt+T on keyboard to open terminal and run command to install all available package updates (recommend for those still running Ubuntu 21.04).

sudo apt update && sudo apt upgrade

A system restart may be required if you haven’t done system package update for long period of time.

2.) Install the latest Pipewire libraries:

Thanks to the “PipeWire Upstream PPA“, it contains the latest Pipewire libraries to make all the things easy!

Open terminal and run the command below to add the PPA:

sudo add-apt-repository ppa:pipewire-debian/pipewire-upstream

Type user password when it asks, while no visual feedback, and hit Enter to continue.

After adding PPA, run command to install pipewire:

sudo apt install pipewire

For GStreamer, JACK, Bluetooth support, install more libraries via command:

sudo apt install gstreamer1.0-pipewire libpipewire-0.3-{0,dev,modules} libspa-0.2-{bluetooth,dev,jack,modules} pipewire{,-{audio-client-libraries,pulse,media-session,bin,locales,tests}}

After installation, restart your system.

3.) Verify Pipewire:

In next boot, open terminal and run “pactl info” command will tell that Pipewire is in use even without any configuration.

[OBSOLETE] Replace PulseAudio with Pipewire in Ubuntu 21.04:

Ubuntu 21.04 has enabled support for pipewire officially. And here’s how I enabled it in my laptop:

1.) Firstly, open terminal either from system application launcher or by pressing Ctrl+Alt+T on keyboard.

When it opens, run command to install the pipewire-audio-client-libraries package:

sudo apt install pipewire-audio-client-libraries 

2.) Then create an empty file by running command:

sudo touch /etc/pipewire/media-session.d/with-pulseaudio

3.) Create pipewire-pulse service files by copying the example files:

sudo cp /usr/share/doc/pipewire/examples/systemd/user/pipewire-pulse.* /etc/systemd/user/

4.) You don’t have to remove the PulseAudio, just disable it and enable Pipewire:

  • Run command to reload the new service files:
    systemctl --user daemon-reload
  • Disable PulseAudio service via command:
    systemctl --user --now disable pulseaudio.service pulseaudio.socket
  • And finally enable the Pipewire services:
    systemctl --user --now enable pipewire pipewire-pulse

5.) I followed the previous steps via Debian Wiki, but it didn’t work. The system tray sound icon’s gone, and pactl info outputs “Connection failure: Connection refused”.

To workaround the issue, enable pipewire-media-session service may work by running command:

systemctl --user --now enable pipewire-media-session.service

If you’re trying to get it work in Ubuntu 20.04, try “mask” the PulseAudio service before reboot, by running command:

systemctl --user mask pulseaudio

Finally reboot your machine.

And check if Pipewire is working, run pactl info command. And it’s working if you see “PulseAudio (on PipeWire 0.3.24)” in output.