Archives For Howtos

The default size of files and folders in Nautilus file browser does not meet you need? It’s easy to change it in all current Ubuntu releases with Gnome.

Though you can’t find how to configure it either in the System Settings or Gnome Tweaks, Ubuntu do provide an option to set an even larger or smaller icon size, and here’s the quick tip shows you how.

Change File & Folder Size via Single Command:

If you’re familiar with Linux command, you can run a single command to change the size.

Since Nautilus displays files and folders in either icon view or list view, the command can be either:

1.) Change icon size in icon view:

gsettings set org.gnome.nautilus.icon-view default-zoom-level 'large'

Here value ‘large’ can be changed to: ‘small’, ‘standard’, ‘larger’, or ‘largest’.

2.) Change icon size in list view:

gsettings set org.gnome.nautilus.list-view default-zoom-level 'large'

Here value ‘large’ can be changed to: ‘small’, ‘standard’, or ‘larger’.

To reset the change, either run command:

gsettings reset org.gnome.nautilus.icon-view default-zoom-level

or run:

gsettings reset org.gnome.nautilus.list-view default-zoom-level

Change file folder icon size via graphical tool:

Firstly open Ubuntu Software, search for and install dconf editor (or install dconf-editor via apt):

Then launch the tool and navigate to “org/gnome/nautilus/icon-view/default-zoom-level” for the icon size in icon view:

  • Turn off ‘Use default value’
  • Then select a size from ‘Custom value’

For the list view mode, go to “org/gnome/nautilus/list-view/default-zoom-level”.

The official LibreOffice Fresh PPA finally made the LibreOffice 7.1 packages for Ubuntu 20.04 and Ubuntu 20.10.

LibreOffice, Ubuntu’s default office suite, released version 7.1 almost a month ago. The new release features new Additions Dialog to better integrate extensions, new User Interface select dialog, new widget with styles preview in tabbed Notebookbar.

LibreOffice Math gets full support of HTML colors, and new examples in Element pane. The Writer application features faster find/replace, a new Style Inspector, and better detection of Unicode in documents. LibreOffice Impress gains new animation presets and adds “Pause/Resume” and “Exit” buttons.

How to Install LibreOffice 7.1 via Ubuntu PPA:

For Ubuntu 20.04, Ubuntu 20.10, Linux Mint 20, firstly open terminal and run command to add the PPA:

sudo add-apt-repository ppa:libreoffice/ppa

Type user password (no asterisk feedback) when it prompts and hit Enter to continue.

After that, open Software Updater and you’ll see the package updates for office suite after checking for updates.

Just install all the updates and done!

How to Restore:

For any reason, you can restore the office suite to the original pre-installed version, by running command in terminal to purge the PPA:

sudo apt install ppa-purge && sudo ppa-purge ppa:libreoffice/ppa

Blender 2.79

For those prefer installing apps via the classic apt method, you can now install Blender 2.92 via PPA in Ubuntu 20.04, Ubuntu 20.10, and also Ubuntu 16.04, Ubuntu 18.04.

The open-source 3D modeller software Blender 2.92 was released a few days ago. Features “a completely new workflow for editing meshes, new physics simulation methods, faster Cycles rendering, better compositing with Eevee, and so much more.

Blender offers official Snap package, which runs in sandbox, and is available to install directly from Ubuntu Software. As well, a Linux portable package is available to download in its website. For those prefer the classic deb packages, Thomas Schiex’s PPA has made it for Ubuntu 20.04 and Ubuntu 20.10 uses.

UPDATE: The Thomas Schiex’s PPA has been abandoned, use this PPA instead.

1. Add Blender PPA:

Firstly open terminal from system application launcher. When it opens, run command to add the PPA:

sudo add-apt-repository ppa:thomas-schiex/blender

Type user password, no asterisk feedback, when it asks and hit Enter to continue.

The PPA does not support for Ubuntu 16.04 and Ubuntu 18.04, but another PPA do! It however requires a few more PPA for updated libaries, see the PPA description for detail.

2. Install or update Blender:

If you have an old version of Blender packages installed via apt method, open Software Updater (Update Manager) and update the software:

upgrade to blender 2.79

Or run commands in terminal to install / update the package:

sudo apt update

sudo apt install blender

3. Fix missing libLLVM-6.0.so.1 issue:

Blender 2.92 does not start in my Ubuntu 20.04, and it outputs an error when running from terminal:

/usr/lib/blender/blender: error while loading shared libraries: libLLVM-6.0.so.1: cannot open shared object file: No such file or directory

This can be easily fixed by running command:

sudo apt install libllvm6.0

Not sure if the problem exists in Ubuntu 20.10, but libllvm6.0 is not available in the Groovy repository.

Uninstall:

To remove the Ubuntu PPA, open Software & Updates and go to Other Software tab, then remove the relevant line.

To remove Blender installed via apt, run command in terminal:

sudo apt remove --autoremove blender

The Kodi media center 19.0 now is available to install via its official Ubuntu PPA.

Kodi 19.0 “Matrix” is a new major release for the open-source home theater software. Though it’s not officially announced at the moment of writing, the PPA packages has been updated, available for Ubuntu 18.04, Ubuntu 20.04, Ubuntu 20.10, Linux Mint 20.x and derivatives.

What’s New in Kodi 19.0:

There are many new features in the release. And here are some big changes:

  • AV1 Codec support.
  • New color for subtitles and ability to change opacity.
  • static HDR10 and dynamic Dolby Vision HDR support.
  • Move to Python 3 for addons.
  • New functions in the PVR.

How to Install Kodi 19.0 via PPA:

Open terminal either from system app launcher or by pressing Ctrl+Alt+T on keyboard. When it opens, run following commands one by one to get the new release packages.

1. Add Kodi PPA.

To add the official Kodi PPA, run command in terminal:

sudo add-apt-repository ppa:team-xbmc/ppa

Type user password when it asks, with no asterisk feedback, and hit Enter to continue.

2. Install / Update Kodi.

The Software Updater utility will prompt you to run a “partial upgrade” since the dependency packages switched from Python 2 to Python 3. So it’s recommended to install or upgrade Kodi by running terminal commands.

Firstly refresh system package cache, if you’re on Ubuntu 18.04, via command:

sudo apt update

Then install Kodi via command:

sudo apt install kodi

If you’re going to upgrade Kodi, the previous command may not update the add-ons, so I recommend to run apt upgrade instead:

sudo apt upgrade

How to Downgrade:

You can purge the Ubuntu PPA as well as downgrade Kodi to the stock version available in Ubuntu main repositories. To do so, run command:

sudo apt install ppa-purge && sudo ppa-purge ppa:team-xbmc/ppa

For those prefer installing app via apt method, there’s now an Ubuntu PPA that contains the latest VLC 3.0.12 deb packages.

VLC 3.0.12 was released a few weeks ago. It features native Apple Silicon support, RIST protocol, YouTube & Vocaroo scripts updates, and various bug-fixes.

The VideoLAN team offers the official Snap package which can be installed directly from Ubuntu Software. If you don’t like the Snap package however, you can now install the media player from the unofficial PPA.

1.) Add the VLC PPA:

Firstly open terminal from system app launcher. When it opens, run command to add the PPA:

sudo add-apt-repository ppa:savoury1/vlc3

Type user password when it asks, while no asterisk feedback, and hit Enter to continue.

For the MATE desktop users, run this command instead to add another PPA with patch from full-screen issue:

sudo add-apt-repository ppa:savoury1/vlc3-mate

2.) Add the dependency PPA:

Secondly, add the dependency PPA for updated media tools:

sudo add-apt-repository ppa:savoury1/ffmpeg4

3.) Install or update VLC:

Finally, either run command to install VLC media player:

sudo apt install vlc

Or open Software Updater and update the software packages:

Uninstall:

You can purge the Ubuntu PPA which also downgrade the installed packages to their stock versions:

sudo apt install ppa-purge && sudo apt install ppa-purge ppa:savoury1/vlc3

Keep an eye when purging the dependency PPA, as it may also remove some media packages.

sudo ppa-purge ppa:savoury1/ffmpeg4

Alternatively, you can just remove the Ubuntu PPAs via commands:

sudo add-apt-repository ppa:savoury1/vlc3
sudo add-apt-repository --remove ppa:savoury1/ffmpeg4

And remove VLC if you want by running command:

sudo apt remove --autoremove vlc

Want to start drawing on your screen and save artwork as PNG or SVG? It’s easy to do this in Ubuntu via Gnome Extension.

“Draw On Your Screen” is a Gnome Shell extension allows to start or stop drawing on screen easily via Alt+Super+D keyboard shortcut. With it, you can start free drawing, create basic shapes, insert text, and export your artwork to SVG file.

1.) Install the Gnome Shell Extension for Ubuntu 20.04:

The extension is available as normal software package in Ubuntu repository. Simply open terminal either from your system app launcher, or by pressing Ctrl+Alt+T on keyboard. When it opens, run command to install the extension:

sudo apt install gnome-shell-extension-draw-on-your-screen

Type your user password, if it asks, and hit Enter. For security reason, there’s no asterisk feedback.

2.) Enable the Extension.

The extension is not enabled immediately after installation. So you have to turn it on via the Gnome Tweaks tool.

1. First press Alt+F2 to bring up ‘Run a Command’ dialog box, type r, and hit Enter to restart Gnome Shell without losing any running applications.

2. Install Gnome Tweaks from Ubuntu Software if you don’t have it. Then open it and navigate to Extensions tab.

There turn on the toggle icon for the extension to enable it.

3.) Start drawing on your screen.

Now you can start drawing by pressing Alt+Super+D, and leave the mode either by pressing the keyboard shortcut again or use Esc key.

In the drawing mode, you can right-click on desktop to get a list of menu options.

To draw rectangle, circle, line, insert text, and more shortcuts, press Ctrl+F1 to get help.

For more about the extension, tips and tricks, go to the project page.

Install the Extension for Ubuntu 22.04

The original extension ends supporting up to Gnome 38. For Ubuntu 22.04 users, do the steps below one by one to install the v2 fork.

1. First, open Ubuntu Software then search for and install ‘Extension Manager’.

Install Extension Manager in Ubuntu 22.04+

2. Next, launch ‘Extension Manager’ from Activities overview screen (press Windows logo key to activate).

3. Finally use Extension Manager to search and install the tool for drawing on screen:

After installed it, you may use the same shortcut (Super+Alt+D) to start drawing in Ubuntu 22.04 screen. Though, you can also go back ‘Installed’ tab in Extension Manager and configure the extension for more options.

This simple tutorial shows how to install WeChat, QQ instant messenger and QQ Music in all current Ubuntu releases.

For those doing business or having friends / family members in China, it’s hard to avoid using these top apps. Thanks to wine and Deepin Linux, they are now easy to install in Linux without native support.


Continue Reading…

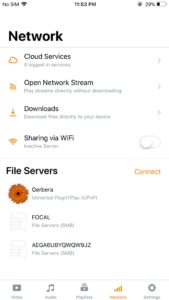
This tutorial is going to show you how to install and setup Universal Media Server in Ubuntu 20.04 Desktop and Server.

Universal Media Server, UMS in short, is a DLNA-compliant UPnP media server allows streaming media files to a wide range of devices including video game consoles, smart TVs, smartphones, and Blu-ray players.

1. Install required libraries:

Media transcoding is accomplished through packages from AviSynth, FFMpeg, MEncoder, and VLC, you have to first open terminal and run command to make sure these packages installed:

sudo apt install mediainfo dcraw vlc mplayer mencoder

2. Download Universal Media Server:

The latest tarballs are available to download at github project page. Select download (run uname -m to tell system type):

  • x86 package for old 32-bit machines.
  • x86_64 package for 64-bit machines.
  • arm64 / armhf for Rasperry Pi devices.

Download Universal Media Server

At the moment, the latest release is version 10.0.1. If you’re running Ubuntu Server, use this command to download it (replace URL in the command if a newer version is available):

wget -c https://github.com/UniversalMediaServer/UniversalMediaServer/releases/download/10.0.1/UMS-10.0.1-x86_64.tgz

3. Decompress the tarball

Run following 2 commands will navigate to user’s Downloads folder, then extract the UMS package /opt, and finally rename result folder from ‘ums-10.0.1‘ to ‘ums‘.

cd Downloads
sudo tar -zxvf UMS-10.0.1-x86_64.tgz -C /opt/ --transform s/ums-10.0.1/ums/

Skip cd Downloads if it was downloaded via wget command.

And replace “UMS-10.0.1-x86_64.tgz” if a newer version was downloaded, also do change version number in “ums-10.0.1“.

4. Run UMS as system service

If everything goes well, you should be able to run the Universal Media Server via command:

/opt/ums/UMS.sh

For Ubuntu Desktop, it brings up a setup dialog to choose language, start minimized or not, choose network, and media folder etc.

Then it offers an user interface with more configurations, log view, and more.

For Ubuntu Server without UI, edit the .config/UMS/UMS.conf file for configurations. By default, it steams all files under user home. You can add “folder = /PATH/TO/MEDIA1,/PATH/TO/MEDIA2” to set media folder. For more, read the UMS.conf file under source tarball.
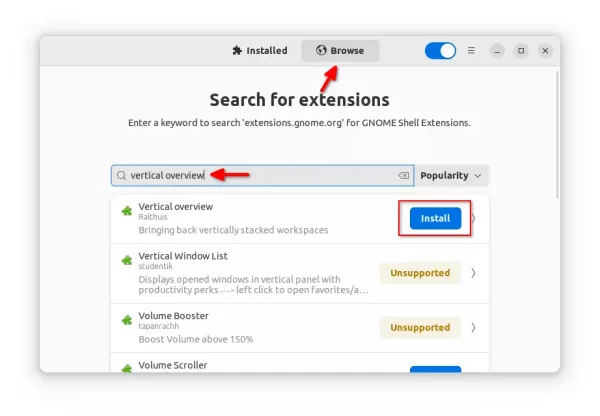
After starting the server go to http://server_ip:9001 in your web browser to check out if the server is working.

To make it run as systemd service, open terminal and run command:

sudo nano /etc/systemd/system/ums.service

It will create an empty file and open with nano command line text editor. Paste (Ctrl+Shift+V) following lines and change ji to your user name. Also change memory limit from 500M to another value if you want.

[Unit]
Description=Run UMS as Ji
DefaultDependencies=no
After=network.target

[Service]
Type=simple
User=ji
Group=ji
ExecStart=/opt/ums/UMS.sh
TimeoutStartSec=0
RemainAfterExit=yes
Environment="UMS_MAX_MEMORY=500M"

[Install]
WantedBy=default.target

Save changes by pressing Ctrl+X, follow with Y, and hit Enter.

Finally run commands to reload systemd daemon, enable and start UMS service.

sudo systemctl daemon-reload
sudo systemctl enable ums.service
sudo systemctl start ums.service

And check the service status via command:

sudo systemctl status ums.service

Wine Stable

The new wine development version 6.1 was released with new features and dozens of bug-fixes.

Wine 6.1 release highlights:

  • Arabic text shaping.
  • More WinRT support in WIDL.
  • VKD3D version 1.2 is used for Direct3D 12.
  • Support for Rosetta’s memory layout on M1 Macs.
  • Support for Thumb-2 mode on ARM.

As usual, there are many bug-fixes to applications including Dark Sector, LabVIEW 2014, Skyrim SE, The Witcher 3, Still Life 2, The Sims 3, and more.

How to Install Wine 6.1 in Ubuntu:

Open terminal either by pressing Ctrl+Alt+T on keyboard, or by searching for ‘terminal’ from system application menu. When it opens, run following steps one by one.

Install Wine Development version via following commands will replace the latest stable Wine release package if installed.

1.) Run command to enable 32 bit architecture (if you don’t have it):

sudo dpkg --add-architecture i386

Type user password (no asterisk feedback) when it asks and hit Enter to continue.

2.) Install the repository key by running command:

wget -O - https://dl.winehq.org/wine-builds/winehq.key | sudo apt-key add -

3.) Add wine repository via command (for Ubuntu 20.04 and Linux Mint 20):

sudo apt-add-repository 'deb https://dl.winehq.org/wine-builds/ubuntu/ focal main'

NOTE: You may replace focal in the code with:

  • groovy for Ubuntu 20.10.
  • bionic for Ubuntu 18.04 and Linux Mint 19.x

4.) For Ubuntu 18.04 and Linux Mint 19.x only, libfaudio0 library is required to install from a third-party repository by running command:

sudo add-apt-repository ppa:cybermax-dexter/sdl2-backport

5.) Finally install Wine 6.1 via command:

sudo apt update && sudo apt install --install-recommends winehq-devel

Uninstall wine:

You may remove the PPA by launching Software & Updates utility and navigating to Other Software tab.

To remove wine 6.1, run command in terminal:

sudo apt remove --auto-remove winehq-devel

This simple tutorial shows how to install the free audio workstation Ardour 6.5 in Ubuntu 20.04 LTS and / or Linux Mint 20.x via PPA.

Ardour 6.5 was released with support for plugins in Steinberg’s VST3 format, on Linux, Windows and macOS. As usual, there’s various bug fixes and improvements ranging from the minor to the extremely useful.
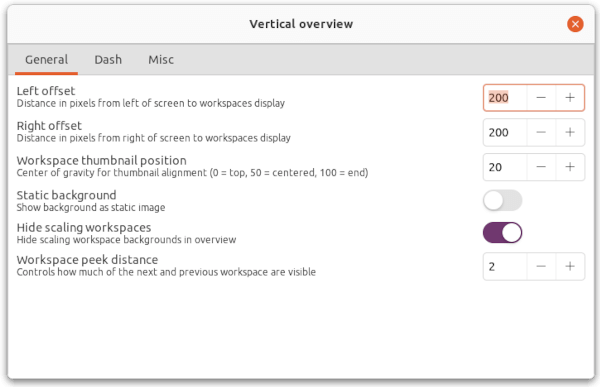
The new release has been made into the main repositories for next Ubuntu 21.04. For Ubuntu 20.04 LTS, a backport PPA by Ubuntu Studio packaging team now maintains the package.
1.) Open terminal either from system application launcher or by pressing Ctrl+Alt+T on keyboard. When it opens, run command to add the PPA:

sudo add-apt-repository ppa:ubuntustudio-ppa/ardour-backports

Type user password (no asterisk feedback) when it prompts and hit Enter to continue.

2.) After adding the PPA and refreshing package cache (should be done automatically), run command to install the multichannel hard disk recorder and digital audio workstation:

sudo apt install ardour

If everything’s done successfully, launch the software from system app menu and enjoy!

Uninstall Ardour 6:

To remove the software package, simply run command in terminal:

sudo apt remove --auto-remove ardour

To remove the Ubuntu PPA, open Software & Updates and go to Other Software tab. Then remove the relevant repository line.