Archives For November 30, 1999

Stellarium released version 0.19.0 today. Here’s how to install it in Ubuntu 16.04, Ubuntu 18.04, Ubuntu 18.10, and higher.

Stellarium 0.19.0 features 5 new sky cultures, many new DSO textures, code refactoring, and many other changes including:

  • Add new type of computation for AstroCalc/Phenomena tool
  • Add GUI options to change constellations and asterisms font size
  • Add Chinese medieval sky culture.
  • Add DSO textures
  • Add scripting graphics tool
  • Add classifications support for sky cultures
  • Add support 2 southern deep sky catalogues
  • Add armintxe, paleolithic sky culture and landscape
  • Add Maya constellations
  • Add 2 Babylonian skycultures

How to Install Stellarium 0.19.0 in Ubuntu:

1. Open terminal either via Ctrl+Alt+T keyboard shortcut or by searching ‘terminal’ from app launcher. When it opens, run command to add the PPA:

sudo add-apt-repository ppa:stellarium/stellarium-releases

Type user password (no asterisk feedback while typing) when it prompts and hit Enter.

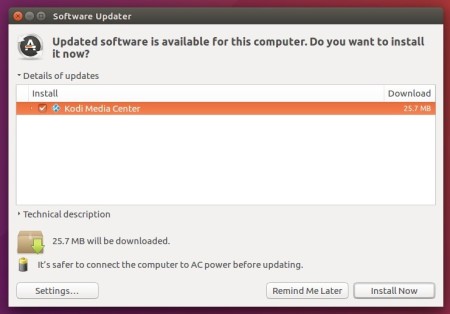
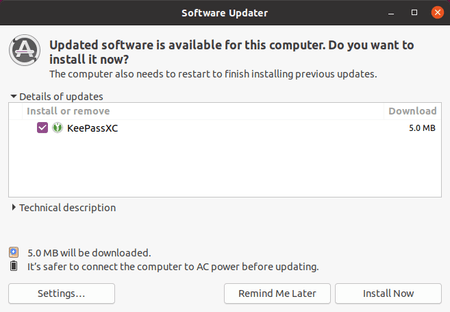
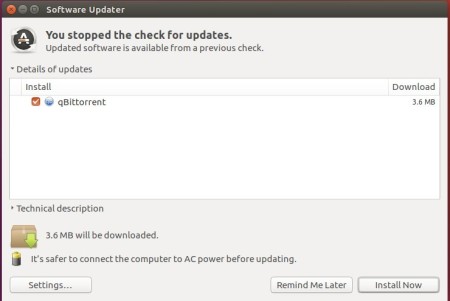
2. Then upgrade Stellarium from an existing release with Software Updater utility:

Or run following commands to install the software for the first time:

sudo apt-get update

sudo apt-get install stellarium

Uninstall:

To remove the software, either use your system package manager or run command:

sudo apt-get remove --autoremove stellarium

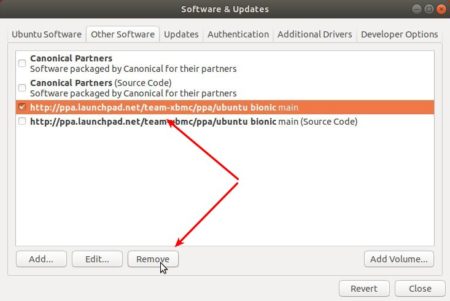
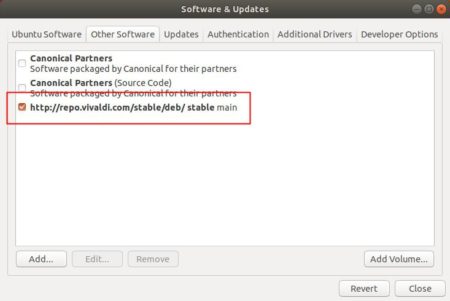
And remove the PPA via “Software & Updates” utility under Other Software tab.

Avidemux video editor

Avidemux video editor released a new bug-fix version just 11 days after the last, with decoder fixes and misc small improvements

Avidemux 2.7.3 release highlights:

  • Vapoursynth is now dynamically loaded to avoid error popup
  • ASF/WMV demuxer fix
  • BMP decoder fix
  • Re-enabled PNG decoder
  • Basic save current state when crashing
  • Misc small improvements

avidemux 2.6 ubuntu 14.04

How to Install Avidemux 2.7.3 in Ubuntu:

There are a few ways installing the latest the video editor in all curren Ubuntu releases.

  • Appimage, single executable (enable it in file properties dialog) to launch the editor.
  • Flatpak, community maintained package that runs in sandbox.
  • Native Ubuntu (.deb) packages via an unofficial PPA.

For Ubuntu 16.04, Ubuntu 18.04, and higher, heres how to install Avidemux 2.7.3 via the unofficial PPA.

1. Open terminal either from app launcher or via Ctrl+Alt+T keyboard shortcut. When it opens, run command to add the PPA:

sudo add-apt-repository ppa:ubuntuhandbook1/avidemux

Type user password (no asterisk feedback due to security reason) when it prompts and hit Enter.

avidemux ppa

2. Then run following 2 commands to refresh package cache and install the video editor:

sudo apt update

sudo apt install avidemux2.7-qt5 avidemux2.7-qt5-data avidemux2.7-plugins-qt5 avidemux2.7-jobs-qt5

Uninstall:

To remove the native Ubuntu .deb package of Avidemux 2.7, run command in terminal:

sudo apt remove --autoremove avidemux2.7-*

And remove the PPA via Software & Updates utility under ‘Other Software’ tab.

Mozilla Firefox

Mozilla Firefox 66.0 was released two days ago. Now it’s available in main repositories of Ubuntu 16.04, Ubuntu 18.04, Ubuntu 18.10.

Firefox 66.0 release highlights:

  • Block sound auto-play. You can add exceptions, or turn the feature off.
  • Easier search via a redesigned new tab in Private Windows
  • Basic support for macOS Touch Bar
  • Title bar is hidden by default in Linux (Unfortunately I still see it in Ubuntu build).
  • Search from the tab overflow menu
  • Scroll anchoring keeps content from jumping as images and ads load at the top of the page
  • Redesigned certificate error pages
  • Improved extensions to load web page faster
  • Enabled AV1 support on 32-bit Windows and MacOS.

Upgrade to Firefox 66 in Ubuntu:

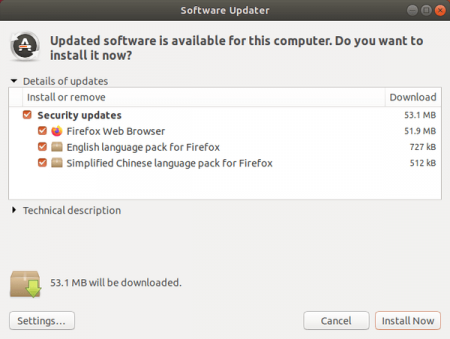
For all current Ubuntu releases, simply open Software Updater and install the updates after checking for updates.

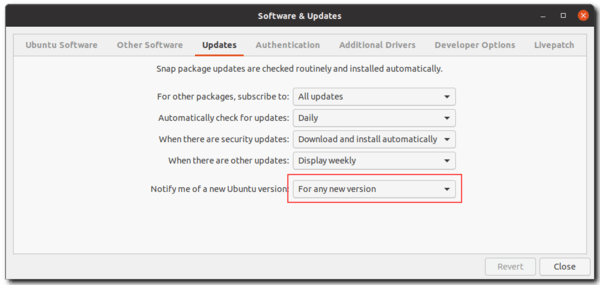
If you don’t see the Firefox updates, go to Software & Updates and make sure the security and updates repositories are enabled in Updates tab.

KeePassX 2 YubiKey support

After two beta releases, KeePassXC password manager 2.4.0 finally goes stable. Here’s how to install it in Ubuntu 16.04, Ubuntu 18.04, and higher.

KeePassXC 2.4.0 enables coordinate system scaling for high-DPI displays, adds new database wizard, implements advanced search, and

  • Automatic update checker
  • KeeShare database synchronization
  • Improve favicon fetching; transition to Duck-Duck-Go
  • Remove KeePassHttp support
  • Linux: Prevent Klipper from storing secrets in clipboard
  • Linux: Enable use of browser plugin in Snap build
  • TOTP QR Code Generator
  • Allow toolbar to be hidden and repositioned
  • Increase max allowed database timeout to 12 hours
  • Password generator uses existing password length by default
  • Browser Integration Enhancements

How to Install KeePassXC 2.4.0 in Ubuntu via Snap:

The official snap package (runs in sandbox and auto-updates itself) has been updated.

The snap can be easily installed in Ubuntu 18.04 and higher via Ubuntu Software:

For Ubuntu 16.04, run command to install snapd daemon first:

sudo apt-get install snapd

Then install the snap package via command:

sudo snap install keepassxc

How to Install KeePassXC 2.4.0 in Ubuntu via PPA:

For those who don’t prefer snap packages, the official KeePassXC PPA contains the most recent .deb packages for Ubuntu 14.04, Ubuntu 16.04, Ubuntu 18.04, Ubuntu 18.10.

The 2.4.0 release package will be made into PPA in 2 or 3 days. Check the previous link before getting started.

1. Open terminal either via Ctrl+Alt+T keyboard shortcut or by searching for ‘terminal’ from app launcher. When it opens, run command to add the PPA:

sudo add-apt-repository ppa:phoerious/keepassxc

Type user password (no asterisk feedback due to security reason) when it prompts and hit Enter to continue.

2. Then upgrade KeePassXC via Software Updater:

or run commands one by one in terminal to install the latest package:

sudo apt update

sudo apt install keepassxc

Uninstall:

To remove the PPA, open Software & Updates and navigate to Other Software tab.

To remove KeePassXC .deb package, run command in terminal:

sudo apt-get remove --autoremove keepassxc

Kid3 audio tag editor released version 3.7.1 today. Here’s how to install it in Ubuntu 16.04, Ubuntu 18.04, Ubuntu 18.10, and higher.

Kid3 3.7.1 primarily brings bug fixes and usability improvements. Most new features target the Android version, which now supports a dark theme, a better file selection dialog and more configuration options.

  • Support max-, min-, unq- aggregation when renaming directories.
  • Android: Support dark and light themes.
  • Android: Support opening files with Kid3 from other apps.
  • Android: Settings for formats, character replacements and import profiles.
  • Improved support format codes in file name for cover.
  • Fixed support setting of ID3v2 version for DSF files.
  • Avoid jumping around frames while deleting.
  • Removal of multiple tags where not all tags are removed.
  • Setting of a simple string as value for IPLS frame with TagLib.
  • Adapted to Discogs server update.

Kid3 Audio Tagger

How to Install Kid3 3.7.1 in Ubuntu:

The official Kid3 PPA contains the latest software packages for Ubuntu 16.04, Ubuntu 18.04, Ubuntu 18.10, and higher.

Open terminal either via Ctrl+Alt+T keyboard shortcut or by searching for ‘terminal’ from software launcher. When it opens, do following steps one by one.

1. Copy and paste following command in terminal and hit run to add the PPA:

sudo add-apt-repository ppa:ufleisch/kid3

Type your password (no asterisk feedback due to security reason) when it prompts and hit Enter to continue.

2. Then you can upgrade Kid3 from a previous version via Software Updater:

upgrade kid3 via software updater

or run commands one by one in terminal to install or upgrade to the latest tag editor:

sudo apt update

sudo apt install kid3-qt

For KUbuntu, you may replace kid3-qt with kid3 in the last command for KDE integration.

Uninstall

To remove the PPA repository, either open Software & Updates -> Other Software tab, or run command:

sudo add-apt-repository --remove ppa:ufleisch/kid3

To remove the audio tag editor, either use your system package manager or run command:

sudo apt remove --autoremove kid3 kid3-*

Sublime Text 3.2 was released yesterday with first-class Git integration, GTK3 port, and many other new features.

Sublime Text 3.2 release highlights:

  • First-class Git integration
  • Incremental diff functionality tracks changes to files being edited.
  • Moved to GTK3, and various high DPI fixes for Linux.
  • New theme functionality and block caret support.
  • Support for Unicode 11.0
  • Many syntax highlighting improvements to Clojure, D, Go, Lua.

How to Install Sublime Text 3.2 in Ubuntu:

The easiest way is to install the community maintained Snap package (run in sandbox).

For Ubuntu 18.04 and higher, simply open Ubuntu Software search for and install sublime-text

For Ubuntu 16.04, open terminal (Ctrl+Alt+T) and run command to install the snap:

sudo apt install snapd && sudo snap install sublime-text

Install Sublime Text 3.2 via its official apt repository:

For those who don’t prefer Snap package, do following steps to install Sublime Text from its official apt repository:

1. Open terminal either via Ctrl+Alt+T keyboard shortcut or from app launcher. When it opens, run command to add the keyring:

wget -qO - https://download.sublimetext.com/sublimehq-pub.gpg | sudo apt-key add -

Type user password (no asterisk feedback) when it prompts and hit Enter.

2. Then run command to add the apt repository:

echo "deb https://download.sublimetext.com/ apt/stable/" | sudo tee /etc/apt/sources.list.d/sublime-text.list

3. Finally install sublime-text package either via Synaptic package manager or by running command:

sudo apt update && sudo apt install sublime-text

Uninstall:

To remove the editor, run command:

sudo apt remove --autoremove sublime-text

To remove the apt repository, go to Software & Updates -> Other Software.

Avidemux video editor

Avidemux video editor released version 2.7.2 today with new demuxers / encoders, bug-fixes, and various other changes.

Avidemux 2.7.2 release highlights:

  • Native AviSynth demuxer (MSVC++ 64 bits Windows builds only)!
  • VapourSynth demuxer to directly load .vpy scripts
  • FFmpeg-based VA-API HW accelerated H.264 encoder (Intel/Linux)
  • FFmpeg-based VA-API HW accelerated HEVC encoder (Intel/Linux)
  • FFmpeg 4.x compatible
  • Allow to cancel indexing of MKV files
  • Add decoding support for multichannel Opus audio
  • Other enhancements, and many bug-fixes.

How to Install Avidemux 2.7.2 in Ubuntu:

Appimage:

The software offers Linux universal binaries (non-install executable to launch the software) in its download page:

Avidemux download (Linux, Universal binaries)

Once you get it, do:

  • right-click and go to file Properties -> Permissions -> allow executing file as program.
  • right-click and select run the Appimage.

Flatpak:

Avidemux is also available as flatpak, see the Flathub page for more details.

Native Ubuntu package:

There’s also an unofficial PPA contains the latest 2.7.2 packages for Ubuntu 16.04, Ubuntu 18.04, Ubuntu 18.10, and higher.

1. Open terminal either from app launcher or via Ctrl+Alt+T keyboard shortcut. When it opens, run command to add the PPA:

sudo add-apt-repository ppa:ubuntuhandbook1/avidemux

Type user password (no asterisk feedback due to security reason) when it prompts and hit Enter.

avidemux ppa

2. Then run following 2 commands to refresh package cache and install the video editor:

sudo apt update

sudo apt install avidemux2.7-qt5 avidemux2.7-qt5-data avidemux2.7-plugins-qt5 avidemux2.7-jobs-qt5

Uninstall:

To remove the native Ubuntu .deb package of Avidemux 2.7, run command in terminal:

sudo apt remove --autoremove avidemux2.7-*

And remove the PPA via Software & Updates utility under ‘Other Software’ tab.

Audacity audio editor 2.3.1 was finally released and restored Linux support which was missing in 2.3.0.

Audacity 2.3.1 brings over 20 bug-fixes and following new features / improvements:

  • Microfades are now an opt-in feature. They were always on in 2.3.0.
  • The advanced vertical zooming option is now available in the View->Zoom menu.
  • Regular interval labels now support range labels.

How to Install Audacity 2.3.1 in Ubuntu:

There’s an unofficial PPA contains the 2.3.1 packages for Ubuntu 16.04, Ubuntu 18.04, Ubuntu 18.10, Ubuntu 19.04, and their derivatives, e.g., Linux Mint 18.x and 19.x.

1. Open terminal either via Ctrl+Alt+T keyboard shortcut or by searching for ‘terminal’ from app launcher. When it opens, run command:

sudo add-apt-repository ppa:ubuntuhandbook1/audacity

Type user password (no asterisk feedback due to security reason) when it prompts and hit Enter to add the PPA.

2. If you have a previous version installed, you can upgrade Audacity via Software Updater after adding the PPA.

upgrade audacity

or run following commands one by one to check updates and install (or upgrade) audacity 2.3.1:

sudo apt-get update

sudo apt-get install audacity

Uninstall:

To remove the PPA repository, launch Software & Updates utility and navigate to ‘Other Software’ tab.

To remove Audacity audio software, either use system package manager or run command in terminal:

sudo apt-get remove --autoremove audacity audacity-data

Nvidia Linux driver

NVIDIA driver 418.43 for Linux was released 2 weeks ago with G-SYNC Compatible (a.k.a. FreeSync / Adaptive-Sync) support. Now you can install it in Ubuntu 18.04 and higher via the “Graphics Drivers” team PPA.

NVIDIA driver 418.43 is the first stable release in the 418 series, and it features:

  • New GPUs support:
    • GeForce GTX 1660 Ti
    • GeForce RTX 2070 with Max-Q Design
    • GeForce RTX 2080 with Max-Q Design
  • Initial support for G-SYNC Compatible monitors.
  • Support for stereo presentation in Vulkan.
  • NVIDIA optical flow support.
  • NVIDIA Video Codec SDK 9.0 support
  • Various Vulkan and OpenGL fixes
  • See the release note for more details.

How to Install NVIDIA Driver 418.43 in Ubuntu:

For Ubuntu 18.04, Linux Mint 19, Ubuntu 18.10, Ubuntu 19.04, you can do following steps to add the PPA and install the latest NVIDIA 418 drivers.

1. Open terminal either via Ctrl+Alt+T keyboard shortcut or by searching for ‘terminal’ from application menu. When it opens, run command:

sudo add-apt-repository ppa:graphics-drivers/ppa

Type user password (no asterisk feedback due to security reason) when it prompts and hit Enter to continue adding PPA.

2. For Linux Mint 19, you may need to run command to refresh system package cache:

sudo apt update

3. Launch Software & Updates utility, and navigate to Additional Drivers tab.

Then choose using “NVIDIA driver metapackage from nvidia-driver-418” from the list and click Apply Changes.

In addition, if the driver does not install after clicking ‘Apply Changes’, try running command in terminal:

sudo apt install nvidia-driver-418 nvidia-settings

For unmet dependency issue, try removing old NVIDIA proprietary drivers first.

Linux Kernel

Linus Torvalds announced the released of Kernel 5.0 yesterday afternoon. He wrote on lkml.org:

Ok, so the last week of the 5.0 release wasn’t entirely quiet, but it’s a lot smaller than rc8 was, and on the whole I’m happy that I delayed a week and did an rc8.

It turns out that the actual patch that I talked about in the rc8 release wasn’t the worrisome bug I had thought: yes, we had an uninitialized variable, but the reason we hadn’t immediately noticed it due to a warning was that the way gcc works, the compiler had basically initialized it for us to the right value. So the same thing that caused not the lack of warning, also effectively meant that the fix was a no-op in practice.

But hey, we had other bug fixes come in that actually did matter, and the uninitialized variable _could_ have been a problem with another compiler.

Regardless – all is well that ends well. We have more than a handful of real fixes in the last week, but not enough to make me go “Hmm, things are really unstable”. In fact, at least two thirds of the patches are marked as being fixes for previous releases, so it’s not like 5.0 itself looks bad.

Changes in Linux Kernel 5.0 include:

  • AMD Radeon FreeSync support
  • Logitech High Resolution Scrolling support
  • Raspberry Pi Touchscreen support out of the box.
  • New console font for HiDPI and retina screens.
  • Initial support for NVIDIA Turing GPUs
  • And numerous other changes

How to Install Linux Kernel 5.0 in Ubuntu:

The mainline kernels do not include any Ubuntu-provided drivers or patches. They are not supported and are not appropriate for production use

The mainline kernel packages for Linux 5.0 are available for download at the link below:

Download Kernel 5.0

Depends on your OS type, download and install the packages in turns:

  1. linux-headers-5.0.0-xxxxxx_all.deb
  2. linux-headers-5.0.0-xxx-generic(/lowlatency)_xxx_amd64(/i386).deb
  3. linux-modules-5.0.0-xxx-generic(/lowlatency)_xxx_amd64(/i386).deb
  4. linux-image-xxx-5.0.0-xxx-generic(/lowlatency)_xxx_amd64(/i386).deb

Select generic for common system, and lowlatency for a low latency system (e.g. for recording audio), amd64 for 64bit system, i386 for 32bit system, or armhf, arm64, etc for other OS types.

Alternatively you can download and install the kernel binaries via terminal commands (Ctrl+Alt+T):

For 64-bit OS:

cd /tmp/

wget -c https://kernel.ubuntu.com/~kernel-ppa/mainline/v5.0/linux-headers-5.0.0-050000_5.0.0-050000.201903032031_all.deb

wget -c https://kernel.ubuntu.com/~kernel-ppa/mainline/v5.0/linux-headers-5.0.0-050000-generic_5.0.0-050000.201903032031_amd64.deb

wget -c https://kernel.ubuntu.com/~kernel-ppa/mainline/v5.0/linux-image-unsigned-5.0.0-050000-generic_5.0.0-050000.201903032031_amd64.deb

wget -c https://kernel.ubuntu.com/~kernel-ppa/mainline/v5.0/linux-modules-5.0.0-050000-generic_5.0.0-050000.201903032031_amd64.deb

sudo dpkg -i *.deb

for 32-bit OS:

cd /tmp/

wget -c https://kernel.ubuntu.com/~kernel-ppa/mainline/v5.0/linux-headers-5.0.0-050000_5.0.0-050000.201903032031_all.deb

wget -c https://kernel.ubuntu.com/~kernel-ppa/mainline/v5.0/linux-headers-5.0.0-050000-generic_5.0.0-050000.201903032031_i386.deb

wget -c https://kernel.ubuntu.com/~kernel-ppa/mainline/v5.0/linux-image-5.0.0-050000-generic_5.0.0-050000.201903032031_i386.deb

wget -c https://kernel.ubuntu.com/~kernel-ppa/mainline/v5.0/linux-modules-5.0.0-050000-generic_5.0.0-050000.201903032031_i386.deb

sudo dpkg -i *.deb

Once installed, restart your computer and enjoy!

Uninstall Linux Kernel 5.0:

Restart your machine and select boot with the previous kernel in boot menu ‘Grub2 -> Advanced Option for Ubuntu’. Then run command to remove Linux Kernel 5.0:

sudo dpkg --purge linux-image-5.0.0-050000-generic linux-image-unsigned-5.0.0-050000-generic