Archives For November 30, 1999

This simple tutorial shows how to install the latest version of TimeShift, to backup your Ubuntu system by creating ‘system store‘ points.

Timeshift is a popular system backup tool originally developed by Tony George. It’s now a project maintained by Linux Mint, though the original developer is still one of the top contributors.

And, he is maintaining a PPA repository contains the latest packages so far for Ubuntu 20.04, Ubuntu 22.04, Ubuntu 22.10 and their derivatives.

Install Timeshift

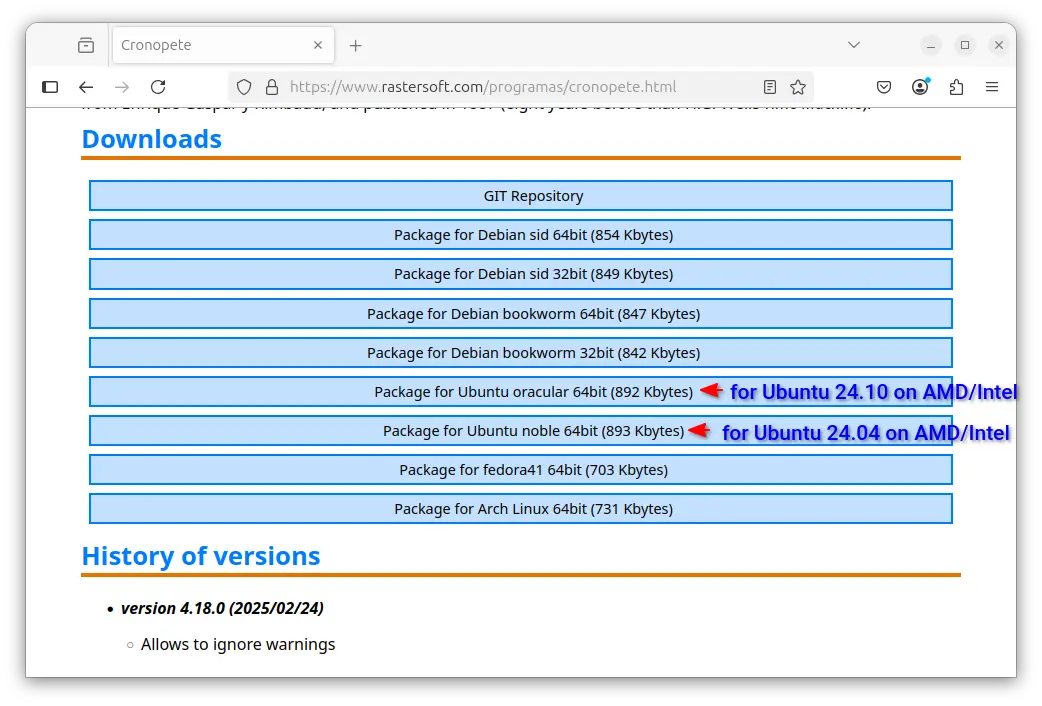
Timeshift is available in Ubuntu system repository, though it’s old! User can either choose to install the old package from Ubuntu Software, or run the commands below one by one to get the latest version from PPA.

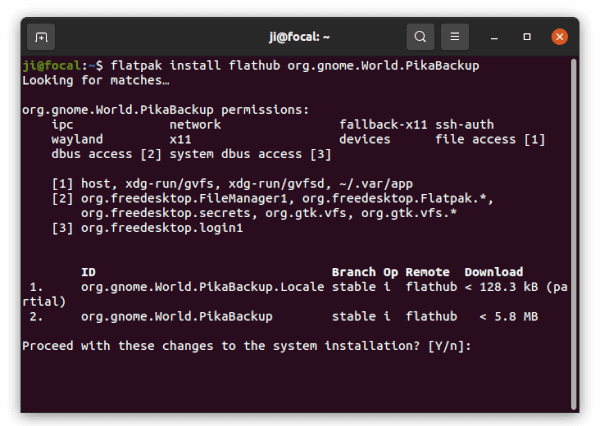
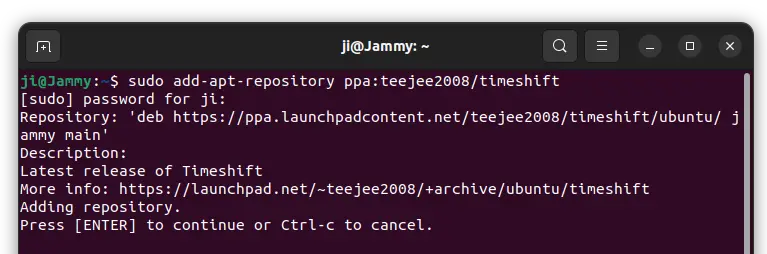
1. First, press Ctrl+Alt+T on keyboard to open a terminal window. When it opens, run command to add its official PPA:

sudo add-apt-repository ppa:teejee2008/timeshift

Type user password (no asterisk feedback) when it asks and hit Enter to continue.

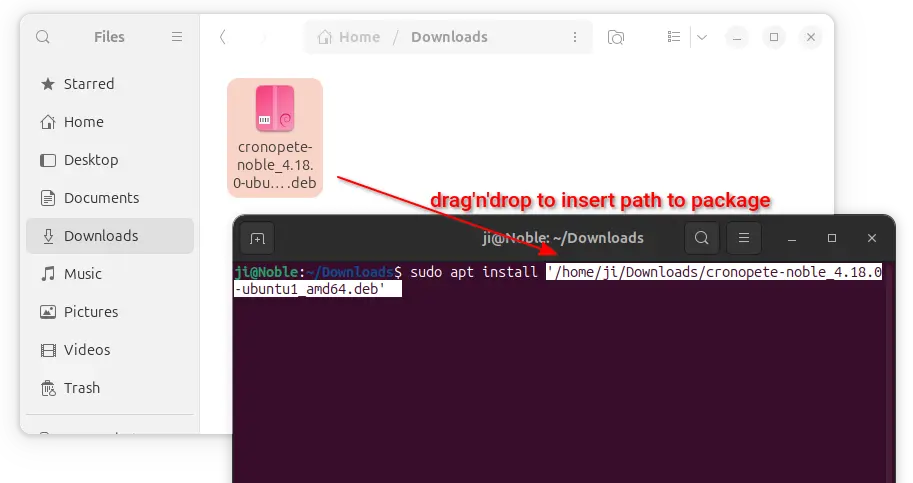
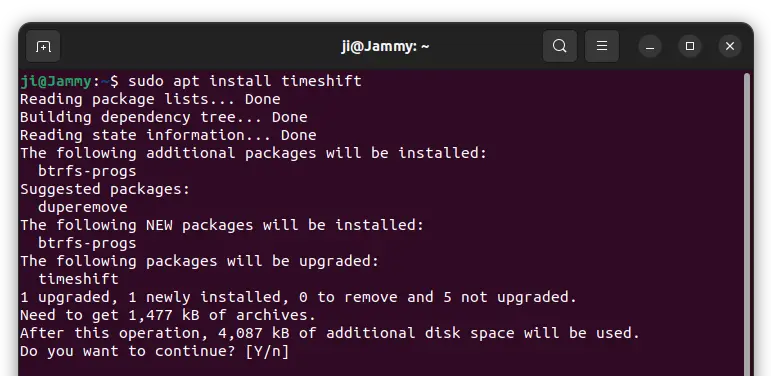
2. Then, either run command below to install the package:

sudo apt install timeshift

The sudo apt update command might be required to run first in some Ubuntu based systems to refresh package cache.

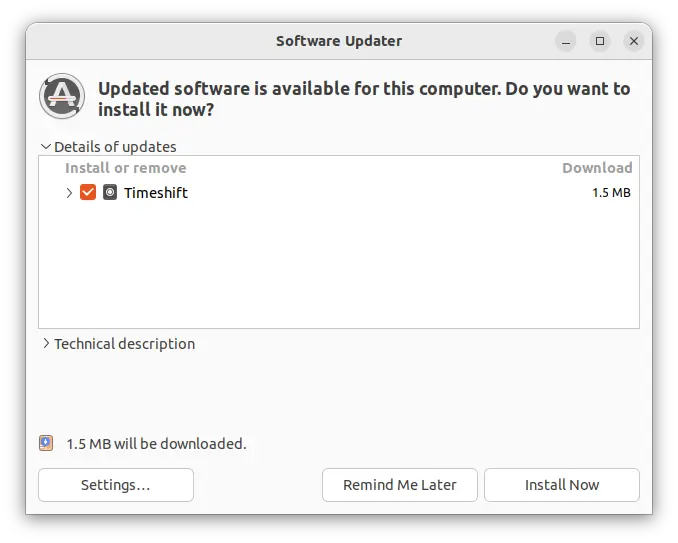
Or, use Software Updater to upgrade the tool if an old version was installed.

Backup your system (Create Restore points)

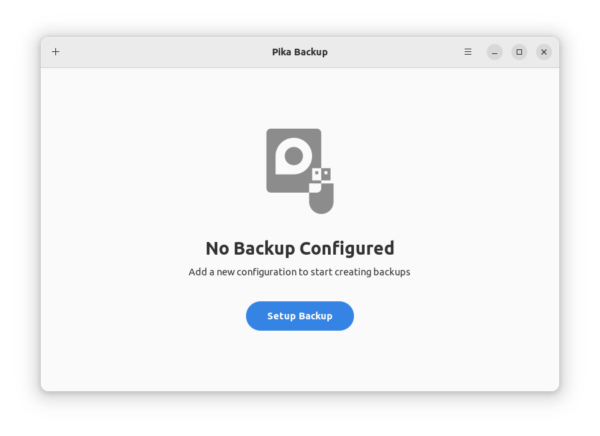
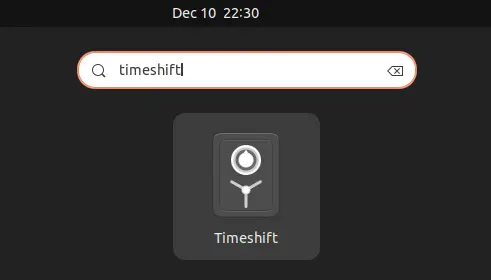
After installing the tool, search for and open it either from system start menu or ‘Activities’ overview depends on your desktop environments.

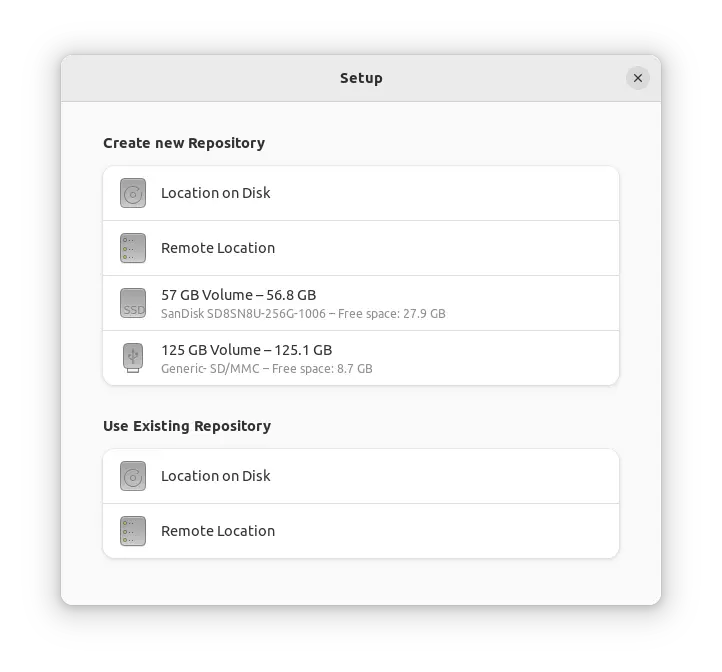
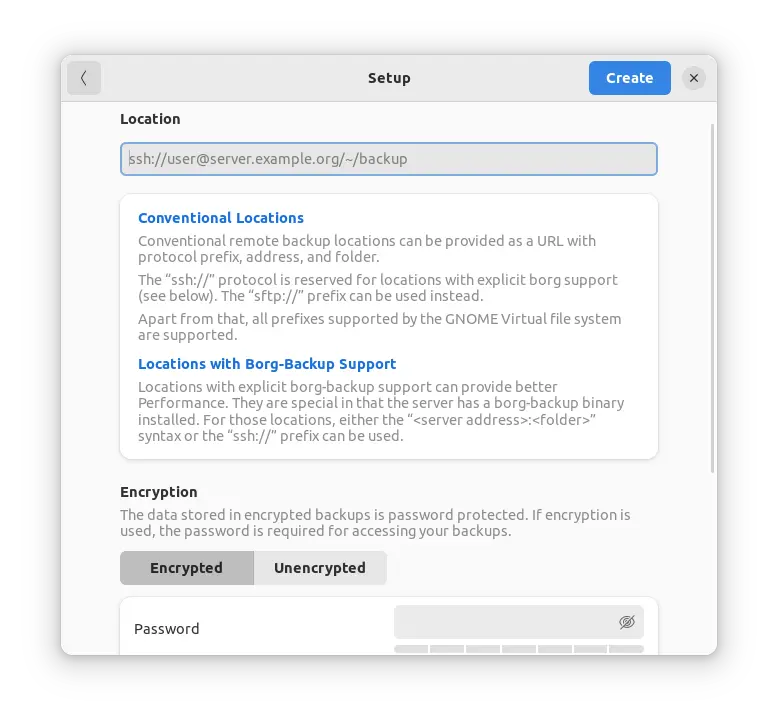
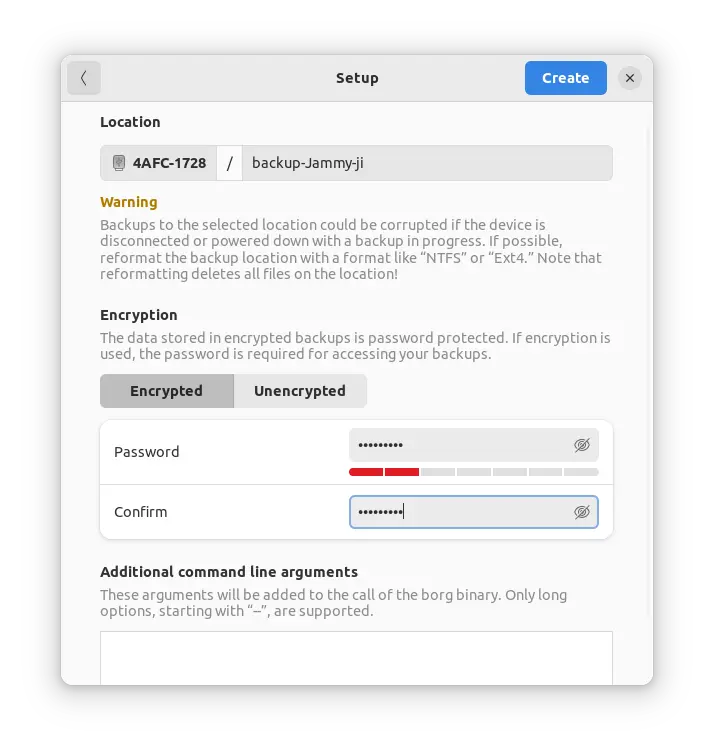
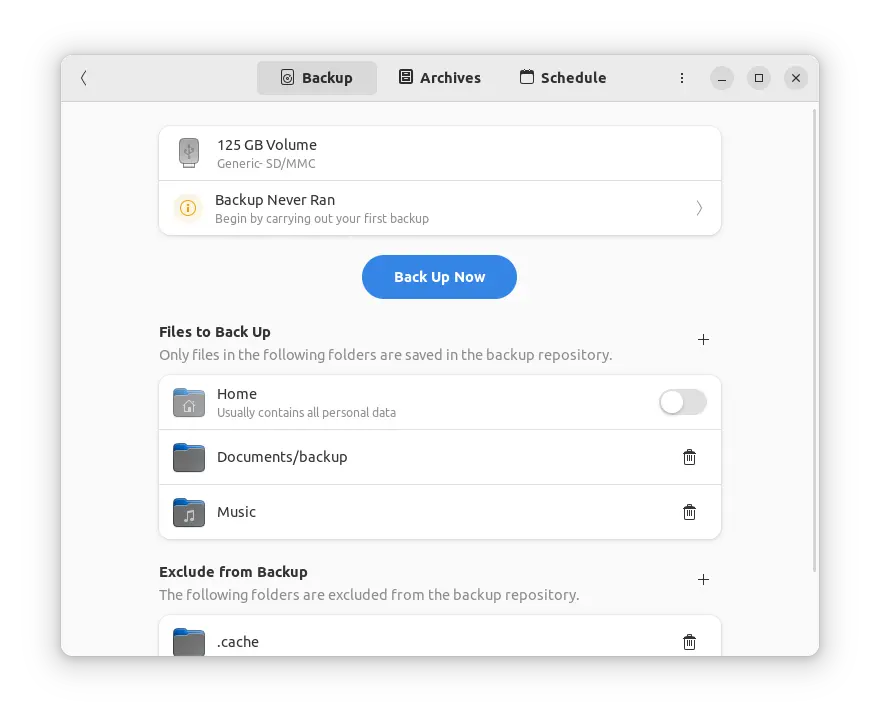
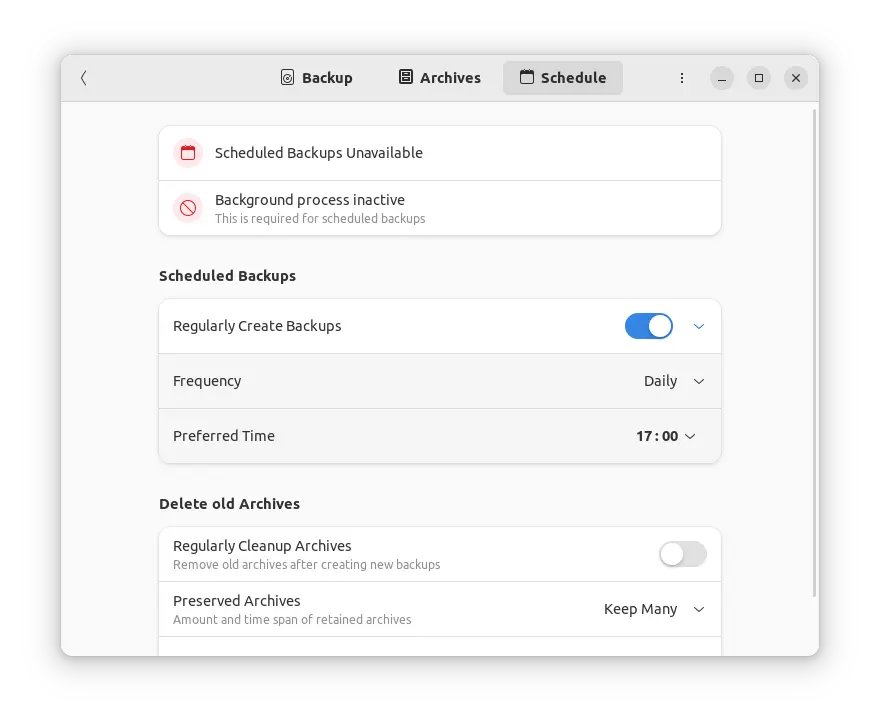
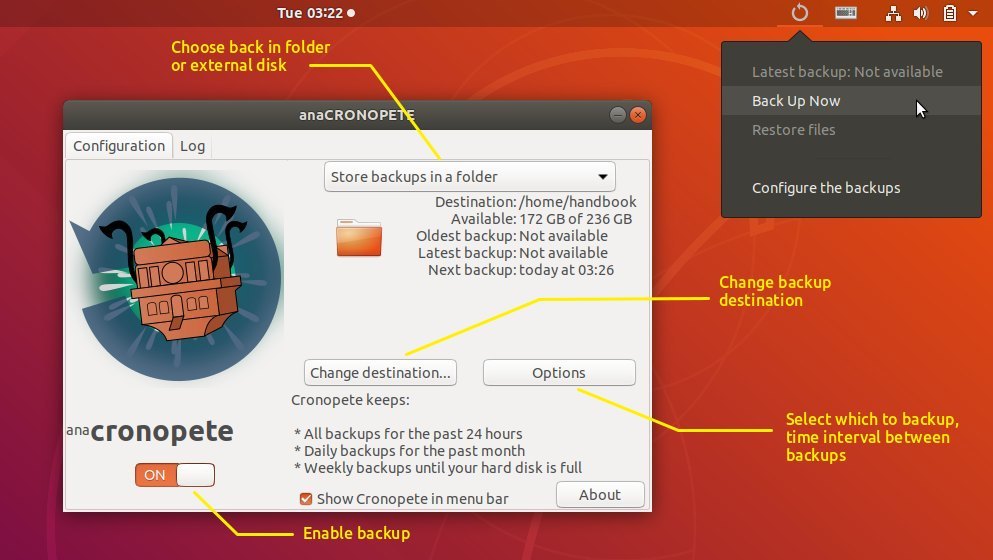
On the first launch, the setup wizard will ask you to choose snapshot type, destination location, setup daily backup, whether to backup user files (excluded by default). And, it’s OK to use Default options, since there’s ‘Settings’ page to re-configure them all.

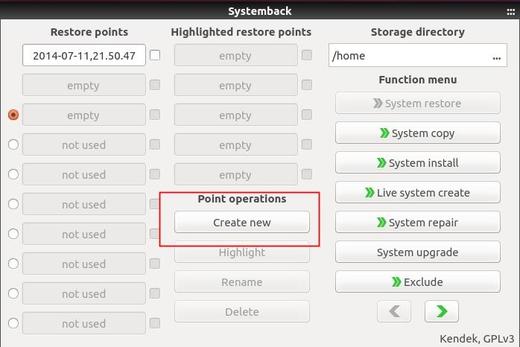
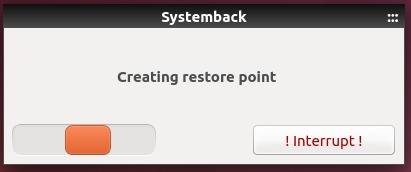
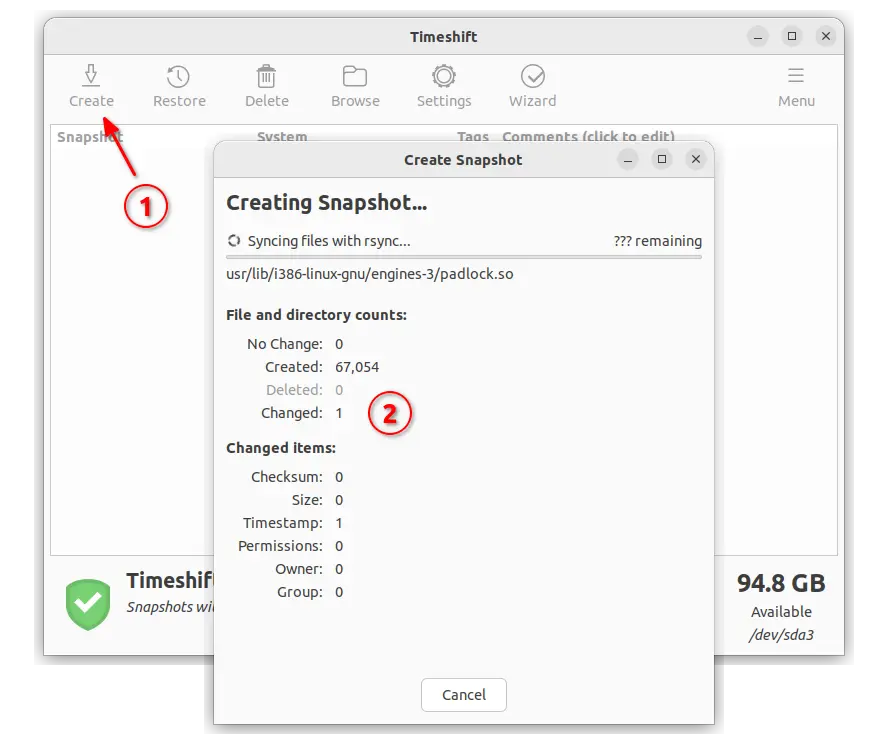
After setup wizard, click on “Create” button on the main UI to start creating the first restore point!

The first backup can take quite a few minutes and dozens of GB disk space (Make sure you have enable free space for saving the first snapshot)! The 2nd, 3rd, … backups can be faster and smaller, because it shares common files between snapshots to save disk space.

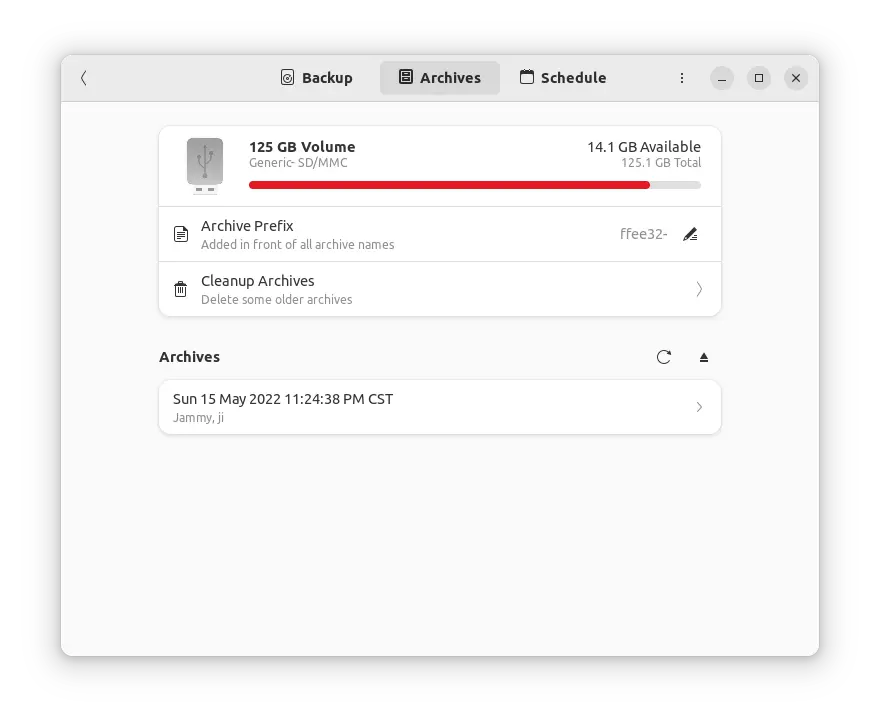
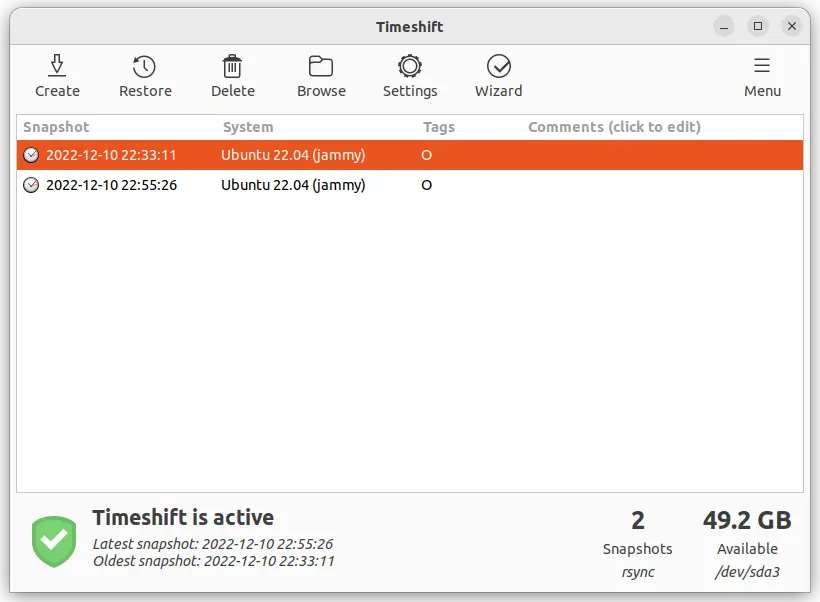
After created backups, they are listed in the main UI window. Simply highlight one, then you can browse its content, copy and save it into another storage device if want.

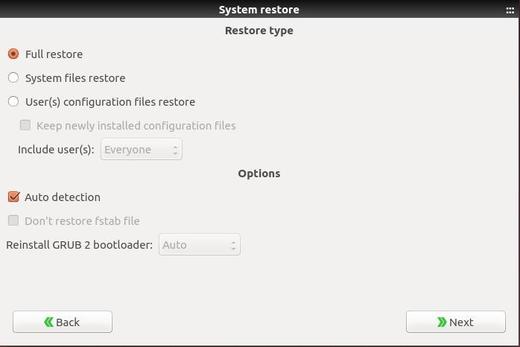
And, just click ‘Restore‘ will revert your system to the status when you created that snapshot, without touching user documents, music, videos, etc, unless you included them in setup Wizard.

Uninstall Timeshift

Before removing the software, you may choose to remove all the backup snapshots that you don’t need anymore to free up disk space.

Then, open terminal and run command to remove the app package:

sudo apt remove timeshift

And remove the Ubuntu PPA via command:

sudo add-apt-repository --remove ppa:teejee2008/timeshift

In case you already removed the software package, but left the backup snapshots on disk. You may try to remove them to free up disk space via command:

sudo rm -R /timeshift/

That’s all. Enjoy!

Looking for a personal data backup program? Pika Backup is a good choice for Ubuntu, Fedora, and other Linux with GNOME desktop.

Pika Backup is free open-source tool to backup your personal data into either local disk (e.g., an USB stick) or remote server using secure shell or sftp. It’s a modern GTK4 + libadwaita app that offers a stylish and easy to use user interface.

The utility is based on BorgBackup (aka Borg), features data de-duplication technique to save time and disk space since only changes are stored for daily backups. With the power of authenticated encryption technique, it also supports password protect for your data.

The app starts in a clean UI with a “Configure Backup” button to get started creating repositories to store backups. The top-left ‘+‘ icon is also present to do the same job.

Once click on “+” icon, it will ask you to create a new repository or select an existing repository to use in next dialog.

You may select to back your data into a remote server via ssh remote file transfer by specifying URL, e.g., “ssh://[email protected]/~/backup“, however borg need to be installed in the server side. For choice, the “sftp://” prefix can be used without borg.

Remote Location

Data can also be saved in local folder or removable devices, such as an USB drive. It will create a sub-folder in selected directory or device and save backup either encrypted or not depends on your selection.

After creation, it will recognize the USB repository automatically once you plug it in, allows you to either edit or select use the repository.

Local repository (USB Stick)

After creating / choosing the backup repository, it brings you to the file selecting screen. There you can choose any file folders, and exclude any for the backup. When you done data selection, click the green “Back Up Now” button to start. It indicates the process with how many percentage finished and how much time left.

setup backup

Backups are stored in unreadable files. You have to open the Pika Backup tool to mount the backups using “Browse saved files” under Archives tab. Then recover files or folder via opened file manager using copy & paste actions. This is not friendly in my opinion since no recover option present.

Archives tab to browser and manage your backups

Scheduled backups are not supported so far, and excluding files from a backup via regular expressions and alike is not implemented yet. Start in v0.4.0, it supports for schedule backup hourly, daily, weekly, or monthly with given time or day. It can also delete old archives automatically by keeping user selected number of last backups.

Install Pika Backup in Ubuntu Linux:

The Pika Backup software is available for most Linux via the universal Flatpak package.

Open terminal either via Ctrl+Alt+T keyboard shortcut or by searching for and opening it from ‘Activities’ overview screen. When it opens, run following commands one by one:

1.) Install flatpak daemon, if you don’t have it, by running command:

sudo apt install flatpak

For Ubuntu 18.04, users have to add the Flatpak PPA first.

2.) Next add the flathub repository, considered as official place hosts flatpak packages:

flatpak remote-add --if-not-exists flathub https://flathub.org/repo/flathub.flatpakrepo

3.) Finally install the backup utility via this command:

flatpak install flathub org.gnome.World.PikaBackup

Like normal apps, you can search for and open it from ‘Activities’ overview screen.

Uninstall Pika Backup:

To remove the software, paste the command below into terminal and hit run:

flatpak uninstall --delete-data org.gnome.World.PikaBackup

And you may clear up unused run-time by running command:

flatpak uninstall --unused

For those looking for Time Machine like backup software, Cronopete is a Linux backup utility modeled after Apple’s time machine.

“The name comes from anacronopete (“who flies through time”), which is a time machine featured in the novel from Enrique Gaspar y Rimbaud, and published in 1887 (eight years before than H.G. Wells’Time Machine).”

Install Cronopete backup tool in Ubuntu:

The software project page so far offers packages for Ubuntu 18.04, Ubuntu 17.10, and other Linux.

Download Cronopete

Grab the package for Ubuntu bionic (for Ubuntu 18.04), or package for Ubuntu artful (for Ubuntu 17.10).

Then install it via:

  1. Install Gdebi package installer from Ubuntu Software.
  2. Right-click on downloaded .deb package, then go to open with Other Application -> Gdebi package installer.
  3. Finally click install the Cronopete package.

Or open terminal (Ctrl+Alt+T) and run command to install the package:

sudo dpkg -i ~/Downloads/cronopete-*.deb; sudo apt-get -f install

Once installed, open the settings dialog from your system app launcher and enjoy!

Enable store backups in a folder:

When you click ‘Change destination’ button to choose a folder to save backups, you’ll be prompted to enable folder backend. And this can be done by:

  1. Install Dconf Editor via Ubuntu Software.
  2. Launch Dconf Editor and navigate to /org/rastersoft/cronopete
  3. Scroll down and enable enable-folder-backend

Uninstall:

To remove Cronopete backup tool, open terminal via Ctrl+Alt+T and run command:

sudo apt-get remove --autoremove cronopete

Aptik backup tool

To simplify re-installation of software packages after upgrading or re-installing Ubuntu, aptik is a simple tool allows to backup software sources (PPA), installed software, and other user data with just a few clicks.

Aptik features:

  • Backup and restore Launchpad PPAs.
  • Backup and restore installed software.
  • Backup and restore downloaded packages (apt cache).
  • Backup and restore themes and icons from /usr/share directory.
  • Backup and restore application settings.
  • Backup and restore user home directory data (.config excluded)
  • One-click backup and restore user selected items.

While doing backup and restore (exclude one-click backup / restore), it lists available items and allows you to choose which to backup / restore. Some backups are encrypted with given passwords.

Aptik backup utility

How to Install Aptik in Ubuntu:

To install the utility in Ubuntu 16.04, Ubuntu 14.04, Ubuntu 12.04, and derivatives, either run the commands below in terminal (Ctrl+Alt+T) to get it from the developer’s PPA:

sudo add-apt-repository ppa:teejee2008/ppa

sudo apt-get update

sudo apt-get install aptik

or grab the DEB package (amd64 for 64bit, i386 for 32bit) from THIS PAGE.

Tip: The DEB packages for Ubuntu 16.04 also works on Ubuntu 16.10.

Uninstall:

To remove aptik, either use Synaptic Package Manager or run the following command in terminal:

sudo apt-get remove aptik && sudo apt-get autoremove

The PPA can be removed by Software & Updates utility under Other Software tab.

Systemback ubuntu 14.04

Systemback is a simple backup and restore application for Ubuntu Linux that makes it easy to create backups of system and users configuration files. In case of problems you can easily restore the previous state of the system.

With systemback, you can create a Windows like system restore point by clicking on the Create new button.

create new restore point

It will take a few minutes backing up system files and user configuration data. User files such as documents, pictures and music are excluded. During this time, you can click the Interrupt button to cancel the process.

create restore point ubuntu

Once you created a restore point, it will be list in the main window with a name looks like “2014-7-11, 20.50.47” (see the first picture). Choose it and you’re able to click the System restore button. Then you can easily restore your system status to the time you create the point.

Systemback restore

Under the function menu, click the green arrow button, you’ll see a button Schedule which allows you to create restore points in a scheduled time.

Besides creating restore points, the tool also allows to:

  • Copy system from one partition to another
  • Create new user, set root password, change hostname.
  • Create a Live CD/DVD/USB from current system with or without user data.
  • System file repair, Grub2 repair.
  • Upgrade your Ubuntu to next release

Install Systemback in Ubuntu 14.04:

The latest stable v1.0 (qt5 port) is available in the developer’s PPA for Ubuntu 14.10 and Ubuntu 14.04. A old stable version is also available for Ubuntu 12.04.

Press Ctrl+Alt+T on keyboard to open the terminal. When it opens, run the commands below one by one will add the PPA and install Systemback:

sudo add-apt-repository ppa:nemh/systemback

sudo apt-get update

sudo apt-get install systemback

Systemback on launchpad

backup ubuntu packages

Aptik is a new tool to simplify re-installation of packages after doing a clean installation of an Ubuntu-based distribution. It can be used while re-installing or upgrading to the next Ubuntu/Linux Mint release.

With this simple tool, you can backup & restore:

  • Software Sources (PPAs.)
  • Software selections (list of installed packages)
  • Downloaded Packages (APT Cache)
  • Themes and Icons

Aptick Ubuntu Backup Tool

How to Use Aptik:

Plug-in your pen drive and create a new folder on it named ‘backups’. Start Aptik and select the new folder as the backup directory.

1. Backup PPAs:

Click on the Backup button and you’ll see a list of third-party PPAs as well as the installed packages from PPAs.

backup ppas

  • PPAs with a green icon are active and have some packages installed.
  • PPAs with a yellow icon are active but unused (no packages installed).

Select the PPAs to backup and click the Backup button. A file named ‘ppa.list’ will be created in the backup directory.

2. Backup Software Selections:

Click on the Backup button will display a list of installed top-level packages. These packages are top-level packages. Dependency packages will not be listed.

backup list of installed software

All packages that are a part of the Linux distribution are un-selected by default. For example, Firefox is a package that is installed by default on most Linux distributions. Since it came with the distribution, it will be un-selected by default. It can be selected if required.

A file named ‘packages.list’ will be created in the backup directory after you clicked no the backup button.

3. Click the Backup button for Downloaded Packages will paste packages from your system cache (/var/cache/apt/archives) to backup folder.

4. Similarly, all themes and icons from the directories /usr/share/themes and /usr/share/icons can be zipped and saved in the backup folder.

To restore backups:

Connect your pen drive to the new system. Install and then start Aptik and select the backup folder on the pen-drive as the backup directory. Click on the Restore buttons and select packages, PPAs, themes and restore them one by one.

About the “Fix Ownership of Home folder”:

The home folder can be manually copied to another location and then restored after doing a fresh install. However, it can sometimes cause problems if the user’s login name or UID is different from the previous one. Click the Take Ownership button to change ownership of files in your home directory to your current login ID. This is same as running the following command:

sudo chown username -R /home/username

How to Install Aptik:

Press Ctrl+Alt+T on keyboard to open the terminal. When it opens, run below commands one by one:

sudo add-apt-repository -y ppa:teejee2008/ppa

sudo apt-get update

sudo apt-get install aptik

Works for Ubuntu 14.04, Ubuntu 13.10, Ubuntu 13.04, Ubuntu 12.10, Ubuntu 12.04 and their derivatives.

via: teejee

The simple Medical Records Manager Clinica released version 0.3 with backup import/export functionality, network sharing service, as well as other improvements and bug fixes.

clinica medical manager

As you may know, Clinica is a simple tool for the desktop to mantain medical records. With it, you can:

  • Search, edit and save patients
  • Manage doctors associated with them
  • Keep track of your scheduled visits and various events using the builtin calendar
  • Search for medicines online and many more with the plugins

The new release Clinica 0.3 add below changes:

  • Reworked the UI to fix some usability issues
  • Moved the CMake build system
  • Added an abstraction to the DataProvider to allow integration with external data sources.
  • Added a Network service to share data across LAN
  • Added a DBus service to ease integration in the desktop environment.
  • Added Backup and Import/Export functionality
  • Gtk+-3.0 only
  • Various fixes
  • Added integration of files in the visits
  • Added a local medicine database
  • Allow to search medicines in more than one database

Install Clinica

For Windows user, download Clinica from Launchpad page.

For Ubuntu 13.10, Ubuntu 13.04, Ubuntu 12.10, Ubuntu 12.04 and Linux Mint. Press Ctrl+Alt+T to open terminal, run below commands one by one to install it from PPA:

sudo add-apt-repository ppa:phcteam/clinica

sudo apt-get update

sudo apt-get install clinica

Once installed, you can open it from Unity Dash home. Enjoy!