


Want to use your face to sign in or run process that needs authentication in your computer? There’s a new project to do the job in Linux!
It’s Gaze, a free open-source Rust written app that provides simple GTK4 + libadwaita user interface for managing facial authentication, while, a CLI tool is also available for command line users.
I’ve written about how to set up the Windows Hello style facial authentication in Ubuntu through howdy. It works, but not so friendly for beginners, and howdy now is moving quite slowly.
To make life easy, gaze was born that provides a stupid simple interface to configure to use your face for Linux login, screen unlock, running sudo command or other processes that need user authentication.
Gaze runs entirely on users’ local devices with no cloud dependency, and, it integrates with PAM for login and lock screen, and works with any standard webcam. And, it provides:
gazed– a daemon that communicates over DBus. It runs silently as a background service, and captures a frame from your webcam when authentication is requested, then compares it against stored enrollments.pam-gaze– a PAM module to manage authentications.gaze-gui– provides a simple user interface to manage face ID.gaze– a command line interface to manage face ID.gaze-gnome-extension– an extension for GNOME users for lock screen authentication.
Install & set up Gaze:
NOTE: Gaze can currently be spoofed with a photo. Don’t use it on production machine! And, it so far only support modern Intel/AMD platform.
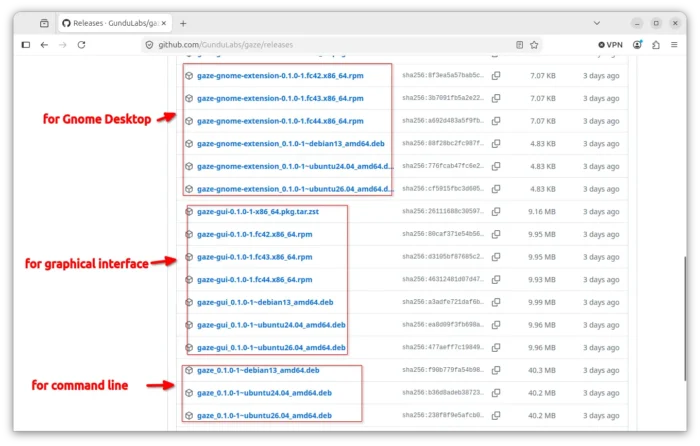
Gaze provides official installer packages for Debian, Ubuntu, Fedora, Arch Linux, and their based Linux distributions, which are available to download at the link below:
Select download gaze, gaze-gui, and gaze-gnome-extension (for GNOME desktop), then click open & install via your system software app, e.g., App Center for Ubuntu 24.04/26.04, Gnome Software for Fedora Workstation.
After installed the tool, restart computer.
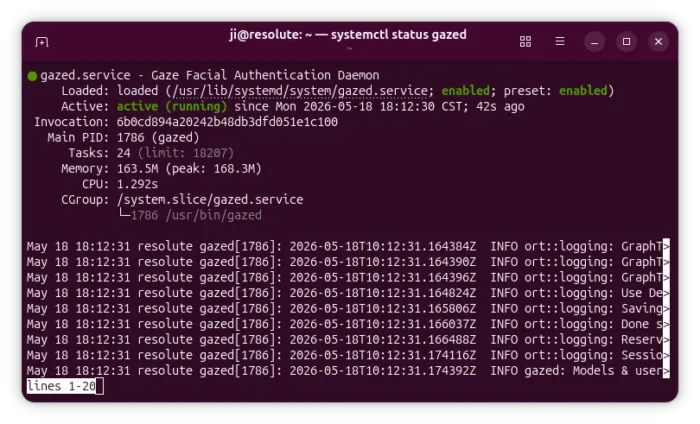
Then, you may open terminal (Ctrl+Alt+T) and run the command below to check if the daemon is running actively:
systemctl status gazed
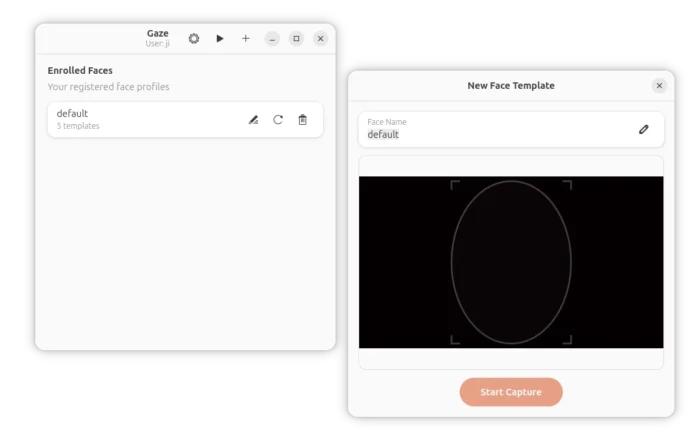
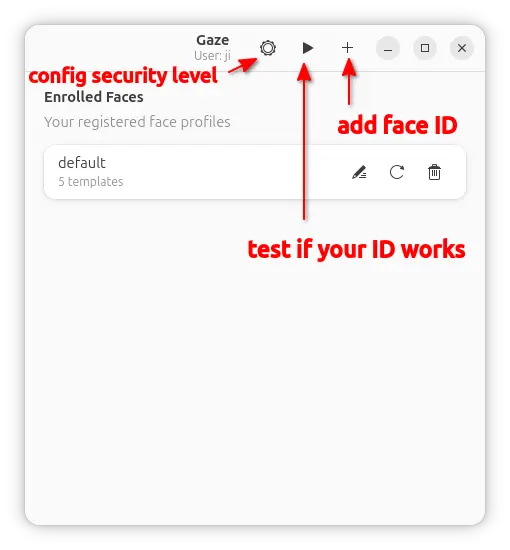
Then, launch Gaze GUI for the graphical interface to add your face ID, configure security level. While, advanced users may run gaze --help and do them in command line.
NOTE: Higher security level may cause more authentication failures.
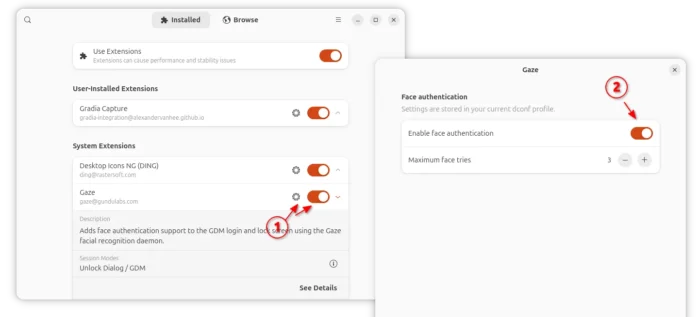
After added your face ID, launch “Gnome Extensions” or “Extension Manager” (both available in Ubuntu App Center, Fedora Gnome Software), enable gaze extension and enable facial authentication for lock screen its preferences.
Known issues and Workarounds
1. For Debian and Ubuntu, the 0.1.0 version incorrectly built the pam-gaze module libraries into /lib/${MULTIARCH}, which causes the facial authentication not function.
To workaround the issue, run command to move them to the correct place:
sudo mv /usr/lib/\$\{MULTIARCH\}/security/* /usr/lib/x86_64-linux-gnu/security/
2. Also for Debian and Ubuntu, the priority of gaze module (version 0.1.0) is lower than the default password authentication. Meaning it will always ask for password authentication first, if failed, it then fall back to gaze facial authentication.
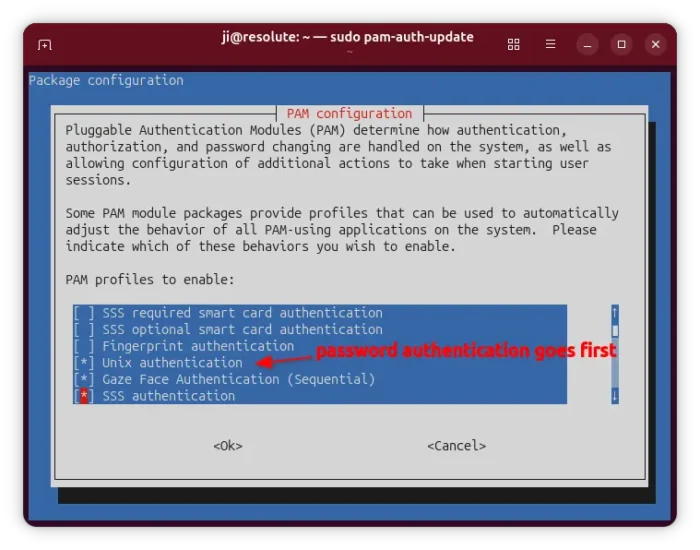
To workaround the issue, try configuring the /usr/share/pam-configs/gaze file and set priority to higher than 256 (e.g., 260).

Finally, re-run sudo pam-auth-update and make sure “Gaze Face Authentication” goes before the “Unix authentication”, finally restart computer to apply changes.


it could not add my face id