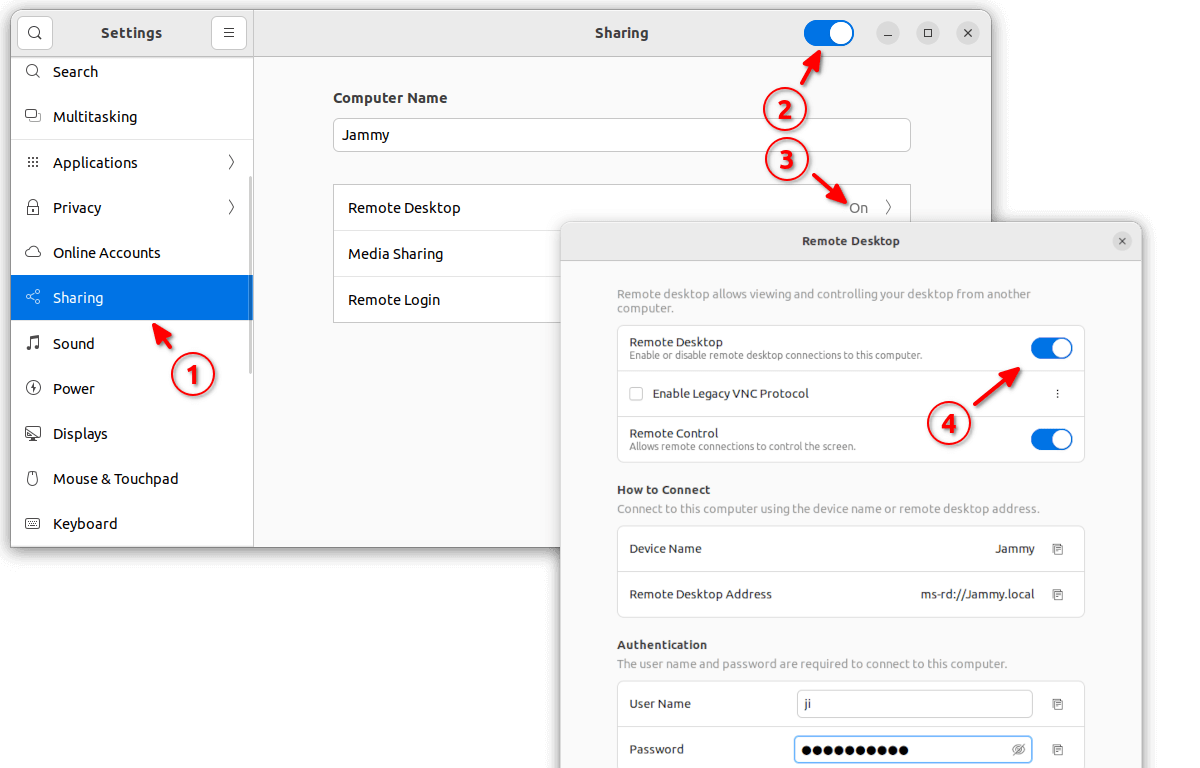
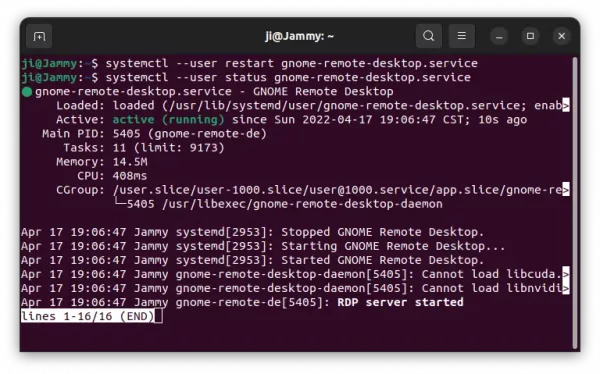
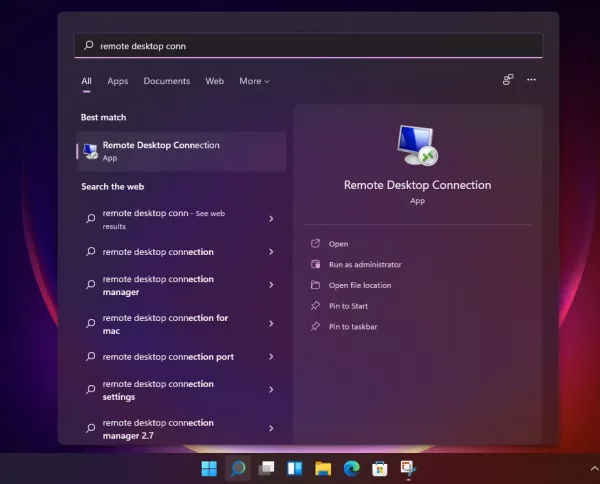
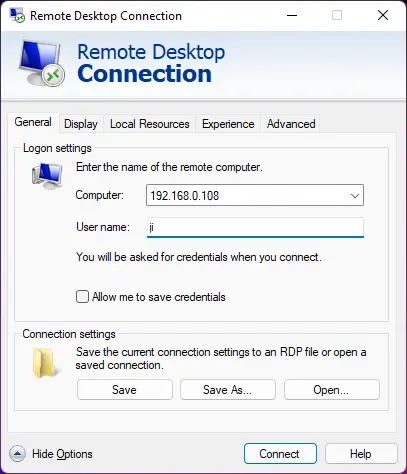
![]()
The new Ubuntu 22.04 LTS has been released! If you’re going to do a fresh install, then this tutorial may help to burn the ISO image into your USB stick.
Requirements:
To follow this tutorial, you need following things to get start:
- USB Stick with 8 GB+ storage.
- Windows, Linux, or MacOS PC/Laptop.
- Download iso image from releases.ubuntu.com/22.04.
Step 1: Verify the Downloads
Before burning the ISO image, it’s better to verify the data integrity. If you’re confident that the iso image is OK, you may just skip this step.
For Linux, simply run the command below in terminal and compare the output with the “SHA256SUMS” file in previous download link.
sha256sum ~/Downloads/ubuntu-22.04-desktop-amd64.iso
For Windows user, search for and open CMD, and run command (replace YOUR_USER accordingly):
certutil -hashfile C:/Users/YOUR_USER/Downloads/ubuntu-22.04-desktop-amd64.iso SHA256
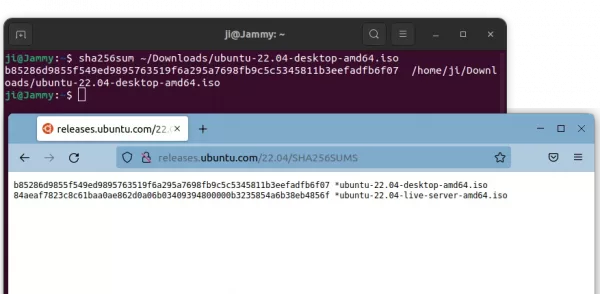
Verify iso image
Step 2: Backup
Creating boot-able USB installer will format your USB stick. All data stored in USB will be cleared!! So it important make a backup first.
Step 3: Burn the ISO image
Firstly, plug in your USB stick and do following steps depends on which operating system you have.
Option 1: From Ubuntu PC:
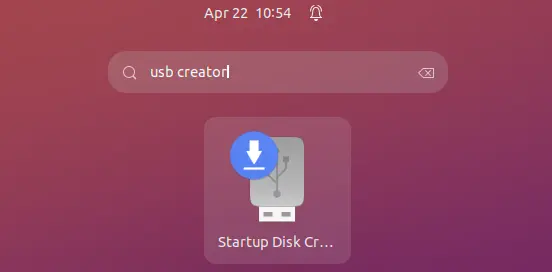
If you’re now running with an old Ubuntu system, just search for and open “Startup Disk Creator” from the Activities overview screen.
When it opens, it should select the USB drive automatically as well as the ISO image. If not, click on “Other” button, then browse and select the Ubuntu 22.04 iso image.
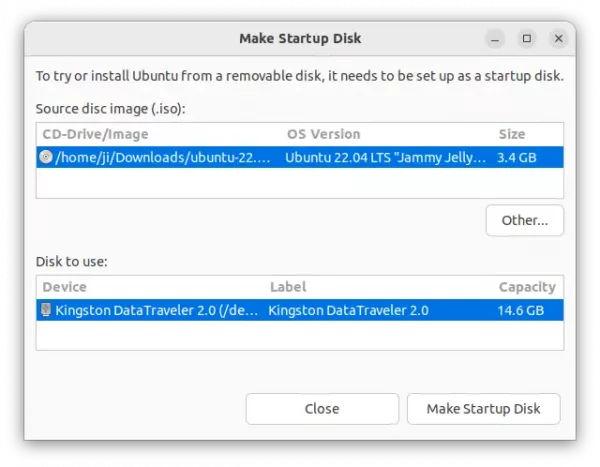
Click on “Make Startup Disk” button, then type user password to authentication. Then just wait, the process should be done in a few minutes!
Option 2: From Windows, MacOS, and other Linux:
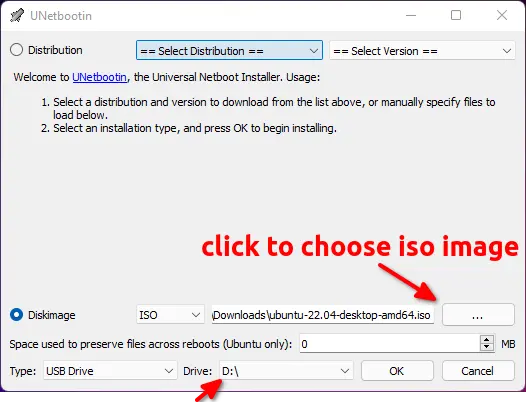
There are a few other tools to create Linux USB installer. Here I tried the UNetbootin, which works in Linux, Windows, and MacOS.
Firstly, download the free open-source tool from its website:
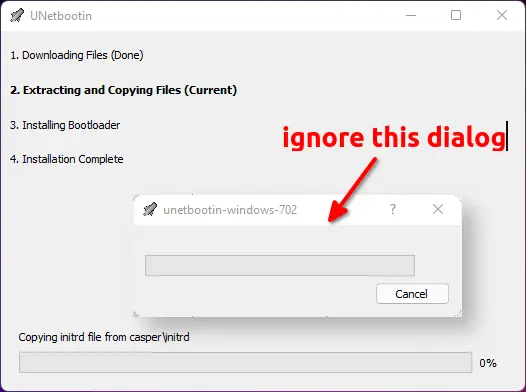
Then start the app, it should automatically detect your USB stick. Just click on the ‘…’ button to select the Ubuntu 22.04 iso image, and then click on OK to start burning it.
Ignore the second dialog, it’s a bug persists for a period of time, though it won’t affect the USB burning process.
Option 3: Use Ventoy
Ventoy is a new solution for booting iso image from USB. With it, you can just save images in normal way, along with other files. When you try to boot from USB, it will look for the iso images automatically and provide the option to boot them.
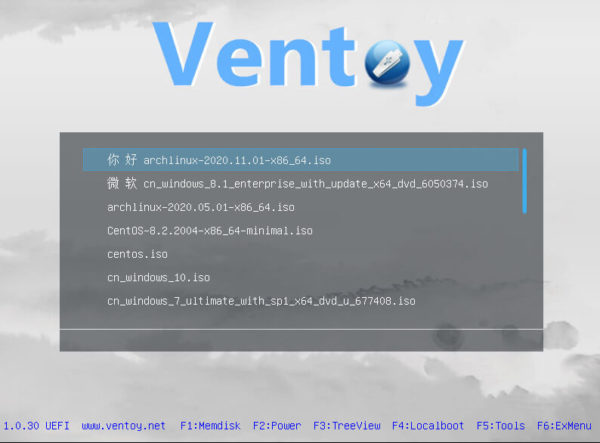
However, it seems not working quite good with UEFI. At least it does not work in my laptop with secure boot enabled. See here for more.
When everything’s done successfully, select boot your USB stick from BIOS (UEFI) and enjoy!