Everyone needs to tweak the default desktop environment before getting ready to work! And here are the top 10 things that I’ve done after installing Ubuntu 21.10 Impish Indri.
1. Install Media Codec:
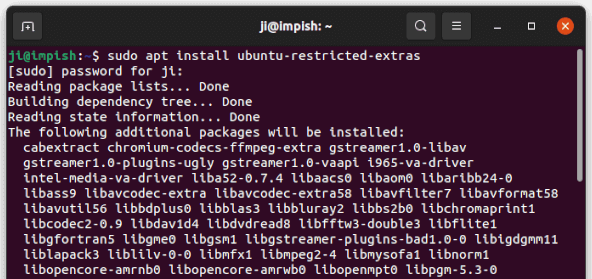
If you didn’t enable ‘Install third-party software …‘ check-box during the installing process, you need to install the multimedia codecs for audio and video playback with built-in apps.
To do so, open terminal by pressing Ctrl+Alt+T on keyboard and run command:
sudo apt install ubuntu-restricted-extras
As you see in terminal outputs, it will also install codecs for Chromium based browser, Microsoft TrueType core fonts, as well as non-free package to handle rar archive.
2. Enable ‘Click-to-minimize’ dock panel click action:
Clicking app icon on the dock panel will do nothing for the focused app window by default. Though I think most people want it act as minimize the current window.
Open terminal (Ctrl+Alt+T) and run the single command will do the trick:
gsettings set org.gnome.shell.extensions.dash-to-dock click-action minimize

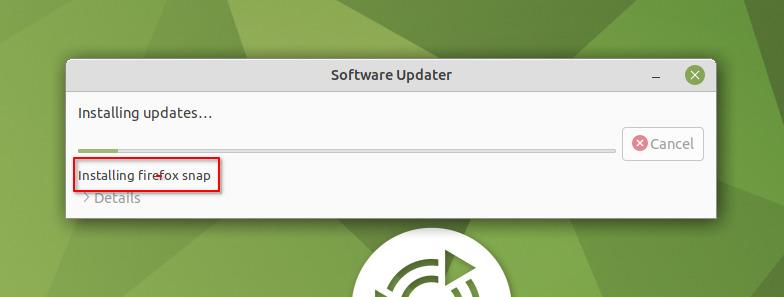
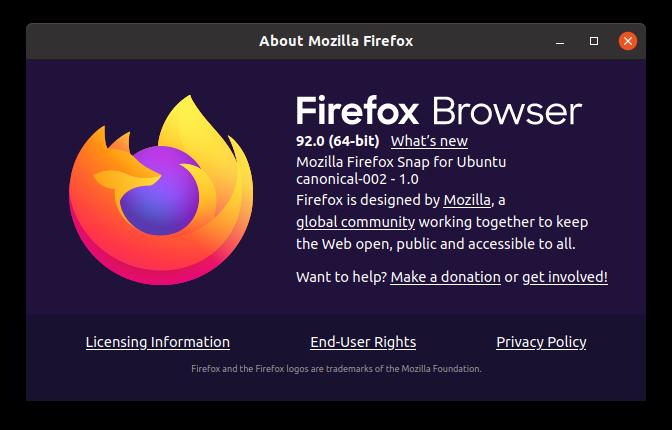
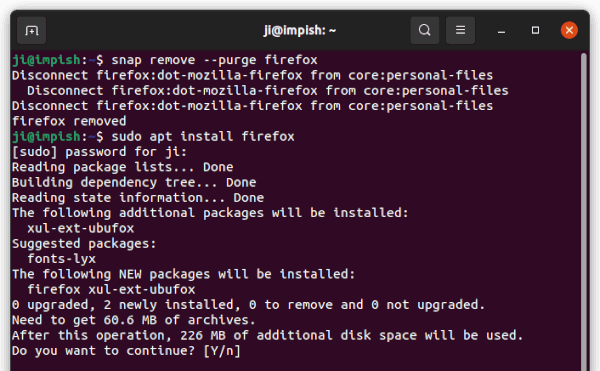
3. Remove Default Firefox Snap, and install back the classic Deb package:
In the final release of Ubuntu 21.10, the default Firefox web browser has been switched to the Snap package runs in sandbox. However, it does not support for installing Gnome extensions!
So I have to remove it by running command in a terminal window:
sudo snap remove --purge firefox
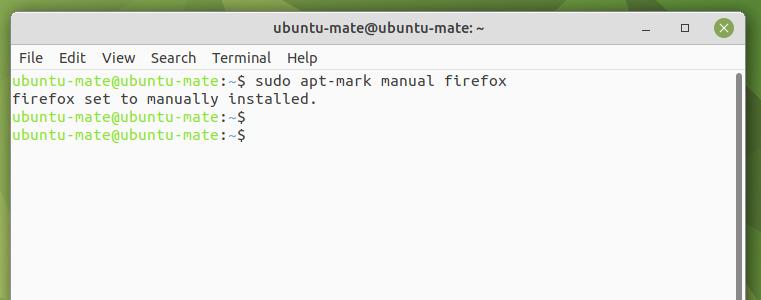
And then install back the classic deb package via command:
sudo apt install firefox
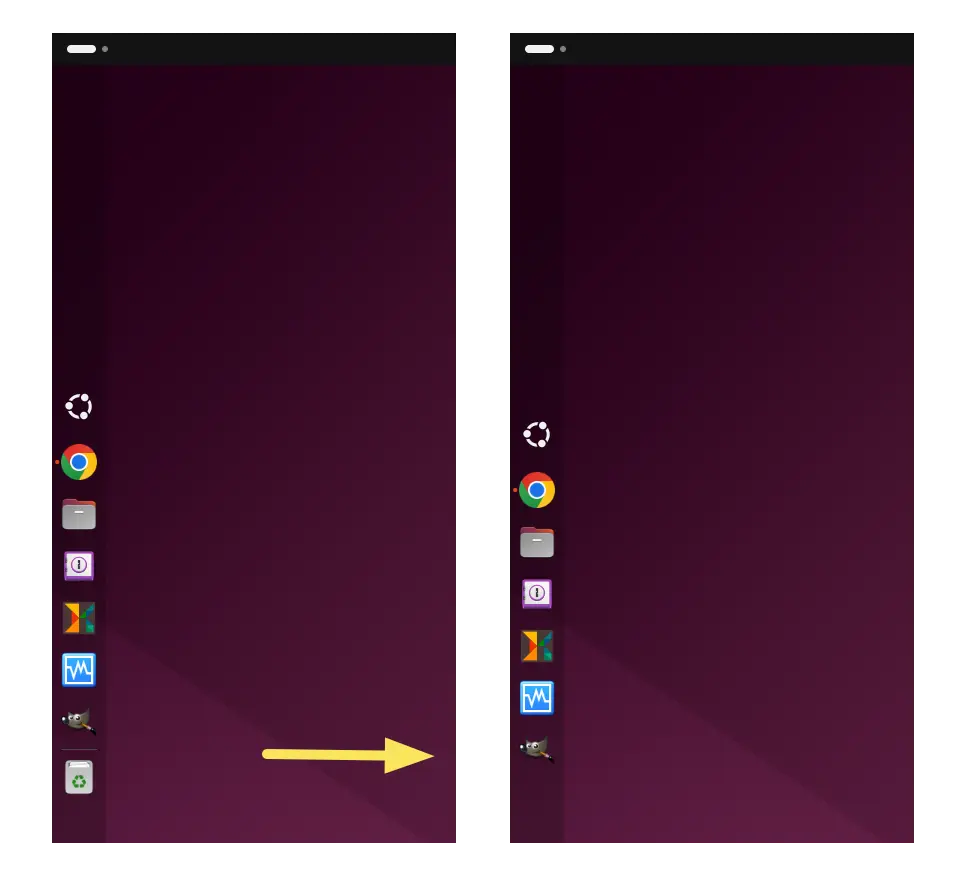
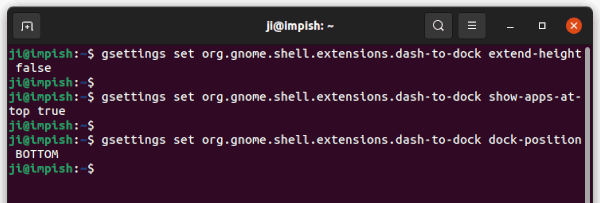
4. Tweak the Dock Panel Appearance:
Also for the left dock panel, there are a few tips to tweak its appearance. Open terminal by pressing Ctrl+Alt+T key combination on keyboard, and run the command below:
- Move ‘Show Applications’ (9 dots icon) to the top:
gsettings set org.gnome.shell.extensions.dash-to-dock show-apps-at-top true
- Shorten the panel to make it compact:
gsettings set org.gnome.shell.extensions.dash-to-dock extend-height false
- Move dock to the bottom, though you may do it via System Settings:
gsettings set org.gnome.shell.extensions.dash-to-dock dock-position BOTTOM
- Disable USB and other removable device icons from panel:
gsettings set org.gnome.shell.extensions.dash-to-dock show-mounts false
For those prefer a graphical configuration tool, all the above commands can be done via Dconf Editor tool.
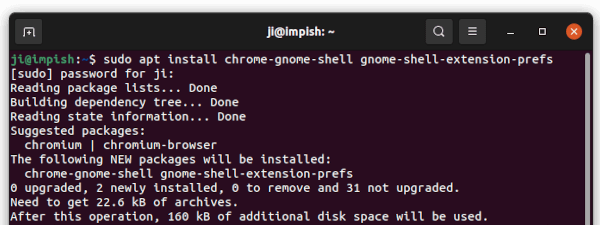
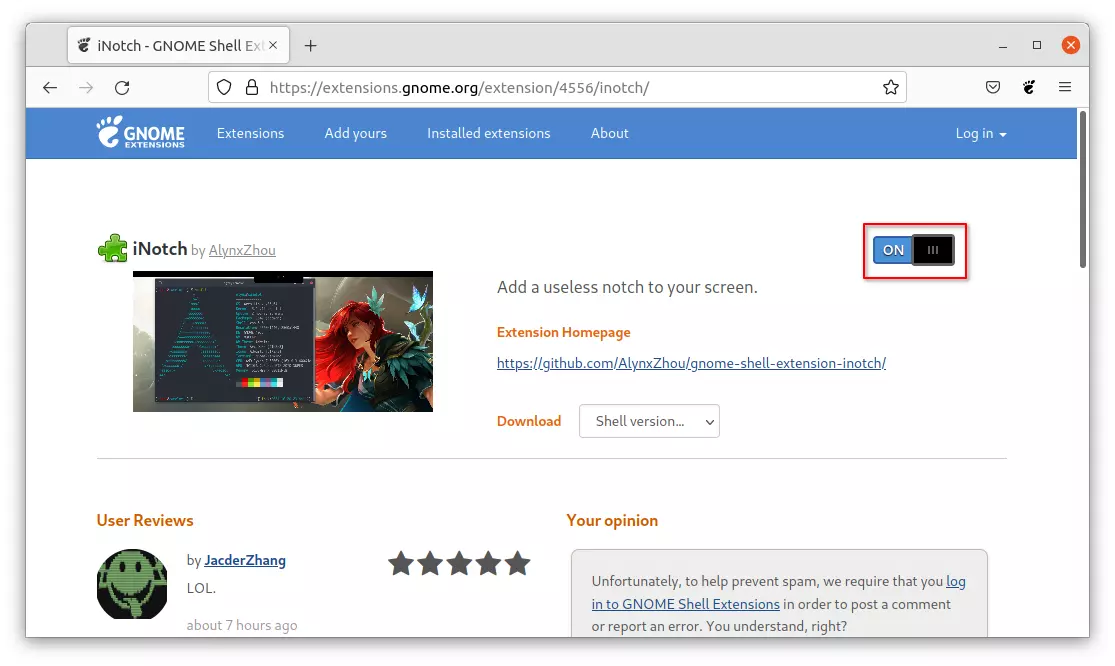
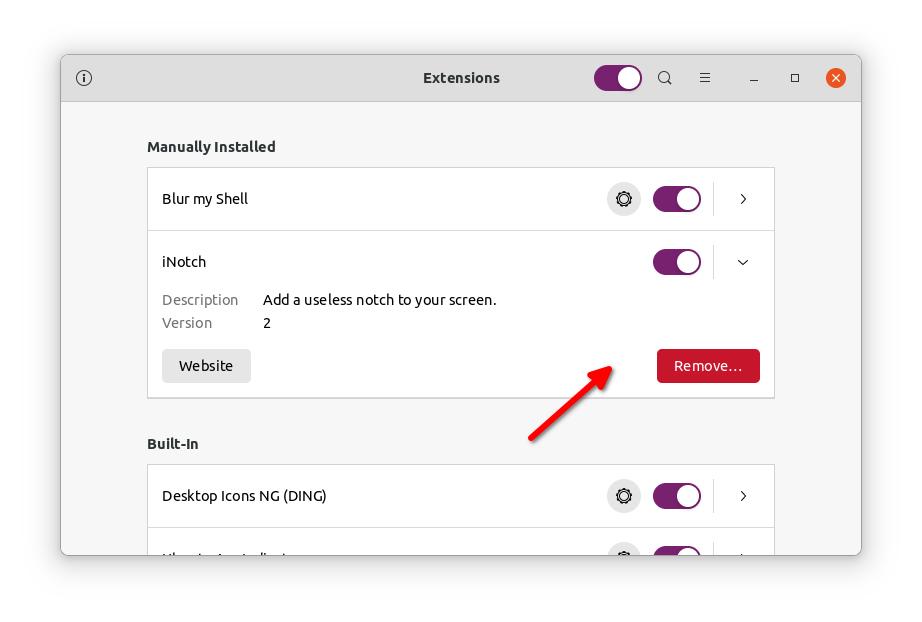
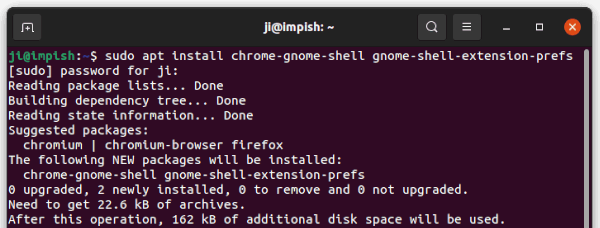
5. Enable Gnome Extensions Support:
The most extensions for Gnome is to be installed via web browser by visiting extensions.gnome.org, though you have to install something to enable it.
Open terminal (Ctrl+Alt+T) and run command to install chrome-gnome-shell and Gnome Extensions app:
sudo apt install chrome-gnome-shell gnome-shell-extension-prefs
After that, you may visit the web site and install browser extension for the first time and install your prefer Gnome Extensions.
And by searching for ‘Gnome Extensions’ from activities overview, you can open the app to manage them.
6. Install Gnome Tweaks:
Besides the default system settings, Gnome Tweaks is the must have configuration tool for GNOME desktop, especially for changing themes and fonts.
To install the tool, open terminal and run command:
sudo apt install gnome-tweaks
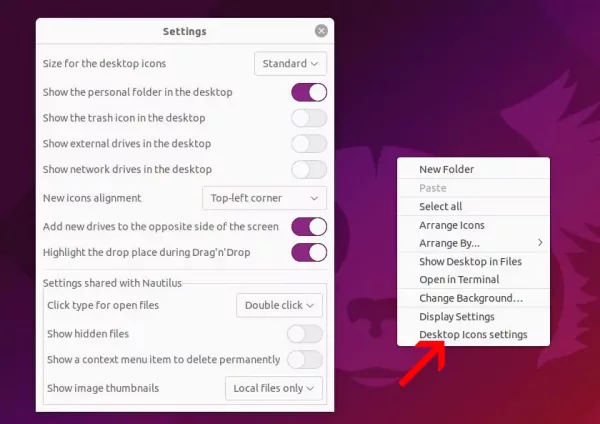
7. Manage desktop icons:
Ubuntu 21.10 now defaults the trash icon into dock panel, though the Home icon present in the desktop out-of-the-box. User may choose to hide it or change the icon size via new settings menu.
Simply right-click blank area on the desktop and choose “Desktop Icons settings” will open the page to manage desktop icons.
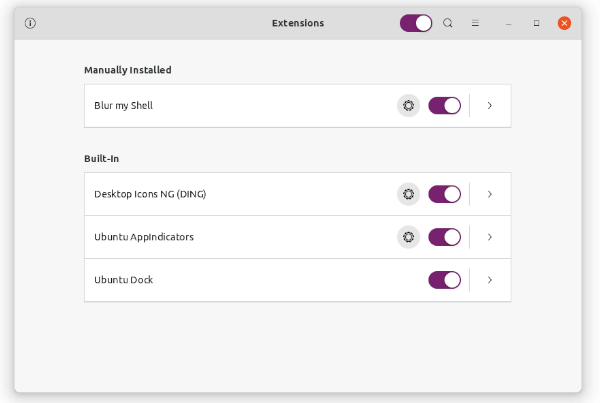
8. Modern desktop appearance via blur effect:
The default top bar and overview screen is a little bit ugly. To make them look good, try “Blur my Shell” Gnome Shell Extension.
After doing step 5, you may click the link below to install it:
Ubuntu 21.10 with Blur effect
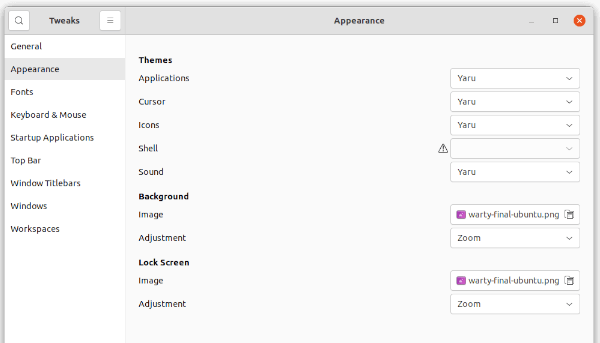
9. Enable Gnome Shell Theme Support:
To be able to switch between dark and light menus, notifications, etc, and try out different Gnome Shell themes, you have to install the User Themes extension.
After that, use Gnome Tweaks to change Shell themes under Appearance tab.
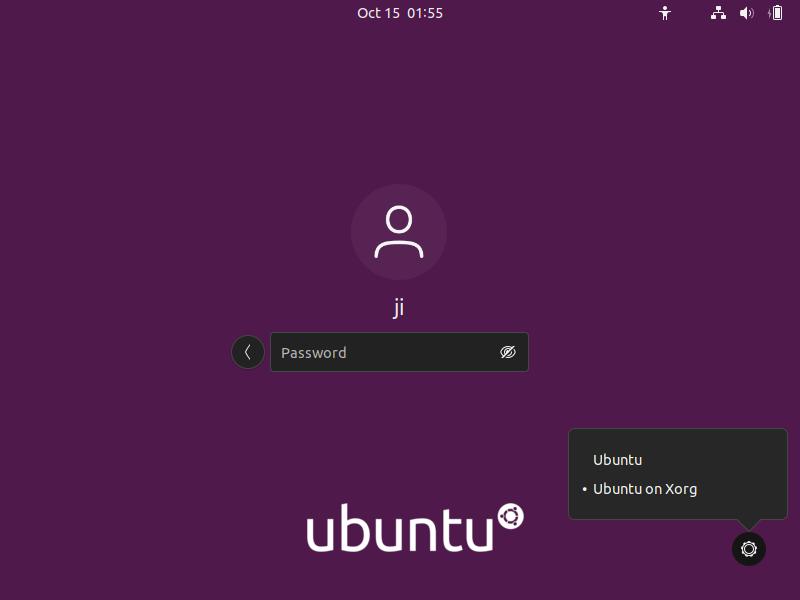
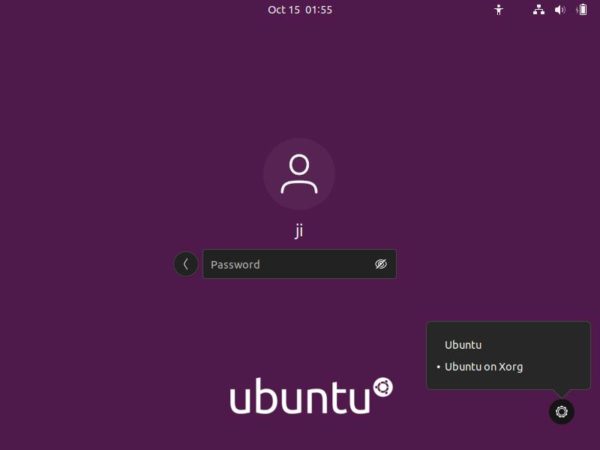
10. Switch back Xorg Session:
Ubuntu defaults to Wayland session since Ubuntu 21.04. However, some applications are still not working good with Wayland. If you’re sticking to those apps, you may choose to switch back “Ubuntu on Xorg” from the login screen via bottom right gear button.
That’s all. If you have more tips to improve the Ubuntu desktop appearance, please leave comment in the bottom!