Archives For November 30, 1999

Mesa 3D graphics library 19.1.4, which was released a week ago, now is made into PPA for Ubuntu 18.04, and Ubuntu 19.04.

For those sticking to the open-source RadeonSI / RADV / Intel / Nouveau drivers, Mesa 19.1.4 is the latest stable release with following release highlights:

  • Vulkan 24/48 bit formats are now not supported on Ivybridge.
  • R8G8B8_UNORM_SRGB is not supported on Haswell.
  • A fix for hair artifacts in Max Payne 3 on AMD/RADV.
  • Vulkan transform feedback extension is disabled on Intel gen7.

Canonical’s Timo Aaltonen has made Mesa 19.1.4 package into “Ubuntu-X” team PPA, available to install in Ubuntu 18.04 and Ubuntu 19.04.

1. Open terminal either via Ctrl+Alt+T keyboard shortcut or by searching for ‘terminal’ from application menu. When it opens, run command:

sudo add-apt-repository ppa:ubuntu-x-swat/updates

Type user password (no asterisk feedback) when it prompts and hit Enter to continue.

2. After adding the PPA, do system update via command:

sudo apt-get dist-upgrade

apt-get update is not required any more in Ubuntu 18.04 since adding PPA automatically refreshes system package cache.

3. Finally check your driver version via command:

glxinfo | grep "OpenGL version"

Uninstall:

To restore changes and downgrade to the default drives shipped in Ubuntu 18.04, run command:

sudo apt-get install ppa-purge && sudo ppa-purge ppa:ubuntu-x-swat/updates

Avidemux video editor

Avidemux video editor released version 2.7.4 today with tons of bug-fixes. Here’s how to install it in Ubuntu 18.04, Ubuntu 19.04.

Aivdemux 2.7.4 release highlights:

  • Detect and warn when cut points in H.264 video streams may result in playback issues despite being on keyframes
  • Update to the 4.1.4 release
  • Enable HW accelerated decoding of 8-bit HEVC for recent versions of Intel graphics driver on Windows
  • Support audio tracks in fragmented MP4 files
  • Support E-AC3 audio tracks in MP4 files
  • Fix ASF demuxer still broken by chance with MSVC++ only, the fix relevant for all platforms
  • Support more varieties of BMP images
  • Optimize output of the Mp4 muxer for streaming on Windows too
  • Add option to the Mp4 muxer to output fragmented MP4 files
  • Support WMAPRO audio codec for decoding
  • Support AAC with signal band replication (SBR) in external audio tracks
  • Numerous other fixes. See HERE for details.

How to Install Avidemux 2.7.4 in Ubuntu:

There are a few ways installing the latest the video editor in all curren Ubuntu releases.

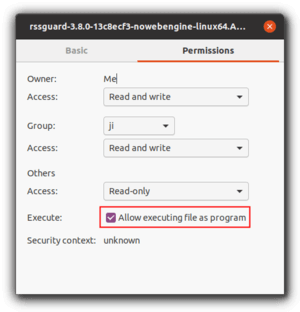
  • Appimage, single executable (enable it in file properties dialog) to launch the editor.
  • Flatpak, community maintained package that runs in sandbox.
  • Native Ubuntu (.deb) packages via an unofficial PPA.

For Ubuntu 16.04, Ubuntu 18.04, and Ubuntu 19.04, here’s how to install Avidemux 2.7.4 via the unofficial PPA.

1. Open terminal either from app launcher or via Ctrl+Alt+T keyboard shortcut. When it opens, run command to add the PPA:

sudo add-apt-repository ppa:ubuntuhandbook1/avidemux

Type user password (no asterisk feedback due to security reason) when it prompts and hit Enter.

avidemux ppa

2. Then run following 2 commands to refresh package cache and install the video editor:

sudo apt update

sudo apt install avidemux2.7-qt5 avidemux2.7-qt5-data avidemux2.7-plugins-qt5 avidemux2.7-jobs-qt5

NOTE: if you get software launching error similar to:

avidemux2.7_qt5: symbol lookup error: avidemux2.7_qt5: undefined symbol: _Z20extractH264FrameTypePhjPjPiP11ADM_SPSInfoS0_

try updating your system via command sudo apt update && sudo apt upgrade.

Uninstall:

To remove the native Ubuntu .deb package of Avidemux 2.7, run command in terminal:

sudo apt remove --autoremove avidemux2.7-*

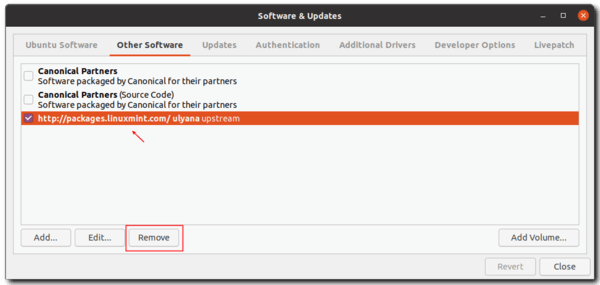
And remove the PPA via Software & Updates utility under ‘Other Software’ tab.

LibreOffice

Libreoffice, Ubuntu’s default office suite, released version 6.3 a few days ago. Here’s how to upgrade it in Ubuntu 18.04 and/or Ubuntu 19.04 via PPA.

LibreOffice 6.3 release highlights:

  • New ‘Tabbed Compact UI’
  • improved PDF export
  • improved Microsfot office file formats support.
  • Redact documents to remove/hide sensitive information
  • New ‘Tip-Of-The-Day’ dialog on startup

Although LibreOffice offers the latest snap package (runs in sandbox) in Ubuntu Software utility, you can choose upgrade the pre-installed LibreOffice package using the Fresh PPA.

1. Open terminal either via Ctrl+Alt+T keyboard shortcuts, or by searching for “terminal” from application launcher. When it opens, run command to add the LibreOffice PPA:

sudo add-apt-repository ppa:libreoffice/ppa

Type user password (no asterisk feedback while typing) when it prompts, and read terminal output for PPA description and hit Enter to continue.

2. Then you’ll see the upgrade available in Software Updater after checking for updates.

Or run commands in terminal to install LibreOffice:

sudo apt update

sudo apt install libreoffice

For Ubuntu 18.04 and higher, you can skip sudo apt update as it’s done while adding PPA.

Uninstall:

You can restore to stock version of LibreOffice in Ubuntu main archive by running command in terminal:

sudo apt-get install ppa-purge && sudo ppa-purge ppa:libreoffice/ppa

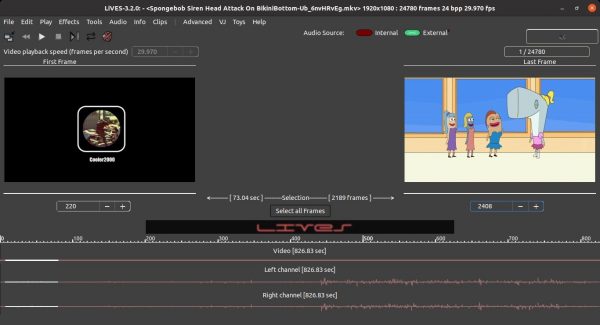
LiVES video editor and VJ tool released version 3.0.1 today. Here’s how to install it in Ubuntu 18.04, and Ubuntu 19.04.

LiVES 3.0 release highlights:

  • Render silence to end of video if necessary during rendering.
  • Improvements to openGL playback plugin, including much smoother playback.
  • Re-enable Advanced options for the openGL playback plugin.
  • Allow “Enough” in VJ / Pre-decode all frames
  • Refactor code for timebase calculations during playback (better a/v synch).
  • Overhaul external audio and audio recording to improve accuracy and use fewer CPU cycles.
  • Auto switch to internal audio when entering multitack mode.
  • Eliminate some race conditions between the audio and video threads.
  • Implemented reference counting for realtime effect instances.
  • Extensively rewrote the main interface, cleaning up the code and making many visual improvements
  • Improvements to online video downloader, clip size and format can now be selected, added an update option.
  • Improvements to the projectM filter wrapper, including SDL2 support.
  • Eliminate race conditions when applying rendered effects.
  • Added an option to invert the Z-order in multitrack compositor.
  • Added support for musl libc.

How to Install Lives 3.0.1 in Ubuntu:

1. Open terminal either via Ctrl+Alt+T keyboard shortcut or from application menu. When it opens, run command to add the unofficial PPA:

sudo add-apt-repository ppa:ubuntuhandbook1/lives

Type user password (no visual feedback while typing due to security reason) when it asks and hit Enter.

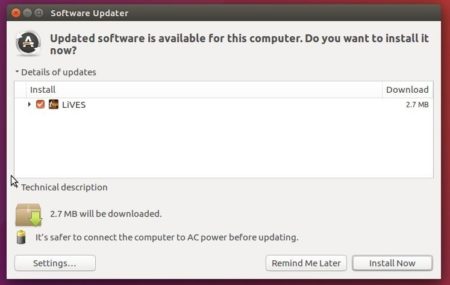
2. Then upgrade the software from an existing release via Software Updater:

or simply run commands in terminal to install or upgrade LiVES:

sudo apt-get update

sudo apt-get install lives lives-plugins

Uninstall:

To remove the software, simply run commands:

sudo apt-get remove --autoremove lives lives-plugins

The PPA can be removed via Software & Updates utility under Other Software tab.

xfce hotcorner plugin

After 4 years and 5 months of development, Xfce 4.14 was finally released today. Xfce 4.14 sees all core components ported to Gtk3 and GDBus, most components received GObject Introspection support.
Xfce 4.14 release highlights:

  • Window manager xfwm4 now supports Vsync
  • Improved GLX support with NVIDIA proprietary source drivers
  • better HiDPI support, and support for XInput2
  • The desktop and panel support for RandR’s primary monitor feature
  • per-panel “icon-size” setting, new default clock format and clock format evaluator
  • save and (automatically) restore complete multi-display configurations
  • support RandR display scaling (configured via Xfconf).
  • added a switch user button in the logout dialog
  • Thunar now supports for larger thumbnails, and a “folder.jpg” file altering the folder’s icon.
  • Add “Do Not Disturb” mode for notification.
  • MPRIS2 support in PulseAudio panel plugin
  • And much more other changes. See the official announcement.

Xfce 4.12 wallpaper

Xfce 4.12 tour (coming soon): https://xfce.org/about/tour

OpenComic is an open-source comic and manga reader that works on Windows, mac OS, and Linux. It’s written with Node.js and using Electron. And features:

  • Support image formats: JPG, PNG, APNG, GIF, WEBP, SVG, BMP, ICO
  • Support compressed formats: PDF, RAR, ZIP, 7Z, TAR, CBR, CBZ, CB7, CBT
  • Manga read mode
  • Double page view
  • Bookmarks and continue reading
  • Floating magnifying glass
  • Reading in scroll or slide

The software offers official snap package, which runs in sandbox and can be easily installed in Ubuntu 18.04 and higher via Ubuntu Software utility:

The Ubuntu native .deb package is also available to download at the link below:

OpenComic (amd64.deb)

Grab the 64-bit (amd64) package and click install via Gdebi package installer and done.

Uninstall:

To remove the snap packge either use Ubuntu Software or run command in terminal:

sudo snap remove opencomic

To remove the .deb package, open terminal (Ctrl+Alt+T) and run command:

sudo apt remove --autoremove opencomic

By releasing version 0.17, the GTK+ frontend for mpv Gnome MPV is officially renamed to Celluloid.

Celluloid 0.17 release highlights:

  • Rename project to Celluloid
  • Add Turkish translation by @TeknoMobil
  • Add Esperanto translation by @F3nd0
  • Migrate from opengl-cb to the new render API
  • Handle numpad keybindings
  • Handle unicode keybindings
  • Forward media key events to mpv
  • Add dconf key for controlling cursor speed threshold for unhiding controls
  • Add option for suppressing playback errors

How to Install Celluloid in Ubuntu 18.04 and Higher:

At the moment you can install the media player easily via Flatpak package in Ubuntu 18.04, Ubuntu 19.04.

Open terminal either via Ctrl+Alt+T keyboard shortcut or by searching for ‘terminal’ from application menu. When it opens, run following commands one by one.

1. Paste below command and run to install flatpak framework:

sudo apt-get install flatpak

2. Add flathub repository, which hosts a large list of flatpak applications:

flatpak remote-add --if-not-exists flathub https://flathub.org/repo/flathub.flatpakrepo

4. Finally install Celluloid via command:

flatpak install flathub io.github.celluloid_player.Celluloid

Once installed, launch the software either from application menu or by right-clicking video files and choose open with Celluloid!

Uninstall:

To remove the Celluloid flatpak package, run command in terminal:

flatpak uninstall io.github.celluloid_player.Celluloid

upgrade ubuntu 15.10

The third point release, Ubuntu 18.04.3 LTS, was released yesterday. Here’s how to upgrade from Ubuntu 18.04 to Ubuntu 18.04.3 and install Linux Kernel 5.0 and updated Xorg display server stack.

Ubuntu 18.04.3 was announced yesterday afternoon:

The Ubuntu team is pleased to announce the release of Ubuntu 18.04.3 LTS(Long-Term Support) for its Desktop, Server, and Cloud products, as well as other flavours of Ubuntu with long-term support.

Like previous LTS series, 18.04.3 includes hardware enablement stacks for use on newer hardware. This support is offered on all architectures and is installed by default when using one of the desktop images.

Ubuntu Server defaults to installing the GA kernel; however you may select the HWE kernel from the installer bootloader.

Ubuntu 18.04 users can easily upgrade to Ubuntu 18.04.3 by installing all available updates via Software Updater (Update Manager).

However, if you installed Ubuntu 18.04 LTS using the .iso images released in April 2018, you may kept back with Linux 4.18 and old Xorg display server.

To install the updated kernel 5.0, Xorg, and graphics drivers, you have to opt-in to “hardware enablement” (HWE). Simply open terminal (Ctrl+Alt+T) and run command:

sudo apt-get install --install-recommends linux-generic-hwe-18.04 xserver-xorg-hwe-18.04

Once installed, restart your computer.

Downgrade Linux Kernel / Xorg:

If you want to revert back to previous Linux Kernel, simply reboot and in Grub boot-loader select boot-up “Advanced -> Linux 4.18.x”. And remove Linux 5.0 (if you want) via command in terminal:

sudo apt remove linux-image-unsigned-5.0.*-generic linux-image-5.0.*-generic

To revert back to previous Xorg, open terminal and run command:

sudo apt remove xserver-xorg-*-hwe-18.04

Then you have to install back the old X packages via command:

sudo apt install xorg

Skype for Linux

The official Skype for Linux Snap package has not been updated for almost one year.

Last week Skype updated the latest Skype Preview Snap package through new insider channel. And here’s how to install it in Ubuntu 18.04, Ubuntu 19.04.

1. First of all, REMOVE Skype Snap if you previously installed it via Ubuntu Software.

2. Then you can install the Skype snap from insider channel either via Ubuntu Software after switching channel:

or by opening terminal (Ctrl+Alt+T) and run command:

sudo snap install skype --channel=insider/stable --classic

Once installed, launch Skype from application menu and enjoy!

qBittorrent

qBittorrent Bittorrent client 4.1.7 was released yesterday. Here’s how to install in Ubuntu 16.04, Ubuntu 18.04, Ubuntu 19.04, and derivatives.

qBittorrent 4.1.7 features:

  • Add 12 hour and 24 hour speed graphs
  • Change “Add new torrent” dialog to horizontal layout
  • Avoid race conditions when adding torrent
  • Fix torrent checking issues
  • Fix torrent properties not saved for paused torrents
  • Some improvements on qtsingleapplication code
  • Remove limits of “Disk cache expiry interval” setting
  • Remove upper limit of “Disk cache” setting
  • Don’t turn window blank when closed to system tray
  • Fix WebUI encoding of special characters
  • Change the speed unit of WebUI from Bytes/s to KiB/s for the rate limiter
  • Ignore RSS articles with non-unique identifiers
  • And various other bug-fixes. See news page for details.

How to Install qBittorrent 4.1.7 in Ubuntu:

The official qBittorrent PPA contains the latest packages for Ubuntu 16.04, Ubuntu 18.04, and Ubuntu 19.04.

1. To add the PPA, open terminal either via Ctrl+Alt+T keyboard shortcut or by searching “Terminal” from app launcher. When it opens, run:

sudo add-apt-repository ppa:qbittorrent-team/qbittorrent-stable

Type user password (no asterisk feedback while typing due to security reason) when it prompts and hit Enter to continue.

2. To upgrade from a previous release, launch Software Updater and you’ll see qBittorrent available for upgrade after checking for updates.

upgrade qBittorrent

Or run commands below to install /upgrade it from terminal:

sudo apt update && sudo apt install qbittorrent

Uninstall:

To remove qBittorrent PPA, go to Software & Updates -> Other Software, or run command in terminal:

sudo add-apt-repository --remove ppa:qbittorrent-team/qbittorrent-stable

To remove the bittorrent client, either use your system package manager or run command:

sudo apt-get remove --autoremove qbittorrent