Archives For November 30, 1999

FFMPEG

FFmpeg 4.0 “Wu” was released months ago as a new major release. Here’s how to install it in Ubuntu 14.04, Ubuntu 16.04, and/or Ubuntu 18.04.

FFmpeg 4.0 release highlights:

  • Intel QSV accelerated overlay filter
  • NVIDIA NVDEC GPU-based decoding for H264 / MJPEG / HEVC / MPEG-1/2/4, VC1, VP8, and VP9 formats.
  • OpenCL overlay filter
  • VA-API MJPEG and VP8 decoding support
  • AV1 Support through libaom
  • AMD AMF H.264 and HEVC encoders
  • And many other new filters, and accelerated code path improvements.

How to Install FFmpeg 4.0 in Ubuntu:

FFmpeg 4.0.2 is available in Ubuntu Software via SNAP package (Runs in sandbox).

To upgrade from the Ubuntu build FFmpeg 3.x, the unofficial PPA contains the latest packages for Ubuntu 18.04, Ubuntu 16.04, and Ubunu 14.04.

1. Open terminal either via Ctrl+Alt+T keyboard shortcut, or by searching for ‘terminal’ from software launcher. When it opens, run command to add the PPA:

sudo add-apt-repository ppa:jonathonf/ffmpeg-4

Type user password (no asterisks feedback) when it prompts and hit Enter.

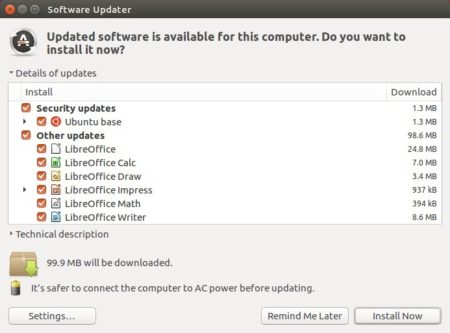
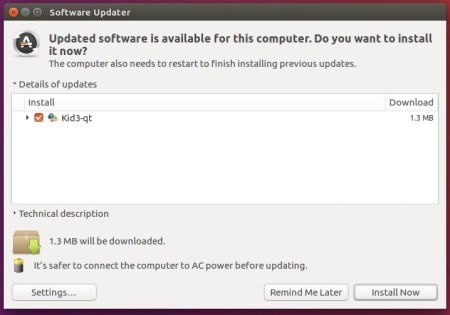
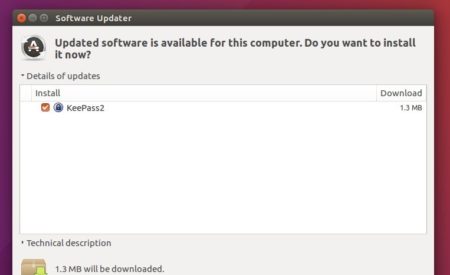
2. You can then upgrade FFmpeg libraries via Software Updater:

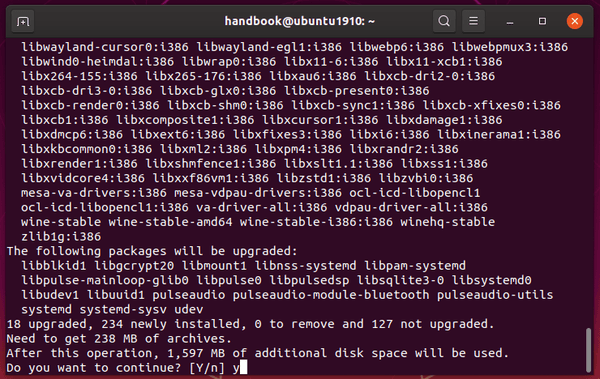
Or run commands in terminal:

sudo apt-get update

sudo apt-get install ffmpeg

How to Restore:

For any reason, you can downgrade FFmpeg to the stock version in Ubuntu universe repositories by purging the PPA via command:

sudo apt-get install ppa-purge && sudo ppa-purge ppa:jonathonf/ffmpeg-4

Grub Customizer, the graphical tool for configuring Grub boot-loader, got a new release a few days ago. The PPA adds support for Ubuntu 18.10 Cosmic Cuttlefish.

Grub Customizer is a simple tool that features:

  • add, remove, edit boot-loader menu entries.
  • Set default OS entry, kernel parameters, etc.
  • Change background image, text font, resolution, etc.
  • Reinstallation of the bootloader to Windows MBR

The most recent 5.1.0 release features:

  • New app icon
  • command option -v to display version info.
  • Traslation updates and some internal changes

How to Install Grub Customizer 5.1.0 in Ubuntu:

For Ubuntu 18.10, and current 3 Ubuntu LTS releases (14.04, 16.04, 18.04), install the new release packages via following steps:

1. Open terminal either from App Launcher or via Ctrl+Alt+T keyboard shortcut. When it opens, paste below command and run to add the official PPA:

sudo add-apt-repository ppa:danielrichter2007/grub-customizer

Type user password (no asterisks feedback due to security reason) when it asks and hit Enter to continue.

2. Then update package lists and install the software:

sudo apt-get update

sudo apt-get install grub-customizer

You can skip sudo apt-get update in Ubuntu 18.04 and higher, since step 1 adding PPA do it automatically.

Once installed, launch it from application menu and enjoy!

Uninstall:

To remove the software, run command in terminal:

sudo apt-get remove --autoremove grub-customizer

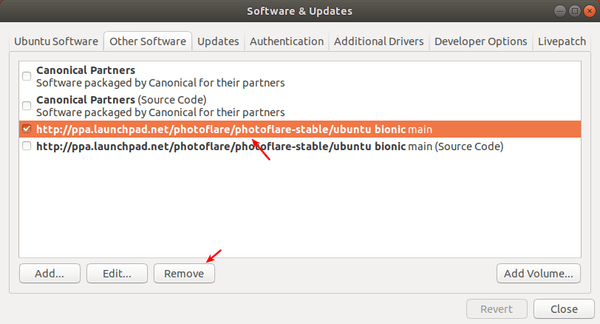
And open Software & Updates and navigate to Other Software tab to remove third party PPA repositories.

sFTP client, a full-featured FTP/SFTP/FTPIS/FTPES/SSH client, now can be easily installed in Ubuntu via Snap package.

sFTP Client uses the most modern libraries and uses the latest technologies (after-all who would ever like an out-dated / old fashioned app), thats why we use the latest frameworks and latest modern designs.

How to Install sFTP client in Ubuntu:

The software now offers official snap package, containerised software package designed to work securely within most Linux desktop.

Simply open Ubuntu Software, search for and install sFTP client:

Or open terminal (Ctrl+Alt+T) and run command to install the snap:

For Ubuntu 16.04, first make sure snapd is installed:

sudo apt install snapd snapd-xdg-open

The latest Mesa graphics driver 18.2.2 is finally available to install in Ubuntu 18.04 via Ubuntu-X PPA.

Mesa 18.2.2 was released a week ago with following changes:

  • Better GTA V support with the RADV Vulkan driver.
  • RADV fix to address a GPU hang encountered by Radeon RX Vega hardware with SteamVR.
  • vkAcquireNextImage2 support within the ANV and RADV Vulkan drivers.
  • ANV now has support for protected memory properties via GetPhysicalDeviceProperties2().
  • The Gallium3D Nine “D3D9” state tracker has increased the number of temp registers as well as other improvements.
  • A new PCI ID added for a Polaris part: 0x6FDF.
  • And various bug-fixes.

How to Install Mesa 18.2.2 in Ubuntu 18.04:

To install the latest Mesa driver, e.g., for gaming, open terminal and do following steps one by one

1. Open terminal by either pressing Ctrl+Alt+T on keyboard or searching for ‘Terminal’ from software launcher. When it opens, run command:

sudo add-apt-repository ppa:ubuntu-x-swat/updates

Type your password (no asterisks feedback) when it prompts and hit Enter to continue.

2. After adding the PPA, do system update via command:

sudo apt-get dist-upgrade

apt-get update is not required any more in Ubuntu 18.04 since adding PPA automatically refreshes system repositories.

3. Finally check your driver version via command:

glxinfo | grep "OpenGL version"

Uninstall:

To restore changes and downgrade to the default drives shipped in Ubuntu 18.04, run command:

sudo apt-get install ppa-purge && sudo ppa-purge ppa:ubuntu-x-swat/updates

KDE Plasma 5.12

For those who to install KDE’s Elisa music player, the official flatpak (containerised software package) is available for most Linux desktops including Ubuntu 18.04 and Ubuntu 16.04.

Elisa is a music player developed by the KDE community that strives to be simple and nice to use. We also recognize that we need a flexible product to account for the different workflows and use-cases of our users.

We focus on a very good integration with the Plasma desktop of the KDE community without compromising the support for other platforms (other Linux desktop environments, Windows and Android).

We are creating a reliable product that is a joy to use and respects our users privacy. As such, we will prefer to support online services where users are in control of their data.

How to Install Elisa player in Ubuntu via Flatpak

Open terminal either via Ctrl+Alt+T keyboard shortcut or by searching for ‘terminal’ from application launcher. When it opens, run following commands one by one:

1. First install Flatpak framework if not exist (For Ubuntu 16.04, add the PPA first):

sudo apt-get install flatpak

2. Then add the flathub repository:

flatpak remote-add --if-not-exists flathub https://flathub.org/repo/flathub.flatpakrepo

3. Finally install the Elisa music player:

flatpak install flathub org.kde.elisa

Once successfully installed, open the music player from application launcher and enjoy!

Uninstall:

To remove the Flatpak package, simply run command in terminal:

flatpak uninstall org.kde.elisa

You may also remove the KDE platform runtime (sandboxed) via command:

flatpak uninstall org.kde.Platform

Visual Studio Code IDE

Microsoft Visual Studio Code 1.28 was released a few days ago. Here’s how to install it in Ubuntu 18.04.

VS Code 1.28 release highlights according to the announcement:

  • VS Code now ships custom icons reflect file type in your OS explorer.
  • Snippets can now be scoped to a project and shared with your team.
  • Editor Tab completion can now complete all kind of suggestions.
  • New command to go to the location of your last edit.
  • New command Save without Formatting to save a file without triggering any of the save participants
  • Rename a JS/TS file through it’s import path.
  • The new Convert to async function suggestion for JavaScript and TypeScript rewrites functions that use .then Promise chaining to use async and await
  • Git improvements: better delete conflict handling, new rebase on sync option.
  • Better Markdown folding: collapse code blocks, multi-line lists, and embedded HTML.

How to Install VS Code 1.28 in Ubuntu:

The easiest way is to install the community maintained Snap (run in sandbox) package from Ubuntu Software:

You can also install the official .deb package which is available for download at the link below:

Download VS Code (.deb)

Grab the deb and install it via either Gdebi package manager or command in terminal(Ctrl+Alt+T):

sudo dpkg -i ~/Downloads/code_*.deb; sudo apt -f install

For those who want to receive updates for VS Code via Software Updater utility, add the Microsoft repository via following steps (64bit only):

1. Open terminal (Ctrl+Alt+T) and run command to add the repository:

sudo sh -c 'echo "deb [arch=amd64] https://packages.microsoft.com/repos/vscode stable main" > /etc/apt/sources.list.d/vscode.list'

2. Download and install the repository key via commands:

curl https://packages.microsoft.com/keys/microsoft.asc | gpg --dearmor > microsoft.gpg

sudo mv microsoft.gpg /etc/apt/trusted.gpg.d/microsoft.gpg

3. Finally install the IDE via command:

sudo apt-get install code

Uninstall Visual Studio Code:

To remove the code editor, either use Synaptic Package Manager or run command:

sudo apt-get remove --autoremove code

And remove the Microsoft repository by launching Software & Updates utility and navigating to Other Software tab.

PDF Mix Tool is an open-source and lightweight application allows to split, merge, rotate and mix PDF files.

The software is written in C++ and depends only on Qt 5 and PoDoFo.

Right click edit PDF

The software offers official snap (containerised software package) package, so it can be easily installed from Ubuntu Software:

You can also run command in terminal instead to install the snap package:

snap install pdfmixtool

For Ubuntu 16.04, install snapd daemon if previous command does not work.

sudo apt install snapd snapd-xdg-open

Guvcview (GTK UVC Viewer), a simple tool for capturing & viewing video from webcams and other v4l2 devices, reached 2.0.6 release earlier today.

Guvcview 2.0.6 is a small release with following changes:

  • Add support for resizing the render window from the command line
  • Update to new libavcodec API
  • And some bug fixes.

How to Install Guvcview 2.0.6 in Ubuntu 18.04:

The developer’s PPA so far contains the latest packages for Ubuntu 18.04, Ubuntu 18.10, Linux Mint 19.

1. Open terminal either via Ctrl+Alt+T or by searching for ‘terminal’ from software launcher. When it opens, run command to add the PPA:

sudo add-apt-repository ppa:pj-assis/ppa

Type user password (no asterisks feedback due to security reason) when it prompts and hit Enter.

2. If you’ve installed an old version from Ubuntu Software, remove it via command:

sudo apt-get remove --autoremove guvcview

3. Finally install the 2.0.6 packages from the PPA repository via command:

sudo apt-get install guvcview

Once installed, launch the UVC viewer from application menu. To check the software version, run guvcview -v command in terminal.

Uninstall:

To remove the software, open terminal (Ctrl+Alt+T) and run command:

sudo apt-get remove --autoremove guvcview

To remove the PPA, open Software & Updates and navigate to Other Software tab.

Pragha 1.4 Release Candidate, a lightweight continuation of the Consonance music player, was released a few days ago with new features, performance improvements and some fixes.

After 4 beta releases, Pragha 1.4 RC (1.3.99) may be the last before the 1.4 stable release. The new 1.4 RC features:

  • First implementation of Favorites as a playlist.
  • Sync favorites with Koel and Last.Fm.
  • New Visualizer plugin.
  • Use Alt+Return shortcut to edit the selected song.
  • Add progress indicator to the search entry while it works.
  • Remember last pane used on song info plugin.
  • Allows to customize the styles to the distro packagers.

How to Install Pragha RC in Ubuntu:

There’s an unofficial PPA that contains the latest Pragha packages for Ubuntu 16.04, Ubuntu 18.04, Ubuntu 18.10, and Linux Mint 18.x/19.

1. Open terminal either via Ctrl+Alt+T or by searching for “terminal” from app launcher. When it opens, run command to add the PPA:

sudo add-apt-repository ppa:ubuntuhandbook1/pragha

Type your user password (no asterisks feedback while typing due to security reason) when it prompts and hit Enter.

2. Then install the music player either via Synaptic Package Manager or by running commands:

sudo apt-get update

sudo apt-get install pragha

Uninstall Pragha:

To remove the music player, either use Synaptic Package Manager or run command in terminal:

sudo apt-get remove --autoremove pragha

And you can remove the PPA via Software & Updates utility under ‘Other Software’ tab.

To do a fresh Ubuntu install, I’m always first burning the ISO image into USB drive, and then boot up with the USB drive and install Ubuntu into hard disk.

I used to use Unetbootin to create the startup USB drive. However, it has been dropped from Ubuntu repositories since Ubuntu 18.04 LTS. And Unetbootin .bin package is not well burning the ISO image in my case.

In this quick tutorial, I’m going to tell you that the default Gnome USB Creator can do the job easier and more straightforward:

1. First download Ubuntu iso from releases.ubuntu.com, and plug-in your USB drive.

2. Search for and launch usb creator (Start Disk Creator) in application menu:

3. When it opens, click the Other button and choose the downloaded ISO image.

Finally click the Make Startup Disk button to start burning the ISO into selected USB drive.

That’s it! When everything’s done, boot the USB drive in your machine and try or install Ubuntu.