Archives For jimingkui

VLC media player 2.2.5 was released recently with a great number of improvements. Here’s how to install it in Ubuntu 14.04, and Ubuntu 16.04.

It has been almost one year since the last VLC 2.2.4 was released on June 2016. VLC 2.2.5 features:

  • Fix green line rendering on Windows with AMD drivers
  • Fix mp3 playback regression on macOS and 64bit Windows leading to distortion for some media
  • Fix screenshots size
  • Improved lua scripts for various websites
  • Various security improvements in demuxers and decoders
  • Security hardening for DLL hijacking environments
  • Fix scrolling sensitivity on Sierra
  • Fix screen recording on Windows
  • See the changelog for details.

VLC 2.2.5

How to Install VLC 2.2.5 in Ubuntu / Linux Mint:

Besides building VLC 2.2.5 from the source tarball, Ubuntu 14.04, 16.04, and Linux mint 18 users can install it from the unofficial PPA.

1. Open terminal via Ctrl+Alt+T or by searching “Terminal” from start menu. When it opens, run command to add PPA:

sudo add-apt-repository ppa:jonathonf/vlc

Type in your password (no visual feedback due to security reason) when prompts and hit Enter.

VLC 2.2.5 PPA

2. (IMPORTANT) Remove old VLC version to avoid a package conflict:

sudo apt remove vlc vlc-nox

3. Finally run commands in terminal to check updates and install VLC 2.2.5:

sudo apt update && sudo apt install vlc

How to Restore:

To restore VLC media player to the stock version in your main Ubuntu repository, run command to purge the PPA:

sudo apt install ppa-purge && sudo ppa-purge ppa:jonathonf/vlc

GIMP 2.8.22

GIMP, The GNU Image Manipulation Program, got another maintenance release for the 2.8 series a few hours ago with drawing performance improvement and 10 years old CVE bug fixed.

GIMP 2.8.22 release highlights:

  • improve drawing performance in single window mode, especially with pixmap themes
  • Fix CVE bug in the ICO plug-in which allowed context-dependent attackers to cause a denial of service (crash) via an ICO file with an InfoHeader containing a Height of zero.
  • Avoid creating wrong layer group structure when importing PSD files
  • Prevent a crash in PDF plug-in if images or resolution are large
  • stop parsing invalid PCX files early and prevent a segmentation fault
  • Fixes for Mac OS, translation updates and build fixes.
  • See the changelog for details.

GIMP 2.8

How to Install GIMP 2.8.22 via PPA in Ubuntu:

Otto Meier promised to maintain the latest GIMP packages in the PPA repository, so far, available for Ubuntu 14.04, Ubuntu 16.04, Ubuntu 16.10, Ubuntu 17.04.

Although GIMP 2.8.22 is NOT available in the PPA at the moment of writing (be patient, there’s always a small delay for maintainer to test and upload the packages), you can add the PPA via following steps:

1. Open terminal via Ctrl+Alt+T or by searching for “Terminal” from start menu. When it opens, run command:

sudo add-apt-repository ppa:otto-kesselgulasch/gimp

Type in your password (no visual feedback due to security reason) when it asks and hit Enter.

GIMP PPA for 16.04

2. After that, upgrade GIMP once the new release is published in the PPA:

For those who want to build GIMP from the source, grab the tarball from HERE.

How to Restore:

For any reason, you can easily restore GIMP to the official build (old) in main Ubuntu repositories, by running command to purge the PPA:

sudo apt install ppa-purge && sudo ppa-purge ppa:otto-kesselgulasch/gimp

opera web browser

Opera 45, codenamed Reborn, was released earlier today. The new release features built-in social messengers: Facebook Messenger, WhatsApp and Telegram.

Simply click a social icon on left sidebar, you can open the social messenger in overlay or pin it side-by-side with your current tab.

If you use more than one messenger, you can easily switch between them via ⌘ + ⇧ + m on macOS, CTRL + SHIFT + m on Windows and Linux.

opera social messengers

Other features in Opera 45:

  • light and dark theme
  • Refined user interface, new icons, and animations.
  • More control over ad blocking
  • graphics improvements on Windows and security warning for non https.
  • For more, see the announcement.

Download / Install Opera 45:

For Linux, download Opera from the official link below:

Opera Download Page

If you have a previous release installed, and enabled the official Opera Linux repository, upgrade it via Software Updater:

In addition, to manually add the Opera for Linux repository, open “terminal” via Ctrl+Alt+T and run following commands:

1. Setup the opera repository:

sudo sh -c 'echo "deb http://deb.opera.com/opera-stable/ stable non-free" >> /etc/apt/sources.list.d/opera.list'

2. Setup the key:

wget -O - http://deb.opera.com/archive.key | sudo apt-key add -

Cinnamon 3.4

Cinnamon desktop environment has reached the new massive 3.4 release a few days ago. Though there’s no official announcement published on Linux Mint blog at the moment of writing, you can now install it in Ubuntu 16.04, Ubuntu 17.04 via PPA.

Cinnamon 3.4.0 brings over 160 changes, and here are some of them:

  • The settings daemon is split into multiple processes. Make it easy to identify excessive CPU or memory usage and isolating crashes to only affect a particular plugin.
  • Nemo is split into two separate processes. One for the desktop icons, and one for the file manager windows.
  • Added “Run now” button in the settings’ module for managing startup applications
  • Support for configuring the LightDM login manager in Cinnamon Settings.
  • New Cinnamon Settings option for configuration acceleration and sensitivity of the mouse.
  • Cinnamon is now capable of adapting to the multi-process CSD.
  • See the full changelog for details.

Cinnamon Desktop 3.4

How to Install Cinnamon 3.4 via PPA in Ubuntu:

The unofficial PPA has just build the Cinnamon 3.4 packages for Ubuntu 16.04, and Ubuntu 17.04.

1. Open terminal via Ctrl+Alt+T or by searching for “Terminal” from start menu. When it opens, run command to add the PPA:

sudo add-apt-repository ppa:embrosyn/cinnamon

Type in your password (no visual feedback due to security reason) and hit Enter.

Cinnamon 3.4 PPA

2. Then update and install Cinnamon desktop via commands:

sudo apt update

sudo apt install cinnamon

After that, log out and select log in back with Cinnamon session.

Cinnamon session in greeter

Linux Kernel

Linux 4.11 Kernel was officially released on April 30th. Linus Torvalds announced in lkml.org:

So after that extra week with an rc8, things were pretty calm, and I’m much happier releasing a final 4.11 now.

We still had various smaller fixes the last week, but nothing that made me go “hmm..”. Shortlog appended for people who want to peruse the details, but it’s a mix all over, with about half being drivers (networking dominates, but some sound fixlets too), with the rest being soem arch updates, generic networking, and filesystem (nfs[d]) fixes. But it’s all really small, which is what I like to see the last week of the release cycle.

Linux 4.11 Kernel release highlights:

  • Enable frame-buffer compression by default for Skylake device and newer.
  • Adds DP MST audio support in Intel’s DRM driver.
  • Initial Geminilake graphics support.
  • ASPEED AST2500 display support.
  • Better Turbo Boost Max 3.0 support.
  • New ARM SoCs and boards support.
  • Realtek ALC1220 is now supported
  • Radeon/AMDGPU and various other DRM driver updates.
  • Improvements and updates to KVM, Xen, TurboStat, Raspberry Pi, TPM2, and more.

How to Install Kernel 4.11 in Ubuntu:

The mainline kernel PPA built the Linux 4.11 build .deb packages a few days later, available for download at the link below:

The mainline kernels do not include any Ubuntu-provided drivers or patches. They are not supported and are not appropriate for production use.

Download Linux 4.11 Kernel (.deb)

You can also use UKUU, a simple graphical tool to install latest Linux Kernels in Ubuntu.

To get Linux 4.11 Kernel from command console, run following commands one by one:

for 64-bit system:

cd /tmp/

wget http://kernel.ubuntu.com/~kernel-ppa/mainline/v4.11/linux-headers-4.11.0-041100_4.11.0-041100.201705041534_all.deb

wget http://kernel.ubuntu.com/~kernel-ppa/mainline/v4.11/linux-headers-4.11.0-041100-generic_4.11.0-041100.201705041534_amd64.deb

wget http://kernel.ubuntu.com/~kernel-ppa/mainline/v4.11/linux-image-4.11.0-041100-generic_4.11.0-041100.201705041534_amd64.deb

sudo dpkg -i *.deb

for 32-bit system:

cd /tmp/

wget http://kernel.ubuntu.com/~kernel-ppa/mainline/v4.11/linux-headers-4.11.0-041100_4.11.0-041100.201705041534_all.deb

wget http://kernel.ubuntu.com/~kernel-ppa/mainline/v4.11/linux-headers-4.11.0-041100-generic_4.11.0-041100.201705041534_i386.deb

wget http://kernel.ubuntu.com/~kernel-ppa/mainline/v4.11/linux-image-4.11.0-041100-generic_4.11.0-041100.201705041534_i386.deb

sudo dpkg -i *.deb

After installed these debs, restart and enjoy!

Uninstall:

To remove Linux Kernel 4.11, first restart and select boot with previous kernel (from Grub boot-loader -> Advanced Options) and then run command:

sudo apt-get remove linux-headers-4.11* linux-image-4.11*

GTK3

Want to change the boring default Ubuntu desktop themes? Well, there’s a script allows to easily install a list of the latest version of nice GTK themes.

It supports GTK 3.18 to 3.24, and will install the correct version according to your system. So far, support themes are:

  • Adapta
  • Arc (Firefox themes: Arc, Arc Darker, Arc Dark)
  • Arc-Flatabulous
  • Arc-Red
  • Breeze
  • Candra (GNOME 3.20+ only)
  • Ceti-2 (GNOME 3.18 only)
  • Cloak (GNOME 3.20+ only)
  • DeLorean Dark (GNOME 3.18 only)
  • EvoPop
  • Flat-Plat
  • Flatabulous (GNOME 3.18 only)
  • Flattiance (GNOME 3.18 only)
  • Fresh-Finesse
  • Greybird
  • macOS-Sierra
  • Minwaita
  • Numix
  • OSX-Arc Collection
  • Paper
  • Plano (GNOME 3.20+ only)
  • Pop
  • Redmond-Themes
  • Vertex
  • Vimix
  • Yosembiance (GNOME 3.18 only)
  • Zuki

1. To get the script, open terminal via Ctrl+Alt+T or searching for “Terminal” from app launcher. When it opens, run command:

sudo apt install git && git clone https://github.com/tliron/install-gnome-themes

2. The command clone the script source into your user root directory. To run the script, simply run command:

~/install-gnome-themes/install-gnome-themes

To avoid rebuilding themes, it will delete installed themes with same names, then install some required libraries, finally download and build the themes one by one in your system:

When everything’s done, launch Gnome Tweak Tool or Unity Tweak Tool and enjoy the new themes by selecting one of them:

via:github

FFMPEG

This quick tutorial is going to show you how to install the latest FFmpeg multimedia library 3.3 “Hilbert” in Ubuntu 16.04, Ubuntu 14.04 via PPA.

FFmpeg 3.3 “Hilbert” is a new major release that features:

  • Apple Pixlet decoder
  • NewTek SpeedHQ decoder
  • QDMC audio decoder
  • PSD (Photoshop Document) decoder
  • FM Screen Capture decoder
  • ScreenPressor decoder
  • XPM decoder
  • DNxHR decoder fixes for HQX and high resolution videos
  • ClearVideo decoder (partial)
  • 16.8 and 24.0 floating point PCM decoder
  • Intel QSV-accelerated VP8 video decoding
  • native Opus encoder
  • DNxHR 444 and HQX encoding
  • Quality improvements for the (M)JPEG encoder
  • VAAPI-accelerated MPEG-2 and VP8 encoding
  • MPEG-7 Video Signature filter
  • Intel QSV video scaling and deinterlacing filters
  • Support MOV with multiple sample description tables
  • Pro-MPEG CoP #3-R2 FEC protocol
  • Support for spherical videos
  • CrystalHD decoder moved to new decode API
  • and many more, see release note.

How to Install FFmpeg 3.3 via PPA in Ubuntu:

1. Open terminal via Ctrl+Alt+T or by searching for “Terminal” from the dash. When it opens, run command to add the PPA repository (unofficial):

sudo add-apt-repository ppa:jonathonf/ffmpeg-3

Type in password (no visual feedback due to security reason) and hit Enter.

2. (For Ubuntu 14.04 only), you also need to add another PPA for the dependencies:

sudo add-apt-repository ppa:jonathonf/tesseract

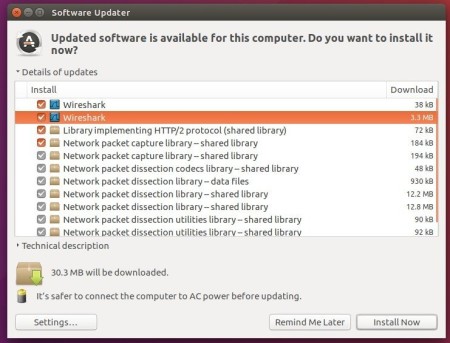
3. Then upgrade FFmpeg using Software Updater:

upgrade ffmpeg

Or simply run command:

sudo apt update && sudo apt upgrade

How to Restore:

To undo the changes and restore to the stock version of FFmpeg in main Ubuntu repositories, purge the PPA via command:

sudo apt install ppa-purge && ppa-purge ppa:jonathonf/ffmpeg-3

MuseScore 2.1, a free music notation software, was released today with new note input modes and a huge list of bug-fixes.

According to the release note, MuseScore 2.1 brings than 350 new features, improvements, and bug fixes. It mainly features:

  • New note input modes:
    • Rhythmic input: enter rhythm first, pitches later.
    • Semi-real-time MIDI input – a limited form of real-time input.
  • Much better support for SFZ sample libraries in Zerberus synthesizer
  • New “Regroup Rhythms” command under Layout menu
  • And so many bug fixes, improvements.
  • There are also known incompatibilities with the 2.0 release. See the release note.

How to Install MuseScore 2.1 in Ubuntu:

MuseScore has an official stable PPA for Ubuntu 14.04, Ubuntu 16.04, and higher.

Though the PPA is not ready for the new release at the moment, you can download the AppImage from the link below:

Download MuseScore AppImage

Then make the file executable from its context menu -> Properties window:

Finally run the file to start MuseScore 2.1:

run MuseScore AppImage

Ubuntu 12.04 LTS Has Reached the End of Life

Last updated: April 29, 2017

Ubuntu 12.04

Ubuntu 12.04 Precise Pangolin LTS (Long-Support Term) reached the end of its life yesterday on April 28 2017.

The news team announced on the Ubuntu Fridge a month ago:

Ubuntu announced its 12.04 (Precise Pangolin) release almost 5 years ago, on April 26, 2012. As with the earlier LTS releases, Ubuntu committed to ongoing security and critical fixes for a period of 5 years. The support period is now nearing its end and Ubuntu 12.04 will reach end of life on Friday, April 28th. At that time, Ubuntu Security Notices will no longer include information or updated packages for Ubuntu 12.04.

If you want to upgrade your Ubuntu 12.04 LTS installation, you may first upgrade to Ubuntu 14.04 LTS, supported until April 2019, and then to Ubuntu 16.04 LTS, supported supported until April 2021.

For users who can’t upgrade immediately, Canonical has announced an extended support package for Ubuntu Advantage customers:

Following the end-of-life of Ubuntu 12.04 LTS, Canonical is offering Ubuntu 12.04 ESM (Extended Security Maintenance), which provides important security fixes for the kernel and the most essential user space packages in Ubuntu 12.04. These updates are delivered in a secure, private archive exclusively available to Ubuntu Advantage customers.

All Ubuntu 12.04 LTS users are encouraged to upgrade to Ubuntu 14.04 LTS or Ubuntu 16.04 LTS. But for those who cannot upgrade immediately, Ubuntu 12.04 ESM updates will help ensure the on-going security and integrity of Ubuntu 12.04 systems.

Users interested in Ubuntu 12.04 ESM updates can purchase Ubuntu Advantage at http://buy.ubuntu.com/

The LiVES video editor and VJ tool has reached the 2.8.5 release. The new release features experimental support for Wayland.

Besides the Wayland support, LiVES 2.8.5 includes following changes

  • Fix audio loss when inserting without audio in clip editor (regression).
  • Fix compiler error and warnings for gcc 7
  • Fix regression in mkv_decoder.
  • Fix compiler warnings for openGL plugin.
  • Change max seek allowed from 1 second to 2 seconds in avformat decoder.
  • Update css state selectors for gtk 3.18+
  • Updated translation to Ukranian (thaks Yuri).

LiVES 2.85

How to Install LiVES 2.8.5 in Ubuntu:

For Ubuntu 14.04, Ubuntu 16.04, Ubuntu 16.10, Ubuntu 17.04, and derivatives, you can install LiVES 2.8.5 from the unofficial PPA.

1. Open terminal via Ctrl+Alt+T or by searching for “Terminal” from start menu. When it opens, run command:

sudo add-apt-repository ppa:ubuntuhandbook1/lives

Type in your password (no visual feedback due to security reason) and hit Enter.

2. If you have a previous release installed, launch Software Updater (Update Manager) to upgrade LiVES after checking for updates:

Or just run commands to install the editor for the first time:

sudo apt update && sudo apt install lives lives-plugins

Uninstall:

To remove LiVES video editor, either use your system package manager or run command in terminal:

sudo apt remove lives lives-plugins && sudo apt autoremove

And remove the PPA by going to System Settings -> Software & Updates -> Other Software tab.