Looking for a weather app for your Ubuntu desktop? Though there are a few available in Software Center, I would recommend my-weather-indicator which is developed by atareao team.
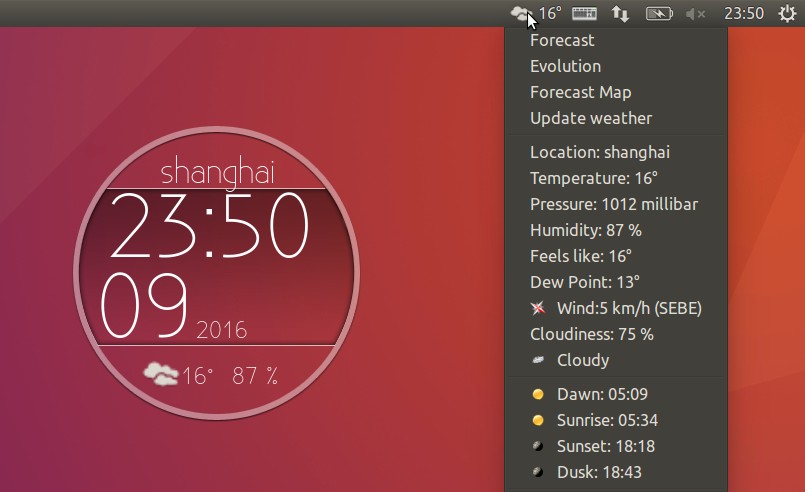
My-weather-indicator is an advanced desktop weather app for Ubuntu Unity. It displays the current weather situation and a week forecast for your location through indicator menu and/or a desktop widget.
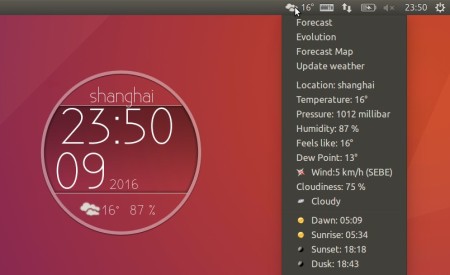
my weather indicator and “alinone” widget

one week forecast
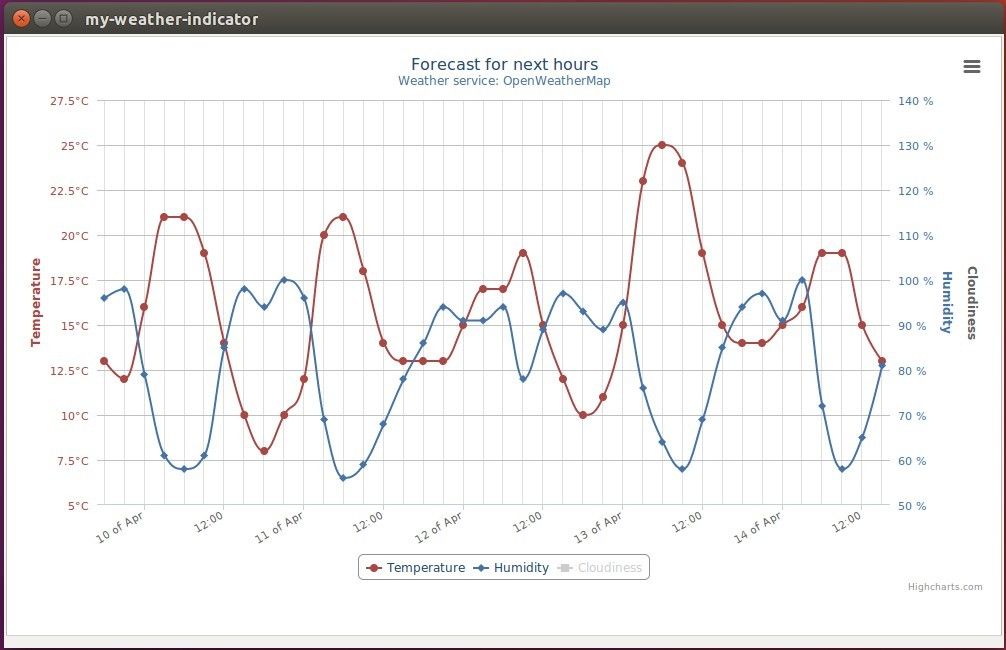
It also allows you to see a map of current situation, forecast information for the next hours and days of the temperature, humidity and cloudiness.
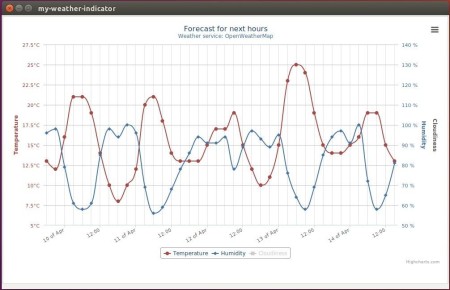
Forecast for next hours
The app also features:
- support two locations
- weather services: Yahoo, OpenWeatherMap, wunderground.com, world weather online.
- weather display: Temperature, Pressure, Humidity, Thermal sensation, Dew point, The speed and wind direction, cloudiness, Time sunrise, sunset and twilight, Moon phase
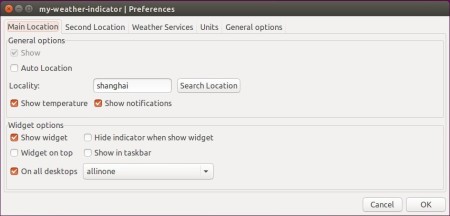
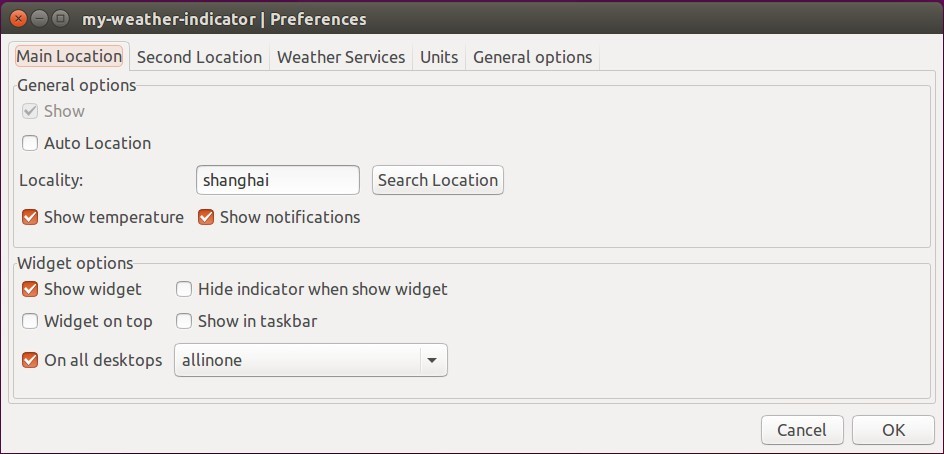
Weather Preferences Window
How to Install My-weather-indicator in Ubuntu:
The weather app is available in the developer’s PPA for all current Ubuntu releases. Follow the steps below to add PPA and install the software:
1. Add PPA
Open terminal from app launcher or via Ctrl+Alt+T keys. When it opens, paste below command and hit run:
sudo add-apt-repository ppa:atareao/atareao
Type in your password (no visual feedback when typing) when it asks and hit Enter to continue.

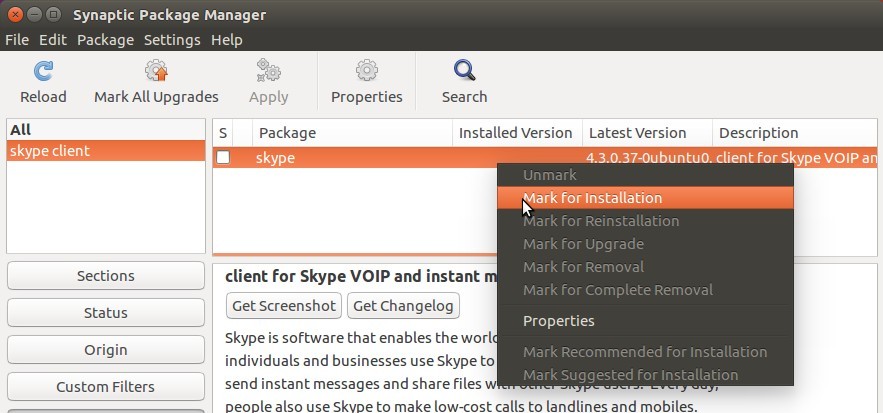
2. Install the software via Synaptic Package Manager after clicked Refresh button. Or run following commands one by one in terminal:
sudo apt-get update

sudo apt-get install my-weather-indicator
Once installed, you can future update of the software alongside other system packages via the Software Updater utility.
3. (Optional) To remove the PPA, use Software & Updates -> Other Software. To remove my-weather-indicator, use Synaptic Package Manager or run command below in terminal:
sudo apt-get remove my-weather-indicator
For new changes, bugs, and requests, go to github.com/atareao/my-weather-indicator