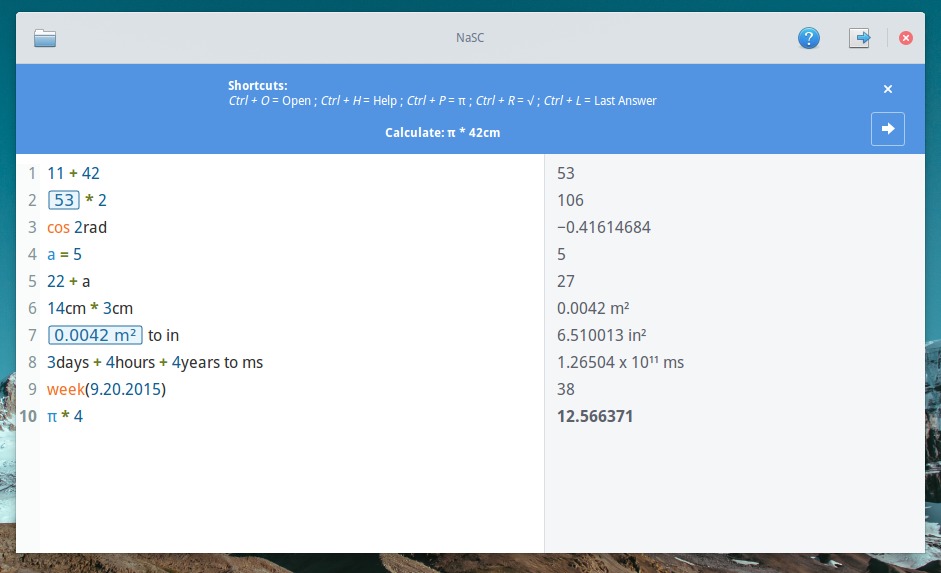
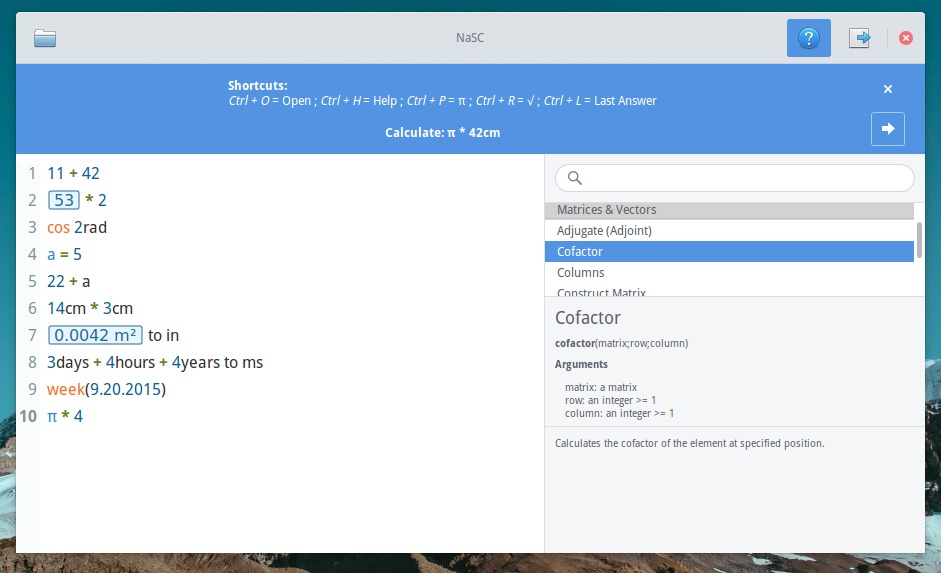
![]()
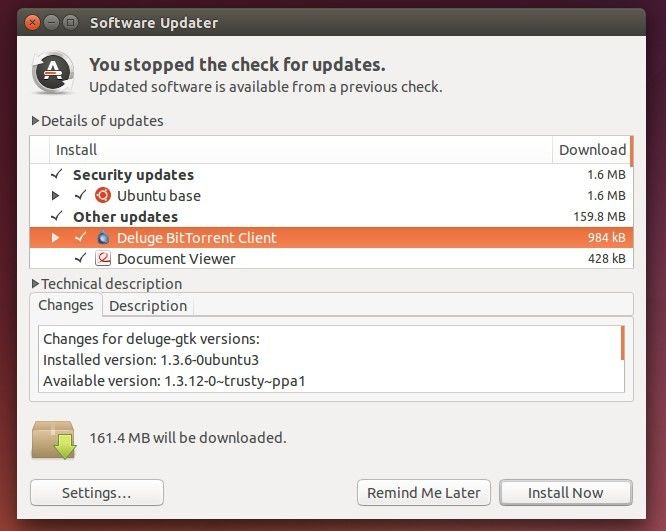
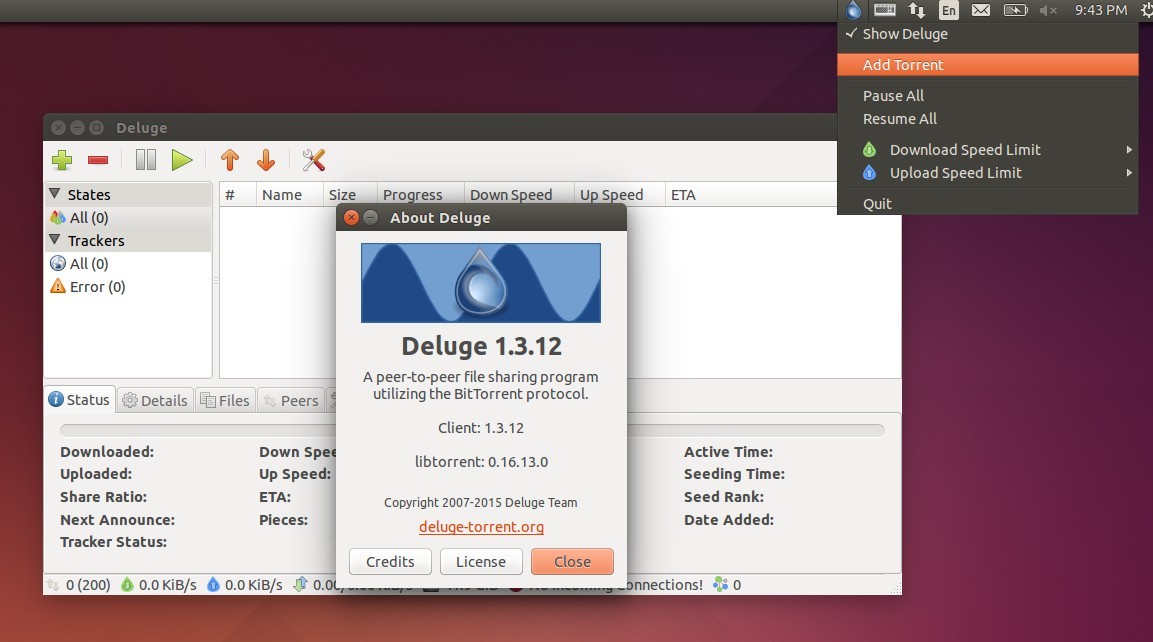
A new release of Deluge BitTorrent Client was release yesterday with a collection of fixes to keep the 1.3 stable.
Deluge 1.3.12 is the first stable release in 2015. It brings following fixes and improvements:
- GTK UI: Add Torrent dialog does not appear
- Include fix for Twisted 15.0 URI class rename
- Enable lt extension bindings again for versions >=0.16.7 (this disables Tracker Exchange by default)
- Backport atomic fastresume and state file saving fixes as another attempt to prevent data loss on unclean exits
- WebUI: Fixed i18n issue in Connection Manager which left users unable to connect
- WebUI: Increase cookie lifespan for display settings
- Console: Fixed ‘set and then get’ in config command
- Scheduler Plugin: Show current speed limit in statusbar
- Win32 packaging fixes.
How to Install / Upgrade Deluge in Ubuntu:
The new release has been made into Deluge’s official PPA, available for Ubuntu 15.10, Ubuntu 15.04, Ubuntu 14.04, Ubuntu 12.04 and their derivatives (e.g., Linux Mint 13/17, Elementary OS Freya).
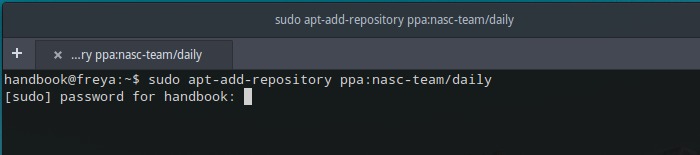
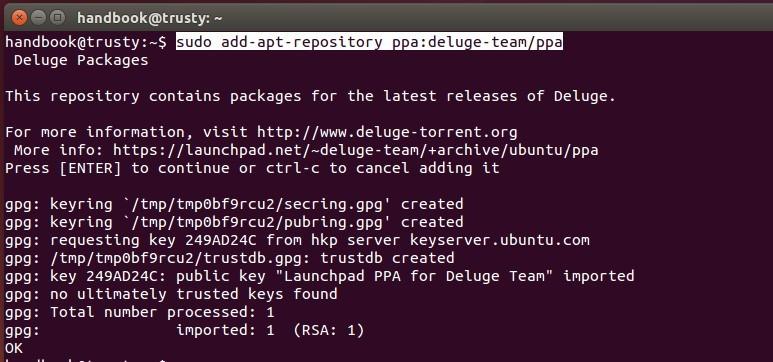
1. To add the PPA.
Open terminal from the Dash, App Launcher, or via Ctrl+Alt+T shortcut keys. When it opens, run command:
sudo add-apt-repository ppa:deluge-team/ppa
2. After that, run commands to update system cache and install Deluge (GTK UI):
sudo apt-get update

sudo apt-get install deluge
You may install the package deluge-web or deluge-console if you want the Web UI or the console UI.
For those who have a previous release installed, Deluge can be upgraded directly via Software Updater.