Archives For jimingkui

Want some cool desktop animations? the ‘Burn My Windows’ extension added some more animation effects for Ubuntu 20.04+, Fedora workstation, and other Linux with GNOME 3.36+.

Previously when user clicks to close an app window, the extension applies a burning window down effect.

Now, more effects have been added to disintegrate your apps in Ubuntu Linux with style. They are: ‘Energize’, ‘TV Effect’, ‘Wisps’, ‘Matrix’, and ‘T-Rex-Attack’.

See the short videos for new effects when closing app windows:

There’s also new “Broken Glass” effect in upcoming release to shatter your windows into a shower sharp shards!

For each animation, there’s a setting page to change the animation speed, scale, color, etc.

Burn My Windows settings (via Gnome Extensions App)

Install Burn Windows Effect:

1. Ubuntu user needs to first press Ctrl+Alt+T on keyboard to open terminal, and run command to install the ‘chrome-gnome-shell’ package:

sudo apt install chrome-gnome-shell gnome-shell-extension-prefs

Also install ‘gnome-shell-extension-prefs’ package for the settings dialog:

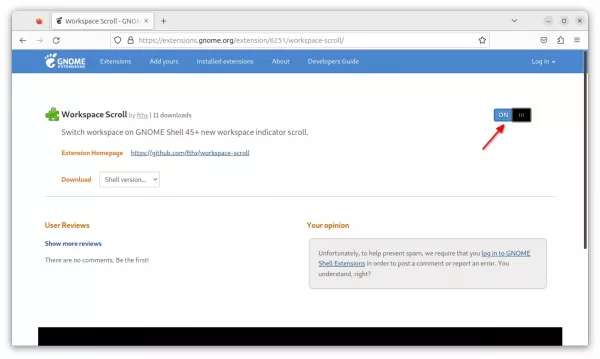
2. In your web browser, go to the extension web page and turn on the toggle icon to install it:

NOTE: Ubuntu 21.10 has Firefox as Snap package by default, which does not support installing Gnome Extensions so far. Use another browser or install Firefox as native DEB.

Don’t see the toggle icon? Use the ‘Click here to install browser extension‘ link to install browser extension and refresh the page.

After installation, search for and open ‘Gnome Extensions‘ app from activities overview screen:

Manage Gnome Extensions

When the app opens, click the gear button for ‘Burn My Windows’ and select your favorite animation!

Want to play some games in Ubuntu desktop? Gamebuntu is a new project to make life easier for beginners!

Without searching for how to tutorials and struggling with Linux commands, Gamebuntu is an all-in-one app makes it possible to single click to install Steam, Heroic / Epic Game launcher, Minigalaxy GOG client, and/or Lutris game clients.

Install Game Clients via Single clicks!

The app also offer buttons to easily install other useful apps for setting up Ubuntu for gaming. They include:

  • OBS Studio for streaming purpose
  • Discord for chatting
  • MangoHUD for system details, frame time and FPS counter.
  • GameMode to optimize game performance,
  • OpenRGB to configure coolers and RAM modules with RGB.
  • Piper to configure gaming peripharals.
  • Polychomatic to configure Razer devices.
  • Noise Torch – real-time microphone noise suppresstion.
  • Low latency / xanmode kernel for critical runtime applications

And if the NVIDA proprietary drivers installed, it will offer shortcut for configuring Nvidia driver settings.

Install Gamebuntu:

Gamebuntu is a free open-source project in earlier stage. It’s so far recommended for Ubuntu 20.04 LTS only. The source code is hosted in gitlab page.

The developer used to provide the .AppImage package, so the app itself may run without installation.

Sadly, it makes itself NOT easy to beginners to install. See installation instructions in the project page:

And to keep track of the project, you may get in touch with the software developer by visiting this thread.

For Ubuntu and Linux Mint users, the latest Enlightenment DR 0.25 now is easy to install via an unofficial Ubuntu PPA.

Enlightenment (aka, E) released version 0.25 (then v0.25.1) as well as Enlightenment Foundation Libraries (EFL) 1.26 a few weeks ago. Here’s how to install them in Ubuntu via PPA.

E 0.25 series comes with lots of minor bug fixes, flat look to match new flat theme, new touchpad gesture recognition bindings, new Procstats module can show mem/CPU usage in titlebar, and many more other changes.

Install Enlightenment 0.25.1 via PPA:

The trustworthy, but unofficial Niko2040’s PPA is back almost 4 years after the last update!!!

Thanks to the maintainer, user may now do following steps to install the latest Enlightenment while Ubuntu repositories always provide old versions.

1. Add Enlightenment PPA

Firstly, either press Ctrl+Alt+T on keyboard or search for and open terminal from start menu (‘Activities’ overview).

When terminal opens, run the command below to add the PPA:

sudo add-apt-repository ppa:niko2040/e19

Type user password (no asterisk feedback) when it asks and hit Enter to continue.

2. Update package cache:

Ubuntu 18.04 and some old Ubuntu based systems may need to manually refresh the package cache after adding PPA. To do so, simply run command in terminal:

sudo apt update

3. Install Enlightenment:

Finally run command in terminal to install the desktop and EFL libraries:

sudo apt install enlightenment

For choice, the latest terminology package is also available to install via the PPA.

After installation, log out and click on the bottom-right corner gear button to choose login via ‘Enlightenment’ session.

Uninstall Enlightenment:

To remove the Ubuntu PPA as well as downgrade the Enlightement package to its original version, use command below to purge it:

sudo apt install ppa-purge && sudo ppa-purge ppa:niko2040/e19

Or, remove the desktop package as well as dependencies via command:

sudo apt remove --autoremove enlightenment

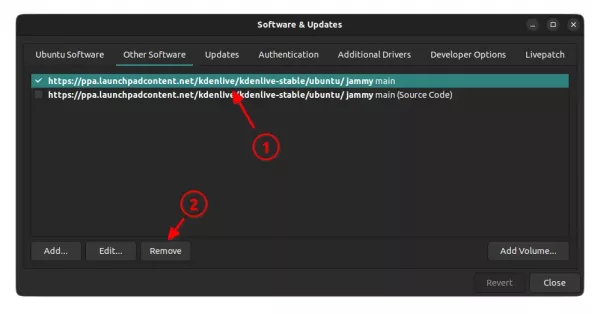
And remove the Ubuntu PPA either via ‘Software & Updates’ utility or by running command in terminal:

sudo add-apt-repository --remove ppa:niko2040/e19

When clicking a magnet link in Chrome browser, it pops-up with “Open xdg-open” option allows to launch the default app to start the downloading.

Unlike Firefox, Google Chrome does not offer an option to choose which app to handle the link. Instead, it launches the default app directly. For those want to change this default app to handle magnet links, here’s how to do the trick in Ubuntu.

Click “Open xdg-open” to open link via default app

Step 1: Tell the default app for magnet links:

Firstly, press Ctrl+Alt+T on keyboard to open a terminal window. When it opens, run the command below will tell the default app for magnet links:

xdg-mime query default x-scheme-handler/magnet

Here xdg-mime is the standard wrapper. User may also run this command instead, which will also output the registered applications:

gio mime x-scheme-handler/magnet

Tell the default app for magnet

Step 2: Set/Change the default app for magnet links:

As the previous steps shows, the both command also support for changing the default app. Say set “QBittorrent” as default app for magnet link, use command:

xdg-mime default org.qbittorrent.qBittorrent.desktop x-scheme-handler/magnet

Or use command:

gio mime x-scheme-handler/magnet org.qbittorrent.qBittorrent.desktop

For any other app, replace org.qbittorrent.qBittorrent.desktop in the previous commands via the .desktop file. You may even set an un-registered app as default, and gio command will register it automatically.

In addition, in case you don’t know the filename of the .desktop file for your app, try running following commands one by one to find it out:

  • First, open terminal and run command to install mlocate (or plocate for 22.04 & higher):
    sudo apt install mlocate plocate
  • Then, update the database:
    sudo updatedb
  • Finally, search the .desktop file for your torrent app:
    locate "*ransmission*desktop"

    In command, replace ransmission with the keyboard for yours. Its case sensitive! I skipped the first letter because which one (‘T’ or ‘t’) is in use for the file-name.

Most torrent clients today have ability to detect clipboard for magnet links. However, after copied an URL link, user has to manually open the downloading app and then click ‘Open URL’ (or ‘Add Torrent Link’) option to let it paste the link automatically.

Instead of using web browser pop-up to choose app to open an URL, KDE desktop has a built-in feature ‘Klipper Actions‘ that detects clipboard contents and automatically pops-up a menu allows to open link with desired app.

Picture 1: Click the pop-up option will automatically launch the app and open the link from clipboard

So just copy a magnet link. It opens the previous context menu (see the picture above) automatically, allows to click the menu option to launch your desired app and open the URL.

Setup the Klipper Actions for Magnet link in KDE:

1.) Firstly, find out the ‘Clipboard’ indicator in system tray on panel (or click the ‘triangle‘ icon). Then right-click on the icon and choose ‘Configure Clipboard‘.

Open Klipper settings

2.) When the settings dialog opens, go to ‘Actions‘ in left pane and click on ‘Add Actions‘ button.

Add a Klipper action

3.) In next dialog, do:

  • input regular expression ^magnet:.*. It means any content started with ‘magnet:‘ (without quotes). See more about regular extension.
  • Add description (optional).
  • Click ‘Add Command’ and use qbittorrent %s or ktorrent %s. Use any torrent client as you prefer.
  • Type description for command (will display as text in pop-up menu).

4.) After adding an action, the settings dialog will look like the screenshot below. Here I added two actions to handle magnet link and url ends with torrent with qBittorrent client.

Actions for magnet links and url ends with .torrent

After clicking Apply (OK), copy a magnet link and the menu should pop-up automatically, allows to single click launching qBittorrent and open the download.

And, there are keyboard shortcuts: Ctrl+Alt+X to enable/disable Klipper actions, and Ctrl+Alt+R to trigger the menu (Picture 1) manually.

Want to display time and date on your Ubuntu Desktop as widget? Without Conky or any other app, there’s now Gnome extension can do the trick by adding a live clock on your wallpaper.

It’s ‘Showtime’, an extension based on the Budgie Desktop widget. It displays transparent live digital lock, weekday, as well as date on the background wallpaper. And, it shows date and time in both vertical and horizontal styles.

Wallpaper clock

Wallpaper clock vertical style

User may change the display position by press and holding Super (Windows) key, and dragging to move it.

As well, it offers preference settings via “Gnome Extensions” app that allows to configure:

  • 12-hour or 24-hour format.
  • The display color.
  • Date and clock display format.
  • Date and clock font family and size.
  • Shadow transparency.

How to Install the Extension in Ubuntu:

The ‘Showtime’ extension so far supports Gnome 3.36, 3.38 and 40. So it will work in Ubuntu 20.04 and Ubuntu 21.10.

1. Install ‘chrome-gnome-shell’:

Firstly, press Ctrl+Alt+T on keyboard to open terminal. When it opens, run command to install the ‘chrome-gnome-shell’ and Gnome Extensions packages if you don’t have it:

sudo apt install chrome-gnome-shell gnome-shell-extension-prefs

This package enables ability to install Gnome Extensions via a web browser.

2. Install the Extension:

Next, click the link button below to go to the extension web page and turn on the slider icon to install it:

For the vertical style, install this one instead.

If you don’t see the toggle icon, install the browser extension via the link in that page and refresh it.

NOTE: The pre-installed Firefox in Ubuntu 21.10 is a Snap package that does NOT support for installing Gnome Extensions so far. Use another browser or install Firefox as deb.

The widget should appear immediately after installation. After that, press Super (Windows) key and drag to move its position, and open ‘Gnome Extensions‘ from overview screen to configure it’s appearance.

Manage Gnome Extensions

That’s all. Enjoy!

Want to check your laptop battery status in Ubuntu or other Linux? There’s a small indicator applet that can do the job in GNOME desktop.

Battery Status” is the free and open-source indicator applet developed by Lorenzo Carbonell, a software developer behind touchpad-indicator and my weather indicator.

It displays an icon on GNOME top bar in system tray area, along with the battery remaining time. By clicking on the applet, it shows battery percentage based on both current and original maximum capacities.

As well, it shows battery health via current and original maximum capacities, and the original and current Voltages.

Battery Health

A setting dialog is also available to configure the refresh time, warning, and colors, etc.

Battery Status Settings

How to Install ‘Battery Status’ in Ubuntu:

The app is available to install as GNOME Extension. At the moment, it supports for Gnome 3.36 and Gnome 40. Which means, user may install it in Ubuntu 20.04 and Ubuntu 21.10 via following steps.

1. Install ‘chrome-gnome-shell’:

Firstly, press Ctrl+Alt+T on keyboard to open terminal. When it opens, run command to install the ‘chrome-gnome-shell’ package if you don’t have it:

sudo apt install chrome-gnome-shell

This package enables ability to install Gnome Extensions via a web browser.

2. Install the Extension:

Next, click the link button below to go to the extension web page and turn on the slider icon to install it:

If you don’t see the toggle icon, install the browser extension via the link in that page and refresh it.

NOTE: The pre-installed Firefox in Ubuntu 21.10 is a Snap package that does NOT support for installing Gnome Extensions so far. Use another browser or install Firefox as deb.

The indicator should appear immediately after installation. If not, try to enable it via “Gnome Extensions” app, which can be installed via command:

sudo apt install gnome-shell-extension-prefs

That’s all. Enjoy!

The free open-source game chatting app Mumble released new major 1.4 version a day ago with exciting new features!

Mumble is a high quality and low latency voice over IP (VoIP) app designed for gamers. By releasing v1.4.230, the first stable in v1.4, it now uses new versioning scheme of the form major.minor.build. The third component of version numbers may now much higher and discontinuous. Because there are snapshot (beta) builds in between stable versions.

Mumber 1.4 introduced a new, general purpose plugin framework. Plugins are no longer restricted to positional data delivery and they can now be installed and updated at any time. See the documentation for more.

The release also added a “Search Dialog“, allows to search users or channels with regular expression support. User may open it either from menu or Ctrl+F keyboard shorcut.

Mumble 1.4 Search Dialog

User may now “listen to” a channel without joining it. Though listener will be visible in the channel’s user-list via an “ear” or a “listener”. In order to speech to people in listened channel, you have to either join the channel or shout to it.

Listen to a channel without joining it

To quickly find out who’s currently talking, “TalkingUI” is introduced in the release. It’s an optional floating window automatically resizes itself to the minimal size needed to display the information. It can be placed in the corner without taking too much of your screen. And, just like the main UI, it supports selection and context menu.

floating window indicates who’s currently talking

Other changes in Mumble 1.4 include:

  • Markdown support for text messages.
  • stereo audio (restricted to playback so far).
  • Set nicknames for users.
  • Join user’s channel” context menu option.
  • Reset all settings at once.
  • Disable text-to-speech for specific user.
  • Echo Cancellation for macOS (experimental).
  • Native PipeWire support.
  • Indicate “access-restricted” channels with a lock icon
  • And much more.

Download / Install Mumble:

Mumble is available to install in Windows, MacOS, Linux, as well as iOS and Android mobiles. Download it at the link below:

For Ubuntu / Linux Mint users, there’s an official PPA though not updated at the moment of writing.

It’s as well available to install in most Linux via universal Flatpak package.

Looking for an app to store your passwords? Secrets is a good choice for those using GNOME desktop.

“Secrets” is a free open-source password manager that integrates perfectly with GNOME desktop and provides a modern and easy to use user interface. It’s formerly Password Safe (nothing to do with pwsafe). Since v6.0, it’s called Secrets.

Secrets:

Secrets is a GTK4 app using libadwaita library to provide an adaptive UI. With it, user may create or open KeePass v4 format database in “.kdbx” files. And, it supports AES, Twofish, and ChaCha20 256-bit encryption algorithms.

Secrets add new or open database

The “.kdbx” file is used to store your passwords. While creating it, user may choose to secure it via password, key file, or password and key combination.

Secure database with password, key, or their combination

Then, each time you open the database or back from inactive, it asks for unlock the database before accessing your passwords.

Need to unlock when back from inactive

After creating / opening a database, user may add as many password entries or groups as possible. It allows to assign a color, icon, and add attachments for each entry. As well, it supports OTP tokens and expiration dates.

Assign color, icon, add attachments, & support one-time password, expiration date

All password entries are listed in the home of the database, with buttons to quickly copy username or password into clipboard. And, the data will be cleared from clipboard 30 seconds later.

Password Entries

Install Secrets:

Actually I don’t use a password manager app, because I use similar accounts and passwords in different websites. And, I wrote them down in plain text 😓. The Gnome Secrets looks really good. Maybe I’ll store passwords with it. The only downside however is that it’s only available via Flatpak package.

1. Open terminal by searching from ‘Activities’ overview. When it opens, run command to install the flatpak daemon:

sudo apt install flatpak
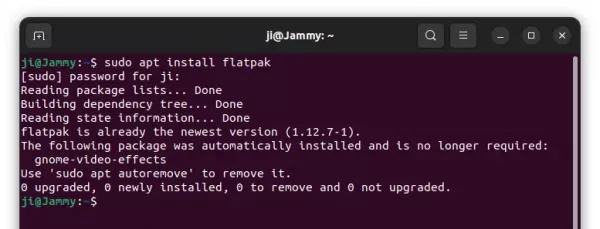
2. Next, install the app via command:

flatpak install https://dl.flathub.org/repo/appstream/org.gnome.World.Secrets.flatpakref

There will be hundreds of MB more install, if you’re first time installing GTK apps via Flatpak.
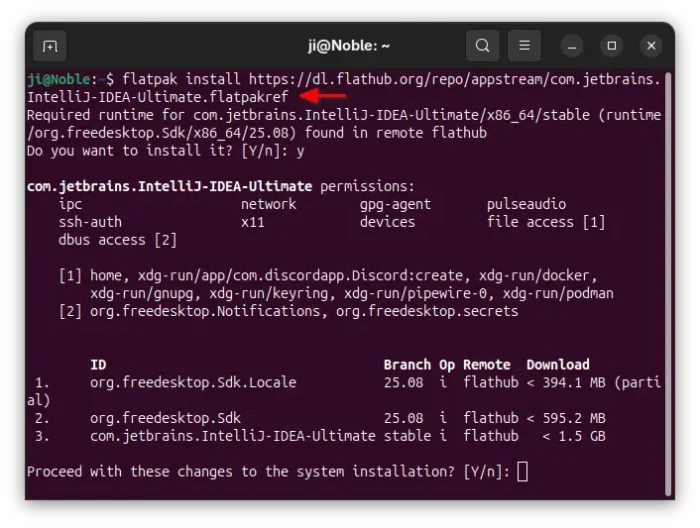
Once installed, search for and open it from ‘Activities’ overview and enjoy!

Uninstall Secrets:

To remove the app, simply open terminal and run command:

flatpak uninstall --delete-data org.gnome.World.Secrets

And run flatpak uninstall --unused to remove useless runtime libraries.

Linux Kernel 5.16 was released a few days ago. Here’s how to install it in Ubuntu 20.04, Ubuntu 21.10, and/or Linux Mint 20.x.

Kernel 5.16 comes with many new features. Here are some of them:

  • Initial DisplayPort 2.0 Support For AMD Radeon Driver.
  • Intel Protected Xe Path for Gen12 graphics.
  • Intel AMX support for Sapphire Rapids.
  • Raspberry Pi Compute Module 4 support.
  • Snapdragon 690 and other new Arm hardware support such as Rockchip RK3566 and RK3688.
  • Better support for the Sony PlayStation 5 controller.
  • Better support for HP Omen laptops.
  • Realtek RT89 WiFi driver
  • Support for 2021 Apple Magic Keyboard.
  • Apple M1 PCIe driver

How to Install Kernel 5.16 in Ubuntu 21.10:

NOTE: The Mainline Kernel PPA provides packages for Ubuntu 21.10. However, it does not include any Ubuntu-provided drivers or patches, which are NOT appropriate for production use.

The .deb packages for amd64, arm64, ppc64el and s390x are available to download at the link below:

For personal computers, select generic for common system, or lowlatency for a low latency system (e.g. for recording audio):

  • linux-headers-5.16.0-xxxxxx_all.deb
  • linux-headers-5.16.0-xxx-generic(/lowlatency)_xxx_amd64.deb
  • linux-modules-5.16.0-xxx-generic(/lowlatency)_xxx_amd64.deb
  • linux-image-xxx-5.16.0-xxx-generic(/lowlatency)_xxx_amd64.deb

Keep an eye on the date in package names. 64-bit build has two versions of same package with different package date.

For those familiar with Linux command, open terminal and run commands one by one to download & install the packages:

cd /tmp/

wget -c https://kernel.ubuntu.com/~kernel-ppa/mainline/v5.16/amd64/linux-headers-5.16.0-051600_5.16.0-051600.202201092355_all.deb

wget -c https://kernel.ubuntu.com/~kernel-ppa/mainline/v5.16/amd64/linux-headers-5.16.0-051600-generic_5.16.0-051600.202201092355_amd64.deb

wget -c https://kernel.ubuntu.com/~kernel-ppa/mainline/v5.16/amd64/linux-image-unsigned-5.16.0-051600-generic_5.16.0-051600.202201092355_amd64.deb

wget -c https://kernel.ubuntu.com/~kernel-ppa/mainline/v5.16/amd64/linux-modules-5.16.0-051600-generic_5.16.0-051600.202201092355_amd64.deb

sudo dpkg -i *.deb

Once installed, restart your computer and enjoy!

Uninstall Linux Kernel 5.16:

Restart your machine and select boot with the previous kernel in boot menu ‘Grub2 -> Advanced Option for Ubuntu’. Then run command to remove Linux Kernel 5.16:

sudo dpkg --purge linux-image-unsigned-5.16.0-051600-generic

Install Kernel 5.16 for Ubuntu 20.04:

The mainline kernel was build against Ubuntu 21.10, so it won’t install in Ubuntu 20.04 LTS. However, for those insist on installing the new kernel, this project is available along with an Ubuntu PPA. Use it at your own risk!

You may run command in terminal to add the PPA:

sudo add-apt-repository ppa:tuxinvader/lts-mainline

Once the Kernel 5.16 package is updated, use command to install it:

sudo apt install linux-generic-5.16

NOTE: Linux Kernel keeps rolling new releases regularly. The PPA package name varies according to the version number. It’s better to check the PPA page before running the apt command.