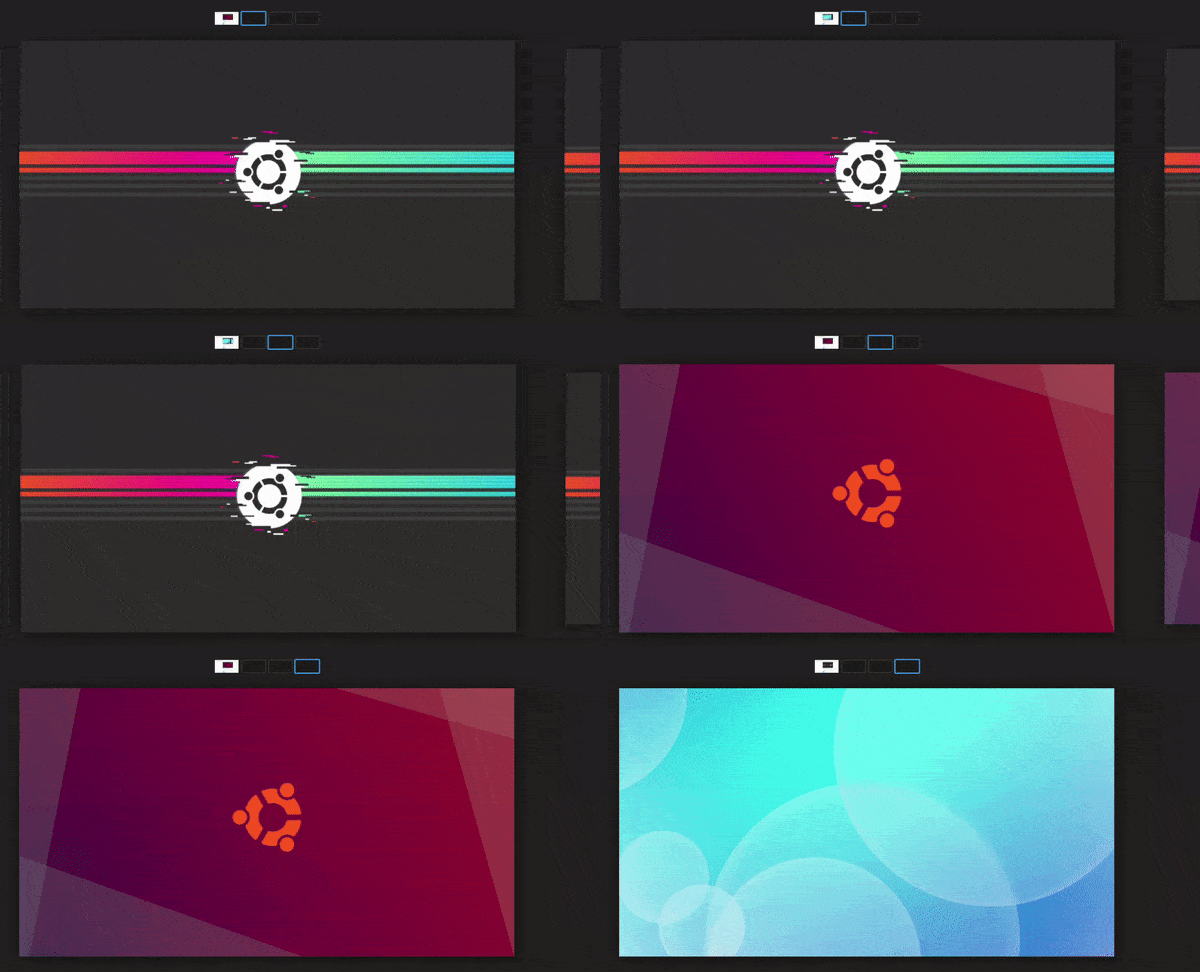
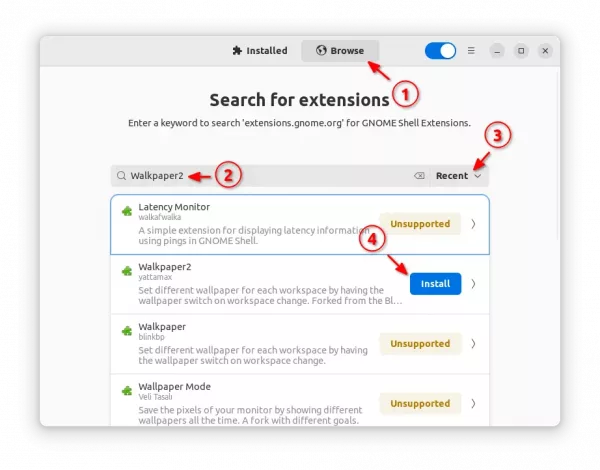
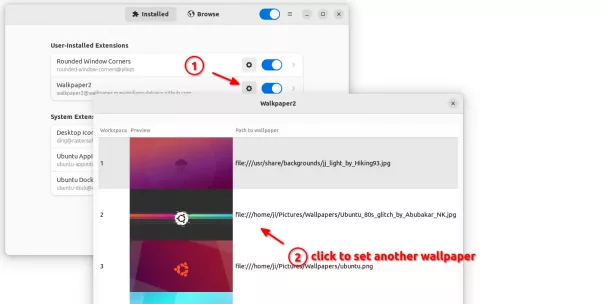
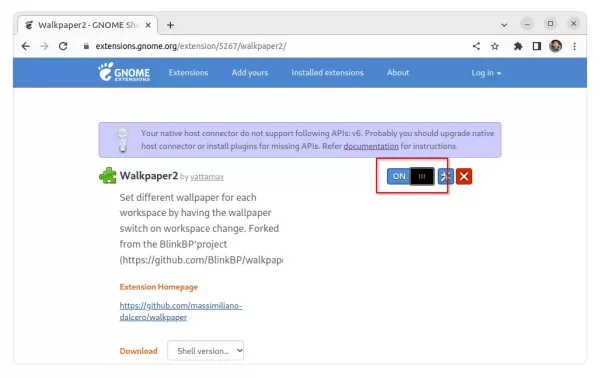
Archives For November 30, 1999

Looking for a lightweight photo editor and management app for Linux? Try Fotoxx, a free and open-source software which is super fast.
Fotoxx is a GTK application to organize and manage a large image collection, edit and optimize photos, and perform batch operations.

Unlike other image editor, Fotoxx has app menus in the left pane with ability to toggle file view, and edit photos. While providing many functions to meet the needs of serious photographers, it remains fast and easy to use.

The software can view and edit most image formats including RAW files. It works internally with 24-bits/color, and outputs 8 or 16 bits/color JPEG, PNG, or TIFF.

The image editing functions include:

  • Select object or area, select hairy or irregular edge, find gap.
  • Rotate, crop, retouch, resize, and paint.
  • Blur, sharpen denoise, adjust color.
  • Apply effects, e.g., sketch, cartoon, line drawing and more.
  • image warp, unwarp, transform.
  • Composite image: HDR, HDF, panorama, etc.
  • Batch convert, RAW conversion.
  • View and edit meta data.
  • Zoom in/out, redo/undo, and more.
  • Use GIMP, Rawtherapee, etc as plugins

How to Install The Latest Fotoxx in Ubuntu via PPA:

The software offers only source tarball available to download at the link below:

Ubuntu has the photo manager in the Software App, however it’s always old.
To install the latest Fotoxx, use the Ubuntu PPA which so far supports for Ubuntu 20.04, Linux Mint 20, and Ubuntu 22.04.

1.) First open terminal from system app launcher. When it opens, run command to add the PPA:

sudo add-apt-repository ppa:xtradeb/apps

Type user password, no asterisk feedback, for sudo prompt and hit Enter to continue

2.) Next run command to install the photo management software:

sudo apt install fotoxx

Once installed, open it from system app launcher and enjoy!

Remove Fotoxx as well as the PPA:

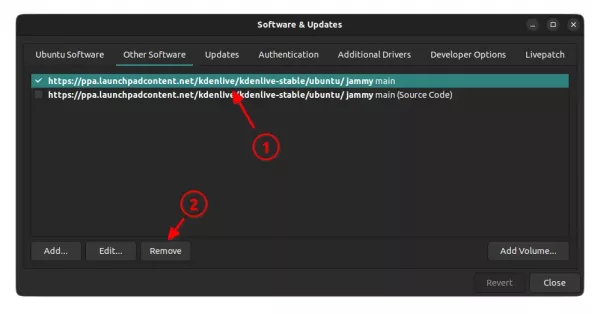
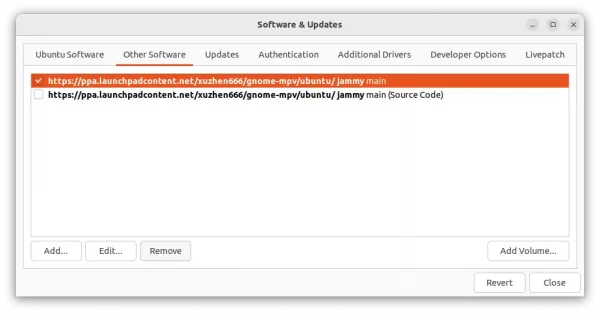
To remove the Ubuntu PPA, simply open Software & Updates utility and navigate to Other Software tab. There highlight the relevant line and remove it.

To remove Fotoxx, run command:

sudo apt remove --auto-remove fotoxx

UPDATE March, 2022: The PPA package is outdated! Use the Flatpak package instead.

For those sticking to the latest Sigil ebook editor, here’s Ubuntu PPA maintains the 1.6.0 release packages for Ubuntu 18.04, Ubuntu 20.04, Ubuntu 21.04, Linux Mint 19 & 20.

Sigil is a free and open-source ebook editor designed to edit books in ePub format (both ePub 2 and ePub 3). The software offers official binary packages only for Windows and Mac OS.

The editor in Ubuntu repositories is always old. And no Flatpak or Snap package for Sigil. So far, using a third-party PPA is the only way besides compiling from the source tarball.

Install Sigil via Ubuntu PPA

So far, this can be the only PPAs that maintain the most recent Sigil packages. Unlike others, the guy maintains the packages for each Ubuntu releases individually.

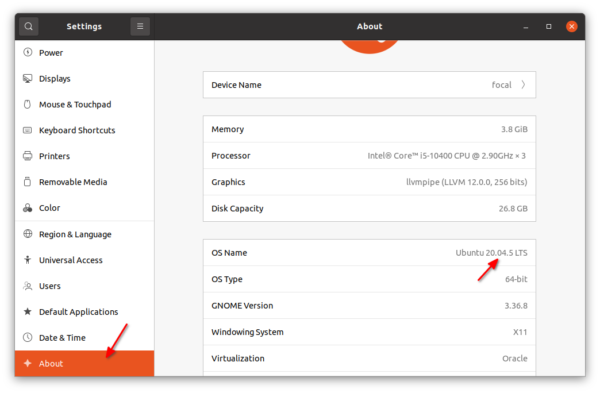
Which means you have to find out your Ubuntu edition either from About settings or via cat /etc/issue command. Then select a command below to add the PPA.

1.) First, open terminal either from system app launcher or by pressing Ctrl+Alt+T on keyboard. When terminal opens, run command to add the PPA:

For Ubuntu 18.04 and Linux Mint 19.x run command:

sudo add-apt-repository ppa:xiota/stuff-18.04

And for Ubuntu 20.04, Linux Mint 20, run command:

sudo add-apt-repository ppa:xiota/stuff-20.04

For Ubuntu 21.04, use command:

sudo add-apt-repository ppa:xiota/stuff-21.04

2.) Next run command to install the ebook editor:

sudo apt install sigil

Ubuntu 18.04 needs to run sudo apt update first to refresh package cache.

Once installed, open the epub editor from system app launcher and enjoy!

How to Remove Ubuntu PPA and/or Sigil:

The Ubuntu PPAs also contains other software packages, e.g., Foliate ebook reader, Geeqie image viewer, Xournal, Xournal++, etc.
You can remove it by opening Software & Updates utility, then remove relevant line under Other Software tab.

To remove Sigil ebook editor, run command in terminal:

sudo apt remove --auto-remove sigil sigil-data

Ubuntu lists all the available user accounts in the GDM login screen. You can however remove them to protect your privacy.

Gnome, the default desktop environment, has a hidden option to force users to type the username and then password to login. If you’re working on public places, it will be good to enable this option for privacy concern.

1.) Firstly open terminal either from system app launcher or by pressing Ctrl+Alt+T on keyboard. Because the login screen is handled by gdm, you have to firstly run command to allows it to make connections to X server.

xhost SI:localuser:gdm

Though it says for X, you also need to run the command in Wayland session to avoid error to disable user list.

2.) Now run gsettings command to disable user list via user gdm:

sudo -u gdm gsettings set org.gnome.login-screen disable-user-list true

Type user password, no asterisk feedback, for sudo prompt and hit Enter.

In next boot, you will no longer see the user accounts. Instead, you need to type username and then password to login.

How to Reset:

To restore the login screen setting, also run both xhost and gsettings commands in a terminal window.

To be lazy, I’ll combine the two commands into single, so it will be:

xhost SI:localuser:gdm && sudo -u gdm gsettings reset org.gnome.login-screen disable-user-list

In addition for more Login Screen settings, e.g, disable ‘Power Off’ menu option, toggle authentications, you can open Dconf Editor (install it first from Ubuntu Software) via user gdm:

xhost SI:localuser:gdm && sudo -u gdm dconf-editor

This simple tutorial shows beginners how to easily wipe files, folder, and/or free disk space to protect your files from recovering in Ubuntu.

As you may know, any deleted files can be easily restored from the trash can. Even after you emptied the trash, files can still be recovered. So to prevent information leakage and protect privacy, you have to ‘wipe’ or ‘shred’ files.

1.) Firstly, open terminal either from system app launcher or by pressing Ctrl+Alt+T on keyboard.

2.) When terminal opens, run command to install nautilus-wipe:

sudo apt install nautilus-wipe

The package adds ability to wipe files, folders, and free disk space via context menu.

3.) Finally restart Nautilus file browser via command to apply change:

nautilus -q

After that, you can right-click on any file or folder to ‘wipe’ or ‘wipe available disk space’.

NOTE ‘wipe available disk space’ will overwrite the free space in your system disk, so your data will not recoverable. And the process can take quite a few minutes slowing down your system.

In addition to protect your privacy, you can use BleachBit to clear caches. As well, the tool offers options to shred files, folders, and wipe free space.

Though it’s not perfect, Global menu is still possible in Ubuntu 20.04, Ubuntu 21.04 with the default Gnome Desktop.

It used to have a Gnome Global Menu extension to enable focused app menus (e.g., File, Edit, View, Help, etc.) in the top panel. It is however discontinued because GTK+ development is blocking the uniform support for the global menu to the Gtk+ applications.

Users can still use Fildem global menu to get the function in Ubuntu 20.04, Ubuntu 20.10, and Ubuntu 21.04, though it does not work with most Gnome Apps.

NOTE: The Extension is NO longer updated! It won’t work in current Ubuntu 22.04 and higher.

1.) Install Fildem global menu extension.

Firstly, open terminal by pressing Ctrl+Alt+T on keyboard. When terminal opens, run commands to install the packages for installing and toggling Gnome Extension:

sudo apt install chrome-gnome-shell gnome-shell-extension-pres

Next, go to extension web page and turn on the slider icon to install it.

If you don’t see the toggle icon, click the top ‘Click here to install browser extension’ link to install browser extension and refresh the web page.

2.) Install and Configure the External App

To make the function work, you have to install the external app.

a.) Download and double-click to install the “fildem_x.x.x_all.deb” package from the link below:

Or install the package via sudo apt install ~/Downloads/fildem_*_all.deb command.

b.) Open terminal (Ctrl+Alt+T) and run command to edit the .gtkrc-2.0 file.

gedit ~/.gtkrc-2.0

When the file opens, add gtk-modules="appmenu-gtk-module" to the end.

c.) Next edit the .config/gtk-3.0/settings.ini file via command:

gedit ~/.config/gtk-3.0/settings.ini

And also add gtk-modules="appmenu-gtk-module" line to the end. Also, add [Settings] line before it if not exist.

3.) Start Global Menu:

Finally in a terminal window, run command fildem &.

Search for and open Extensions utility. When it opens, click on the gear button to configure the Gnome Extension:

  • Toggle off ‘Show menu only when the mouse is over the panel’ option.
  • Change the Button padding as you prefer.

Now global menu should work for apps, e.g., Google Chrome, Chromium, GIMP, Audacious, Shutter, LibreOffice, etc.

Sadly, most Gnome Apps as well as Firefox does not work with global menu. If you intend to get it work with Firefox, install the one from Ubuntu 18.04 repository (all current Ubuntu releases has the latest Firefox packages).

4.) Auto-start Fildem global menu:

To make the function work on startup, search for and open ‘Startup Applications‘ utility. Then click on Add button to add:

  • Type fildem in command box.
  • Type Name and Comment as you prefer.

How to Remove Fildem global menu:

To remove fildem package, open terminal and run command:

sudo apt remove python3-fildem --autoremove

And remove the extension via Extensions utility.

To remove the auto-start service, just remove which you created in step 4.

Got .HEIC photo images import from your iPhone? You may found that Ubuntu does not open the file format out-of-the-box.

It’s however easy to either enable this file format support or convert it to JPG or PNG image.

Enable HEIF/HEIC Support for the Default Image Viewer

In Ubuntu 20.04 and Ubuntu 22.04, you can easily enable the HEIF / HEIC file format support via libheif libraries.

1.) Simply search for and open terminal from system app launcher (or press Ctrl+Alt+T on keyboard).

2.) When terminal opens, run command to install the library:

sudo apt install heif-gdk-pixbuf

Type user password (no asterisk feedback) when it asks and hit Enter

Now, double-click to open the .heic (or right-click -> Open with Other Application -> select Image Viewer) photo and enjoy!

For Ubuntu 18.04 / Ubuntu 16.04 users, the library is not available in system repositories. You have to add the third-party PPA by running command:

sudo add-apt-repository ppa:strukturag/libheif

Then refresh package cache via:

sudo apt update

And finally run the command in step 2.) to get it installed.

Convert HEIF/HEIC to JPEG or PNG

It’s also quite easy to convert the photo to another format in Ubuntu Linux.

Simply open the photo via either GIMP or Krita image editor (both available in Ubuntu Software), then select Export to JPG / PNG.

Too many HEIC photos to convert? Using heif-convert command will be more effective.

1.) Firstly open terminal and run command to install heif-convert tool:

sudo apt install libheif-examples

2.) Next you can convert a HEIC file to JPEG via command:

heif-convert -q 85 input.HEIC output.JPG

Here -q 85 specifies the output quality level. You can skip it to use default value 92.

To batch convert HEIC photos to JPEG, firstly navigate to the photo folder in file manager and select ‘Open in Terminal’ from context menu:

Finally run command:

for file in *.HEIC; do heif-convert $file ${file%.HEIC}.jpg; done

NOTE: Linux commands are case sensitive! If your HEIC photos have file extension in lower-case, replace HEIC with heic in the last command.

For instance, convert all .HEIC photos to jpg with quality 100%, run command:

for file in *.HEIC; do heif-convert -q 100 $file ${file%.HEIC}.jpg; done

Updates for Ubuntu 22.04 LTS:

The powerful Imagemagick package in Ubuntu 22.04 repository has support the HEIC/HEIF image format!

First, press Ctrl+Alt+T on keyboard to open terminal and run command to install the tool:

sudo apt install imagemagick

Then, open the folder that contains the photo images, right-click on select “Open in Terminal” and finally use command to convert:

convert input.HEIC -quality 95 output.JPG

Change the number in -quality 95, or skip it to use default 90. To convert a batch of files (from .HEIC to .jpg), use command:

for file in *.HEIC; do convert $file ${file%.HEIC}.jpg; done

That’s all. Enjoy!

This simple tutorial shows how to add a system tray menu option to switch between Dark and Light system mode in Ubuntu.

By default, the System Settings -> Appearance page offers options to choose Standard, Light, and Dark window colors. It however only apply the app theme.

For system menu, notifications, date and time menu, etc, you have to install user themes extension, and change the Gnome Shell theme individually via Gnome Tweak Tool.

Here I’m going to introduce a new Gnome Shell Extension called ‘Ubuntu Appearance‘. With it, you can toggle fully dark and light mode easily via a few clicks.

The extension features:

  • Integrate Light, Dark, Standard option into system tray menu.
  • Toggle fully dark / light mode, not only app window colors but also system theme (e.g., system menu, calendar, notifications.).
  • Option name vary according to current system mode.
  • The user themes extension is not required.

Install Ubuntu Appearance extension:

1.) Firstly, open terminal by pressing Ctrl+Alt+T on keyboard. When terminal opens, run command to install required packages:

sudo apt install chrome-gnome-shell gnome-shell-extension-prefs

2.) Secondly, go to the extension web page and click on the slider icon to install it.

Though the extension says for Gnome 40, it works well in my Ubuntu 20.04 and Ubuntu 21.04 machine.

Don’t see the toggle icon? Click the link ‘Click here to install browser extension’ to install browser extension and refresh the web page.

Once you installed the extension, the option should appear in system menu immediately. Log out and back in or restart Gnome Shell if you don’t see the option.

This is an easy to follow beginner’s guide shows how to encrypt the full file system while installing Ubuntu.

As you may know, it’s easy to hack against Ubuntu Linux physically. Though users can add password protect to the Grub boot menu, the file system is still accessible via a live system, e.g., bootable USB installer.

To prevent your Ubuntu from physical hacking ultimately, adding password protect to the full system disk can be the best choice. And you can do it during installing Ubuntu.

Important: If you forget the password, all data will be lost! No way to reset forgotten password.

1.) Firstly, this tutorial is not a full Ubuntu installation guide. If you are not getting started, take a look at this step by step how to install guide.

2.) If you’re going to install Ubuntu as the ONLY operating system in the hard drive, just choose ‘Erase disk and install Ubuntu‘ when you’re at Installation type page.

Then click on ‘Advanced features’ to choose either LVM or ZFS and enable ‘Encrypt the new Ubuntu installation for security’.

3.) Mostly I’ll choose ‘Something else‘ to manually create partitions for Ubuntu file system.

Unlike Fedora and Manjaro, Ubuntu does not provide an ‘Encrypt‘ checkbox while creating an EXT4 partition. Instead you need to create a partition use as ‘physical volume for encryption’.

a.) Simply choose the free space and click on ‘+‘ icon on partition table. In the pop-up Create partition dialog do:

DO LEAVE 500 MB free space for /boot partition, and a few GB for Swap area if need.
  • Set the size for Ubuntu file system. 20 GB at least. For long time use, as large as possible.
  • Select use as ‘physical volume for encryption‘.
  • Set your password and confirm, and finally click OK.

b.) After clicking OK, wait for a few seconds. A new device ‘/dev/mapper/sdaX_crypt‘ will be created as EXT4 file system.

Highlight it, and click on ‘Change‘ button. In the pop-up dialog, set the mount point as /.

c.) Same to Fedora, you have to create a separated /boot partition, as it can not be encrypted.

To do so, select the free space and click “+” to create:

  • 500 MB should be enough. 1 GB will be better.
  • use as ‘Ext4 journaling file system’
  • mount point /boot

d.) Also create 250 MB ‘EFI System Partition‘ for UEFI boot machine, or 2 MB ‘Reserved BIOS boot area‘ for legacy BIOS boot machine. For small RAM, a swap area is also recommended.

Finally the partition table will look like:

Finally click on “Install Now” button. And confirm on pop-up dialog.

Once you successfully installed Ubuntu, restart and you’ll get into the password prompt when booting Ubuntu (see the top picture). As well, accessing the file system from any other OS need the password you set.

Unlike laptop lid close action, it’s easy to tell Ubuntu to shutdown or hibernate automatically when reached idle timeout.

In all current Ubuntu releases, including Ubuntu 18.04, Ubuntu 20.04, Ubuntu 22.04, and Ubuntu 24.04 running with the default GNOME desktop, you can enable ‘Automatic Suspend‘ feature in Power Settings easily.

What if you want to power off, hibernate, or even log-out Ubuntu after it reached inactivity timeout? Here’s how to do this in two ways.

Method 1. Run 2 commands to enable Automatic Shutdown / Hibernate:

Firstly open terminal either from system application launcher or by pressing Ctrl+Alt+T on keyboard.

NOTE: Hibernate does not function out-of-the-box in current Ubuntu releases. You have to enable it first if you need automatic hibernation.

When terminal opens, run command for computer on AC power:

  • Enable automatic shutdown for desktop PC or laptop on AC power:
    gsettings set org.gnome.settings-daemon.plugins.power sleep-inactive-ac-type 'shutdown'

    For choices, you can change ‘shutdown’ in command to ‘hibernate‘, ‘logout‘, ‘nothing‘, etc.

  • Change the inactivity timeout (in seconds), half an hour for instance:
    gsettings set org.gnome.settings-daemon.plugins.power sleep-inactive-ac-timeout 1800

For laptops on battery, use following commands instead:

gsettings set org.gnome.settings-daemon.plugins.power sleep-inactive-battery-type 'shutdown'
gsettings set org.gnome.settings-daemon.plugins.power sleep-inactive-battery-timeout 1800

Method 2: Change system idle action via Dconf Editor.

For those prefer graphical configuration tool, search for and install ‘Dconf Editor‘ from Ubuntu Software.

Then launch the tool, and go to ‘org/gnome/settings-daemon/plugins/power‘.

Next scroll down, find out and change the values of ‘sleep-inactive-ac-type‘ and ‘sleep-inactive-ac-timeout‘ for system idle action when on AC power.

When on battery, change the values of ‘sleep-inactive-battery-type‘ and ‘sleep-inactive-battery-timeout‘ instead.

Changes will take place immediately when you click on ‘Apply’ button.

Blender 2.79

The free and open-source 3D modeling software Blender 2.93 was announced as LTS (Long Term Support) release.

Blender 2.93 is the last major milestone of the 2.x series. And the next Blender 3.0 is under development now.

Blender 2.93 brings 22 new nodes to the Geometry Nodes editor, mesh primitives support, adds the much anticipated Line Art modifier to automatically generate grease pencil lines around objects, a new and faster fill tool, and many Eevee renderer improvements.

How to Install Blender 2.93 via PPA:

Blender is available officially via Snap package, which can be easily installed from Ubuntu Software.

For those prefer the classic .deb package format, Rob Savoury’s PPA maintains the latest packages for all current Ubuntu releases.

1.) Remove Thomas Schiex’s PPA

If you installed old Blender packages from Thomas Schiex’s PPA, it’s better to remove it first to prevent from going to dependency hell!

Firstly, open terminal from system app launcher.

Secondly, run command to remove the PPA:

sudo add-apt-repository --remove ppa:thomas-schiex/blender

You can try purge the PPA instead, but it won’t work in my case due to issue.

2.) Remove old Blender package:

Open terminal and run command to remove old Blender packages if any:

sudo apt remove blender blender-data libopenshadinglanguage1.10

It’s important to remove libopenshadinglanguage1.10 package, or the configuration will fail while installing Blender 2.93.

3.) Add Rob Savoury’s PPA

To add the new PPA, simply run command in terminal:

sudo add-apt-repository ppa:savoury1/blender

4.) And add the FFmpeg PPA for dependency libraries:

To do so, run command in terminal:

sudo add-apt-repository ppa:savoury1/ffmpeg4

5.) For Ubuntu 18.04 and Ubuntu 16.04 only.

For Ubuntu 18.04 and Ubuntu 16.04, you need to add even more PPAs for dependencies. To do so, run commands:

sudo add-apt-repository ppa:savoury1/gcc-defaults-9
sudo add-apt-repository ppa:savoury1/display

6.) Finally install package updates & install Blender:

Firstly run command to refresh package cache and install available package updates:

sudo apt update && sudo apt full-upgrade

Finally install Blender 2.93 via command:

sudo apt install blender

If everything’s done successfully. Open Blender from system app launcher and enjoy!

Remove Blender and Ubuntu PPAs:

If you don’t use these PPAs anymore and want to remove Blender, purge them by running following commands one by one:

1. Firstly open terminal and run command to install ppa-purge:

sudo apt install ppa-purge

2. Then purge the Ubuntu PPAs one by one:

sudo ppa-purge ppa:savoury1/gcc-defaults-9
sudo ppa-purge ppa:savoury1/ffmpeg4
sudo ppa-purge ppa:savoury1/display
sudo ppa-purge ppa:savoury1/blender

Note purging Ubuntu PPA will either downgrade or remove packages installed from that PPA. Even other packages, GIMP in my case, will be removed.

You can alternatively remove these Ubuntu PPAs only, without uninstalling software packages, by going to ‘Software & Updates -> Other Software’ and removing relevant lines: