Looking for Linux drives of Canon printers and multifunction devices? Here’s easy way to install the ScanGear MP2, Cnijfilter2, and UFRII drivers in Ubuntu 24.04, Ubuntu 22.04, and Ubuntu 20.04 via PPA.
Thanks to Thierry Ordissimo, the guy maintains an Ubuntu PPA that contains official Canon drivers for Linux.
The most recent version added G6000, G6080, TS5300, TS5380, TS6300, TS6380, TS7330, TS8300, TS8380, TS8330, XK60, TS6330, TS3300, and E3300 series support in ScanGear MP2 driver. And E3300, G5000, G5080, G6000, G6080, GM2000, GM2080, TR703, TS3300, TS5300, TS5380, TS6300, TS6330, TS6380, TS700, TS708, TS7330, TR8300, TS8330, TS8380, XK60 support in the IJ print driver.
And a large list of devices were added support in the UFRII driver, they include:
TS5350i, G600, TS3500, TR4600, E4500, TR4700, XK500, TS8530, XK100, TS7530, TS7450i, GX6000, GX7000, TS5400, TS3400, E3400, TR7000, G2020, G3060, G2060, G3020, TS7430, XK90, TS8430, TR7600, TR8600, TR8630, TS6400, TS7400, G7000, G7080, GM4000, GM4080, G6000, G6080, TS5300, TS5380, TS6300, TS6380, TS7330, TS8300, TS8380, TS8330, XK60, TS6330, TS3300, E3300, TS8200, XK80, TS8230, TS8280, TS6200, TS6230, TS6280, TS9500, TR9530, TS9580, TR4500, E4200, LiDE 400, LiDE 300, G3010, G4010, TS9100, TS8100, TS6100, TR8500, TR7500, TS5100, TS3100, E3100, TS9180, TS8180, TS6180, TR8580, TS8130, TS6130, TR8530, TR7530, XK50, XK70, TS9000, TS8000, TS6000, TS5000, MG3000, E470, G4000, MB2100, MB2700, MB5100, MB5400, G3000, MG7700, MG6900, MG6800, MG5700, MG3600, MX450, MX490, E480, MG7500, MG6600, MG5600, MG2900, MB2000, MB2300, MB5000, MB5300, E460
E200, E300, E3100, E3300, E3400, E4200, E4500, E460, E470, E480, G1020, G2020, G2060, G3000, G3010, G3020, G3060, G4000, G4010, G5000, G500, G5080, G6000, G600, G6080, G7000, G7080, GM2000, GM2080, GM4000, GM4080, GX6000, GX7000, IB4000, IB4100, IP110, MB2000, MB2100, MB2300, MB2700, MB5000, MB5100, MB5300, MB5400, MG2900, MG3000, MG3600, MG5600, MG5700, MG6600, MG6800, MG6900, MG7500, MG7700, MX490, TR150, TR4500, TR4600, TR4700, TR7000, TR703, TR7500, TR7530, TR7600, TR8500, TR8530, TR8580, TR8600, TR8630, TR9530, TS200, TS300, TS3100, TS3300, TS3400, TS3500, TS5000, TS5100, TS5300, TS5350I, TS5380, TS5400, TS6000, TS6100, TS6130, TS6180, TS6200, TS6230, TS6280, TS6300, TS6330, TS6380, TS6400, TS700, TS708, TS7330, TS7400, TS7430, TS7450I, TS7530, TS8000, TS8100, TS8130, TS8180, TS8200, TS8230, TS8280, TS8300, TS8330, TS8380, TS8430, TS8530, TS9000, TS9100, TS9180, TS9500, TS9580, XK100, XK500, XK50, XK60, XK70, XK80, XK90
MF540 Series, MF642C/643C/644C, iR-ADV C7565 III, LBP622C/623C, MF645C, iR-ADV C5550/5560 III, iR2625/2630, LBP227, iPR C165, LBP323/324/325, WG7000 Series, iR2635/2645, MF745C/746C, iR-ADV 4545/4551, LBP8750, LBP3980M, LBP253, D1300 Series, MF8300 Series, LBP7600C, iPR C1PLUS, iR2422, iR1018/1022/1023, iR-ADV 8505, MF8500C Series, LBP251, MF6100 Series, iR-ADV C3320, LBP8900, LBP310/311/312, MF520 Series, iR-ADV C2020/2030, MF4700 Series, iR-ADV 6255/6265, MF4500w Series, iR C5185, MF420 Series, MF720C Series, MF633C/635C, D530/D560, L90/L160/L230, iPR C850, MF240 Series, MF7200 Series, MF4500 Series, MF4500 Series, MF632C/634C, iR1020/1024/1025, LBP6670, MF240 Series, iPR C1, LC600 Series, iR5570/iR6570, MF3010, iR5570/iR6570, MF417, MF720C Series, iR-ADV C5045/5051, iR2420, iR7086-7105, MF4320-4350, MF631C, iR-ADV 6275, LBP841C, iR-ADV C2025, MF4800 Series, LBP443, iR C2880/C3380, MF8300 Series, iR-ADV 8585/8595, iR-ADV C5235/5240, LBP712C, LBP441e, LBP653C/654C, MF631C, MF8300C Series, MF510 Series, MF4400w Series, LBP252 CARPS2, iR2422, MF633C/635C, LBP842C, D400-450, iR-ADV C7280, iR-ADV 4225/4235, L90/L160/L230, MF8400, LBP8780, iR3570/iR4570, MF4360-4390, iR C5180, iR-ADV 4045/4051, iR2002/2202, MF410 Series, iR-ADV C9270/9280, MF4010 Series, iR C5880/C6880, LBP9510C, LBP3950, MF220 Series, iR-ADV C2220/2230, MF6500 Series, LBP8730, iR C1325/1335, iR C5870, iR C5180, MF4700 Series, MF9200 Series, MF8000 Series, LBP7750C/5460, iR-ADV C250/350, iR8070, iR3030, MF632C/634C, iR3235/iR3245, iR3235/iR3245, iR-ADV 6055/6065, iR-ADV 400/500, MF6800 Series, iPR C1, LBP8720/8710, iR1018/1022/1023, iR-ADV C3520, iPR C750, MF4700 Series, iPR C750, MF4010 Series, iR C1021/C1022, iR1730/1740/1750, iR1020/1024/1025, MF735C, iR C2110, D500 Series, LBP8630/8620/8610, iR C5870, iR-ADV C256/356, iR2020, iR-ADV 8205, MF8300C Series, MF220 Series, iR-ADV 4045, iR105PLUS, MF4800 Series, iR 3180C EUR, MF3010, MF240 Series, MF6100 Series, iR-ADV 6055/6065, D460-490, iR2002/2202, iR-ADV 6275, MF4360-4390, MF6500 Series, LBP253, MF620C Series, iR-ADV C3320, iR-ADV 8085/8095, L410 Series, LBP710C, MF8200C Series, MF110/910 Series, L1000, MF732C/734C/735C, iR-ADV C9060/9070, iR2230, MF4500 Series, D530/D560, iR-ADV C255/355, LBP312, iR-ADV 4025/4035, iR-ADV 8585/8595, iR2525/2530, iR-ADV C2225, iR85PLUS, imageRUNNER1133 series, MF210 Series, LBP3370, MF5900 Series, iR-ADV 4245, LBP6710, iR2020, MF8400, MF731C/733C, MF4800 Series, MF210 Series, iR-ADV 4245/4251, MF8200C Series, iR-ADV 4545/4551, LBP5360, iR C1325/1335, MF110/910 Series, MF7200 Series, iR-ADV C3325/3330, iPR C600, MF731C/733C, iR C2550, LBP213, iR-ADV C7260/7270, MF6700 Series, iPR C700/800, MF260 Series, iR-ADV C7055/7065, MF9200 Series, iR-ADV C2218, iR-ADV 6555/6565, iR-ADV C5535/5540, MF230 Series, MF4400 Series, LBP5900, LBP841C, MF5800 Series, iR-ADV C5030/5035, MF732C/734C/735C, iR2525/2530, L90/L160/L230, iR-ADV 4025/4035, LBP9650C, iR-ADV 6075, LBP612C/613C, iR-ADV 8205, iR-ADV C9270/9280, iPR C1PLUS, LBP6650, LBP6680/3480, iR-ADV 4525/4535, MF8500C Series, iPR C850, iR2520, iR-ADV C351, iR2420, iPR C850, iR-ADV C3320L, iR-ADV C2020/2030, iR-ADV C7580/7570, iR-ADV C5535/5540, iR C1225, iR-ADV 8085/8095, L100/L150/L170, MF4100 Series, iR-ADV C9065, iR C3180, LBP5400, iR C5880/C6880, iR-ADV C9075, iR-ADV 4545, MF4200 Series, MF9100/9300, iR-ADV C2020L/2030L, MF4500w Series, iR2004/2204, iR C1028/C1030, iR8570N, LBP5970/5975, iR2520, LBP9950C/9900C, MF8300C Series, L190/L410 Series, LBP215, MF810/820, iR-ADV C255/355, LBP310/311/312, iR3025, LBP9520C, LBP6600, iR-ADV C5250/5255, LC800/L3000, LBP843C, D1500 Series, LBP9660C, MF4200 Series, iR-ADV C7580/7570, LBP7780C/5480, iR-ADV C3320/3330, MF4100 Series, iR3035/iR3045, MF8500C Series, MF8000 Series, MF4320-4350, iR2022/2025/2030, LBP351/352, MF4600 Series, LBP653C/654C, iR-ADV C2020i/2030i, LBP651C, iR2016, MF7400 Series, MF5900 Series, iR-ADV C7580/7570, MF210 Series, MF8000C Series, D1100, iR-ADV C355, LBP9600C/9500C, MF4400 Series, iR-ADV C5235/5240, LBP3800, MF4400 Series, LBP712C, LBP611C, MF720C Series, iR2022/2025/2030, LBP4500, LBP843C, LBP6700, iPR C650, LBP214, LBP161/162, MF8000C Series, LBP3920/3970, iR9070, MF5800 Series, MF260 Series, LBP7660C, iPR C750, LBP6780/3580, iR3230, iR C6870, iR2318/2320, LBP652C/654C, iR C1028/C1030, MF731C/733C, iR5075, iR-ADV C5045/5051, iR-ADV C2220/2230, iR2016, MF220 Series, D570, iR-ADV C256/356, iR-ADV C3525/3530, MF8400, iR C1021/C1022, iR2270/iR2870, LBP215, D400-450, MF520 Series, iR-ADV C356, LBP611C, LBP351/352, iR-ADV 6255/6265, iPR C700/800, iR C2580, iR-ADV 8505, D500 Series, LBP441, LBP3910/3930, iR-ADV 8505, iR C3000 Series, iR-ADV C9065/9075, iR-ADV 8285/8295, iR-ADV 6575, iR2535/2545, LBP612C/613C, iR2270/iR2870, LBP161/162, MF4600 Series, MF632C/634C, iR C4080/C4580, MF4360-4390, MF620C Series, MF620C Series, iR-ADV 4525/4535, LBP351/352, iR-ADV C5550/5560, iR-ADV 6575, iR-ADV C3325/3330, LBP214, iR3225, MF8200C Series, iR3530, iR-ADV 6555/6565, iR-ADV C7260/7270, LBP5910M, LBP3360, MF9100/9300, LBP3980, iR-ADV 8285/8295, iR3025, iR C5185, iR5075, LBP211/212, iR C2380/2550, L100/L150/L170, LBP251, iR-ADV 8105, MF8300 Series, iR-ADV 6555/6565, iR7086-7105, LBP7700C, iR1435, MF4600 Series, MF6500 Series, D1300 Series, iR-ADV 6560, MF230 Series, iR 5880C/6880C EUR, iR C4080, LBP3410, iR C3880/C4580, MF4100 Series, D1100, LBP3700, iR C3000 Series, iR5055/iR5065, iR2830, iR3035/iR3045, iR1435, MF8000C Series, MF420 Series, LBP251 CARPS2, iR2535/2545, iR105i, LBP253, iPR C650, MF9200 Series, D460-490, MF520 Series, iR-ADV C5030/5035, iR-ADV C3520/3530, iR-ADV 8585/8595, iR-ADV 4525/4535, iR-ADV C5250/5255, LBP712C, iR-ADV C5535/5540, iR2018, iR3570/iR4570, iR C3080/3480/3580, iPR C700/800, LBP6750/3560, MF7100 Series, iR2230, MF410 Series, iR C3080/C3580, MF8000 Series, iR-ADV C7565, MF4320-4350, iR-ADV C7565, LBP6670, LBP6650/3470, MF4200 Series, iR C6870, D400-450, iR C2880/C3380, MF810/820, iR5055/iR5065, iR-ADV C7565, L190/L410 Series, LBP3460, LBP612C, iR-ADV 8105, iR C3000 Series, iR2318/2320, LBP7660C, LBP252, iR7270N, LBP252, LC800/L3000, LBP5960, iR2006/2206, MF510 Series, L250, LBP442, iR1730/1740/1750, LBP5910, iR2018, iR-ADV C7055/7065, iR-ADV C5550/5560, iR-ADV 6575, MF510 Series, iR-ADV 4225/4235, D570, MF7400 Series, LBP7680C/5280, MF230 Series, iR3225, iR4530, iR-ADV C3525/3530, iR-ADV 6075, iR-ADV C350, iR-ADV C5550/5560, iR-ADV C475 III, LBP225, MF741C/743C, iR-ADV 4545/4551 III, LBP223, iR-ADV 715 III, iR-ADV C3520 III, LBP226, iR-ADV 4525/4535 III, LBP664C, iR-ADV 8505 III, iR-ADV C256/356 III, MF440 Series, iR-ADV 8585/8595 III, iR-ADV 615, iR-ADV 6575 III, LBP228, iR-ADV C7580/7570 III, iR1643i, iR1643P, LBP621C, iR-ADV 525 III, iPR C710/810/910, LBP852C, iR-ADV C3525/3530 III, iR-ADV 525, LBP222, MF641C, D1600 Series, WG7000Z Series, iR-ADV 6555/6565 III, iR-ADV 715,
How to install the Canon Printer Driver from PPA
1.) Add the PPA repository
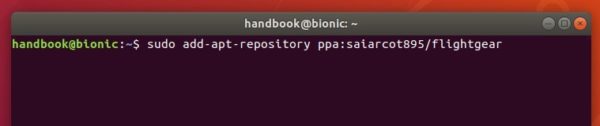
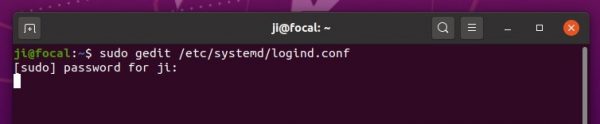
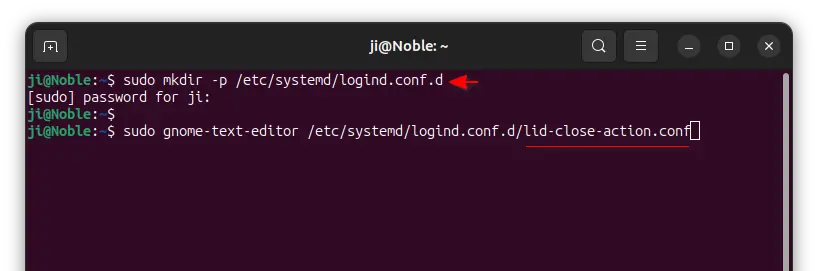
Open terminal either by pressing Ctrl+Alt+T on keyboard or by searching for ‘terminal’ from system application menu. When it opens, run command:
sudo add-apt-repository ppa:thierry-f/fork-michael-gruz
Type your password (no asterisk feedback) for sudo prompt and hit Enter to continue.

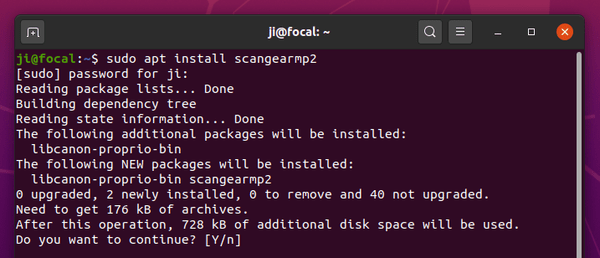
2.) To install the ScanGear MP driver, run command:
sudo apt install scangearmp2
To install IJ printer driver, run command:
sudo apt install cnijfilter2
3.) To install UFRII or LIPSLX printer driver for Canon LBP/iR printers, install one of following packages for your devices via apt command:
- cnrdrvcups-lipslx
- cnrdrvcups-ufr2-uk
- cnrdrvcups-ufr2-us
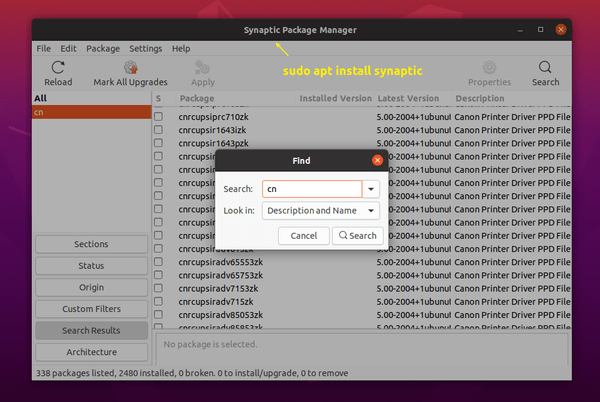
There are also a list of PPD (PostScript Printer Description) files available in the PPA, either install one via apt command or use Synaptic to search for your printer.