Archives For Howtos

Want to get better performance when playing games in Linux? Try GameMode!

GameMode is a free open-source Linux project allows games to request a set of optimizations be temporarily applied to the host and/or game process.

The project was originally designed as a stop-gap solution to problems with Intel and AMD CPU powersave or ondemand governors. But now GameMode supports for optimizations including:

  • CPU governor
  • I/O priority
  • Process niceness
  • Kernel scheduler
  • Screensaver inhibiting
  • GPU performance mode (NVIDIA and AMD), GPU overclocking (NVIDIA)
  • Custom scripts

1. How to Install GameMode in Ubuntu Linux:

The package is available in Ubuntu as well as most other Linux repositories.

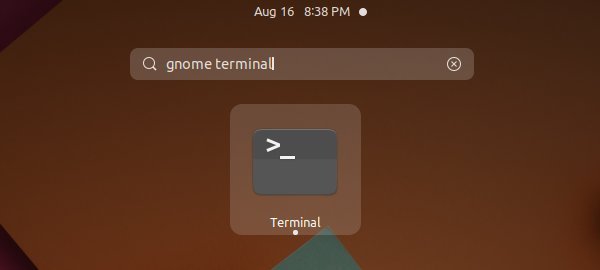
Firstly open terminal by either searching from ‘Activities’ overview screen, or pressing Ctrl+Alt+T on keyboard. When terminal opens, run command to install it:

sudo apt install gamemode

For Fedora and CentOS Linux, you can install it via command:

sudo dnf install gamemode

(Optional) Install GameMode indicator:

For choice, you can install an indicator applet that shows the current status of GameMode. It’s an extension for the default Gnome desktop.

a.) Open terminal and run command to make sure chrome-gnome-shell browser integration is installed:

sudo apt install chrome-gnome-shell gnome-shell-extension-prefs

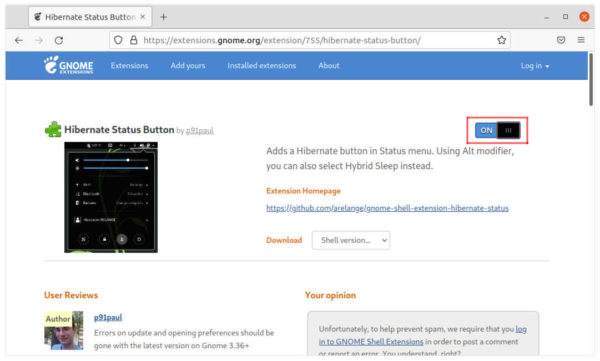
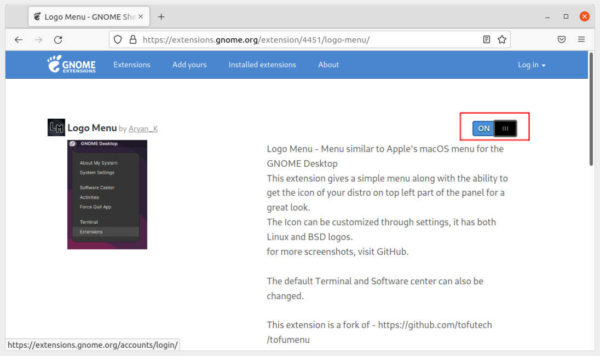
b.) Next go to the extension web page by clicking the button below. And turn on the slider icon to install it.

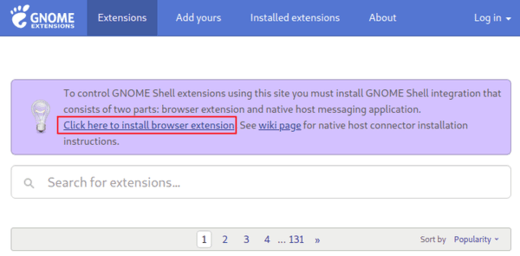
If you don’t see the toggle icon, click the “click here to install browser extension” link to install browser extension and reload the page.

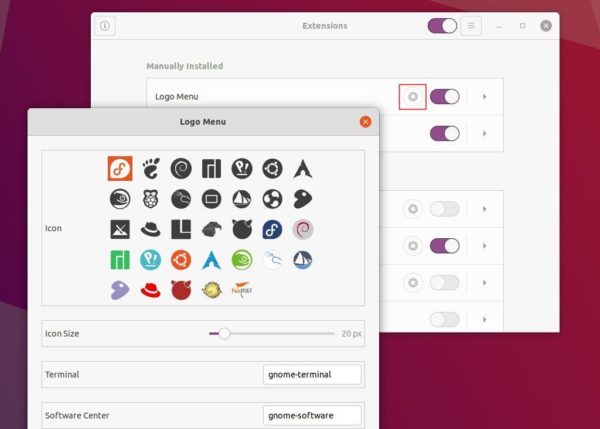
Finally, search for and open ‘Gnome Extensions App’ from start menu. And click on the gear button to configure the status indicator.

2. How to Run Game in GameMode:

Some games and platforms have integrated GameMode support. Which means you don’t have to do anything to activate it. They are:

  • DiRT 4
  • Rise of the Tomb Raider
  • Shadow of the Tomb Raider
  • Total War Saga: Thrones of Britannia
  • Total War: Three Kingdoms
  • Total War: WARHAMMER II
  • ATLauncher Minecraft launcher
  • Lutris

For other games, you can now run the executable command by adding gamemoderun at the beginning. For example, run SuperTux2 in GameMode via:

gamemoderun supertux2

For steam, you can simply add gamemoderun %command% as launch option.

And without launching game every time from command line, write the rule into app shortcut file. They are .desktop files generally locate in “/usr/share/applications” directory.

For example, edit SuperTux 2 app shortcut via command:

sudo gedit /usr/share/applications/supertux2.desktop

When the file opens, add gamemoderun before executable command in Exec line.

For Hybrid GPU users, the GameMode supports environment variable via GAMEMODERUNEXEC. So you can run GameMode while using dedicated gpu for rendering game which will be displayed using the integrated card. For example:

export GAMEMODERUNEXEC="env DRI_PRIME=1" && gamemoderun supertux2

To set the environment variable globally, add either line into /etc/environment config file for your case.

GAMEMODERUNEXEC=optirun #Bumblebee implementation.

GAMEMODERUNEXEC="env DRI_PRIME=1"

or

GAMEMODERUNEXEC="env __NV_PRIME_RENDER_OFFLOAD=1 env __GLX_VENDOR_LIBRARY_NAME=nvidia env __VK_LAYER_NV_optimus=NVIDIA_only"

Want to enable Guest account in Ubuntu? Without switching to another display manager, you can add Guest in Gnome login screen for people to use your computer while NOT being able to install/remove app, change system wide settings, and access files outside its own directory.

Guest is available by default in Ubuntu 16.04 Unity desktop. After Ubuntu switched to Gnome Desktop, the feature is removed. For those need Guest account, it’s easy to add it back via following steps.

1. Create Guest Account.

Firstly, open system settings either from top-right system menu, or by searching from Activities overview screen.

Next, navigate to Users in left pane (For Ubuntu 24.04, go to “System -> Users” in settings app) and click “Unlock” button and type your user password to unlock the settings page.

Finally, click on “Add User…” to create a new user:

  • select Standard, (for Ubuntu 24.04, leave “Administrator” turned off) so it has no sudo permission, can’t install/remove app, and no access file outside its user home.
  • set username to Guest.
  • And set password for it. REQUIRED though it’s useless. Next step I’ll tell how to enable no password login.

2. Enable No Password Login for Guest

Press Ctrl+Alt+T on keyboard to open terminal, then copy and paste the command below and hit Enter.

sudo gedit /etc/pam.d/gdm-password

This command will open the configuration file. Simply add the following line at the beginning (so it will be the first line) and save it:

auth sufficient pam_succeed_if.so user ingroup guest

OK, in next boot you’ll see the Guest account in GNOME login screen. Simple click to login without typing password, and enjoy!

3.(Optional) Add more Restrictions:

The Guest account can’t install/remove apps, manage PPAs, access files out of its home directory. Any action needs authentication will ask for typing password for Admin Account.

It however has permissions to customize its own desktop appearance, access CD Rom, mount/un-mount USB and other removable devices, use audio/video devices (e.g., webcam, microphone), full and direct access to serial ports.

These permissions are handled via groups. You can check which groups that include Guest account via command:

cat /etc/group |grep guest

And the Debian Wiki tells what do the groups do. By removing Guest from a group will disable the permission. For example, remove it from plugdev group run command:

sudo gpasswd --delete guest plugdev

For even more restrictions, e.g., disable save file, lock down appearance settings, disable printing, etc., go to the Gnome Wiki.

For those prefer Gnome 3 style Activities overview, here’s how to bring back the vertical workspace thumbnails in Ubuntu 21.10 and Ubuntu 22.04.

Since Ubuntu 21.10, the default GNOME desktop brings new design of the Activities overview screen. It now has large and horizontal workspaces locates across the center of screen. Along with thumbnails in the top, you can either click / use keyboard shortcuts or touchpad gestures to switch workspaces.

Personally I like the new design. But for those who are accustomed to the vertical view, here’s an extension to restore the change.

1. Prepare for installing Gnome Shell Extension:

Before getting started, make sure chrome-gnome-shell package is installed for GNOME Shell extensions integration for web browsers.

To do so, open terminal (Ctrl+Alt+T) and paste the command below and hit Enter:

sudo apt install chrome-gnome-shell gnome-shell-extension-prefs

The command also installs the app for managing Gnome Extensions.

2. Install Vertical Overview extension:

Next go to the link page below in your web browser, then turn on the slider icon to install the extension:

Don’t worry if you don’t see the slider icon, click the ‘click here to install browser extension’ link to install browser extension and re-fresh the web page.

NOTE: The preinstalled Firefox in Ubuntu 22.04 does not support installing Gnome Extensions. As a workaround, you may search for & install “Extension Manager” in Ubuntu Software. Then, use the tool to search and install Vertical Overview extension.

Install the extension via Extension Manager tool

3. Configure Overview Appearance:

After installed the extension, you can press Win/Super key and search for and open ‘Gnome Extensions app’ to configure its settings.

Click on the gear button, then you can change the workspace thumbnail size, position, as well as toggle on / off the big central workspace.

That’s all. Enjoy!

For those want to set the CPU TDP limit, a new Intel Controller app is available by Spanish Linux computer company Slimbook.

TDP stands for Thermal Design Power, in watts, and refers to the power consumption under the maximum theoretical load.

Similar to its AMD Controller app, the new app works by setting your CPU TDP value. That is, the amount of power measured in watts allowed for your CPU to either save battery or to improve the overall performance.

To use the app, you need to disable secureboot because it does not allow kernel access to CPU parameters.

As a new project, it so far supports for: i3-10110U, i3-1005G1, i5-8250U, i5-8265U, i5-10210U, i5-1035G1, i7-7500U, i7-8550U, i7-8565U, i7-1065G7, i7-10510U, i7-10750H, i7-1165G7.

You can however test your CPU by adding into the “~/.config/slimbookintelcontroller/slimbookintelcontroller.conf” file.

Search on the web to find out your CPU Specifications, including TDP, TDP-up and TDP-down. Then add your CPU and set the Low, Medium, and High performance in watts as the picture shows. You can then choose between them via either the desktop app or indicator menu.

NOTE: The software is still in early development, they may have bugs. And in higher performance, it drains the battery faster and makes your CPU hotter. USE it at your own risk!

Install Slimbook Intel Controller:

The slimbook PPA maintains the package so far only for Ubuntu 20.04.

1. Add the PPA.

Firstly open terminal either by pressing Ctrl+Alt+T on keyboard, or by searching for and open terminal from system app launcher. When terminal opens, copy and paste the command below and hit Enter:

sudo add-apt-repository ppa:slimbook/slimbook

Type user password, no asterisk feedback, when it asks and hit Enter to continue.

2. Install the controller app.

Next run command to install the Intel Controller:

sudo apt install slimbookintelcontroller

For AMD CPU, you can install another package instead:

sudo apt install slimbookamdcontroller

Once installed, open it from system app launcher. As I mentioned above, it won’t start if your process is not in the configuration file. For the source code, go to Github.

Uninstall:

For any reason, you can copy and paste the command below into terminal and hit Run to remove the software.

sudo apt remove slimbookintelcontroller

As well, do for removing the Slimbook PPA via the command below:

sudo add-apt-repository --remove ppa:slimbook/slimbook

Want to change the position of top-bar items, e.g., Activities button, app menu, date and time, and system tray icons?

A Top Bar Organizer extension now is available for Ubuntu 21.04 Gnome 40. With it, you can drag and drop to re-order top panel items as you prefer. For example, moving the Activities button or date & time clock menu to right corner.

Install Top Bar Organizer:

1.) Firstly open terminal by pressing Ctrl+Alt+T on keyboard. When terminal opens, run command to install Gnome extension integration for web browser, as well as Gnome Extension management tool:

sudo apt install chrome-gnome-shell gnome-shell-extension-prefs

2.) Next go to the extension web page, and turn on the toggle icon to install it:

Don’t see the slider icon? Install browser extension by clicking on ‘Click here to install browser extension’ link and refresh the web page.

3.) Finally search for and open ‘Extensions‘ from system app launcher. And click on the gear icon to open the extension settings.

Next drag and drop to re-order all panel items and enjoy!

Need the most recent HPLIP to get your HP printer or scanner working in Ubuntu? Here’s how to install guide as well as workaround to fix the python-pyqt5 dependency issue.
HPLIP is an open-source Linux drivers for HP’s inkjet and laser printers. The project is initiated and led by HP Inc. While the package in Ubuntu repositories is always old, you can install the official binary to get new devices support.

However, the most recent releases refuse to install in my Ubuntu 20.04 due to python-pyqt5 dependency issue. If you’re facing with the similar issue, then this tutorial may help!
Download & Install HPLIP in Ubuntu 20.04

1.) Firstly, download the latest binary from the link below. It’s ‘hplip-3.21.10.run‘ at the moment.

2.) Next, add executable permission by pressing Ctrl+Alt+T on keyboard to open terminal. Then run command:

chmod u+x ~/Downloads/hplip*.run

And try to install it via command:

~/Downloads/hplip*.run

Follow the terminal output and answer some questions to start installing the driver.

3.) Fix python-pyqt5 dependency issue.
As I said, it refuse to install in Ubuntu 20.04 because it tries to install old Python 2 binding for Qt5 as dependency in my case.

Thanks to Christoph Mueller, I found it has something to do with python symbolic links.

As you may know, python2 and python3 in /usr/bin are symbolic links. While python2 is python2.7, python3 links to python3.8 (or 3.9 depends on Ubuntu edition), python is not exist out-of-the-box. However, it will be created in some cases and links to either python2 or python3.

And the point is when Python links to Python2, HPLIP will mistakenly try to install Python 2 libraries as dependency.

Until HPLIP fixed the issue, the solution is either remove /usr/bin/python if you don’t need it or make it link to Python3.

Make Python to be Python3:

There are two choices to create symlink for python: install python-is-python3 or use update-alternatives command.

Option 1. Open terminal and run command to install ‘python-is-python3’:

sudo apt install python-is-python3

Option 2. Use ‘update-alternatives’ to choose which to link to. Firstly, add both python2 and python3 as alternatives:

sudo update-alternatives --install /usr/bin/python python /usr/bin/python2 1
sudo update-alternatives --install /usr/bin/python python /usr/bin/python3 2

You can then choose which to use anytime via command:

sudo update-alternatives --config python

Finally, re-do step 2.) to install the HPLIP-*.run file.

4.) Fix make command failed issue:

This seems to be HPLIP 3.21.6 only issue, that it outputs ‘error: make command failed with status code 2‘.

By re-running ‘make’ command from the source folder (see Uninstall section), it tells that “/usr/bin/ld: cannot find -lavahi-core”.

And it can be fixed by installing libavahi-core-dev package via command:

sudo apt install libavahi-core-dev

How to Remove HPLIP from Ubuntu:

While installing HPLIP via step 2.), it extracts the .run package into the source folder. And you can find it in Downloads folder.

NOTE: HPLIP 3.21.10 somehow does not create source folder. Run ~/Downloads/hplip*.run --target ~/Downloads/hplip to generate it manually if required.

The folder contains an uninstall script allows to remove HPLIP from your computer.

To do so, go to the source folder, right-click on blank area and select ‘Open in Terminal’.

Finally, run the uninstall script in pop-up terminal window:

sudo python3 uninstall.py

That’s all.

Want to access your Ubuntu desktop remotely from a Windows 11 computer? It’s easy to do the job with built-in screen sharing function.

Ubuntu uses Vino as default VNC server to share your existing desktop. With it, users can access Ubuntu remotely either in or out of local network via a VNC client.

Enable Vino VNC in Ubuntu:

1. Firstly, click on ‘Activities’ in top bar, search for and open terminal from system app launcher. When it opens, run commands:

Make sure Vino is installed by running command:

sudo apt install vino

To allow computer outside of local network to access, enable upnp is your router support it:

gsettings set org.gnome.Vino use-upnp true

Vino requires encryption by default. However, VNC clients from Windows computer does not support the encryption type. So you may disable the feature via command:

gsettings set org.gnome.Vino require-encryption false

There are more settings, e.g., change listening port, disable background, lock on disconnect. And you can control them via Dconf Editor (install from Ubuntu Software), by going to ‘org -> gnome -> desktop -> remote access’.

2. Secondly, open System Settings and go to Sharing in the left pane. Toggle on the slider icon on header, and then click ‘Screen Sharing’ to go to its settings page.

3. Finally, turn on ‘Screen Sharing’ function, and do:

  • Allow remote control by enabling “Allow connections to control the screen”
  • Set ‘New connections must ask for access’ if you’re sitting at Ubuntu computer.
  • Or set a hard-to-guess password for choice.
  • If you have both wired / wireless network connected, choose one to share with.

Remove Access Ubuntu from Windows 11:

Windows uses need a VNC client to get access remote computers. And I use TigerVNC which is available to download at the link below:

Download & install the exe. Launch the client, and type either IP address or hostname of Ubuntu machine:

If password was not set in Ubuntu, it will pop up a window asking whether to allow access. Or, type password in next dialog to get access.

That’s all. Enjoy!

The open-source video transcoder HandBrake released new 1.4.0 version with exciting new features.

HandBrake 1.4.0 adds native 10 and 12-bit encoding support. Though it has limitations that some filters (e.g., Detelecine, Chroma Smooth, and more) do not currently support higher than 8-bit. With these filters enabled, you won’t benefit from the new feature.

You can select the new 10-bit / 12-bit encoder from the “Video codec” drop-down on the Video tab. For hardware encoders, the option will only be shown if the system supports it.

The release also adds new filters including Chroma Smooth and Colourspace Selection. New Media Foundation encoder for Windows based ARM64 devices powered by Qualcomm Chipsets.

Other changes in HandBrake 1.4.0 include:

  • HDR10 metadata passthru.
  • Added support for Apple Silicon based macs.
  • MP2 Audio Passthru support.
  • Added support for DVB Subtitles.
  • Added support for EIA608 Closed Captions.
  • Improved Static Previews to reduce temporary disk space usage
  • And much more.

How to Install HandBrake 1.4.0 in Ubuntu:

HandBrake has an official Ubuntu PPA though it’s not updated at the moment.

Besides the PPA, you can download & install the flatpak package.

First time installing a flatpak package? Make sure flatpak daemon is installed via command:

sudo apt install flatpak

Then install the downloaded package via command:

flatpak install ~/Downloads/HandBrake-*.flatpak

(Optional) To uninstall the package, open terminal and run command:

flatpak uninstall fr.handbrake.ghb

For those sticking to the open-source graphics driver, the latest Mesa 3D graphics library is easy to install via an Ubuntu PPA.

Mesa is an open-source software implementation of OpenGL, Vulkan, VDPAU, VA-API, and other graphics API specifications.

Ubuntu uses Mesa as OpenGL implementation if no proprietary driver is in use. It is however always old. For users want to play some games with the open-source RadeonSI, RADV, Intel, or Nouveau drivers, you may try the latest Mesa via PPA.

Install Mesa via Ubuntu PPA:

A trustworthy Ubuntu PPA is available that contains the latest stable Mesa packages for Ubuntu 20.04, Ubuntu 22.04, Ubuntu 24.04, and Ubuntu 24.10 on amd64, armhf/arm64, and i386 CPU platforms.

1. Add the PPA:

Search for and open terminal from system app launcher. When it opens, run command to add the PPA:

sudo add-apt-repository ppa:kisak/kisak-mesa

Type user password, no visual feedback, when it asks. Read the PPA description as you want and hit Enter to continue.
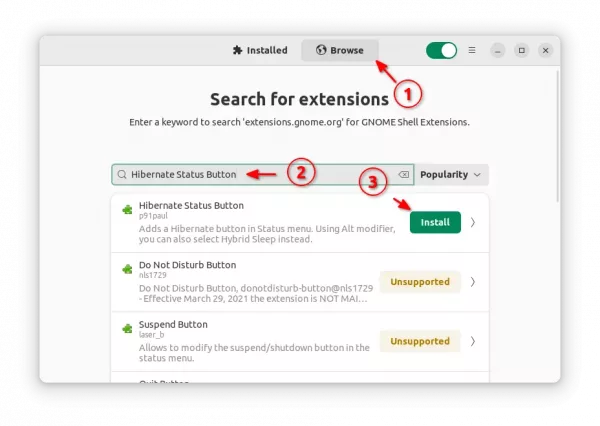
2. Install Mesa packages:

For, Linux Mint, you need to update package cache though it’d done automatically in Ubuntu while adding PPA.

sudo apt update

Finally install available upgrades of all packages including Mesa library via command:

sudo apt full-upgrade

3. Check mesa version:

To find out the package version, use command:

glxinfo | grep "OpenGL version"

Restore Original Mesa packages:

To restore your graphics driver to the original status, firstly install ppa-purge via command:

sudo apt install ppa-purge

Next purge the Ubuntu PPA which will downgrade all the installed packages:

sudo ppa-purge ppa:kisak/kisak-mesa

For Linux Mint 21/22, it’s recommended to add -d jammy or -d noble flag to work safely:

sudo ppa-purge -d jammy ppa:kisak/kisak-mesa

Here jammy and noble is the code-name of Ubuntu that Linux Mint is based on. If you don’t know which to use, run cat /etc/os-release to tell.

By releasing recent update, the popular Arc Menu Gnome Shell extension finally adds Gnome 40 and Windows 11 layout support.

Arc Menu is a free open-source app menu extension for Gnome. It provides various menu layouts to choose from, as well as many options to customize the appearance. For users new to GNOME and looking for a Windows style start menu, this extension will be perfect for you!
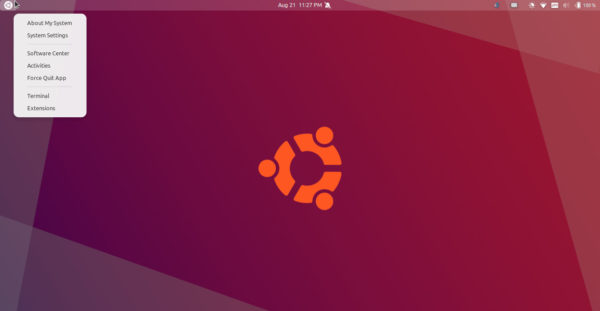
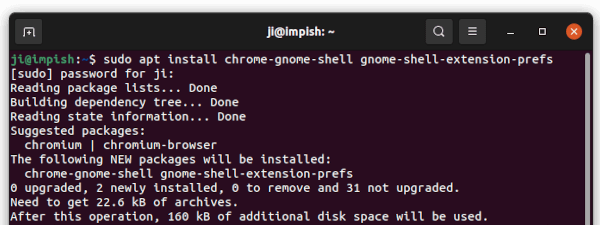
With the extension along with dash to panel, you can make Ubuntu just look like Windows 11.

The new menu layout does not display a search bar by default. Just type and it will bring up the search box as well as results.

How to Install Arc Menu:

The extension requires Gnome 3.36 +, which means you can install it in Ubuntu 20.04, Ubuntu 20.10, Ubuntu 21.04 and next Ubuntu 21.10.

1.) Firstly, open terminal (Ctrl+Alt+T) and run command to install the required tools, if you don’t have it:

sudo apt install chrome-gnome-shell gnome-shell-extension-prefs

Next go to Arc Menu web page and turn on the slider icon to install it:

If you don’t see the toggle icon, install browser extension via “Click here to install browser extension” link and refresh the web page.

Once installed, you can toggle on / off Arc Menu by opening Extensions from system app menu.

To select Windows 11 style start menu, right-click on start icon and go to settings. Then navigate to “Menu Layout -> Modern Menu Layouts”, choose ‘Eleven’ and click on Apply button.

Arc Menu follows your system theme. For dark mode menu, set Gnome Shell theme to dark.