For those who want to install the simple Audio Recorder application in Ubuntu 23.10 and Ubuntu 24.04, here’s new Ubuntu PPA.
UPDATE: The PPA support until Ubuntu 24.04. No longer updates for 24.10 and higher due to lack of upstream source development!!
Audio Recorder is a free open-source GTK3 audio recording application for Linux. It has a stupid simple user interface, while can record any sound from your computer.
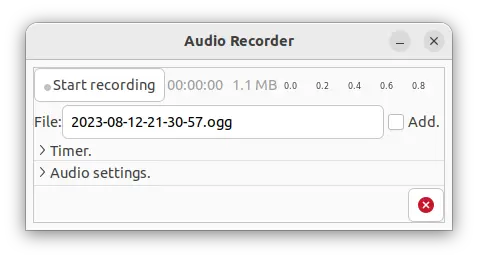
Audio Recorder simple UI
This app can record sound from your speaker, microphone, music player applications, and mixed source, such as recording speaker and microphone at the same time.
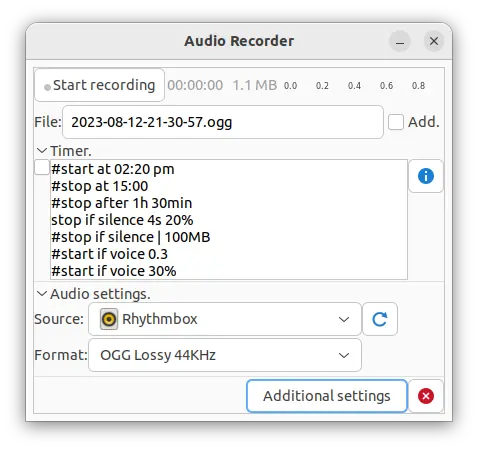
Sound can be recorded into OGG, FLAV, MP3, WAV, OPUS, M4A audio formats. And, it has a timer to start/stop recording automatically on given time and/or voice, silence.
This audio recorder is one of my most favorite Linux applications. But don’t know why, it’s excluded in Debian/Ubuntu repositories. And, the official Ubuntu PPA support so far until Ubuntu 22.04.
Some users reported it does NOT install in Ubuntu 23.04, so I made a new PPA contains this software packages, with support for Ubuntu 22.04, Ubuntu 24.04, and Ubuntu 23.10 on amd64 (X86_64), arm64/armhf (for Apple M1/M2, Raspberry Pi, etc) CPU architecture types.
And thankfully, the new PPA package seems working good (with only minor testing). Since you may know, Ubuntu 23.04 switched to Pipewire sound server while 22.04 and earlier are using classic PulseAudio.
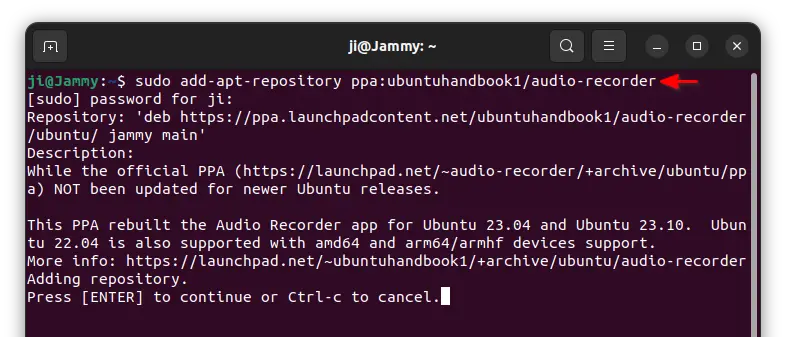
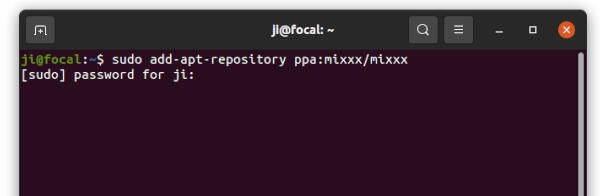
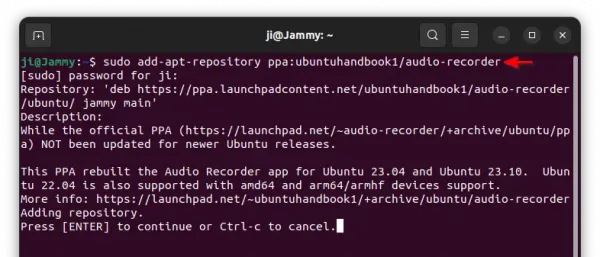
1. Add the new PPA
To add the PPA, simply press Ctrl+Alt+T on keyboard to open terminal. Then run command:
sudo add-apt-repository ppa:ubuntuhandbook1/audio-recorder
2. Update system package index
Since Ubuntu 20.04, it automatically updates system package index while adding PPA. Though, some Ubuntu based systems may NOT.
Just in case, you may run command manually to refresh your system package index:
sudo apt update
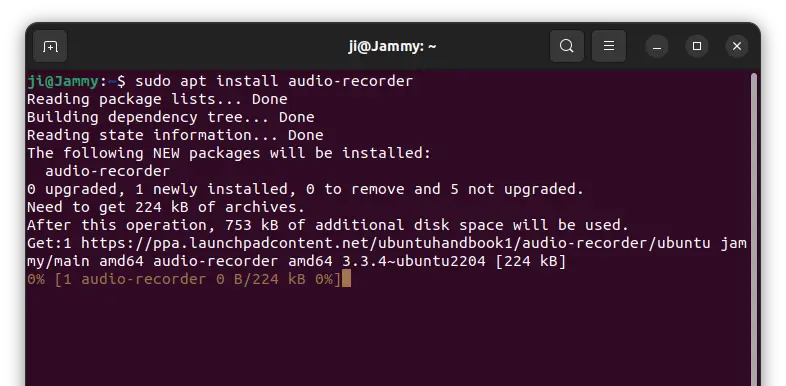
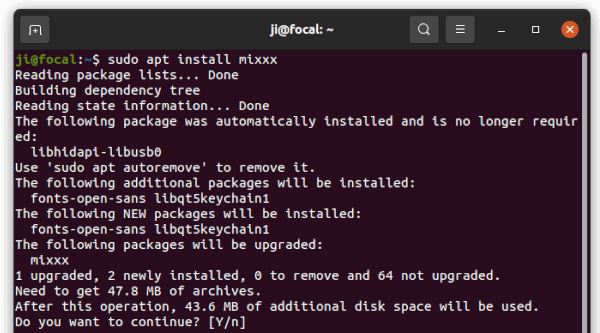
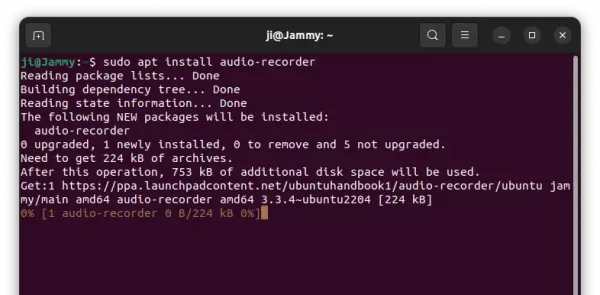
3. Install Audio Recorder
Finally, install the audio recorder package by running command in terminal:
sudo apt install audio-recorder
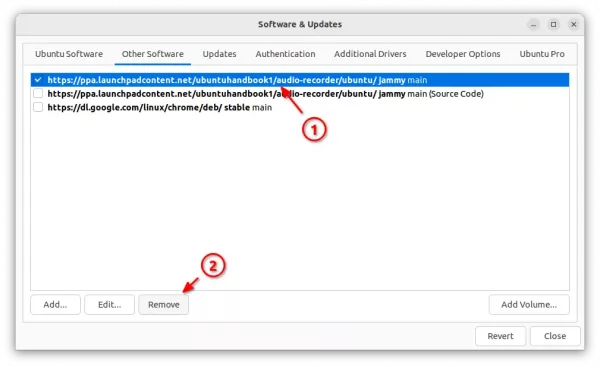
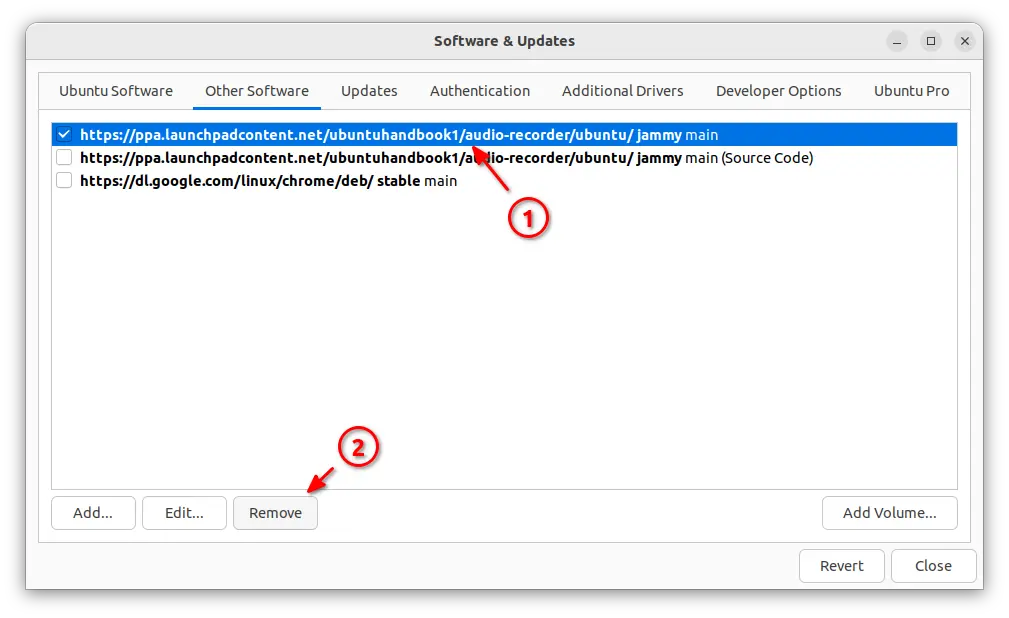
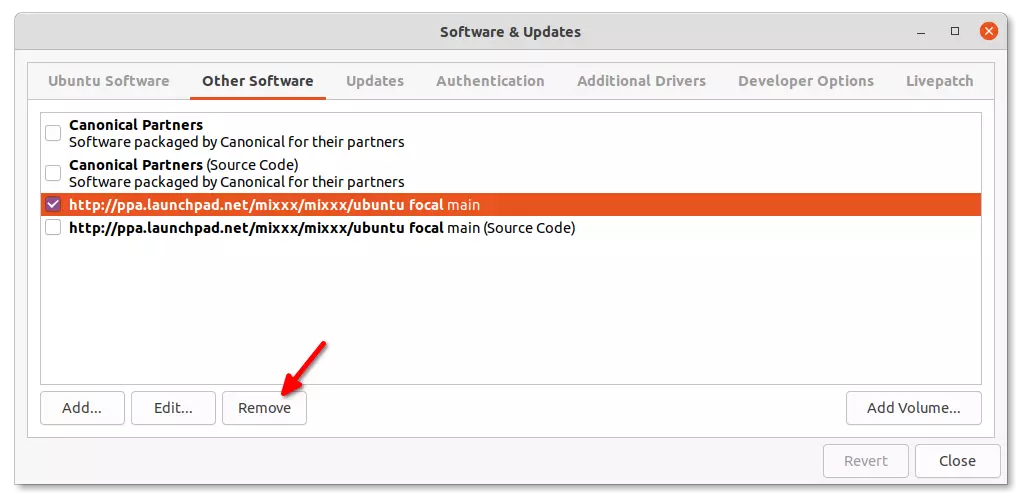
The Audio Recorder app updates rarely, so you can remove the PPA after installation (see the bottom screenshot).
Uninstall:
To remove the audio recorder, simply run command:
sudo apt remove --autoremove audio-recorder
And remove the PPA, either by running command in terminal:
sudo add-apt-repository --remove ppa:ubuntuhandbook1/audio-recorder
Or, use “Software & Updates” utility by removing the source line under ‘Other Software’ tab.