Archives For Audio

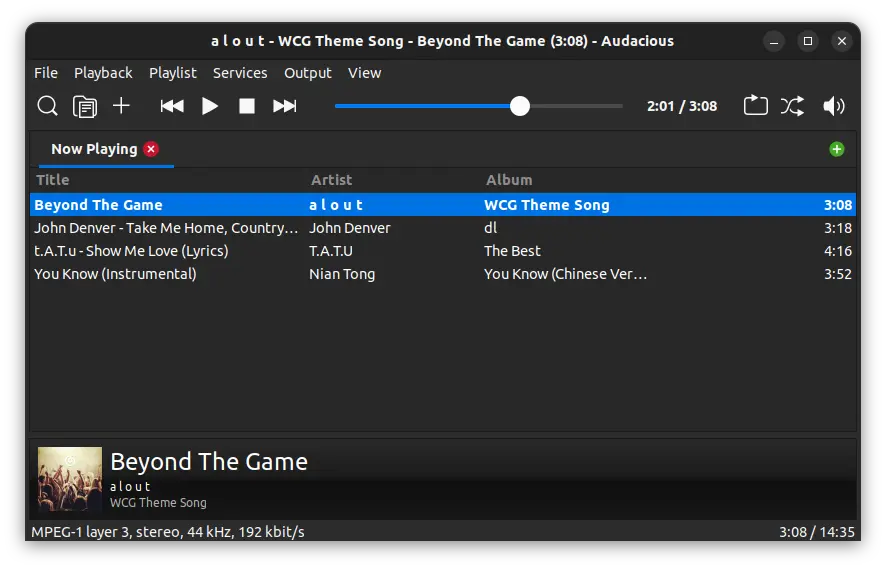
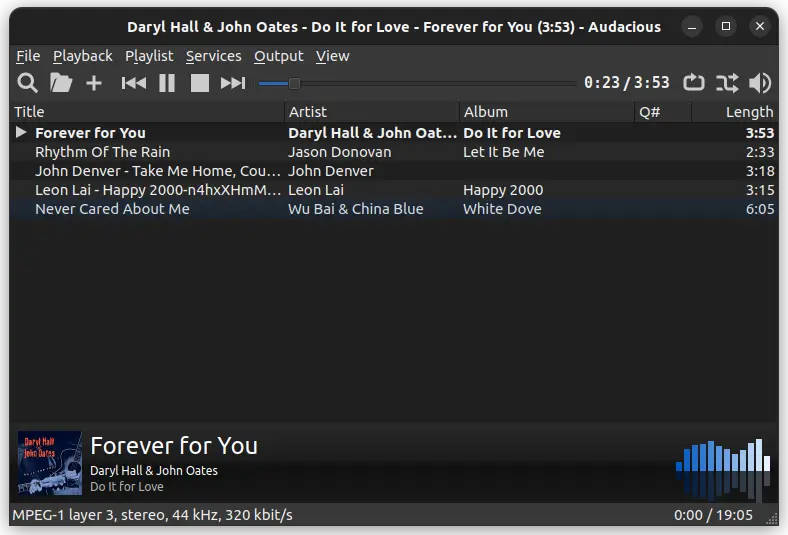
Audacious music player finally announced the release of version 4.3 after a few weeks of beta testing.

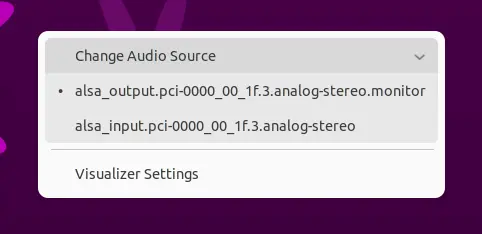
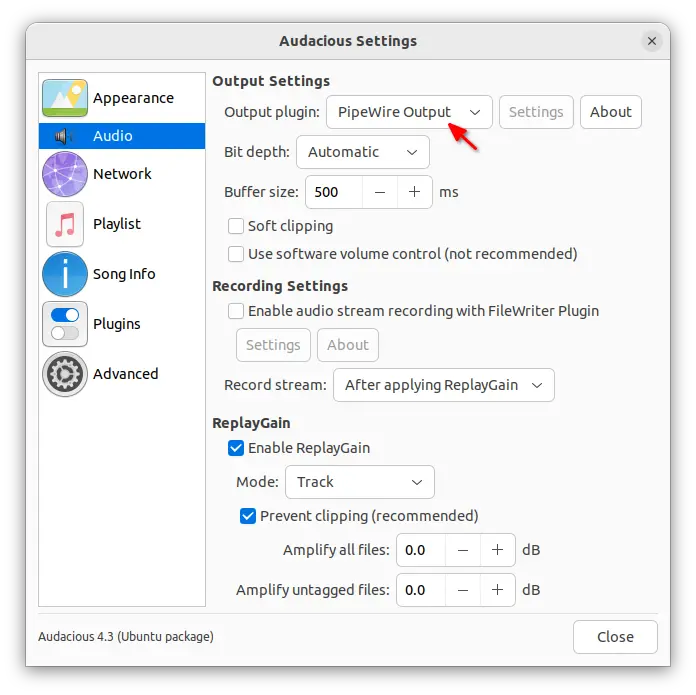
As you may already know, the new release features PipeWire output plugin. Meaning Ubuntu 22.10 + users can switch sound output using the new low-level multimedia framework.

Pop! OS 22.04 (have PipeWire support out-of-the-box) and Ubuntu 20.04 that have switched to Pipewire to replace PulseAudio are also supported.

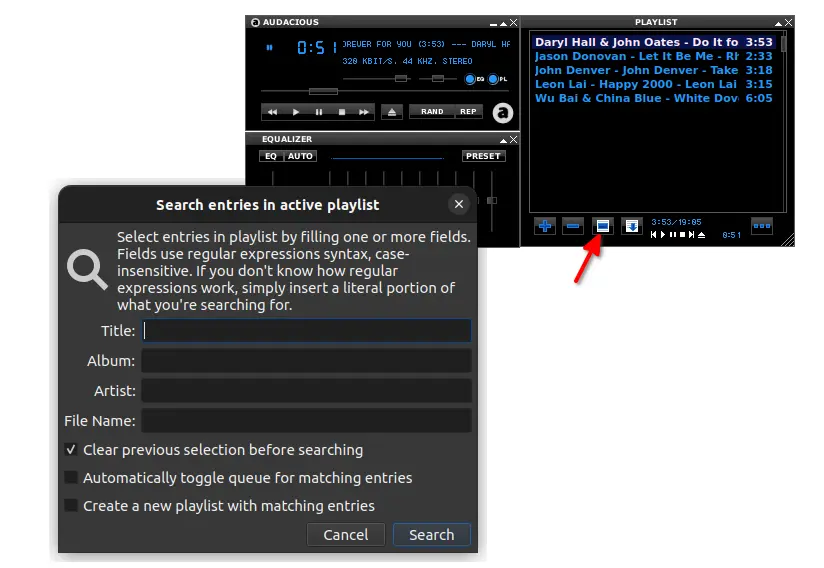
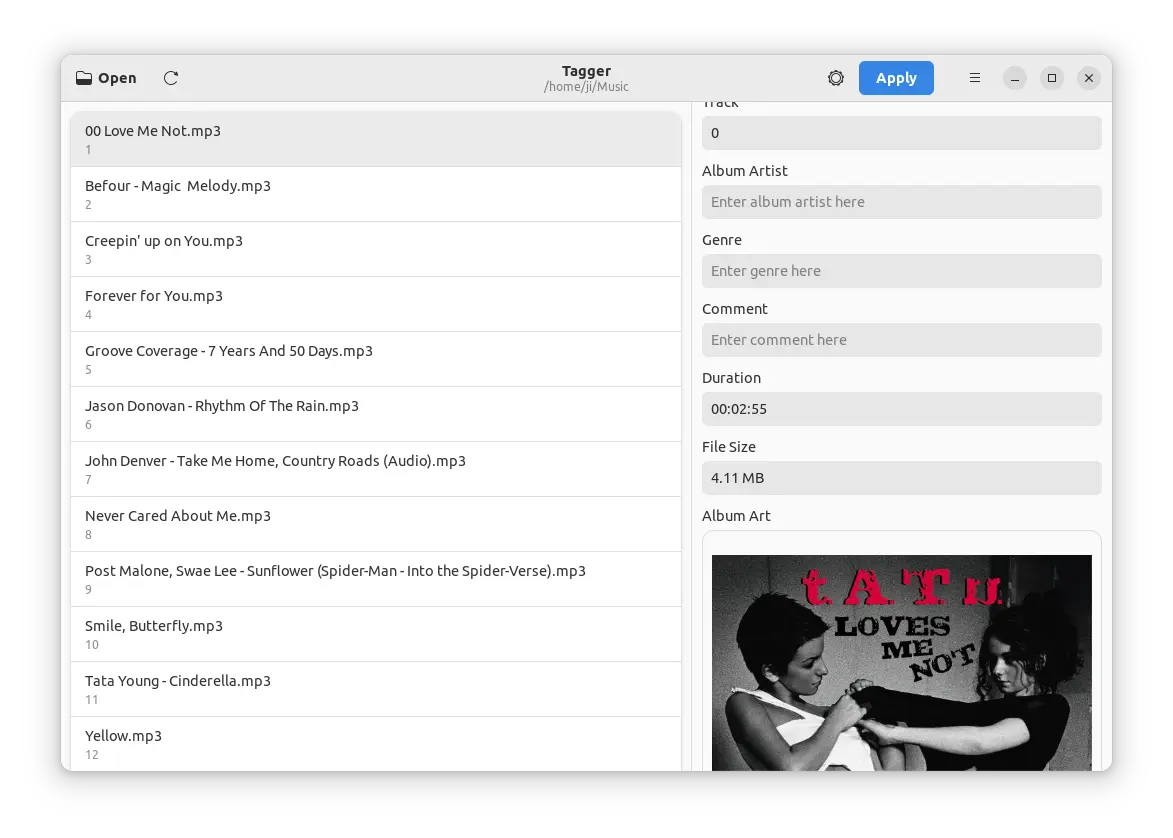
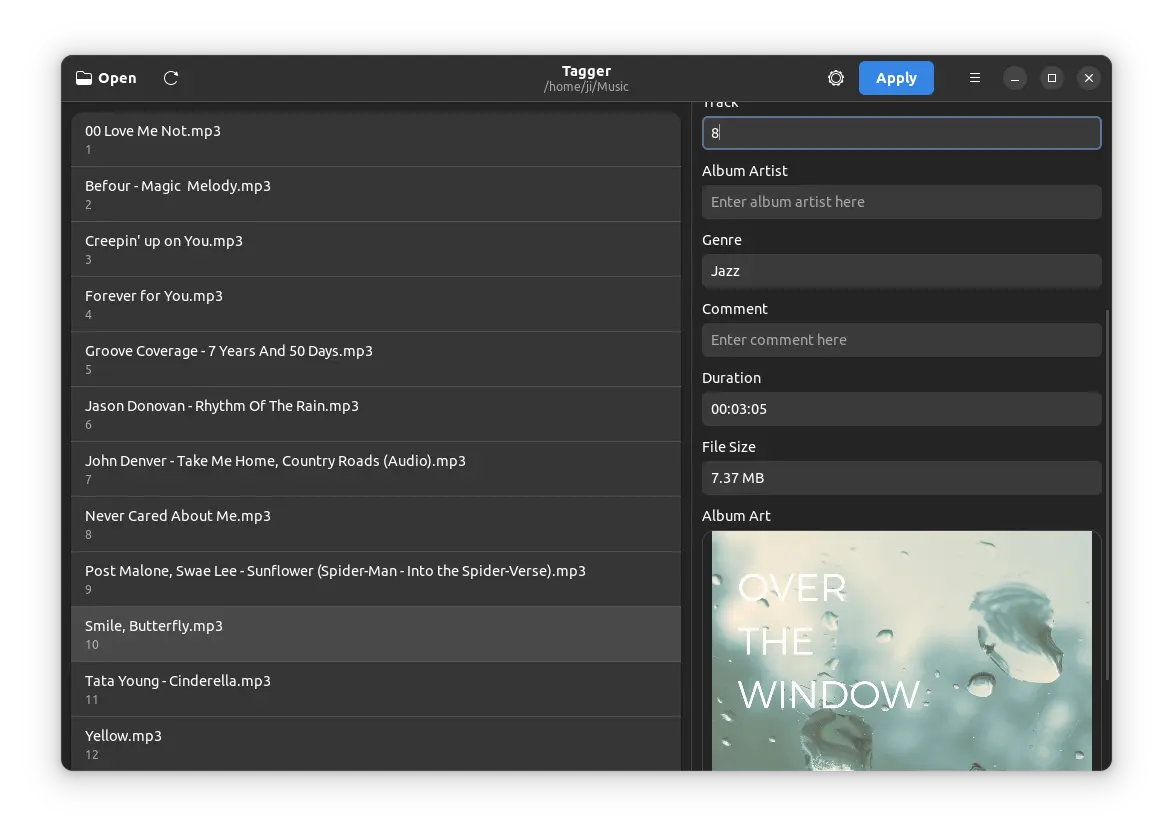
The release also added GTK3 support again, which has much better appearance in my case compare to the old GTK2 interface. It now has a new set of tool-bar icons with both light and dark mode support. Though, the icons in the Settings page are still too big.

Other changes in Audacious 4.3 include:

  • Native Opus decoder plugin, previously done via FFmpeg plugin.
  • Qt6 support goes mature, though still defaults to Qt5.
  • Meson built system support
  • Allow copying file path in song info dialog.
  • Support Ogg FLAC audio streams
  • Support reading embedded lyrics tags.
  • Account for album artist in Search Tool.
  • Support new song length database format in SID plugin.
  • Support Publisher and Catalog Number tags
  • Add file filter to Export Playlist file dialog
  • Remove alarm plugin.
  • Add Romanian translation.

How to Install Audacious 4.3 in Ubuntu:

Without building from the source, Ubuntu users can install the audio player in 2 ways: Flatpak and Deb.

1. Flatpak

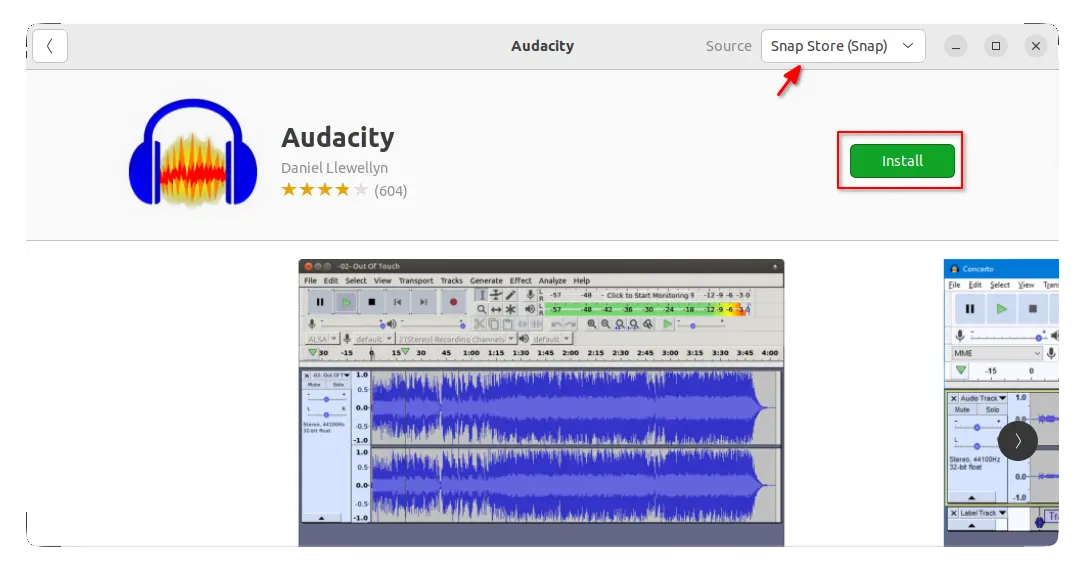
Audacious 4.3 is available to install as Flatpak package, though it runs in sandbox. Linux Mint user can easily search for and install it from Software Manager.

Ubuntu user can press Ctrl+Alt+T on keyboard to open terminal and run the 2 commands below one by one to get it.

  • Enable Flatpak support:
    sudo apt install flatpak
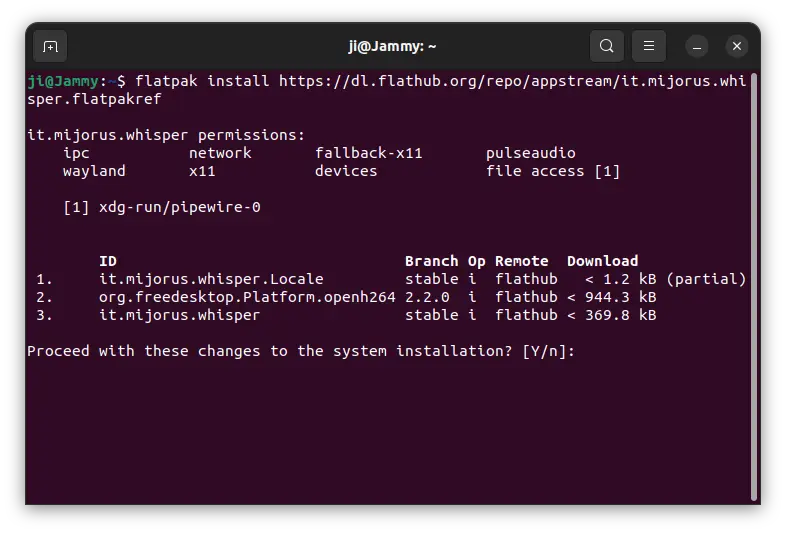
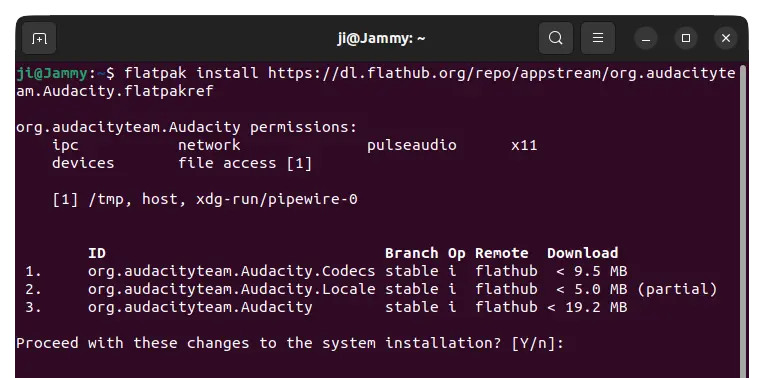
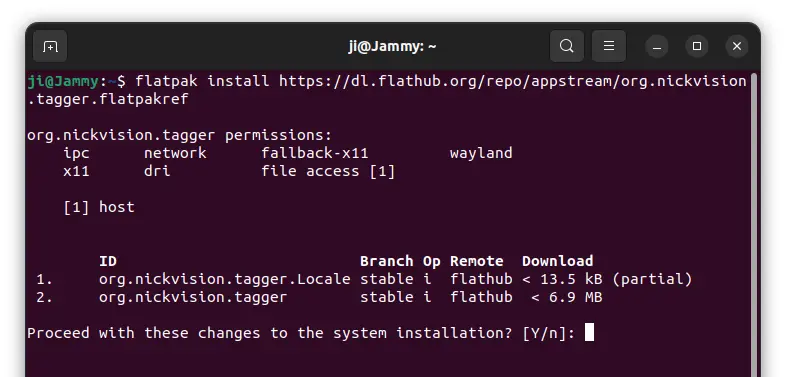
  • Install Audacious as Flatpak:
    flatpak install https://dl.flathub.org/repo/appstream/org.atheme.audacious.flatpakref

2. Ubuntu PPA

For those who prefer the classic .deb package, I’ve upload the new package into this PPA repository.

It now supports the package for Ubuntu 18.04, Ubuntu 20.04, Ubuntu 22.04, Ubuntu 22.10, and Ubuntu 23.04. Besides the modern PC and laptop with x86_64 architecture type, arm64/armhf devices such as Raspberry Pi are also supported!

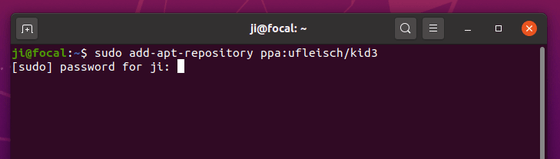
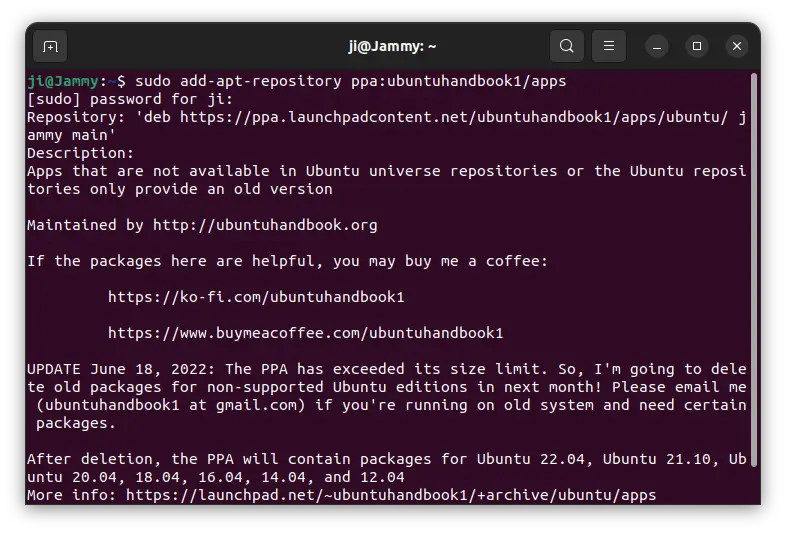
1. First, press Ctrl+Alt+T on keyboard to open terminal. When it opens, run command to add the PPA:

sudo add-apt-repository ppa:ubuntuhandbook1/apps

Type user password (no asterisk feedback) when it asks and hit Enter to continue.

2. Then, update system package index in Ubuntu 18.04 and Linux Mint via the command below. For Ubuntu 20.04+, it’s done automatically while adding PPA.

sudo apt update

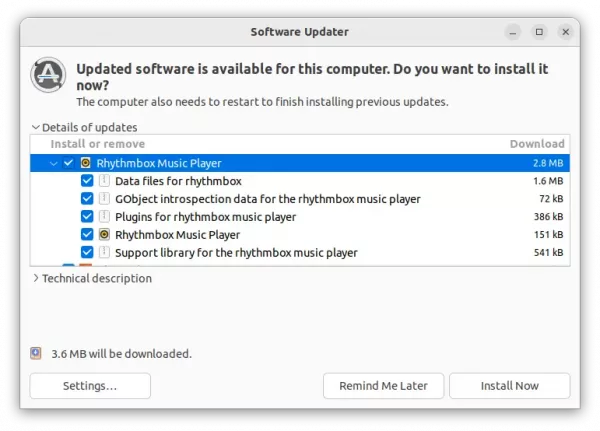
3. If you have an old version of the music player installed, you can now update the package to the latest using “Software Updater” utility.

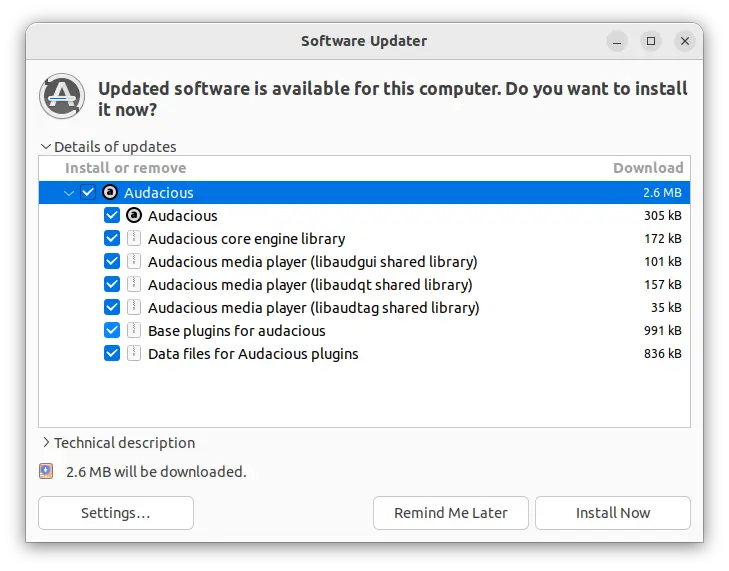
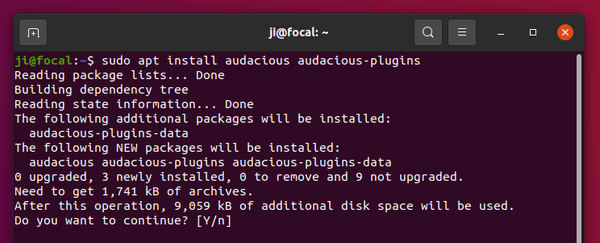
Or, run the command below in terminal to install or upgrade the package:

sudo apt install audacious audacious-plugins

Uninstall Audacious

Remove the Flatpak package

To remove the audio player installed as Flatpak, open terminal (Ctrl+Alt+T) and use command:

flatpak uninstall --delete-data org.atheme.audacious

Also clean up runtime library via flatpak uninstall --unused.

Remove Audacious installed from PPA

If you want to restore the music player to the stock version available in system repository. Run command below to purge PPA as well as downgrade installed packages:

sudo apt install ppa-purge && sudo ppa-purge ppa:ubuntuhandbook1/apps

Or, simply remove the software packages, use command:

sudo apt remove audacious audacious-plugins-data libaudcore5

And remove the PPA either via “Software & Updates” under ‘Other Software’ tab or use command:

sudo add-apt-repository --remove ppa:ubuntuhandbook1/apps

That’s all. Enjoy!

The lightweight audacious music player announced the beta release of the next v4.3 a few days ago.

Usually, the final release will be out in next or next few months with mostly no change since beta. So far, this beta release include the following new features.

The new release added plugin support for Pipewire, which is a low latency sound server that is default in Ubuntu since 22.10.

Also, it added a plugin for Opus audio decoding support. Though it previously supports Opus through FFmpeb library compiled with --enable-libopus.

Audacious 4.3 also added again GTK3 as well as Qt6 support. In current v4.2 stable, I prefer to use Qt UI since GTK2 interface looks ugly due to incorrect icon size.

However, Qt UI lacks automatic light and dark mode switch depends on system color scheme in GNOME (default desktop environment in Ubuntu). With the new GTK3 build, it now looks good in my case in Ubuntu 22.04 with better integration.

Audacious 4.3 GTK3 UI

Other changes in Audacious 4.3 Beta include:

  • Implement Meson build system.
  • Allow copying file path in song info dialog
  • Support Ogg FLAC audio streams
  • Support reading embedded lyrics tags
  • Support new song length database format in SID plugin
  • Increased M3U file size limit from 16 MB to 256 MB
  • Support Publisher and Catalog Number tags
  • Add file filter to Export Playlist file dialog
  • Removed alarm plugin due to serious bugs

How to Get Audacious 4.3 Beta:

Audacious website provides the Windows EXE and source code for downloading at the link below:

For all current Ubuntu releases, including Ubuntu 18.04, Ubuntu 20.04, Ubuntu 22.04, Ubuntu 22.10, just open terminal (Ctrl+Alt+T) and run the commands below one by one to install it:

sudo add-apt-repository ppa:ubuntuhandbook1/apps
sudo apt update
sudo apt install audacious audacious-plugins

Uninstall:

To uninstall Audacious packages installed from PPA, open terminal (Ctrl+Alt+T) and run command:

sudo apt remove --autoremove libaudcore5 audacious-plugins-data

And remove the PPA repository via command:

sudo add-apt-repository ppa:ubuntuhandbook1/apps

Want to hear your sound in microphone? Here’s a stupid simple tool to the job in Linux.

It’s Whisper, a new free and open-source GTK4 application, allowing listen to microphone through your speaker. Which, is useful for testing your microphone or for listening to your voice.

As the screenshot shows, the app is quite easy to use. Just select the microphone and speaker from the list, and click ‘Connect’. Then, you can say something or make some noise through microphone to see the magic.

As a GTK4 application, it follow system color scheme by switching between light and dark automatically. However, it needs both PulseAudio and Pipewire to make things work, which is default in Pop! OS 22.04, Ubuntu 22.10, Ubuntu 23.04, Fedora 35/36/37, etc.

How to Install Whisper in your Linux

As mentioned above, this application requires Pipewire audio server. For current Ubuntu 22.04 LTS, it’s NOT the default, though you can enable it by following this tutorial (NOT recommend for beginners).

Whisper is available to install as universal Flatpak package. You can install it by following the steps below one by one:

1. First, press Ctrl+Alt+T on keyboard to open terminal. When it opens, run command to install Flatpak daemon:

sudo apt install flatpak

Other Linux can follow this setup guide to enable Flatpak support.

2. Then, run command to install Whisper as Flatpak package:

flatpak install https://dl.flathub.org/repo/appstream/it.mijorus.whisper.flatpakref

3. After installation, search for and launch it from start menu (Show Applications) like normal app and enjoy!

How to Remove Whisper

To remove the software package, also open a terminal window and run command:

flatpak uninstall --delete-data it.mijorus.whisper

Also run flatpak uninstall --unused to remove useless runtime libraries.

Ubuntu by default play a short alert sound when you plug in/out USB drive, power supply, or hit tab function key in terminal.

This is useful for indicating certain type of system messages and events, but it’s easy to mute these type of sounds in case you don’t like them. And, here’s the quick tutorial show you how.

Single command to disable event sound

There’s a dconf database option to toggle on/off this feature for GNOME and Cinnamon desktop.

Simply, press Ctrl+Alt+T key combination on keyboard to open terminal. When it opens, run command:

gsettings set org.gnome.desktop.sound event-sounds false

Not only for Ubuntu, this command should also work for Fedora workstation, Debian, Arch and other Linux with GNOME desktop.

For Linux Mint cinnamon desktop, use the command below instead:

gsettings set org.cinnamon.desktop.sound event-sounds false

Disable event sound via Dconf Editor (graphical way)

In case for those who hate Linux commands, there’s an advanced configuration tool Dconf Editor, that provides a graphical interface to do the job.

1. Firstly, search for and install Dconf Editor from Ubuntu Software (or App Center for 24.04).

2. Then launch Dconf Editor, and navigate to org/gnome/desktop/sounds. Finally, turn off the option for ‘event-sounds’.

Similarly, navigate to org/cinnamon/desktop/sounds or org/mate/desktop/sounds and set the key depends on your desktop environment.

That’s all. Enjoy!

Want to display audio/music visualizer on the desktop? This extension can do the job for Ubuntu 22.10, Fedora 37, Arch/Manjaro Linux with GNOME.

It’s “Sound Visualizer” extension for Gnome Shell based on Gstreamer specially for Wayland. And, it’s working good in my case in Ubuntu 22.04, though it’s said for Gnome v43.

Besides for music playback, it works when any sound play from your computer. And, it has a right-click menu to switch between input/output audio sources. Meaning, it supports sounds input from microphone.

How to Install this “Sound Visualizer” desktop widget

1. (For Ubuntu 22.04 only) As mentioned, the extension supports GNOME v43 at the moment of writing. If you want to try it out in 22.04, first disable extension version validation.

To do so, press Ctrl+Alt+T on keyboard. When it opens, run command (no longer required):

gsettings set org.gnome.shell disable-extension-version-validation true

2. Next, open Ubuntu Software. Search for and install ‘Extension Manager‘ tool for installing and managing Gnome Shell extensions. Or, run command in terminal in case the Software App does not work.

sudo apt install gnome-shell-extension-manager

Install Extension Manager in Ubuntu 22.04+

3. Finally, launch ‘Extension Manager‘, and navigate to ‘Browse‘ tab. Search for and install the ‘Sound Visualizer‘ extension. (For Ubuntu 22.04, just click on Unsupported button)

For Fedora 37, Arch and Manjaro Linux with GNOME, visit this page in web browser and use the ON/OFF switch to install it.

4. After installation, try playing some sounds and see your desktop for the result. To move the widget, you have to temporarily disable “Desktop Icons NG (DING)” under ‘Installed’ tab in Extension Manager.

You can also adjust the visualizer size by opening the extension preferences either via widget’s context menu or by clicking the gear button for that extension in Extension Manager.


Audacity audio editor got a new major update few days ago, features real-time effects and VST3 support.

In the new 3.2.0 release, there’s a new “Effects” button in the tracks menu, allowing to place realtime effects. However, it does not yet ship with any effect so far. User has to get effects via plugins, though only Audio Units (macOS only), VST3, LV2, and LADSPA formats are supported at the moment.

The release also merged the mixer bar with the meter bars. The device tool-bar has been replaced with a new Audio Setup button, though it can be re-enabled via “View -> Toolbars” menu.

As the screenshot above shows you, there also introduced a new “Share Audio” button, allowing to upload audio into audio.com either with login account or anonymously, then share the link with your friend.

Other changes in Audacity 3.2.0 include:

  • Apple Silicon (arm64) is now supported on macOS. Though, need arm64 versions of FFMPEG and plugins.
  • Add support for Wavpack
  • Possible to compile without JACK present in Linux.
  • Use XDG directories on Linux. Need to delete .audacity-data and .audacity folders in user home if exist.
  • Use mpg123 as mp3 importer instead of mad.
  • Update license to GNU General Public License V3, though most code files remain GPLv2 or later.
  • Update icons, remove Zoom tool and various bug-fixes.

How to Install Audacity 3.2.0 in Ubuntu Linux

There seems no native .deb package for the latest Audacity. User can however get the application via the universal AppImage, Snap, or Flatpak that works in most Linux.

Option 1: AppImage

For the non-install AppImage, go to the github releases page and grab the package under “Assets” section:

Then, right-click on the package and open “Properties” dialog. Add executable permission under ‘Permissions’ tab and finally click run the package to launch Audacity.

Audacity AppImage

Option 2: Flatpak

User can also install Audacity via universal Flatpak package that runs in sandbox.

First, press Ctrl+Alt+T on keyboard to open terminal in Ubuntu, then run command to make sure the daemon package is installed:

sudo apt install flatpak

Then install the audio editor as Flatpak by running command:

flatpak install https://dl.flathub.org/repo/appstream/org.audacityteam.Audacity.flatpakref

Like normal applications, search for and launch it from system start menu (‘Activities’ overview) after installation.

Option 3: Snap

Audacity is also available as Snap package that runs in sandbox. I put this method as last choice because it does not yet update to v3.2.0 at the moment of writing.

However, it’s quite easy to install for Ubuntu users. Simply open the Software App, search for and click install it:

Uninstall Audacity

Depends how you install the software package, uninstall the editor via:

  • For AppImage, just remove the package file.
  • For the Flatpak package, open terminal and run command:
    flatpak uninstall org.audacityteam.Audacity
  • And remove the snap package by either using Ubuntu Software or running command in terminal:
    sudo snap remove audacity

Kid3, the popular Qt audio tag editor, released version 3.9.2 today. PPA updated for Ubuntu 22.04, Ubuntu 20.04, and Ubuntu 18.04.

The new Kid3 3.9.2 is a bug-fix release. Though, there are new features including .dff support, an audio format developed by Sony and Philips for Super Audio CD (SACD).

New features also include support for chapters in MP4 audio books, importing from URLs containing search results from Discogs and MusicBrainz, and a Norwegian translation.

Other changes in the release include:

  • Allow playlist file name formats to be edited.
  • URLs with search results from web browser can be entered in the import dialogs (Amazon, Discogs, gnudb.org, MusicBrainz).
  • New style for macOS icon.
  • Cli interface adds encoding detection for text file import and export.
  • Set rating as star count with ‘set ratingstars’ (Kid3-cli).
  • Build with latest mp4v2 library.
  • Fix wrong modifications of frames when importing.

How to Install Kid3 3.9.2 in Ubuntu:

The app has an official PPA contains the packages for all current Ubuntu releases, and their based systems, such as Linux Mint, Pop! OS, Zorin OS.

1. First, search for and open terminal either from system start menu or ‘Activities’ overview. When it opens, run command to add PPA:

sudo add-apt-repository ppa:ufleisch/kid3

2. Then update package cache by running command:

sudo apt update

3. If an old version of the software package exist in system, you can now open “Software Updater” or “Update Manager” to update the tag editor app.

Or, simply run the command below in terminal to install it:

sudo apt install kid3-qt

You may replace kid3-qt with kid3 in the code for KDE desktop, and/or with kid3-cli for the command-line interface.

Uninstall:

To remove the PPA, either use ‘Software Sources’ or ‘Software & Updates’ utility, or run command in terminal:

sudo add-apt-repository --remove ppa:ufleisch/kid3

And, remove kid3 tag editor via command:

sudo apt remove --auto-remove kid3 kid3-*

Audacious 4.2 finally goes stable! Here are the new features and how to install guide for Ubuntu users.

This release is a bit late, since the beta has been released for 5 months. As you may already known, Audacious 4.2 feature new dark theme, as well as Flat icon in both light and dark. You can enable them via ‘Files -> Settings’ dialog.

Audacious Dark & Flat icons

For Winamp interface in Qt mode, there’s now a Search and Select dialog for searching music in playlist. Which, supports regular expressions syntax for advanced users.

Winamp interface, search in playlist

Other changes in the release include:

  • Add partial support for Ogg FLAC streams
  • Automatically set the title of an imported playlist based on the filename
  • Preselect the filename of an imported playlist when exporting it again
  • Add a Jump to Song dialog to the Winamp interface in Qt mode
  • Add formatter syntax to allow truncating title strings

Install Audacious 4.2 via PPA:

I’ve updated the unofficial PPA with the package for Ubuntu 18.04, Ubuntu 20.04, Ubuntu 22.04 and their based systems, such as Linux Mint and Pop! OS.

NOTE if you’re using the Audacious 4.2 beta package via my test PPA, you have to remove it as well as the PPA first.

First, open terminal by either pressing Ctrl+Alt+T on keyboard or searching from Activities overview (start menu). When it opens, run the command to add the PPA:

sudo add-apt-repository ppa:ubuntuhandbook1/apps

Second, update the package cache in Ubuntu 18.04, Linux Mint, though it’s done automatically in Ubuntu 20.04 +

sudo apt update

Finally, either update the music player via Software Updater, or run the command below in terminal to install/update the package:

sudo apt install audacious audacious-plugins

Uninstall Audacious:

To remove the music player package, use command:

sudo apt remove --autoremove audacious audacious-plugins

And remove the Ubuntu PPA via command:

sudo add-apt-repository --remove ppa:ubuntuhandbook1/apps

Ubuntu’s default Rhythmbox music player got new release updates a few days ago. Here’s how to install it in Ubuntu via PPA.

Rhythmbox released version v3.4.5 last month and v3.4.6 days ago after more than 2 years of development. Compare to previous Rhythmbox 34.4, Soundcloud plugin and mmkeys plugin have been removed since they are no longer work / useful. DAAP plugin now supports libdmapsharing 4 API, but no longer enabled by default.

The new release has rewritten podcast downloader with better resume and retry, uses podcast episode GUIDs to handle episode URL changes, preserves original order of episodes in podcasts even if episodes have the same publication date. And, crossfading player backend now works much better with network streams. There are as well many bug-fixes and translation updates.

Install / Update Rhythmbox in Ubuntu

The latest Rhythmbox package is available to install as Flatpak package, which runs in sandbox.

For those prefer the pre-installed .deb package, here’s how to update it via the unofficial PPA.

1. Add PPA

First, press Ctrl+Alt+T on keyboard to open terminal. When it opens, run command to add the PPA. So far, Ubuntu 22.04 and Ubuntu 20.04 are supported.

sudo add-apt-repository ppa:ubuntuhandbook1/rhythmbox

Type user password (no asterisk feedback) when it asks for sudo authentication and hit Enter to continue.

2. Install / Update Rhythmbox

After adding the PPA repository, search for and launch “Software Updater” from Activities overview. It should show you the updates for the music player. Simply click on “Install” to get them and enjoy!

Or, you may run the single command in terminal to install/update the music player package:

sudo apt install rhythmbox

How to Restore:

If you found any issue for the package installed from PPA, open terminal (Ctrl+Alt+T) and run command:

sudo apt install ppa-purge && sudo ppa-purge ppa:ubuntuhandbook1/rhythmbox

The command will install the ppa-purge tool and purge the Ubuntu PPA you just added, which also downgrade all installed packages from that PPA to the stock versions in your Ubuntu system repository.

There are quite a few audio tag editing applications for Linux. Tagger is a new one with modern GTK4 user interface.

Kid3, puddletag, and easytag editors are really good. But for GNOME (the default desktop environment for Ubuntu, Fedora Workstation), Tagger looks more native due to GTK4 and libadwaita.

Tagger light mode

The app provides a simple and easy to use interface that follow system light and dark color scheme. With it, you can:

  • Edit metadata and audio tag including Filename, Title, Artist, Album, Year, Track, Album Artist, Genre, and comment.
  • Insert album cover art from file.
  • Remove tag.
  • Convert filenames to tags and tags to filenames with ease
  • And download tag data from internet via MusicBrainz.

filename to tag conversion

It support multiple music file types, such as mp3, ogg, flac, wma, and wav. And, it can edit tags and album art of multiple files, even across subfolders, all at once.

Tagger Dark Mode

How to Install this Tag Editor in Ubuntu & Other Linux:

The app provides official binary package through the universal Flatpak, which works on most Linux distributions.

1. For Ubuntu, firstly press Ctrl+Alt+T on keyboard to open terminal. When terminal opens, run the command to install the Flatpak daemon:

sudo apt install flatpak

Type user password for sudo authentication, though there’s no asterisk feedback.

Fedora, Linux Mint, Pop! OS, etc have flatpak support out-of-the-box. Other Linux may follow this setup guide to get it.

2. After setup the daemon, run the single command below will install the app in your Linux:

flatpak install https://dl.flathub.org/repo/appstream/org.nickvision.tagger.flatpakref

NOTE: First time installing flatpak app will also install the Gnome run-time libraries which take more MB disk space.

Once installed, press Super (‘Windows’) key on keyboard to get into overview screen. Then search for and open the audio tagger and enjoy!

How to Remove the Audio Tag Editor:

To remove the flatpak package, open a terminal window and run command:

flatpak uninstall --delete-data org.nickvision.tagger

Also clear useless run-times if any by running flatpak uninstall --unused command.