Archives For November 30, 1999

PyCharm IDE

PyCharm IDE 2019.1 was released yesterday with many new features and improvements. Here’s how to install it in Ubuntu.

PyCharm 2019.1 release highlights:

  • Completely redesigned Jupyter Notebooks support
  • Improved quick documentation for HTML and CSS.
  • Navigate quickly to recent locations, rather than files.
  • Python 2.6 and 3.4 are no longer supported.

How to Install PyCharm 2018.3.1 in Ubuntu:

Jetbrains offers official Snap package for Linux desktop, which keeps the IDE always up-to-date.

For Ubuntu 18.04 and higher, simply open Ubuntu Software, search for and install pycharm packages:
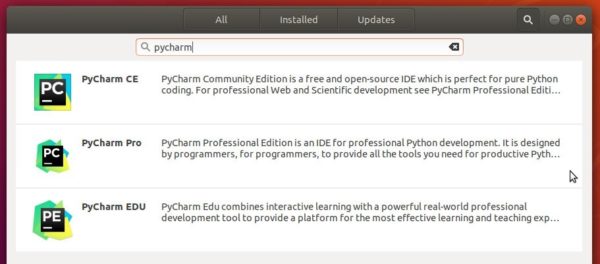
For Ubuntu 16.04, open terminal (Ctrl+Alt+T) and install snapd daemon via command:

sudo apt install snapd snapd-xdg-open

Then install PyCharm snap package via command:

sudo snap install pycharm-community --classic

In the command replace pycharm-community with pycharm-professional for the professional edition.

Uninstall:

To remove the PyCharm snap package, either use Ubuntu Software or run command in terminal:

sudo snap remove pycharm-professional pycharm-community

PyCharm 2018.3.1 Released with Various Bug Fixes

Last updated: December 6, 2018

PyCharm IDE

PyCharm IDE released version 2018.3.1 one day ago with various bug fixes. Here’s how to install it in Ubuntu 16.04 and higher.

PyCharm 2018.3.1 release highlights:

  • A fix for the recently added WSL support in PyCharm 2018.3
  • An issue where PyCharm couldn’t correctly authenticate over SSH using a passphrase-protected private key has been resolved.
  • A few fixes for Docker and Docker Compose
  • Fixes for the embedded terminal
  • Many fixes coming from WebStorm, DataGrip and IntelliJ IDEA

How to Install PyCharm 2018.3.1 in Ubuntu:

Jetbrains offers official Snap package for Linux desktop, which keeps the IDE always up-to-date.

For Ubuntu 18.04 and higher, simply open Ubuntu Software, search for and install pycharm packages:

For Ubuntu 16.04, open terminal (Ctrl+Alt+T) and install snapd daemon via command:

sudo apt install snapd snapd-xdg-open

Then install PyCharm snap package via command:

sudo snap install pycharm-community --classic

In the command replace pycharm-community with pycharm-professional for the professional edition.

Uninstall:

To remove the PyCharm snap package, either use Ubuntu Software or run command in terminal:

sudo snap remove pycharm-professional pycharm-community

PyCharm IDE

PyCharm IDE released version 2018.2.5 today with some important bug-fixes. PyCharm 2018.2.5 features following changes:

  • An issue that causes PyCharm to crash on Ubuntu 16.04 has been resolved
  • Matplotlib 3.0.0 can now be imported in the Python Console
  • Python code now folds correctly after it’s minimized with Ctrl+Shift+Numpad – (Cmd+Shift+- on macOS)
  • Pycharm fails to generate tensorflow skeletons
  • Gnome-Shell crashes upon replace in path confirmation action
  • And other bug-fixes. See the release note.

How to Install PyCharm 2018.2.5 in Ubuntu:

Jetbrains offers official Snap package for Linux desktop. For Ubuntu 18.04 and higher, simply open Ubuntu Software, search for and install pycharm packages:

For Ubuntu 16.04, open terminal (Ctrl+Alt+T) and install snapd daemon via command:

sudo apt install snapd snapd-xdg-open

Then install PyCharm snap package via command:

sudo snap install pycharm-community --classic

In the command replace pycharm-community with pycharm-professional for professional edition.

Uninstall:

To remove the PyCharm snap package, either use Ubuntu Software or run command in terminal:

sudo snap remove pycharm-professional pycharm-community

PyCharm IDE

PyCharm python IDE 2018.2 was released yesterday. Here’s how to install it in Ubuntu 18.04, Ubuntu 16.04.

PyCharm 2018.2 release highlights:

  • Fully supports pipenv: easily create projects with pipenv, create a pipfile, and have PyCharm update it for you when you install packages.
  • Improved support for pytest: code completion and inspections are now support for pytest fixtures.
  • Redesigned quick documentation for easy use and better look.

See the feature video for more about PyCharm 2018.2:

How to Install PyCharm 2018.2 in Ubuntu:

It’s quite easy to install the latest PyCharm in Ubuntu since JetBrains offers the official snap packages in snap store.

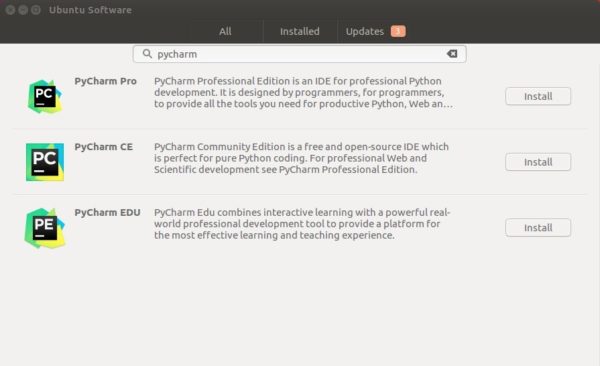
Simply open Ubuntu Software and search for PyCharm. You’ll see the community, professional, and educational packages are available.

You can also install the software by running command in terminal (Ctrl+Alt+T):

snap install pycharm-community

For professional version, replace pycharm-community with pycharm-professional in command.

Note for Ubuntu 16.04 users first time installing a snap package, make sure if the snapd is installed via command:

sudo apt install snapd snapd-xdg-open

PyCharm IDE

The first release of PyCharm python IDE 2018 was announced earlier today with great new features.

PyCharm 2018.1 release highlights:

  • Data scientists can now define code cells in their files, and choose exactly which parts to execute. No more need to re-import your data every time you finetune your analysis!
  • Do you run Python code on remote machines? Configuring an SSH remote Python interpreter is now easier than ever.
  • Even though Python 3.7 isn’t out yet, PyCharm 2018.1 already fully supports developing Python 3.7 code.
  • Those of you who take pride in having precise commits will be pleased to hear that you can now choose which chunks of files to include in your git commits.
  • PyCharm is the Python IDE that knows your code, and PyCharm 2018.1 knows Python code better than ever with new code intelligence features.
  • Docker Compose file format 3.3 and later are now supported. Also, performance of Docker Compose interpreters has improved significantly.

How to Install PyCharm 2018.1 in Ubuntu:

Jetbrains offers official snap packages for Ubuntu Linux users. You can install it in Ubuntu 16.04, Ubuntu 17.10, Ubuntu 18.04 via following steps.

1. (Ubuntu 16.04 only) For those who never installed a snap package, open terminal (Ctrl+Alt+T) and run command to install snapd daemon:

sudo apt-get install snapd snapd-xdg-open

No visual feedback while typing your password due to security reason.

2. Then you can search for and install PyCharm via Ubuntu Software:

Or run command in terminal instead to install the IDE:

snap install pycharm-community --classic

For professional, replace pycharm-community with pycharm-professional in the code.

PyCharm IDE

Jet Brains announced the release of PyCharm 2017.3 earlier today. Here’s how to install it in Ubuntu 16.04, Ubuntu 17.04, Ubuntu 17.10, Ubuntu 18.04.

PyCharm 2017.3 release highlights:

  • Performance improvements: Python indexing is twice as fast, JavaScript indexing is up to 40% faster, configuring SSH interpreters is much faster (in some cases over 100x), and more!
  • The new release makes creating and selecting Python interpreters easier.
  • A new scientific mode, which puts all the tools you need for data science at your fingertips (professional version only)
  • An all new HTTP client for those who build (REST) APIs.
  • Fully supports for Django 2.0 (professional edition only)
  • Supports running Python modules (python -m )
  • Supports for SSH config files

How to Install PyCharm 2017.3 in Ubuntu:

You can easily run the new release in Ubuntu via either:

method 1: official Linux binaries. NON-INSTALL version, just extract and run executable file to launch the IDE:

Download PyCharm Linux binary

method 2 (recommended): or install the Snap package. WELL integrated with Ubuntu. Support for Ubuntu 16.04 and higher:

Simply open terminal via Ctrl+Alt+T or by searching for ‘terminal’ from app launcher. When it opens, run command:

sudo snap install pycharm-community --classic

For sudo prompts, input your password (no visual feedback while typing) when it asks and hit Enter.

For professional edition, run following command instead:

sudo snap install pycharm-professional --classic

Once installed, launch the IDE from your application launcher and enjoy!

Uninstall:

To remove the snap packages, either use Ubuntu Software or run command in terminal:

sudo snap remove pycharm-community pycharm-professional

How to Install Python 3.6.1 in Ubuntu 16.04 LTS

Last updated: December 23, 2017

This quick tutorial is going to show you how to install the latest Python 3.6.1 in Ubuntu 16.04 LTS via PPA.

Ubuntu 16.04 comes with both Python 2.7 and Python 3.5 by default. You can install Python 3.6 along with them via a third-party PPA by doing following steps:

1. Open terminal via Ctrl+Alt+T or searching for “Terminal” from app launcher. When it opens, run command to add the PPA:

sudo add-apt-repository ppa:jonathonf/python-3.6

Type in your password (no visual feedback due to security reason) when it asks and hit Enter.

2. Then check updates and install Python 3.6 via commands:

sudo apt-get update

sudo apt-get install python3.6

Now you have three Python versions, use python command for version 2.7, python3 for version 3.5, and/or python3.6 for version 3.6.1.

3. To make python3 use the new installed python 3.6 instead of the default 3.5 release, run following 2 commands:

sudo update-alternatives --install /usr/bin/python3 python3 /usr/bin/python3.5 1

sudo update-alternatives --install /usr/bin/python3 python3 /usr/bin/python3.6 2

Finally switch between the two python versions for python3 via command:

sudo update-alternatives --config python3

After selecting version 3.6:

python3 -V

UPDATE: due to this bug, gnome-terminal won’t launch after step 3, a workaround is running following commands to recreate the symlink:

sudo rm /usr/bin/python3

sudo ln -s python3.5 /usr/bin/python3

PyCharm IDE

PyCharm 2017.1 was released yesterday. Features a much faster debugger, improved Python and JavaScript unit testing, and support for the six library.

PyCharm 2017.1 release highlights:

  • The Python debugger got forty times faster for Python 3.6 projects, and up to two times faster for older versions of Python
  • added support for the six compatibility library
  • Unit test runners for Python have been rebuilt from the ground up: you can now run any test configuration with PyCharm
  • Improved JavaScript unit testing: gutter icons indicating whether a test passed and support for Jest, Facebook’s JS testing framework (PyCharm Professional only)
  • Zero-latency typing is now on by default
  • Support for native Docker for Mac – no more need to use SOCAT! (PyCharm Professional only)
  • And more!

How to Install PyCharm 2017.1 in Ubuntu:

For the community version, the GetDeb repository has made the packages for Ubuntu 16.04, Ubuntu 16.10, and Linux Mint 18.

1. Open terminal via Ctrl+Alt+T for searching for “terminal” from start menu. When it opens, run command:

sudo sh -c 'echo "deb http://archive.getdeb.net/ubuntu $(lsb_release -sc)-getdeb apps" >> /etc/apt/sources.list.d/getdeb.list'

2. After adding the GetDeb repository, setup the GPG key via command:

wget -q -O - http://archive.getdeb.net/getdeb-archive.key | sudo apt-key add -

For Linux Mint, please enable GetDeb repository via Software Sources -> Additional Repositories.

3. Finally install PyCharm, the community version, via commands:

sudo apt update

sudo apt install pycharm

For the professional version, download the official Linux package from the link below, extract, and run the executable from bin/ folder (or read the document).

PyCharm Download Page

PyCharm IDE

This is a quick tutorial for beginners how to install the latest PyCharm Python IDE with Ubuntu integration via PPA.

The official PyCharm Linux binary packages lack shortcut launchers for Ubuntu desktop. To install the IDE with Ubuntu patch and receive future updates along with other system updates via Software Updater, you may use a third-party PPA maintained by Mystic-Mirage.

The PPA contains both the Professional and free Community version for Ubuntu 16.04, Ubuntu 15.10, Ubuntu 14.04, Ubuntu 12.04, and their derivatives.

PyCharm IDE

Mystic-Mirage has stopped updating the PPA, for those sticking to the latest Pycharm Community, use the GetDeb repository instead, see here.

1. Add the PPA.

Open terminal and paste (Shift+Ctrl+V) the command below and hit run:

sudo add-apt-repository ppa:mystic-mirage/pycharm

PyCharm PPA

Type in your password (no visual feedback) when it asks and hit Enter.

2. Update and install PyCharm.

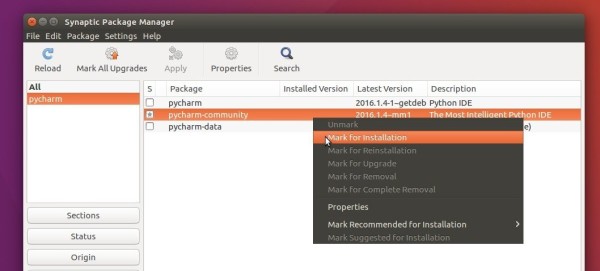
If you have Synaptic Package Manager installed, launch it and then search for and install pycharm (or pycharm-community) after clicking the Refresh button.

Install PyCharm via Synaptic

Or run the commands below one by one in terminal to install the Professional version:

sudo apt update

sudo apt install pycharm

For the community version, replace the last command with:

sudo apt install pycharm-community

Once a new version is released and made into PPA, you can simply launch Software Updater to upgrade it.

3. (Optional) To remove the PPA, go to Software & Updates -> Other Software tab. And PyCharm IDE can be removed with apt command with remove flag:

sudo apt remove pycharm pycharm-community

That’s it. Enjoy!

How to Install PyCharm IDE in Ubuntu 14.04/15.04

Last updated: November 28, 2016

PyCharm Ubuntu

Quick tutorial shows how to install the PyCharm, a Python IDE, in Ubuntu 14.04, Ubuntu 15.04, Linux Mint 17, or Elementary OS Freya via PPA.

PyCharm is an intelligent Python IDE with unique code assistance and analysis, for productive Python development on all levels. It features (community version):

  • Intelligent Editor, with code completion, on-the-fly error highlighting, auto-fixes, etc.
  • Automated code refactorings and rich navigation capabilities
  • Integrated debugger and unit testing support
  • Native VCS integrations
  • Customizable UI and key-bindings, with VIM
  • emulation available
  • And much more, all available under the Apache 2 license

PyCharm in Ubuntu

Install PyCharm from PPA:

Update Nov, 2016: The PPA now supports Ubuntu 16.04 and Ubuntu 16.10. The packages for Ubuntu 15.10 and older have been removed.

There’s a PPA repository for Ubuntu based users that contains both professional (30-day free trial) and community version of PyCharm packages. So far, Ubuntu 15.04, Ubuntu 14.04, Ubuntu 12.04 and their derivatives are supported.

1. To add the PPA, open terminal from the Dash, Launcher, or via Ctrl+Alt+T shortcut keys. When it opens, run command:

sudo add-apt-repository ppa:mystic-mirage/pycharm

pycharm-ide-ppa

2. After adding the PPA, update system package cache and install the IDE via Synaptic Package Manager. Or just run below commands one by one in terminal:

sudo apt-get update

sudo apt-get install pycharm

You may replace last command via sudo apt-get install pycharm-community to install the community version which is free.

For those who don’t want to add PPA, grab the .deb installer for either professional or community version from the launchpad page.