Archives For November 30, 1999

You Can Now Install Skype in Ubuntu via Snap

Last updated: February 1, 2018

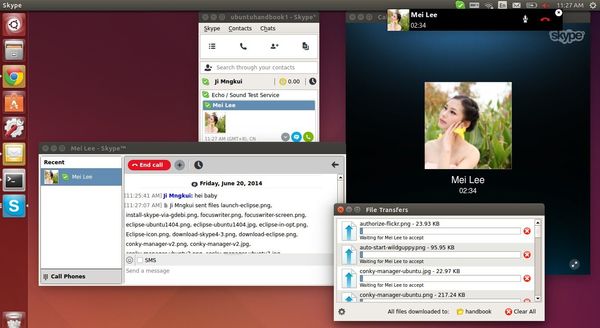
Skype for Linux

Skype for Linux now is available as snap, the universal Linux app packaging format, with easy install and automatic updates.

London, UK – 1st February 2018 – Canonical, the company behind Ubuntu, announces today that Skype is now available as a snap, the universal Linux app packaging format. Available as of today, the release means that Skype can deliver its communication service to a wider range of Linux users, including millions on Ubuntu.“, it’s announced in Ubuntu Insights.

For Ubuntu 16.04 users who’ve never installed a snap package, first install snapd daemon in terminal (Ctrl+Alt+T):

sudo apt-get install snapd snapd-xdg-open

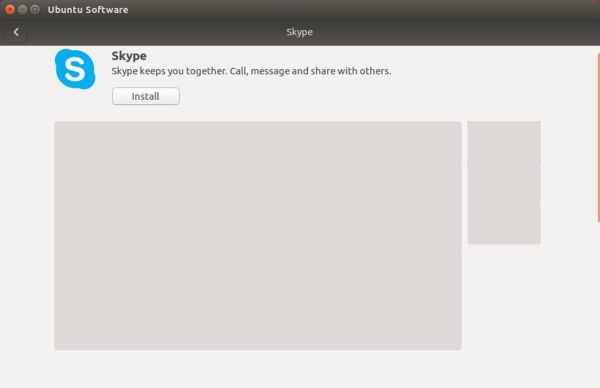
The snap package can be installed directly from Ubuntu Software. At the moment, it’s skype 8.14.0.10:

You can also open terminal and run command to install the snap:

snap install skype --classic

And the snap automatic updates itself when a new release is out and published.

To launch Skype, search it from application launcher (may need re-login) or run command:

/snap/bin/skype

Uninstall:

To uninstall the snap, either use Ubuntu Software or run command:

snap remove skype

Skype 5.0 for Linux

Skype 5.0 for Linux has been announced a few hours ago. It’s now in the beta stage.

What’s New in Skype 5.0 for Linux:

  • Calls to mobiles and landlines with Skype credit
  • one-to-one VIDEO CALLS support from Linux to Skype for Android, iOS, Windows, and Mac.
  • View shared screens from other Skype desktop clients
  • Unity launcher now shows the number of unread conversations
  • online contacts in contact list now include Away and Do Not Disturb statuses.

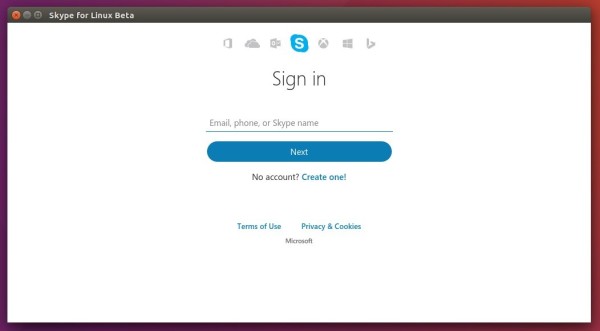
Skype for Linux Beta

How to Install Skype 5.0 for Linux in Ubuntu / Linux Mint:

The new release can be installed from the Skype apt repository, simply open terminal from Unity Dash, App Launcher, or via Ctrl+Alt+T shortcut key and run following commands one by one:

1. Make sure you have ‘apt-transport-https’ installed by running command:

dpkg -s apt-transport-https > /dev/null || bash -c "sudo apt-get update; sudo apt-get install apt-transport-https -y" 

Type in your password (no visual feedback) when it prompts and hit Enter.

check-apt-transporthttps

2. Download and install Skype GPG key via command:

curl https://repo.skype.com/data/SKYPE-GPG-KEY | sudo apt-key add -

3. Add Skype apt repository to your system via command:

echo "deb [arch=amd64] https://repo.skype.com/deb stable main" | sudo tee /etc/apt/sources.list.d/skype-stable.list

4. Finally, install Skype for Linux either via Synaptic Package Manager or by running following commands in terminal:

sudo apt update

sudo apt install skypeforlinux

How to Remove:

For any reason you can remove Skype for Linux either via Synaptic Package Manager or by running the command:

sudo apt remove skypeforlinux && sudo apt autoremove

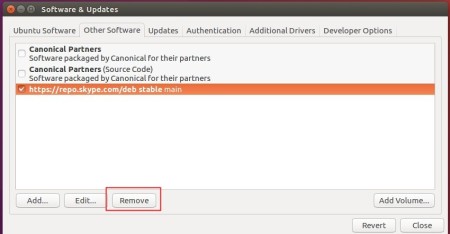
And you can remove the Skype repository via Software & Updates -> Other Software.

remove-skype-repo

How to Install Skype 4.3 in Ubuntu 16.04

Last updated: April 13, 2016

Skype Ubuntu 16.04

Skype for Linux sucks. It is lagging behind and has lots of problems, but some of Ubuntu users may still need this application.

Here’s the quick tip for beginners how to install Skype 4.3 in Ubuntu 16.04 LTS:

1. Enable Canonical Partners Repository

Canonical partners repository offers access to proprietary and closed-source software including Skype for Linux and is not enabled by default.

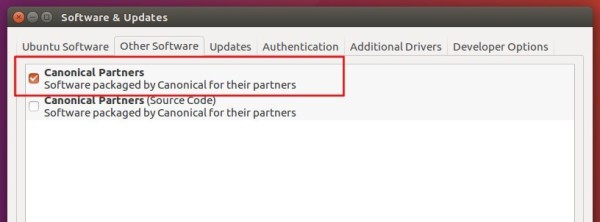
To enable it, launch Software & Updater from Unity Dash or System Settings, then check the first box in Other Software tab.

enable canonical partners

The second “Canonical Partners (Source Code)” is not required unless you want to get software sources and make some changes.

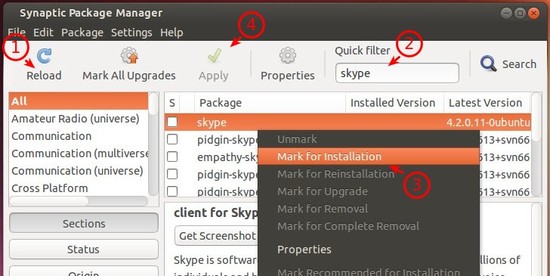
2. Skype won’t be listing in the Software App even after adding the partners repository. To install it, use Synaptic Package Manager (need to install):

  • click Reload to update cache
  • click Search and search Skype
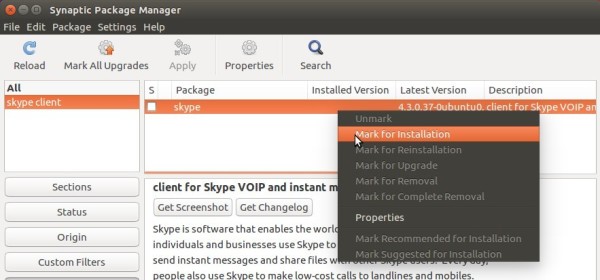
  • right-click skype package from the list and select “Mark for Installation”
  • click Apply to apply changes

install-skype-synaptic

Or just open terminal (Ctrl+Alt+T) and paste following command and hit run:

sudo apt update && sudo apt install skype

Type in your password (no visual feedback while typing password) when it asks and hit Enter to continue.

install-skype

Finally launch Skype from Unity Dash or App Launcher and enjoy!

Skype Ubuntu 15.10

Quick tutorial that shows beginner how to install the Skype 4.3 client for Linux in Ubuntu 15.10 Wily Werewolf.

This just is a rewritten of one my old tutorial when the 4.3 release was released to make the installation more clear and easy to understand!

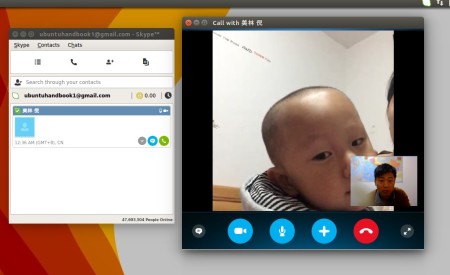
Skype Call

Skype Audio/Video Call

1. Enable Canonical Partners repository.

The partner repositories offer access to proprietary and closed-source software and are not enabled by default, e.g., adobe-flashplugin, google-cloud-sdk, and skype.

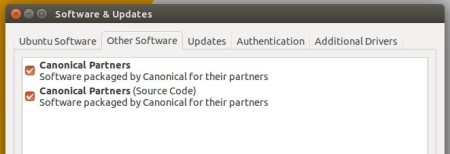
To add the repository, launch Software & Updates and then go to Other Software tab. Check first two boxes as shown below:

Canonical Partners repository

2. Refresh package cache and install Skype

For graphical way, install Synaptic Package Manager in Software Center. Then launch the software to refresh your system repositories, search for and install skype.

Install skype via Synaptic

For those who prefer Linux commands, launch terminal from the Unity Dash, App Launcher, or via Ctrl+Alt+T shortcut key. When it opens, run below commands one by one:

sudo apt-get update

sudo apt-get install skype

Finally, launch the client from the Dash/Launcher and Enjoy!

Skype Web UI

Skype native client available in Ubuntu partner repository sucks? Try this unofficial client based on Skype Web version. .

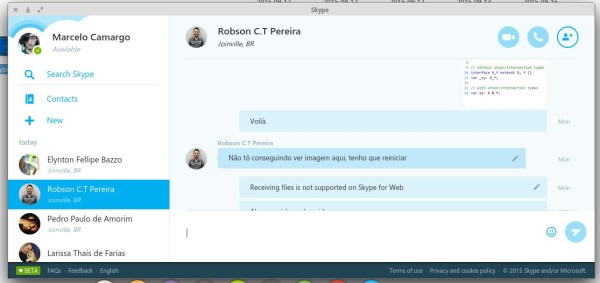
Microsoft provides a web version of Skype allows users to chat and call friends using a web browser. For Linux, you can run the Skype Web as a desktop application (without browser) via an open source program called skype-unofficial-client.

The project is created two days ago. It’s built on top of node webkit and uses system’s notification.

Skype Web client

How to install:

This software works on all Ubuntu releases and other Linux. Just open terminal from the Dash, App Launcher, or via Ctrl+Alt+T shortcut keys.

launch-terminal-emulator

When it opens, run below commands one by one:

1. Download the source:

git clone https://github.com/haskellcamargo/skype-unofficial-client.git

2. Navigate to the source folder in some terminal via:

cd skype-unofficial-client

3. Depends on your OS type, check out top-right corner shutdown menu -> About Computer, select run:

For 32-bit OS run:

sudo make linux_x86

For 64-bit OS run:

sudo make linux_x64

You can now launch it from main menu or via /opt/skype_unofficial_client/skype command. And remove the source folder in your home folder to clean up.

(Optional) To remove this unofficial client, just run below commands to remove the installation files:

sudo rm -R /opt/skype_unofficial_client/

sudo rm /usr/share/applications/Skype.desktop

sudo rm /usr/bin/skype-desktop

via

install Skype 4.3 in Ubuntu

The latest skype for Linux 4.3 was released in the middle of June with updated UI, new cloud-based Group chat experience. Now it’s available in the Canonical Partners repository for Ubuntu 14.10, Ubuntu 14.04, Ubuntu 12.04 and their derivatives.

From now on, enable Canonical Partners repository via Software & Updates utility, then you are able to upgrade to Skype 4.3 by running regular system updates via Software Updater

Skype 4.3 in Ubuntu 14.04

What’s New in Skype 4.3:

  • An updated UI
  • Our new cloud-based Group Chat experience
  • More reliable file transfer support when using multiple devices at once
  • Greater accessibility by blind and visually impaired users
  • PulseAudio 3.0 and 4.0 support
  • Lot of bug fixes
  • Skype 4.3 release note.

Install / Upgrade to Skype 4.3:

1. Open Software & Updates or Software Sources from Unity Dash, go to Other Software tab and enable Canonical Partners repository.

Enable canonical partners repository

2. To install Skype, just search for and install it from Ubuntu Software Center.

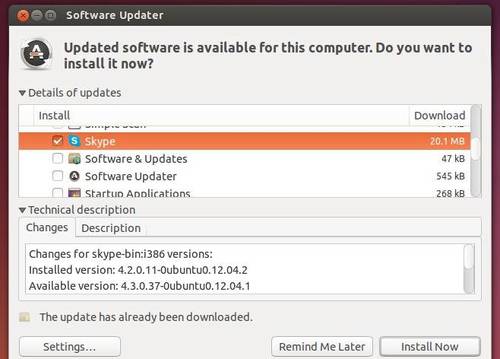
To upgrade Skype, open Software Updater, after checking for updates, you’ll see Skype 4.3 available for update:

Upgrade to Skype 4.3

If you are familiar with command line, just run:

sudo apt-get update; sudo apt-get install skype

Skype 4.3 Ubuntu 14.04

install Skype 4.3 in Ubuntu

Skype for Linux has been updated to version 4.3.0.37 with updated UI, new cloud-based Group chat experience, and more.

Microsoft finally announced Skype for Linux 4.3 on June 18, 2014. The new release dropped support for direct Alsa support, now it uses PulseAudio for better calling experience. Also Skype 4.3 contains below changes:

  • An updated UI
  • Our new cloud-based Group Chat experience
  • More reliable file transfer support when using multiple devices at once
  • Greater accessibility by blind and visually impaired users
  • PulseAudio 3.0 and 4.0 support
  • Lot of bug fixes
  • Skype 4.3 release note.

Skype 4.3 in Ubuntu 14.04

Install Skype 4.3 in Ubuntu or Linux Mint:

Canonical has finally made the latest Skype 4.3 into the partners repository, which means only do step a.), b.), and c.) will install Skype 4.3 in Ubuntu 14.04 and Ubuntu 12.04

At the moment, Skype for Linux 4.3 is not available in any Linux repository. Below steps will tell you how to install the official .deb package in Ubuntu 14.04, Ubuntu 12.04, and their derivatives.

1. Install required libraries (for 64-bit system)

Skype website only provides 32-bit package for Ubuntu 12.04 and higher. You’re unable to install it directly on 64-bit system due to dependencies issue.

However, install the old skype from Canonical partners repository will also install the required libraries we need for NEW skype.

a.) Press Ctrl+Alt+T on keyboard to open terminal. When it opens, run commands one by one to remove old skype and .skype folder:

sudo apt-get remove skype skype-bin

rm -rf ~/.skype

b.) Open “Software & Updates” and enable Canonical partners repository under Other Software tab.
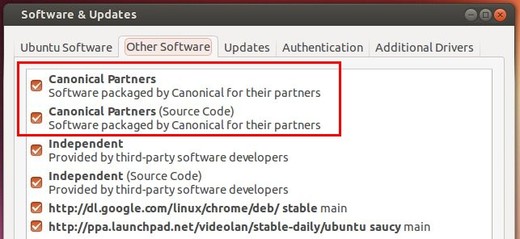
Enable canonical partners repository

c.) Press Ctrl+Alt+T on keyboard to open terminal. When it opens, run the commands below to install old skype:

sudo apt-get update; sudo apt-get install skype

UPDATE: Below steps are no longer required! Just do the above step a.), b.) and c.) will install Skype 4.3 in your system.

c.) Once installed, remove the old skype package:

sudo apt-get remove skype skype-bin

2. Download & install Skype 4.3

Download the “Ubuntu 12.04 (multiarch)” package from: www.skype.com/go/linux
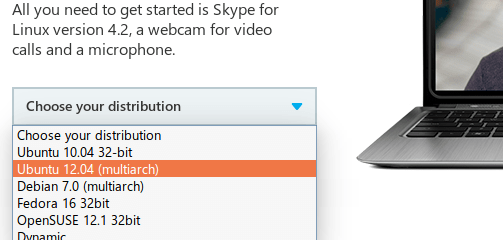
Download Skype 4.3 for Linux

Click to install the package via Ubuntu Software Center. Or run command below in terminal (Ctrl+Alt+T):

cd ~/Downloads/ && sudo dpkg -i skype-ubuntu-precise_*.deb

Once installed, you’re able to open Skype 4.3 from Unity Dash result:
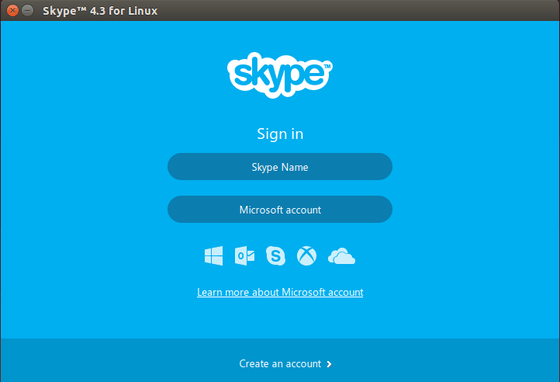
Skype 4.3 Ubuntu 14.04

Ubuntu 13.10 Quick Tip: How to Install Skype

Last updated: October 27, 2013

skype video call

This quick tip is going to show beginners how to install Skype in Ubuntu 13.10 Saucy Salamander.

Ubuntu 13.10 final will be release on October 17th. Now it’s in beta 2. If you’re going to install Skype on Ubuntu Desktop, this tutorial may help.

1.) Skype is available in Canonical Partners repository, so first we’re going to enable this repository. Search and open Software & Updates from Unity Dash. When it opens, navigate to Other Software tab. Check on the first two lines.

enable canonical partners repository

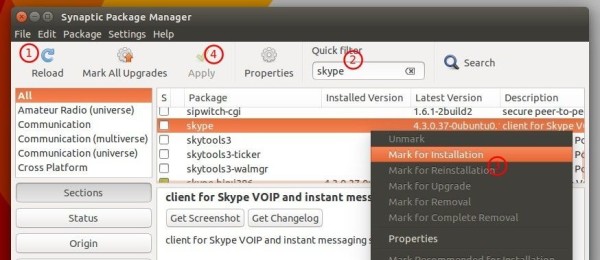
2.) Install Synaptic Package Manager from Ubuntu Software Center. When done, you can use the tool to install Skype (see picture):

install skype ubuntu

If you don’t want to install Synaptic, you can also run below commands instead in terminal (Ctrl+Alt+T):

sudo apt-get update; sudo apt-get install skype

To fix Skype no sound or distorted sound issues occured on Ubuntu 13.10:

sudo sed -i 's/^Exec=.*/Exec=env PULSE_LATENCY_MSEC=30 skype %U/' /usr/share/applications/skype.desktop