Archives For November 30, 1999

Wallpaper Contest for the upcoming Ubuntu 24.10, Oracular Oriole, is open, accept artwork for the 20th anniversary!

Like the last wallpaper contest, the artwork submissions are separated into 4 categories. Each category will have 2 winners, and finally 8 mixed images will be included in the Ubuntu 24.10 disc image as optional wallpapers.

With Ubuntu 24.10, Ubuntu is reaching the 20th anniversary. So, this time the contest includes a category that’s specially for the two decade anniversary of Ubuntu. While 3 others are Mascot Theme, Digital / Abstract, and Photography.

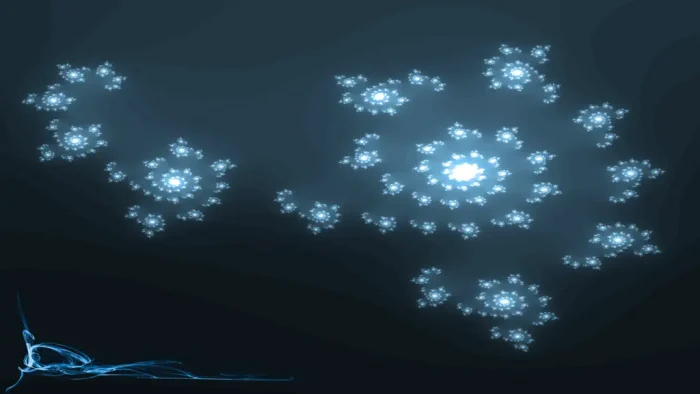
image by romactu1 from 24.10 wallpaper contest

Continue Reading…

Ubuntu Studio, the official Ubuntu flavor, opens wallpaper competition for the next 24.04 LTS release!

Ubuntu Studio is one of the official Ubuntu flavors, that features KDE Plasma desktop environment and aims to general multimedia production.

The developer team opens the wallpaper competition on February 16. All users (needs login) can submit their own artworks until March 11. And 5 winner images will be shipped (as optional wallpapers) in Ubuntu Studio 24.04 iso image.

image name Charge by Aaron Rainbolt

Like the Ubuntu 24.04 wallpaper competition, the AI generated artwork is NOT allowed in this one, due to active legal debates and license issue of the popular AI generation tools.

The competition rules include:

  • Submitter must own the rights to the image.
  • Full quality image must be 3840×2160 px. PNG and WebP recommended.
  • No watermark, name or logo in image.
  • image license CC BY-SA 4.0 or CC BY 4.0

Differently, this competition will NOT include any wallpaper that wins in the Ubuntu 24.04 Wallpaper Competition (see link above).

And, due to lack of time constraints, there will be no community vote this time, instead, Ubuntu Studio Project Leader and Art Leader will judge which images win.

The entrance of the contest:

Wallpaper Contest for the next Ubuntu 24.04 LTS, Noble Numbat, is open! Top 8 winner images will be shipped in the iso image.

A bit different to the previous contests, this time the submissions are separated into 4 categories: Mascot Theme, Digital / Abstract Art, Nature, and Other. Each category will have 2 winners, and finally 8 mixed images will be made as optional wallpapers in Ubuntu 24.04 out-of-the-box.

The AI generated artwork is NOT allowed! Because there are active legal debates on the ownership of AI generated artwork and whether it can be copyrighted or not. And, many popular AI generation tools use a license that does not align with those for the contest.

image via meetdilip


Continue Reading…

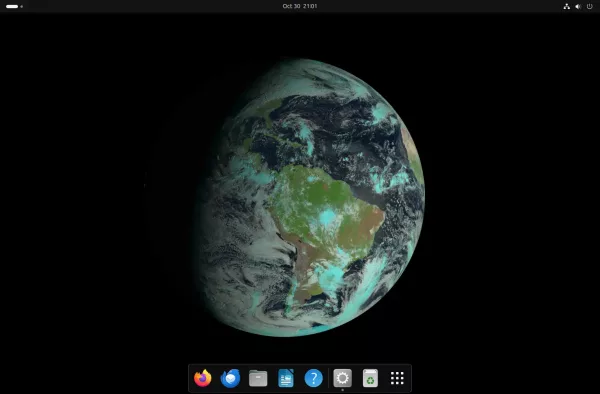
This simple tutorial shows how to display live earth as desktop wallpaper in Ubuntu 22.04 and Ubuntu 24.04.

Ubuntu has Wallch wallpaper changer in system repository, which has option to show live earth as wallpaper. However, the app is no longer updated and the feature is broken for all current Ubuntu releases.

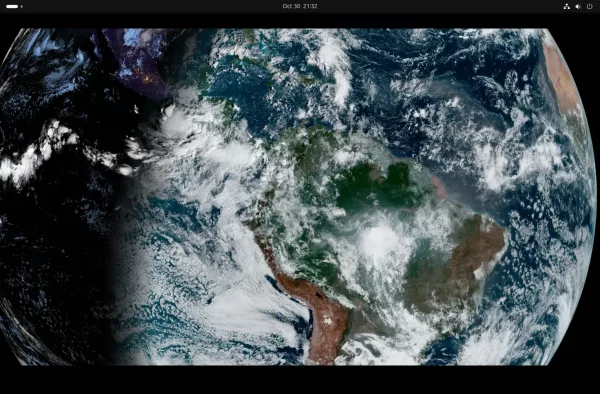
If you’re interested in viewing high-resolution 3d real-time image of the earth in your desktop, then there’s another free open-source tool can do the job.

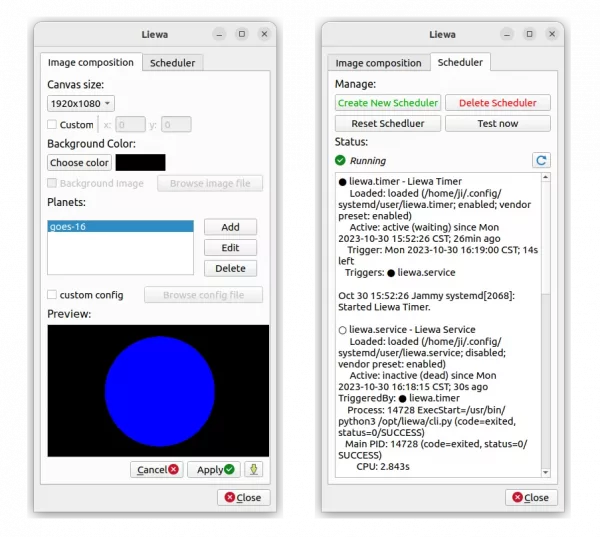
It’s liewa (Live Earth Wallpapers), that supports all known geostationary satellites for the high resolution sentinel images, Nasa Solar Dynamics Observatory images and NASA astronomy picture of the day (Apod)!

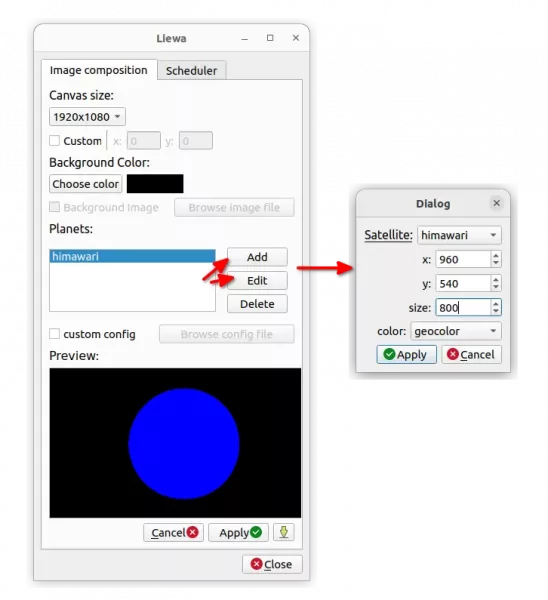
By default, it uses GEOS-16 satellite for the earth image, that display a small earth in center of your screen. Though, the app has setting options to add or edit satellites.

Add, configure satellites

So, you can have more than one real-time images of the earth from different satellites displayed on your screen at the same time, in different size, with either natural color or geocolor.

How to Install Live Earth Wallpapers (Liewa)

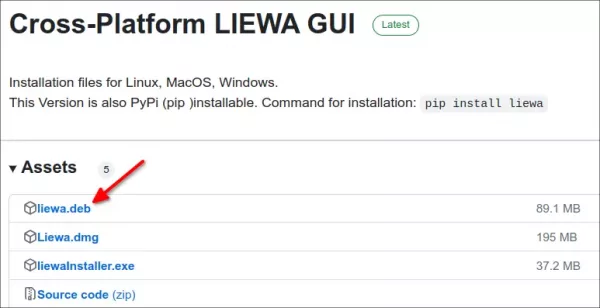
The tool provides .deb package for downloading in its Github releases page:

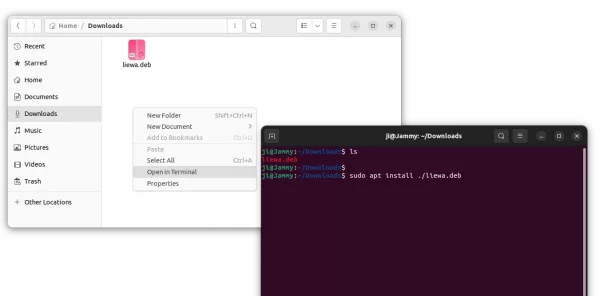
After downloaded the .deb package, right-click on ‘Downloads’ folder and select “Open in Terminal”. Finally, run command to install it in pop-up terminal window:

sudo apt install ./liewa.deb

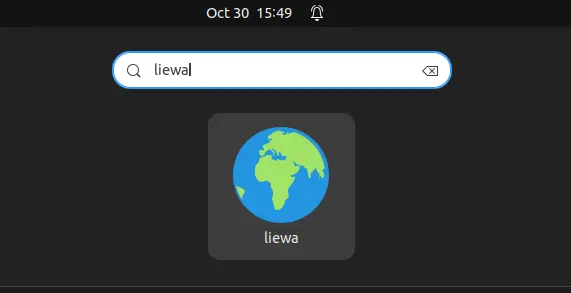
Finally, launch it from either start/applications menu or the overview screen depends on your desktop environment.

When the app window opens, configure canvas size, satellites, etc in first tab, then click on “Create New Scheduler” in Scheduler tab should start the live earth wallpaper.

Though, it takes quite a few seconds to apply, waiting for automatically start the service. If you can’t wait, try to open terminal (Ctrl+Alt+T) and run command to manually start the service:

systemctl status --user liewa

Uninstall:

You can stop the live earth wallpaper by clicking on “Delete Scheduler” button in app window, then set another wallpaper via ‘Background’ settings.

To remove the software, simply open terminal (Ctrl+Alt+T) and run command:

sudo apt remove --autoremove liewa

Got photo images in both light and dark style? There’s a super simple application to set them as dynamic wallpapers in GNOME 42+ desktop.

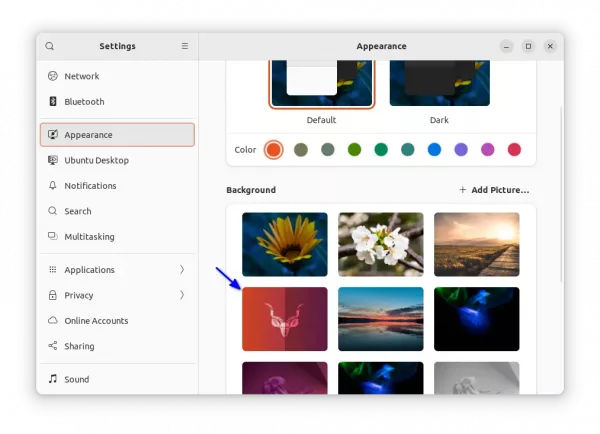
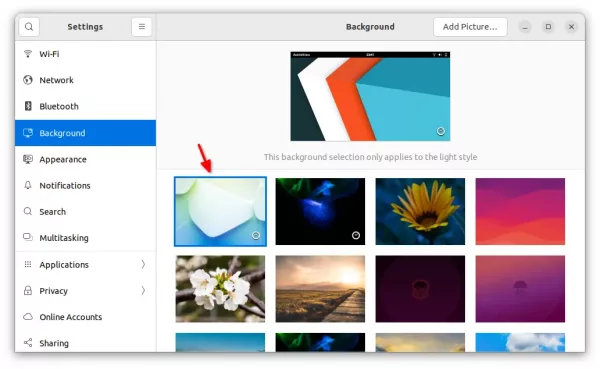
As you may know, GNOME 42+ support light and dark wallpapers that change automatically depends on system color scheme. Ubuntu 22.04 does not support the feature, but in upcoming Ubuntu 22.10 you may add your own ones into wallpaper selection dialog:

It’s easy to group your light and dark photo images as a single wallpaper selection. Just create a XML file under “.local/share/gnome-background-properties” (create folder if not exist), and write following rules:

<?xml version="1.0"?>
<!DOCTYPE wallpapers SYSTEM "gnome-wp-list.dtd">
<wallpapers>
  <wallpaper deleted="false">
    <name>TYPE_NAME_HERE</name>
    <filename>/PATH/TO/PICTURE_LIGHT</filename>
    <filename-dark>/PATH/TO/PICTURE_DARK</filename-dark>
    <options>zoom</options>
    <shade_type>solid</shade_type>
    <pcolor>#3465a4</pcolor>
    <scolor>#000000</scolor>
  </wallpaper>
</wallpapers>

It will then be available in the “Appearance” settings pages (Ubuntu 22.10 will merge ‘Background’ into ‘Appearance’).

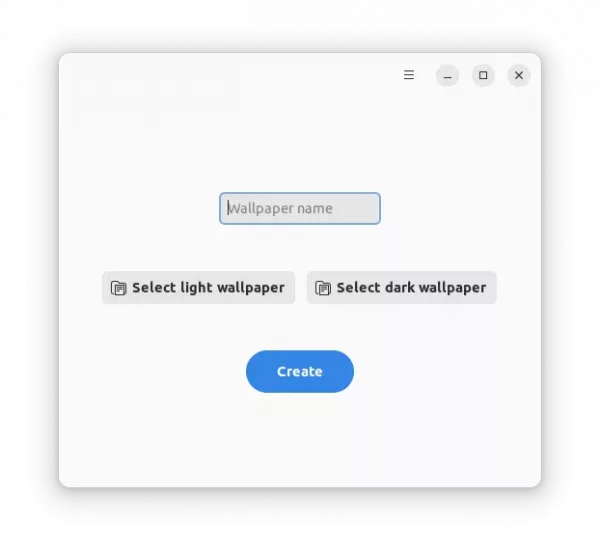
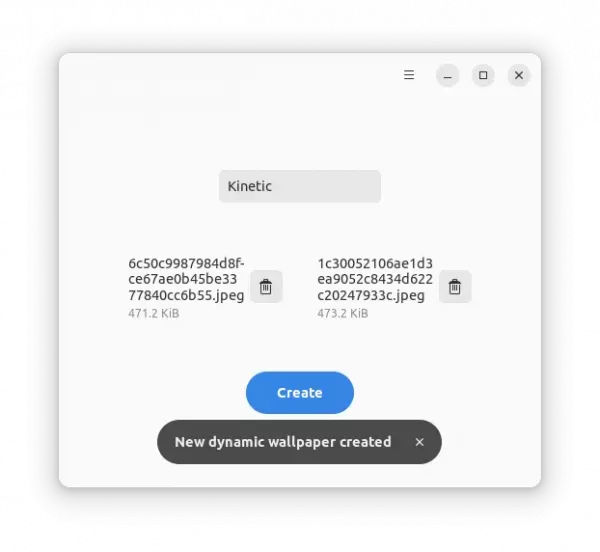
To make life easier, a stupid simple application called “Dynamic Wallpaper” is created to do the job. With it, you may just type a name, select the 2 photo images and click “Create” button.

As mentioned above, it automatically creates a XML file with the name you typed, and saves to “.local/share/gnome-background-properties” directory. It also makes a copy of the photo images into “.local/share/backgrounds“, and refers to them in the XML file.

When done, you may go to “Appearance” in GNOME Control Center (aka “Settings” utility) to select that wallpapers.

How to Install the “Dynamic Wallpaper” app

The tool is available to install as Flatpak package, that works in Ubuntu 22.10+, Fedora 36+, Arch and Manjaro Linux with GNOME Desktop.

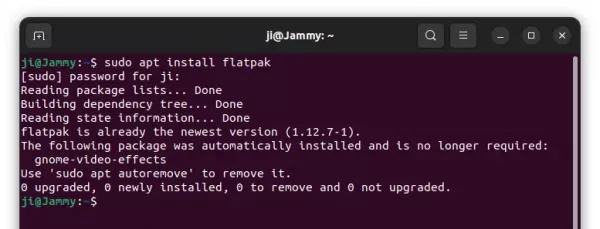
1. First, search for and open terminal from ‘Activities’ overview (or press Ctrl+Alt+T on Ubuntu). When it opens, run command to install Flatpak daemon:

sudo apt install flatpak

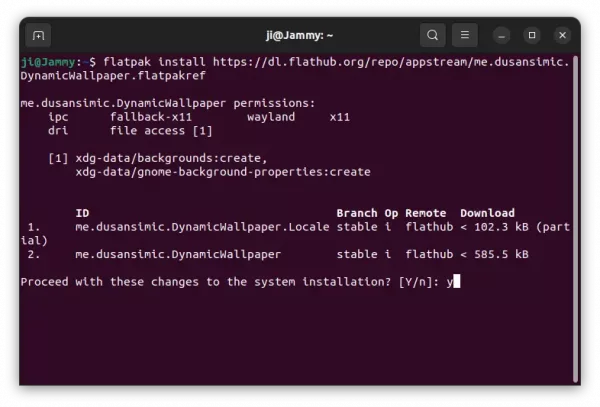
2. Next, run the command below to install the tool:

flatpak install https://dl.flathub.org/repo/appstream/me.dusansimic.DynamicWallpaper.flatpakref

If you’re first time installing a Flatpak package, there will be also hundred MB run-time libraries to install.

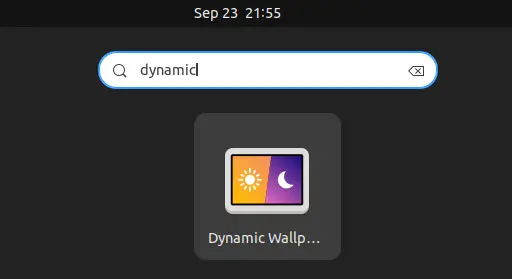
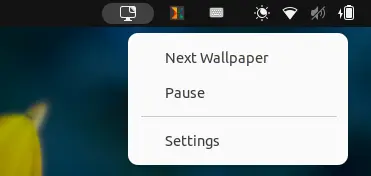
Finally, click the top-left corner ‘Activities’, then search for and open the application:

Uninstall:

To remove the tool, open terminal and run command:

flatpak uninstall --delete-data me.dusansimic.DynamicWallpaper

And clear useless libraries via flatpak uninstall --unused.

This quick tutorial shows how to easily set a solid color as background wallpaper in your Ubuntu 22.04 or Ubuntu 24.04 PC/laptop.

To stay focused and increase productivity, user may set a solid color desktop background which can also reduce eye strain. And, a black background will consume significantly less power especially for AMOLED displays.

If you already downloaded a solid color wallpaper from web, or created one via an image editor, simply click the “Add Picture” button in system settings -> Background (or Appearance). Then, your image will be there as a choice.
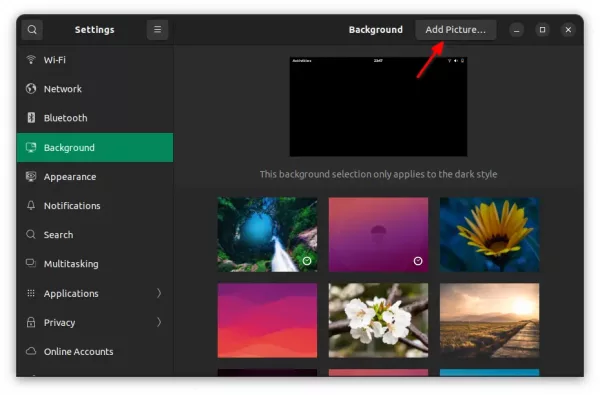
Add Personal Wallpapers

Set Solid color background via Dconf Editor

Instead of using an image file, there’s a hidden option that could work better! Not only for Ubuntu, it also works on Fedora, Debian, Manjaro, and other Linux with GNOME Desktop.

1. Firstly, search for and install “Dconf Editor” configuration tool from either Ubuntu Software or App Center:
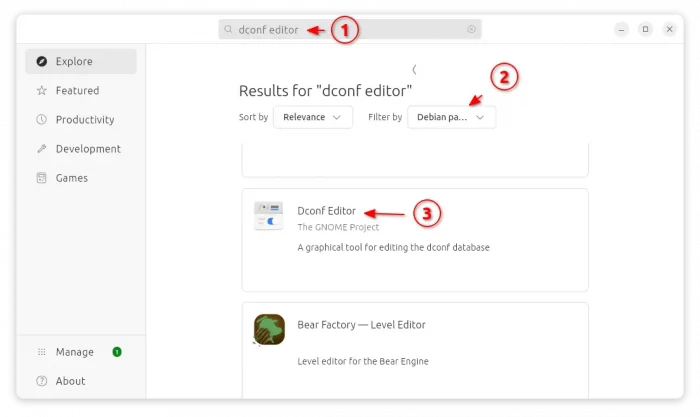
Or press Ctrl+Alt+T on keyboard, and run the command below in pop-up terminal to install the tool:

sudo apt install dconf-editor

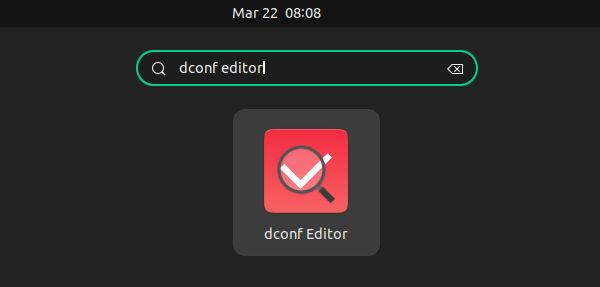
2. Once installed, either press Windows (Super) key on keyboard or click the top-left corner “Activities”, then search for and open ‘Dconf Editor’
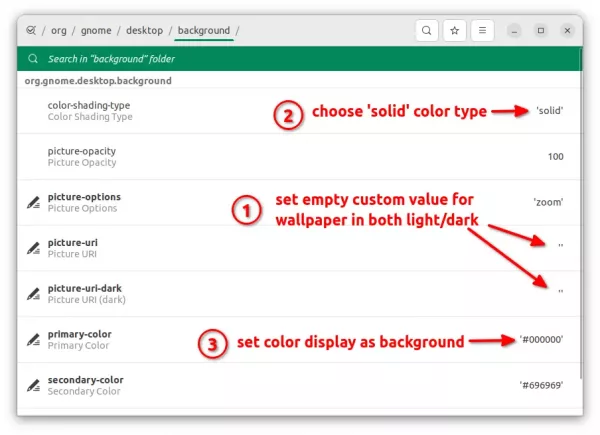
3. When the tool opens, navigate to ‘org/gnome/desktop/background‘ page. There you need to do:

  • Clear the value of ‘picture-uri‘ and ‘picture-uri-dark to disable current wallpapers for both light and dark mode. Click them one by one, disable “use default value”, and set empty content for custom value.
  • Set ‘color-shading-type’ to ‘solid’ (usually default).
  • Change value of ‘primary-color’ to display as background. (#000000 for dark, #ffffff for white. Or use color picker tool to get other color value)

For choice, you may set gradient color background, by setting ‘color-shading-type’ to ‘vertical’ or ‘horizontal’, and set color value of “secondary-color”.
Linux commands to set solid color background.

If you’re familiar with Linux command line, press Ctrl+Alt+T on keyboard to open a terminal window.

When it opens, run the commands below one by one to disable current wallpapers for light and dark mode:

gsettings set org.gnome.desktop.background picture-uri ''
gsettings set org.gnome.desktop.background picture-uri-dark ''

In case you’ve set gradient color background before, reset the “color-shading-type” via command:

gsettings reset org.gnome.desktop.background color-shading-type

Finally, run the command below in set a solid color background (total dark for example):

gsettings set org.gnome.desktop.background primary-color '#000000'

How to Restore:

To restore the changes, simply open Settings -> Background and select a wallpaper as you want. Just note that you need to do this in both Light and Dark mode in Ubuntu 22.04 LTS.

For other Desktop Environments:

The steps above was written for the default GNOME Desktop. For other desktop environments, see below:

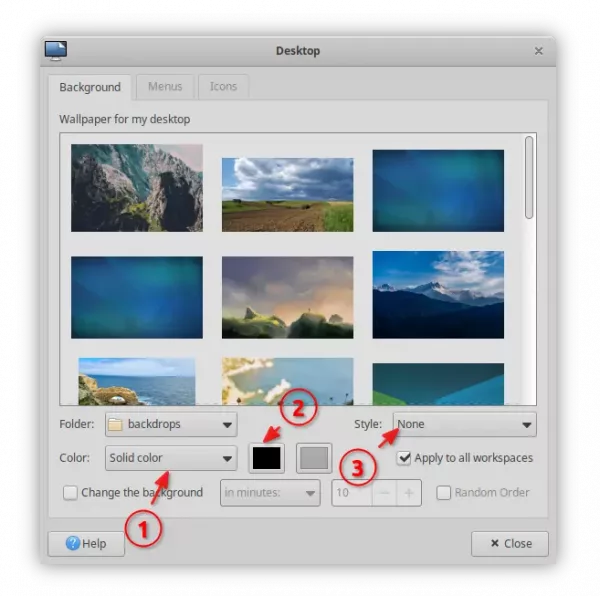
XFCE (XUbuntu)

For XFCE, the default desktop in XUbuntu and many other Linux, right-click on desktop and select “Desktop Settings“.

In pop-up dialog, choose “Solid color” from Color select box, and pick a color right after it. Finally, set Style to “None” to make it work.
KDE Plasma (KUbuntu, Ubuntu Studio)

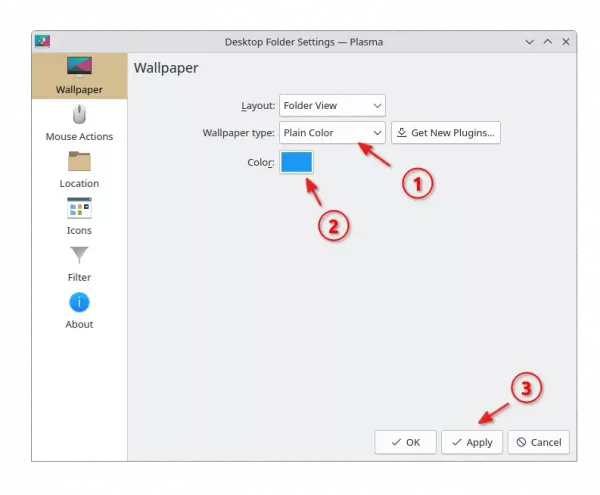
KDE user can right-click on desktop and select “Configure Desktop and Wallpaper” to launch the configure dialog.

Then, choose “Plain Color” as Wallpaper type, and set your favorite color, finally click “Apply”.
MATE (Ubuntu MATE)

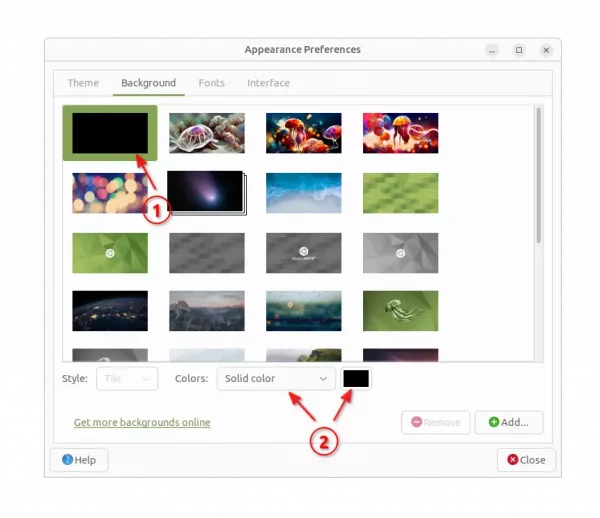
For MATE desktop, also right-click on desktop and select “Change Desktop Background” from pop-up menu.

Then, select the first image in top-left as background, and choose “Solid color” from Colors selection box, and click color picker to choose a color as you want.
Cinnamon (Ubuntu Cinnamon)

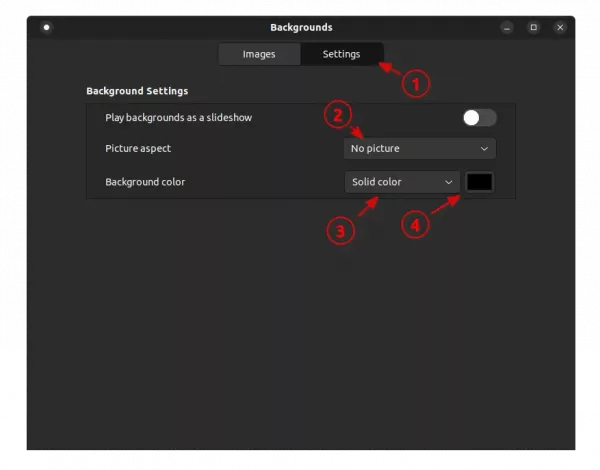
Also, right-click on desktop and select “Change Desktop Background”.

Then in pop-up dialog, navigate to “Settings” page, and do:

  • Set “Picture aspect” to No picture.
  • Change Background color to Solid color and choose a color.
LXQt (LUbuntu)

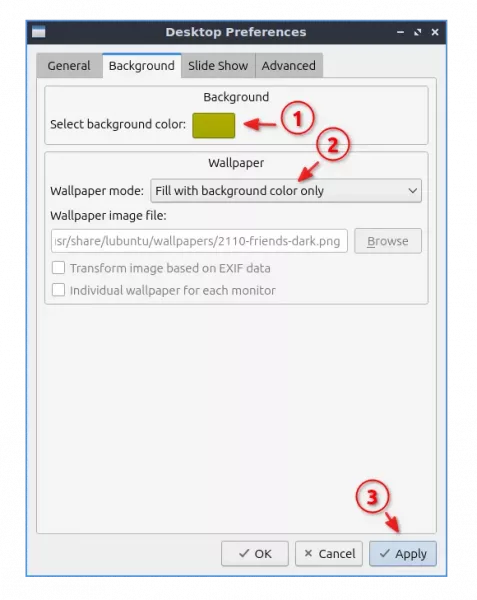
For LXQt desktop, right-click on desktop and select “Desktop Preferences” from context menu.

In pop-up dialog, navigate to “Background” tab, then do:

  • Choose color via the button under “Background”.
  • Select “Fill with background color only” for Wallpaper mode.
  • Finally, click Apply.
Got some beautiful photo images? Let me show you how to set them as desktop slideshow, so it will be your Ubuntu background wallpaper and switch automatically in certain time interval.

Option 1: Use Shotwell

Using Shotwell is the easiest way to do the job in Ubuntu. You don’t need to install anything, as it available out-of-the-box.

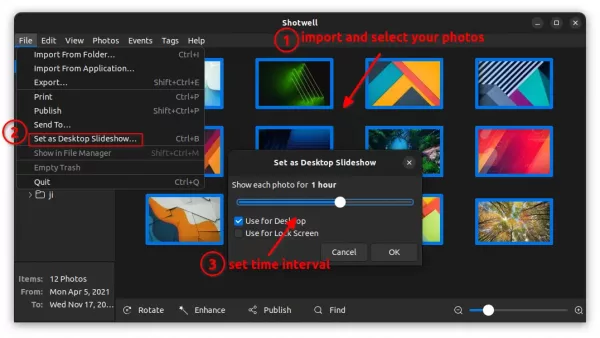
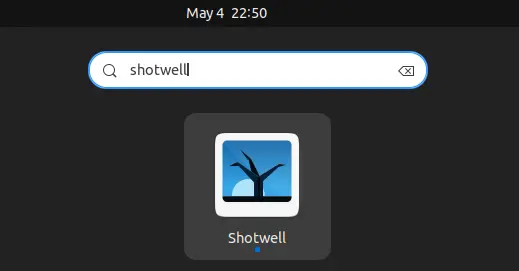
Just search for and open the app from Activities overview screen. Import (via File menu) and select your photos (Ctrl or Shift + Click), then you may use “File -> Set as Desktop Slideshow” option to set them as wallpaper and change automatically.

You may set time interval from 5 seconds up to 1 day. And, the slideshow will work even in next boot, until you select another wallpaper in “System Settings -> Background” page.
Option 2: Use Gnome Extension

There’s an extension can do the job, not only for Ubuntu, but also for Fedora and other Linux using GNOME desktop (e.g., Arch, Manjaro, CentOS, etc).

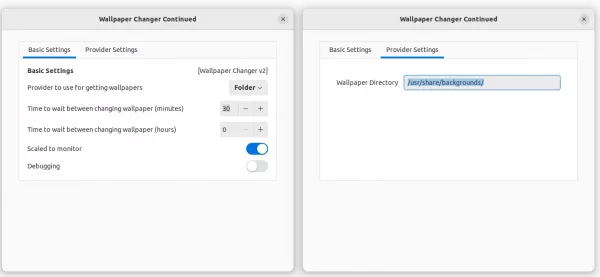
It’s light, simple and just do the basic function as well as options to manually go next wallpaper, and stop changing automatically.

Install the extension

Firstly, press Ctrl+Alt+T on keyboard to open terminal and run the command to install the agent package:

sudo apt install chrome-gnome-shell

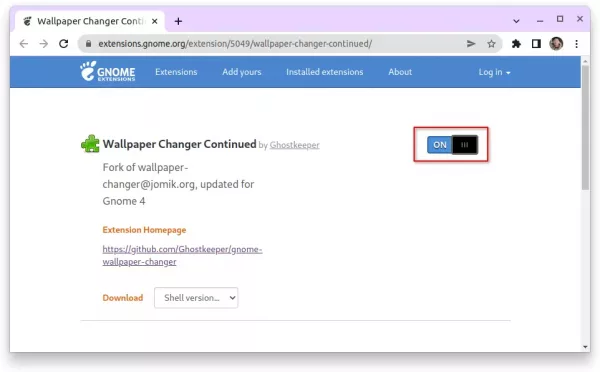
Secondly, turn on the toggle icon in the link page below to install the extension.

NOTE: The pre-installed Firefox does not support installing Gnome Extension so far, use another browser or install the Deb version instead. And, for the first time, you need to install browser extension and refresh the page to see the toggle button.

Option 3: Use Variety

Besides automatically changing your desktop wallpaper, Variety is a good choice that also supports for downloading photo images from flickr, deviantart, unsplash, etc.

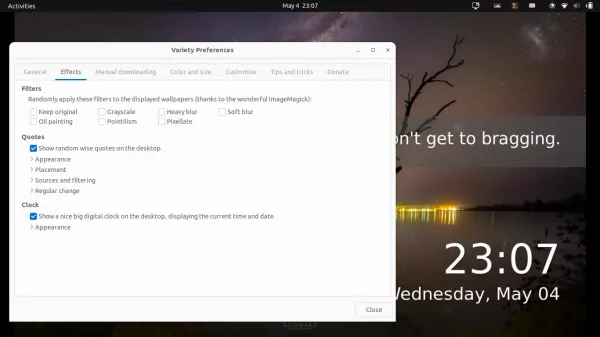
What makes it different is that it supports displaying custom text and digital clock on wallpaper. As well, it can apply random effect to your wallpapers, e.g., blur, oil painting.

To install Variety in Ubuntu, either press Ctrl+Alt+T on keyboard to open terminal and run command:

sudo apt install variety

or just search for and click install in Ubuntu Software.

Option 4: Use Wallch

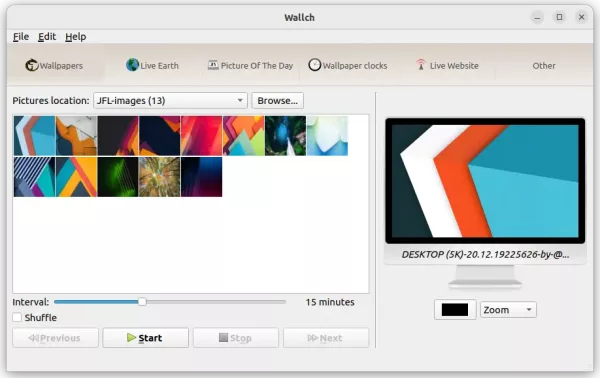
Wallch was a popular wallpaper managing app for Linux. Though it’s not been updated for a long period of time, the basic desktop slideshow function still works. And, it can be a choice for old desktop environments.

However, the live earth, daily picture, wallpaper clocks and live website features never work in my case.

To install Wallch, either use Ubuntu Software or run command in terminal:

sudo apt install wallch

Option 5: Group your images via XML file

If you would like to add your desktop slideshow as a choice in Background selection page, then this is for you.

1.) Create XML:

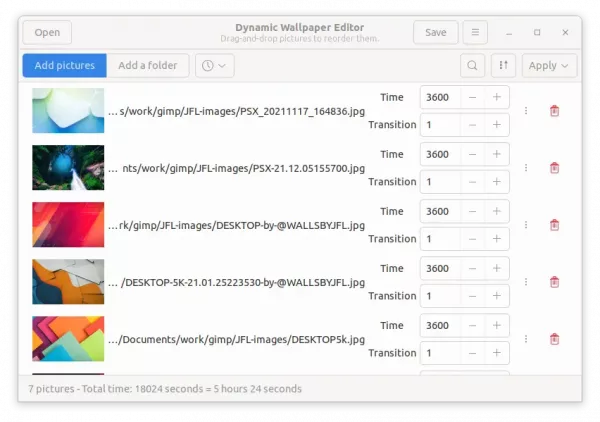
Firstly, you need to create a XML file that defines which photo images to use, how long each wallpaper will be displayed, transition time, etc.

To make things easy, you may install “Dynamic Wallpaper Editor” by running following 2 commands one by one in terminal (Ctrl+Alt+T):

sudo apt install flatpak
flatpak install https://dl.flathub.org/repo/appstream/com.github.maoschanz.DynamicWallpaperEditor.flatpakref

2.) Make use of XML:

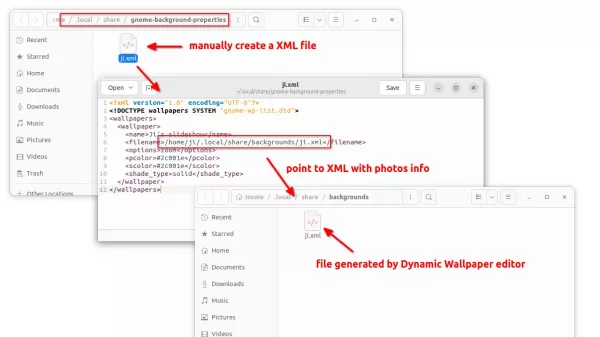
After creating XML file or files, you need to put them into “~/.local/share/backgrounds” folder.

  • Run command in terminal (Ctrl+Alt+T) to create the folder in case it does not exist.
    mkdir -p ~/.local/share/backgrounds
  • Open that folder in file manager to do copy & paste things.
    nautilus .local/share/backgrounds/

For each XML, you have to create another XML under “~/.local/share/gnome-background-properties”.

  • Run command to create that folder in case it does not exist.
    mkdir -p ~/.local/share/gnome-background-properties
  • Open that folder in file manager to create another XML files.
    nautilus ~/.local/share/gnome-background-properties

In this new XML file, you need to add following lines:

<?xml version="1.0" encoding="UTF-8"?>
<!DOCTYPE wallpapers SYSTEM "gnome-wp-list.dtd">
<wallpapers>
  <wallpaper>
    <name>TYPE NAME HERE</name>
    <filename>PATH-TO-DESKTOP-SLIDESHOW-XML</filename>
    <options>zoom</options>
    <pcolor>#2c001e</pcolor>
    <scolor>#2c001e</scolor>
    <shade_type>solid</shade_type>
  </wallpaper>
</wallpapers>

As the picture shows, you have to type the full path (‘/home/USERNAME/.loca/share/…’) to the generated XML you created in previous step. If you did everything correctly, you should see the new choice (with little clock) in Background settings page.

That’s all. Enjoy!

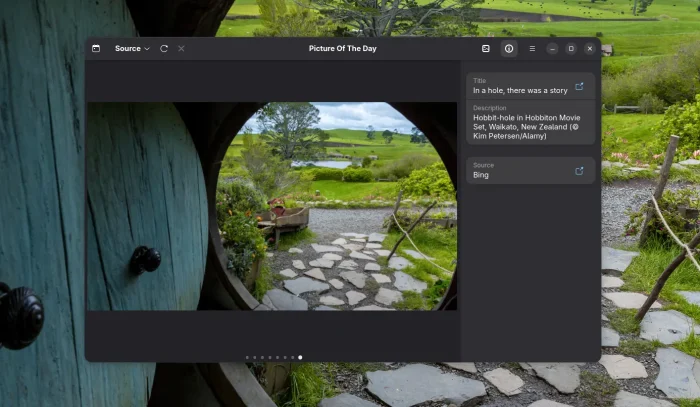
Want to automatically set the background & lock screen wallpaper once per day to Microsoft Bing image of the day? It’s easy to do this in Ubuntu via an Extension.

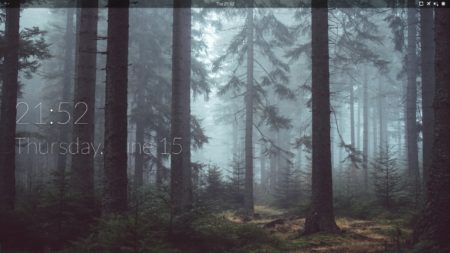
For Ubuntu 18.04, Ubuntu 20.04, Ubuntu 20.10, and all other Linux with Gnome Desktop, a lightweight Gnome Shell Extension “Bing Wallpaper” make it possible to set Microsoft Bing image as background and/or lock screen wallpaper.

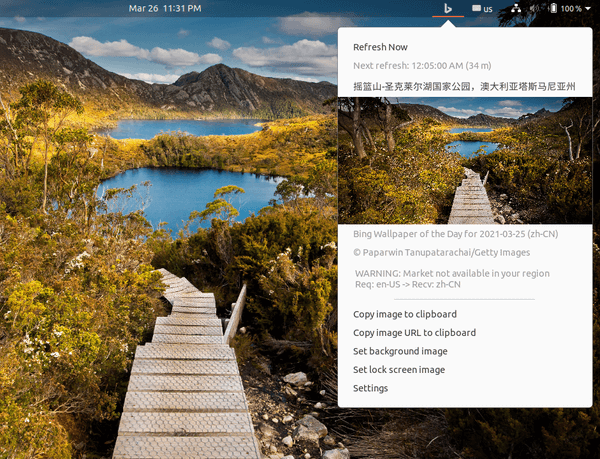
The extension downloads Bing image and refreshes your wallpaper once per day. By providing system tray indicator menu, you can copy image to clipboard and change the extension preferences.

How to Install Bing Wallpaper Extension:

1.) Firstly open terminal (Ctrl+Alt+T) and run command to install the chrome-gnome-shell package, which will add Gnome Shell extensions integration for web browsers, if you don’t have it.

sudo apt install chrome-gnome-shell

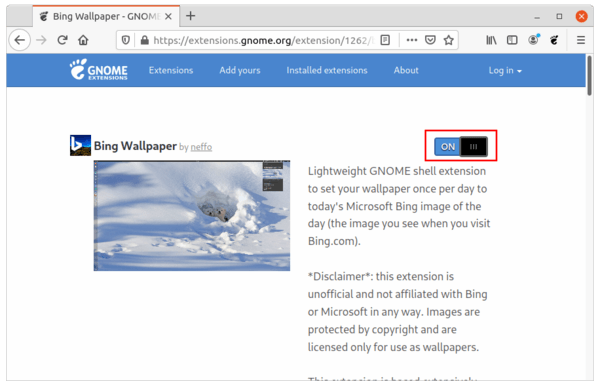
2.) Then go to the extension web page, turn on the toggle icon to install it.

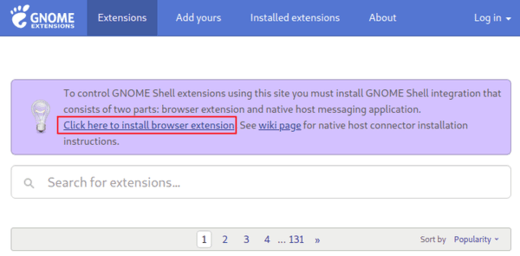
Don’t see the toggle icon? Follow the link to install the browser extension and refresh the web page.

Once installed the extension, an indicator applet should appear in the top-right corner. You can either click “Refresh Now” or wait till it refreshes wallpaper automatically.

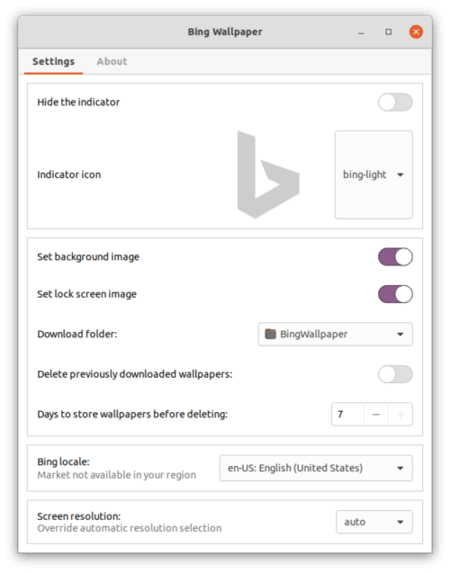
For Bing locale, download folder, screen resolution, and other settings, just go to indicator menu ‘Settings’ option.

Uninstall the Exension:

To remove the extension, either turn off the toggle icon in the previous link page, or use Extensions tool (install it via sudo apt install gnome-shell-extension-prefs command).

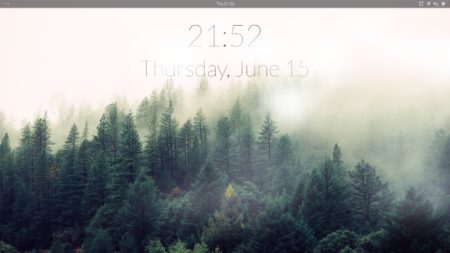
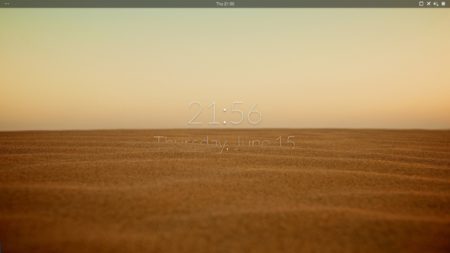
Komorebi is a Linux wallpaper manager that provides fully customizable backgrounds, e,g., show date and time on desktop.

Wallpapers included by default range from animated ones, still, and gradients! See screenshots below.

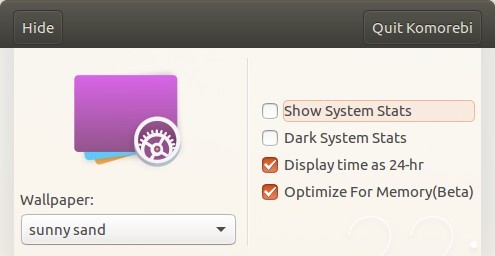
A settings dialog is available to launch by right-clicking on desktop and choose what to display.

Wallpapers are located in /System/Resources/Komorebi/, you can create your own wallpapers easily by following this tutorial.

Starting by opening terminal via Ctrl+Alt+T and run command to open the wallpaper folder:

gksudo nautilus /System/Resources/Komorebi/

Install Komorebi:

Download the .deb package from the link below, then click install via Ubuntu Software or Gdebi:

Komorebi Release Page

(Optional) To uninstall Komorebi, either use you system package manager or run command:

sudo apt-get remove komorebi

In addition, the software so far is in beta stage. I’ve tested on Ubuntu 16.04. The configuration dialog works on launch, but changing wallpaper sometimes not work a few minutes later.

Ubuntu 16.10 Yakkety Yak

The default desktop wallpaper for Ubuntu 16.10 Yakkety Yak has been unveiled. PNG-8, PNG-24, and the same for greyscale, along with mobile formatted ones are available for download.

The new desktop wallpaper looks not all that different from the previous releases’ wallpapers:

Ubuntu 16.10 Wallpaper

Ubuntu 16.10 Wallpaper

Ubuntu 16.10 Wallpaper Gray version

Ubuntu 16.10 Wallpaper Gray version

Here are the old releases wallpapers:

Ubuntu 16.04 default wallpaper

Ubuntu 16.04 default wallpaper

Ubuntu 15.10 default wallpaper

Ubuntu 15.10 default wallpaper

Ubuntu 15.04 default wallpaper

Ubuntu 15.04 default wallpaper

Download:

All the Ubuntu 16.10 default wallpaper version, provided by Will Cooke, is available for download at Bug #1621413.