Archives For November 30, 1999

Ubuntu and Windows dual boot

For users who dual boot Ubuntu 16.04 and Windows, you may find the clock time is off that causes time differences after you reboot and switch between the two systems. Here’s how to fix it.

Ubuntu maintains the hardware clock (RTC, real time clock) in universal time (UTC) by default while Windows maintains the clock in local time, thus causing time conflicts between Ubuntu and Windows.

To fix it, either set Ubuntu to maintain RTC in local time or make Windows uses UTC.

1. Disable UTC and use Local Time in Ubuntu:

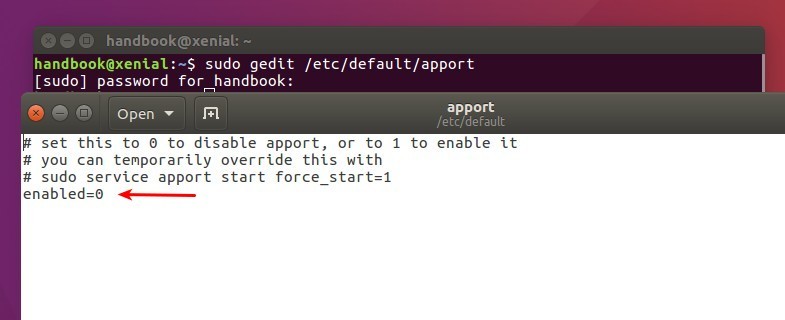
In previous Ubuntu editions, you can edit the config file /etc/default/rcS to disable UTC.

In Ubuntu 16.04, open terminal (Ctrl+Alt+T) and run the command below instead:

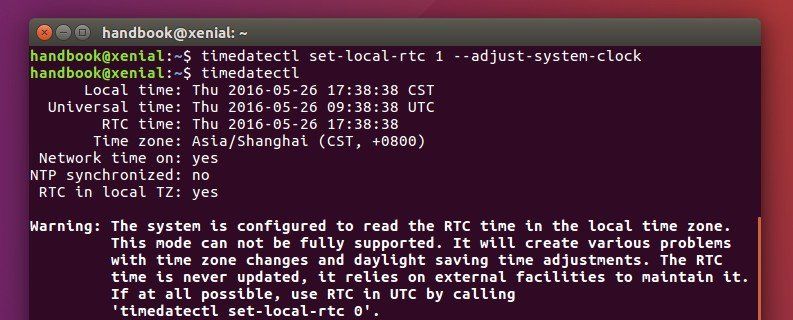
timedatectl set-local-rtc 1 --adjust-system-clock

To check out if your system uses Local time, just run:

timedatectl

you’ll the local time zone is in use in the Warning section.

RTC Local Time

Finally restart and switch to Windows, adjust system clock time if need and done.

2. Make MicroSoft Windows uses UTC:

Another way to fix this issue is doing the following changes in Windows, Windows 10, in the case below:

1.) First if you’ve switched to local time in Ubuntu, run command in Ubuntu terminal to use back UTC:

timedatectl set-local-rtc 0

2.) Restart and select boot into Windows 10, when you’re in, do:

  • go to Start Menu, search for and launch cmd as Administrator.
  • When the command console opens, paste below command to create a DWORD value to the registry:
    Reg add HKLM\SYSTEM\CurrentControlSet\Control\TimeZoneInformation /v RealTimeIsUniversal /t REG_DWORD /d 1

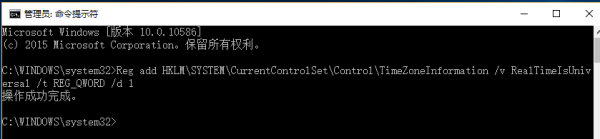
    For 64-bit Windows, use a QWORD value instead:

    Reg add HKLM\SYSTEM\CurrentControlSet\Control\TimeZoneInformation /v RealTimeIsUniversal /t REG_QWORD /d 1

    enable UTC in Windows 10

  • Disable the “internet update” for the time and reboot.

KDE Plasma 5.6

The Plasma Desktop 5.6 was finally made into Kubuntu Backports PPA, two months after its release date, available for upgrade in KUbuntu 16.04 LTS.

While Ubuntu 16.04 comes with Plasma 5.5, you can now upgrade to the latest Plasma 5.6.4 by following the steps blew one by one.

KDE Plasma 5.6

1. Add Kubuntu Backports PPA.

If you have not yet added the PPA, open terminal emulator, paste the command below and hit run:

sudo add-apt-repository ppa:kubuntu-ppa/backports

Type in your password (no visual feedback) when it asks and hit Enter to continue.

kubuntu backports ppa

2. Then update your whole system via your update-manager.

Or run the commands below one by one in terminal:

sudo apt update

sudo apt full-upgrade

3. (Optional) To revert the changes, purge the Kubuntu Backports PPA via ppa-purge which also downgrade Plasma Desktop to the stock version in Ubuntu 16.04.

sudo apt install ppa-purge && sudo ppa-purge ppa:kubuntu-ppa/backports

Install Font Files in Ubuntu

Want to install Microsoft fonts or Google web fonts for off-line use, or you just found a favorite font on the web and want to install it in Ubuntu?

Well here’s how to install the font files (.ttf, .ttc) downloaded from web, Google fonts page, or copied from your Windows OS.

Font files

Here are 4 font files shown in the picture above. In the steps below I’ll show you how to install and use it in Ubuntu Desktop:

1. Launch Terminal from Unity Dash, or by pressing Ctrl+Alt+T on keyboard:

ubuntu-terminal

When it opens, paste following commands and run one by one.

2. In Ubuntu Linux, font files are installed to /usr/lib/share/fonts or /usr/share/fonts. The former directory is recommended in this case for manual installation.

First create a sub folder in the font directory, ms_fonts, as example:

sudo mkdir /usr/local/share/fonts/ms_fonts

Type in your password when it asks (no visual feedback) and hit Enter.

3. Move all font files from your Downloads directory to the new created folder:

sudo mv ~/Downloads/*.ttc ~/Downloads/*.ttf /usr/local/share/fonts/ms_fonts/

4. Set permissions to these files by running the commands below one by one:

sudo chown root:staff /usr/local/share/fonts/ms_fonts -R

sudo chmod 644 /usr/local/share/fonts/ms_fonts/* -R

sudo chmod 755 /usr/local/share/fonts/ms_fonts

5. Finally builds font information caches for apps using fontconfig for their font handling:

sudo fc-cache -fv

Now you can apply new installed fonts via Unity Tweak Tool:

change-fonts

For Chrome browser, go to Settings -> Advanced settings-> Web contents -> Customize fonts.

SMplayer 16.4.0

While Ubuntu 16.04’s repository contains the old SMPlayer 15.11 packages, you can easily upgrade to the latest 16.4 release and receive future updates by using the SMPlayer PPA.

Changes in SMPlayer 16.4.0:

  • The Windows installer now includes mpv as well.
  • Now it’s easier to switch between MPlayer and mpv via Preferences -> General -> select multimedia engine.
  • The extrastereo filter works again when using mpv.
  • Possibility to use the VLC shortcuts. (Preferences -> Keyboard and mouse, click the load button, select vlc.keys).
  • Possibility to enable mouse gestures (when the mouse is dragged up or down in the video window the volume changes, if dragged left or right it changes the time position). You can enable this option in Preferences -> Keyboard and mouse -> Mouse -> Drag function: seek and volume.
  • A fix for saving bookmarks.
  • The option for streaming sites in Preferences -> Network is different now, and allows these values: disabled, auto, YouTube and mpv+youtube-dl.
  • An animated icon has been added in the status bar to indicate when the player is buffering.
  • A new layout is used to display the media information (Options -> View info and properties).

SMPlayer with Mac skin

How to Install/Upgrade SMPlayer 16.4 via PPA:

NOTE: The current 16.4.0 build available in PPA is based on QT 4.8.7, while the stock version in Ubuntu 16.04 repo is built against Qt5.

1. Add PPA.

Open terminal (Ctrl+Alt+T), paste the command below and hit run:

sudo add-apt-repository ppa:rvm/smplayer

Type in your password (no visual feedback) when it asks and hit Enter to continue.

Smplayer PPA

2. Install/Upgrade SMPlayer.

If you have a previous release installed, you can now upgrade the media player by launching Software Updater and installing SMPlayer package updates after checking for updates.

upgrade SMPlayer

For the first time installing this player, use your favorite package manager or just run the commands below one by one in terminal:

sudo apt update

sudo apt install smplayer smtube smplayer-themes smplayer-skins

3. (Optional) To revert back the stock version of SMPlayer in Ubuntu 16.04, install ppa-purge and purge the PPA, which also downgrade the packages installed from that repository:

sudo apt install ppa-purge && sudo ppa-purge ppa:rvm/smplayer

How to Install Ubuntu Tweak in Ubuntu 16.04

Last updated: April 4, 2019

Ubuntu Tweak Ubuntu 16.04

For users of Ubuntu 16.04 LTS who still need Ubuntu Tweak, especially for its Janitor (system cleaning) feature, a repacked of 0.8.7 release now is available in GetDeb repository.

Ubuntu Tweak in 16.04

If you have already added Getdeb App repository, just search for and install Ubuntu Tweak via your package manager or use apt install command. For those who don’t want to add the repository, follow the steps below:

1. Download the deb installer:

Ubuntu Tweak 0.8.7 for Ubuntu 16.04

2. Click install the package via Ubuntu Software.

install-ubuntu-tweak-1604

Or open terminal (Ctrl+Alt+T), run the commands below one by one to install it via dpkg and fix dependency problem via apt:

sudo dpkg -i ~/Downloads/ubuntu-tweak_0.8.7-1~getdeb2~xenial_all.deb

sudo apt-get -f install

3. (Optional) If you want to remove the tool, run the command below in terminal:

sudo apt remove ubuntu-tweak

notification bubbles

A patched version of Notify OSD with some extra features to Ubuntu’s on-screen-display notifications is available in Leolik’s PPA.

With the patch and a graphical Notify OSD configuration tool, you can easily tweak the notification bubbles by:

  • Close notification bubble on click
  • Stop fading out when mouse cursor hovers on it.
  • Change notification display timeout.
  • Change notification bubble location
  • Edit the bubble size, background, transparency, etc.
  • Edit the text size, color, etc.

Customized Notification bubble

1. Install the patched version of Notify OSD:

Open terminal (Ctrl+Alt+T) and run the commands below one by one to get it from PPA:

sudo add-apt-repository ppa:leolik/leolik

sudo apt update

sudo apt install notify-osd

Or grab the .deb installer from the link below:

Download Notify OSD with Extra Features(.deb)

Select download and install the latest version of:

  • notify-osd_x.x.x+16.04.x.x.x-0ubuntu1-leolik~ppa0_i386.deb for 32-bit Ubuntu 16.04
  • notify-osd_x.x.x+16.04.x.x.x-0ubuntu1-leolik~ppa0_amd64.deb for 64-bit Ubuntu 16.04

2. Restart notify-osd daemon by running the command below in terminal:

pkill notify-osd

restart-notifyosd

Just close the terminal after running the command since there’s no terminal output.

3. Install a graphical configuration tool for NotifyOSD:

Open terminal (Ctrl+Alt+T) and run the commands below one by one to get it from Webupd8 PPA:

sudo add-apt-repository ppa:nilarimogard/webupd8

sudo apt update

sudo apt install notifyosdconfig

Or grab the .deb installer from the link below:

Download Notify OSD Graphical Configuration Tool (.deb)

Select download and install the latest version of:

  • notifyosdconfig_x.x+xxx~ubuntu16.04.1_i386.deb for 32-bit Ubuntu 16.04
  • notifyosdconfig_x.x+xxx~ubuntu16.04.1_amd64.deb for 64-bit Ubuntu 16.04

4. Finally launch the configuration tool and enjoy customizing your on-screen notifications:

Notify OSD configuration

Install Komodo Edit in Ubuntu

Here’s a brief tutorial that shows how to install Komodo Edit with Unity integration in Ubuntu 16.04 LTS via PPA.

Komodo Edit is an open-source code editor based on Komodo IDE. Its website provides official Linux packages, but lacks global menu and application shortcut for Ubuntu Unity desktop.

Mystic-Mirage is maintaining a PPA contains unofficial Komodo Edit packages with patches for Ubuntu integration. Support for Ubuntu 16.04 was added a few days ago.

Komodo Edit 9.3

1. To add PPA

Open terminal (Ctrl+Alt+T), paste following command and hit run:

sudo add-apt-repository ppa:mystic-mirage/komodo-edit

Komodo PPA

Type in your password (no visual feedback) when it asks and then hit Enter to continue.

2. After added the PPA, search for and install komodo-edit via Synaptic Package Manager after clicking Refresh.

Or run following commands one by one:

sudo apt update

sudo apt install komodo-edit

For those who don’t want to add PPA, grab the .deb installer from PPA file archive.

Cinnamon 3.0

Cinnamon 3.0, the GTK3 desktop environment developed by (and for) Linux Mint, was released yesterday afternoon.

Here’s a quick overview of some of the changes in Cinnamon 3.0 according to the release note:

  • Window management improvements on tiling, mapping and unmapping windows, compositor’s window groups and tracking of full screen windows
  • Improved out of the box touchpad support (edge-scrolling and two-finger-scrolling can now be configured independently and are both enabled by default)
  • New accessibility and sound settings (both rewritten as native cinnamon-settings modules)
  • Battery powered devices can be renamed
  • Different favorite applications can now be set for plain-text, documents and source code files
  • Panel launchers now include application actions
  • Animation effects are now enabled by default on dialogs and menus
  • Favorites and system options can now be disabled in the menu applet
  • The photo-frame desklet now also scans subdirectories
  • Improved support for GTK 3.20, Spotify 0.27, Viber

Cinnamon 3.0 in Ubuntu 16.04

How to Install Cinnamon 3.0 in Ubuntu:

Linux Mint users can upgrade to Cinnamon 3.0 via the update-manager. For Ubuntu, there’s a PPA contains unofficial (though probably closest to official) builds of Cinnamon releases for Ubuntu 16.04, Ubuntu 15.10, and a little old version of Ubuntu 14.04.

1. Add Cinnamon PPA

Open teriminal (Ctrl+Alt+T), paste below command and hit run:

sudo add-apt-repository ppa:embrosyn/cinnamon

After typing your password, take a look at the PPA description in terminal output and hit Enter.

2. Then update and install the Cinnamon desktop via:

sudo apt-get update

sudo apt-get install cinnamon

3. If everything goes OK, log out and select log in with Cinnamon session (or Cinnamon (Software Rendering) session if you want it use software rendering to do more of the graphical work).

Cinnamon Session

(Optional) To uninstall the Cinnamon session, use Synaptic Package Manager or run commands:

sudo apt-get remove cinnamon && sudo apt-get autoremove

And the PPA can be removed via Software & Updates -> Other Software utility.

wifi hotspot

The default network manager in Ubuntu 16.04 now supports to create WiFi hotspot for Android devices.

You can create a Wireless access point in Ubuntu 14.04 using Unity’s default network manager, but a little hack on the configuration file is required.

In Ubuntu 16.04, there’s a Hotspot mode in the WiFi connection editings page that works directly for Android devices. Here’s the step by step how to guide:

1. First disable WiFi and connect your laptop to a wired network, so your network menu looks like:

wired network

2. Click Edit Connections on the menu shown in above picture. Then click Add to add a new connection:

add connection

3. Choose WiFi from the drop-down box in the next window and click Create button.

choose wifi connection

4. When the editing window popup, do:

  • Type in connection name, SSID, select Hotspot mode.
  • In Wifi Security tab, select WPA & WPA2 Personal and type in a password.
  • In IPv4 Settings tab, select mode “Share to other computers”

edit-wifi-connection

5. After clicked the save button, enable WiFi and click Connect to Hidden Wi-Fi network and select connect to the connection you just created.

connect hidden wifi

6. Your network menu now looks like:

wifi-hotspot-connected

Finally connect to this hotspot from your Android device and enjoy!

disable error reporting

On the new released Ubuntu 16.04 desktop, you may get a few error popups that asks you to report problems. Some popups has already been reported so you may want to disable these error popups before they are fixed by upstream.

Ubuntu Error Popups

To do so, you can either temporarily stop the Apport service on current boot, or manually edit the config file to disable error reporting system permanently

1. To stop the Apport service, open terminal (Ctrl+Alt+T) and run command:

sudo service apport stop

Type in password when it asks and hit Enter. There’s no visual feedback while typing your password.

stop-apport-service

2. To disable the apport system so you’ll never see the error popups, run command to edit config file:

sudo gedit /etc/default/apport

When the file opens, change the value to 0 and save it.

disable-error-report

That’s it. Enjoy!