Archives For September 30, 2013

Google Music uploader
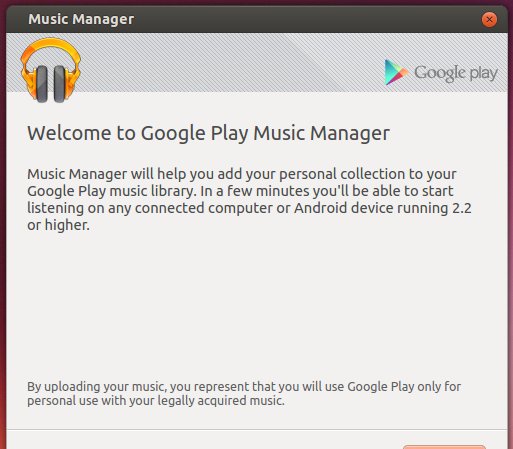
This tutorial shows you how to install Google Music Manager, a simple application for adding the music files on your computer to your Google Play Music library.

Music Manager is compatible with desktop and laptop computers and is not available to download onto mobile devices. With it you can:

  • Upload up to 20,000 songs from your iTunes library, Windows Media Player library, My Music folder, or folders of your choice to Google Play.
  • Only upload what you want – choose individual songs or upload songs automatically.
  • Adjust the bandwidth available for uploading songs.
  • View your upload progress.
  • Download any songs that you previously uploaded to your music library, as well as songs you purchased from Google Play.

Install Google play music manager:

Press Ctrl+ALt+T on your keyboard to open terminal. When it opens, follow the steps below:

1. Copy and paste below command and run to add the Google repository for Ubuntu Linux:

sudo sh -c 'echo "deb http://dl.google.com/linux/musicmanager/deb/ stable main" >> /etc/apt/sources.list.d/google-musicmanager.list'

2. Get the key:

wget -q -O - https://dl-ssl.google.com/linux/linux_signing_key.pub | sudo apt-key add -

3. update package lists on your system:

sudo apt-get update

4. Now you can install the app via:

sudo apt-get install google-musicmanager-beta

Google Music Manager Setup

Hotshots is a screenshot tool with some editing features. It is particularly suitable for writing documentation (as used in the following chapters) but you can use it to highlight some details on a map image or what ever you want. Because HotShots is written with Qt, it runs on Windows and Linux (MacOSX isn’t tested yet).

Current features:

  • Grab current screen, all monitors (in case of multi-monitors configuration), current window or a part of the desktop.
  • Save the screenshot in multiple formats (PNG, JPG, BMP, …).
  • Automatically save the screenshot to clipboard, disk or launch the editor tool.
  • Automatically scale the screenshot to a given size.
  • Use “system” shortcuts to take a screenshot.
  • Add automatically some “post-effects” to the screenshot (drop shadow, rotation, border, …).
  • Can be minimized to system tray and work in background.
  • Can be launch at system start-up (Windows).
  • Export edited image in multiple formats (PNG, JPG, BMP …).
  • Save/Restore edited image in proprietary format.
  • Send image directly to printer.
  • Install Hotshots via PPA:

    Hotshots is available in a launchpad ppa for Ubuntu 13.10 Saucy, Ubuntu 13.04 Raring, Ubuntu 12.10 Quantal, Ubuntu 12.04 Precise and Linux Mint 13 Maya, 15 Olivia, 14 Nadia , 16 Petra and other Ubuntu derivatives.

    To add the PPA, press Ctrl+Alt+T on your keyboard to open terminal. When it opens, run below command:

    sudo add-apt-repository ppa:dhor/myway

    After that, update package lists and install the tool:

    sudo apt-get update; sudo apt-get install hotshots

    hotshots ubuntu 13.10

    Linux Kernel 3.10.17

    The Latest Long Time Support Linux Kernel 3.10.17 has been released. All users of Kernel 3.10 series are urged to upgrade as soon as possible. Here’s how to do it in Ubuntu 13.10, Ubuntu 13.04, Ubuntu 12.10, Ubuntu 12.04 and Linux Mint 13 / 14 / 15 /16.

    Linux Kernel 3.10.17 includes architecture updates, including arc, ARM, mips, parisc, PowerPC, s390, SPARC and x86, various Radeon and Intel i915 updates, some Btrfs and EXT4 filesystem fixes, and sound improvements. See official release announcement.

    Install / Upgrade Kernel 3.10.17:

    Press Ctrl+Alt+T on your keyboard to open terminal. Follow the steps below by copying and pasting the commands into terminal and hit run.

    1. Download the DEBs from kernel PPA:

    For 32-bit system:

    wget http://kernel.ubuntu.com/~kernel-ppa/mainline/v3.10.17-saucy/linux-headers-3.10.17-031017-generic_3.10.17-031017.201310181435_i386.deb
    
    wget http://kernel.ubuntu.com/~kernel-ppa/mainline/v3.10.17-saucy/linux-headers-3.10.17-031017_3.10.17-031017.201310181435_all.deb
    
    wget http://kernel.ubuntu.com/~kernel-ppa/mainline/v3.10.17-saucy/linux-image-3.10.17-031017-generic_3.10.17-031017.201310181435_i386.deb

    2. For 64-bit system:

    wget http://kernel.ubuntu.com/~kernel-ppa/mainline/v3.10.17-saucy/linux-headers-3.10.17-031017-generic_3.10.17-031017.201310181435_amd64.deb
    
    wget http://kernel.ubuntu.com/~kernel-ppa/mainline/v3.10.17-saucy/linux-headers-3.10.17-031017_3.10.17-031017.201310181435_all.deb
    
    wget http://kernel.ubuntu.com/~kernel-ppa/mainline/v3.10.17-saucy/linux-image-3.10.17-031017-generic_3.10.17-031017.201310181435_amd64.deb

    3. Install the downloaded packages to upgrade kernel:

    sudo dpkg -i linux-headers-3.10.17-*.deb linux-image-3.10.17*.deb

    4. Restart your computer and done.

    5. If something goes wrong, run command below to remove Linux Kernel 3.10.17:

    sudo apt-get purge linux-image-3.10.17-*

    CTorrent is a lightweight command-line bittorrent client which is written in the C++. Original ctorrent’s upstream has stopped its development and now it’s kept updated with new releases/bug fixes by a new developer. It’s built as a console program and it can be even used remotely in a machine that provides outside ssh access. Other main features are:

    • Support for large files (>2GB) and large torrents (>255 files).
    • Strategic selection of pieces to request for download.
    • Continuous queueing of download requests, tuned based on latency and throughput for each peer.
    • Improved download performance, including parallel requests in initial and endgame modes.
    • Improved bandwidth regulation.
    • Improved compatibility with other peers.
    • Performance optimization and bug fixes.
    • An interface for monitoring and managing multiple clients.
    • Dynamic cache allocation and management, including prefetch.

    Install cTorrent:

    You don’t have to do something special to install cTorrent, just search for and install the package from Ubuntu Software Center.

    install-ctorrent

    To run ctorrent:

    ctorrent -s new_filename -e 12 -C 32 -p 6881 example.torrent

    For more options, run:

    ctorrent

    DeadBeef ubuntu 13.10

    The DeadBeef music player now is available for Ubuntu 13.10 Saucy Salamander in its PPA repository after Canonical released the Ubuntu 13.10 Final.

    As you may know, DeedBeef is a free audio player for Linux only. It has following features:

  • mp3, ogg vorbis, flac, ape, wv/iso.wv, wav, m4a/mp3 (aac and alac), mpc, tta, cd audio, and many more
  • nsf, ay, vtx, vgm/vgz, spc and many other popular chiptune formats
  • SID with HVSC song length database support for sid
  • tracker modules – mod, s3m, it, xm, etc
  • ID3v1, ID3v2.2, ID3v2.3, ID3v2.4, APEv2, Xing/Info, VorbisComments tag reading and writing, as well as reading many other tag/metadata formats in most supported formats
  • automatic character set detection for non-unicode id3 tags – supports cp1251, iso8859-1, and now chinese cp936 (optional), as well as SHIFT-JIS and MS-DOS CP866 for selected formats
  • unicode tags are fully supported as well (both utf8 and ucs2)
  • cuesheet (.cue files) support, including charset detection/conversion
  • clean fast GUI using GTK2 and GTK3, you pick what you like more!
  • no GNOME or KDE dependencies
  • minimization to system tray, with scrollwheel volume control, etc
  • drag and drop, both in playlist, and from other apps
  • control playback from command line
  • global hotkeys
  • multiple playlists using tabbed interface
  • album cover display
  • OSD notifications about current playing songs
  • 18-band graphical equalizer and other DSP plugins
  • built-in high quality tag editor, with custom fields support
  • customizable groups in playlists
  • customizable columns with flexible title formatting
  • streaming radio support for ogg vorbis, mp3 and aac streams
  • gapless playback for correctly encoded files
  • lots of plugin, such as global hotkeys, last.fm scrobbler, converter, and many more, sdk is included
  • comes with advanced Converter plugin, which allows to transcode files to other formats
  • was tested on x86, x86_64, powerpc, arm, mips architectures, should work on most modern platforms
  • new features are being added all the time — check for updates frequently!
  • Install Deadbeef Music Player:

    Press Ctrl+Alt+T on your keyboard to open terminal. When it opens, run command to add the PPA:

    sudo add-apt-repository -y ppa:starws-box/deadbeef-player

    Then you can install it from Ubuntu Software Center after checking for updates. Or run below commands instead:

    sudo apt-get update; sudo apt-get install deadbeef

    deadbeef player ubuntu 13.10

    Vuze 5.1 ubuntu 13.10

    As you may know, BitTorrent protocol client that offers multiple torrent downloads, queuing/priority systems (on torrents and files), start/stop seeding options, and instant access to numerous pieces of information about your torrents. It includes an embedded tracker that is easily set up and ready to use.

    Vuze in Ubuntu’s default repository is old. Here’s how to install the latest v5.1.0 in Ubuntu 13.10 Saucy or Linux Mint 16 Petra using getdeb repository.

    Enable GetDeb repository

    For Ubuntu 13.10, press Ctrl+ALt+T on your keyboard to open terminal. When it opens, run below commands one by one:

    wget http://archive.getdeb.net/install_deb/getdeb-repository_0.1-1~getdeb1_all.deb
    
    sudo dpkg -i getdeb-repository_0.1-1~getdeb1_all.deb

    For Linux Mint, there’s an option under ‘Software Sources -> Additional repositories’ allows to enable the Getdeb.

    Install Vuze:

    After enabled the Getdeb, you can install Vuze from Ubuntu Software Center after checking for updates. Or run below commands instead:

    sudo apt-get update; sudo apt-get install vuze
    vuze 5.1 on Ubuntu 13.10

    vuze 5.1 on Ubuntu 13.10

    This simple tutorial is going to show you how to disable laptop camera in Ubuntu 13.10 Saucy. Cameras are controlled by the uvcvideo kernel module, so all you need to do is block it from loading.

    After this tutorial, you’ll get a blank screen in Cheese:

    blank screen after disabled camera

    blank screen after disabled camera

    To get started:

    Press Ctrl+Alt+T on your keyboard to open terminal. When it opens, run command to disable the camera until reboot:

    sudo modprobe -r uvcvideo

    You will be asked for your password, and after typing it, if there are no errors shown in the terminal, your webcam should be disabled.

    To enable your webcam again, run:

    sudo modprobe uvcvideo

    If you want to permanently disable camera, run below command to block the kernel mode by adding to config file.

    echo 'blacklist uvcvideo' | sudo tee -a /etc/modprobe.d/blacklist.conf

    Reboot your machine and done.

    qbittorrent 3.1.0 ubuntu 13.10

    qBittorrent 3.1.0 has been released with a lot of new features and bugfixes. This tutorial shows you how to install or upgrade it in Ubuntu 13.10, Ubuntu 13.04, Ubuntu 12.10, Linux Mint 16/15.

    What’s New in qBittorrent 3.1.0:

    • Add command line option to daemonize qbittorrent-nox (ngaro)
    • Add “Shutdown qBittorrent” button to Web UI (ngaro)
    • Add setting to copy .torrent files for finished downloads (Driim)
    • Add option to start qBittorrent on Windows startup (sledgehammer999)
    • Add context menu to Web seed list (Gelmir)
    • Add support for tracker tiers / groups to creator (Gelmir)
    • Allow clearing execution and ban logs (Gelmir)
    • Add option to use random port on each startup (ireallylikeher)
    • Expose the cache expiry to the user (Gelmir)
    • Support Atom feeds (Gelmir)
    • Add “save path” column (John Peterson)
    • Add μTorrent-compatible “Flags” column in the peer tab(sledgehammer999)
    • Load magnet metadata in the background while the “Add New Torrent” Dialog is showing (Gelmir)
    • Allow to enter only an info-hash for download(sledgehammer999)
    • Bring the “Add New Torrent” Dialog to the front(glassez)
    • Add confirmation dialog for “Force recheck” action (closes #131)
    • Greatly improve RSS manager performance (closes #34)
    • Ensure that all columns in the tranferlist have a size > 0.
    • Don’t mark RSS item as read when it failed to download (Gelmir)
    • Fix ETA calculation when some files are downloaded and marked afterwards as ‘do not download'(sledgehammer999)
    • Make the UI show that PEX/DHT/LSD are actually disabled on private torrents(sledgehammer999)
    • Scheduler should be much more robust and correct now(sledgehammer999)
    • Now qBt won’t forget torrent settings after an unclean shutdown(sledgehammer999)
    • Text boxes in edit dialogs will fit to text width(Gelmir)
    • Enable edit/rename via F2 or double click in various places(Gelmir)
    • Allow to edit trackers and copy their urls(Gelmir and Driim)
    • Add Uploaded column to main view(Gelmir)
    • Calculate ETA for seeding torrents(Gelmir)
    • Add option to ignore global share ratio limits for created torrents(Gelmir)
    • Many RSS bugfixes and improvements all over the place(Gelmir)
    • Generate translations at configure time to reduce tarball size
    • Make peer tab sortable by ip too (Gelmir)
    • Translations moved to Transifex(https://www.transifex.com/projects/p/qbittorrent/)
    • New Translation – Vietnamese (Anh Phan)
    • Impove drawing speed of tranferlist when there are many torrents(>100)
    • Impove drawing speed of peers list when there are many peers

    Install / Upgrade qBittorrent:

    The qBittorrent PPA has updated packages for Ubuntu 13.10 Saucy, Ubuntu 13.04 Raring, Ubuntu 12.10 Quantal and their derivatives.

    To install it, press Ctrl+Alt+T on your keyboard to open terminal. When it opens, run below commands one by one:

    sudo add-apt-repository ppa:hydr0g3n/qbittorrent-stable
    
    sudo apt-get update
    
    sudo apt-get install qbittorrent

    Calibre 1.6 ubuntu 13.10

    Calibre, the free and open source e-book computer software application suite has reached v1.6 with handy mark-book feature.

    What’s New in Calibre 1.6:

    • Temporary marking of books in the library
      This allows you to select books from your calibre library manually and mark them. This ‘mark’ will remain until you restart calibre, or clear the marks. You can easily work with only the marked subset of books by right clicking the Mark Books button. To use this feature, go to Preferences->Toolbars and add the ‘Mark Books’ tool to the main toolbar.
    • Get Books: Add Wolne Lektury and Amazon (Canada) ebook stores
    • DOCX Input: Handle hyperlinks in footnotes and endnotes
    • Driver for Sunstech reader
    • Allow using both uri: and url: identifiers to create two different arbitrary links instead of just one in the Book details panel
    • E-book viewer: Make all keyboard shortcuts configurable
    • Conversion: Add an option to not condense CSS rules for margin, padding, border, etc. Option is under the Look & Feel section of the conversion dialog.
    • calibredb: Allow setting of title sort field
    • ebook-meta: Add an –identifier option to set identifiers.
    • Fix a locking error when composite columns containing formats are used and formats are added/deleted.
    • EPUB Output: Do not strip <object> tags with type application/svg+xml in addition to those that use image/svg+xml.
    • Cover grid: Fix selecting all books with Ctrl+A causing subsequent deselects to not fully work
    • HTMLZ Output: Fix long titles causing error when converting on windows.
    • Content server: Fix OPDS category links to composite columns
    • E-book viewer: Fix regression that broke import/export of bookmarks
    • E-book viewer: Use the default font size setting for the dictionary view as well.
    • DOCX Input: Avoid using the value attribute for simple numbered lists, to silence the asinine epubcheck
    • HTML Input: Images linked by the poster attribute of the <video> tag are now recognized and processed.
    • DOCX Input: Fix erorr when converting docx files that have numbering defined with no associated character style.
    • EPUB Metadata: Implementing updating identifiers other than isbn in the epub file from calibre when polishing or exporting the epub
    • Amazon metadata download: Fix parsing of some dates on amazon.de

    New news sources

    • Various Uruguayan news sources by Carlos Alves

    Improved news sources

    • National Geographic Magazine
    • New York Review of Books
    • Focus (PL)
    • Carta Capital
    • AM 730
    • Ming Pao (HK)
    • Neu Osnabrucker Zeitung

    Install / Upgrade Calibre:

    For Ubuntu 13.10, Ubuntu 13.04, Ubuntu 12.04, Ubuntu 12.10, Linux Mint users, press Ctrl+Alt+T on your keyboard to open terminal. When it opens, copy and paste below codes and hit enter to run:

    sudo python -c "import sys; py3 = sys.version_info[0] > 2; u = __import__('urllib.request' if py3 else 'urllib', fromlist=1); exec(u.urlopen('http://status.calibre-ebook.com/linux_installer').read()); main()"

    It automatically download the source code and install it on your system.

    calibre 1.6 ubuntu 13.10

    disable overlay scrollbar ubuntu 13.10

    This quick tutorial is going to show you how to disable overlay scrollbars and switch back to old fat regular scrollbars in Ubuntu 13.10 Saucy Salamander.

    Since Ubuntu 13.04, there’s an option in Dconf Editor allows to switch on / off this feature. Follow steps show you how:

    1. Open Ubuntu Software Center. Search for and install dconf Editor.

    2. Open dconf Editor, navigate to com/canonical/desktop/interface. Change the scollbar-mode to normal

    disable overlay scrollbars dconfeditor

    If you’re familiar with command line, just run one command in terminal:

    gsettings set com.canonical.desktop.interface scrollbar-mode normal

    That’s it. Enjoy!