Archives For November 30, 2016

ubuntu cleaner

Ubuntu Cleaner is an open-source tool makes it easy to clean up your Ubuntu system. It’s a Ubuntu Tweak fork for the Computer Janitor feature.

The tool offers a similar interface to Ubuntu Tweak, allows to clean up:

  • App (browser) caches.
  • Thumbnail cache.
  • Old kernels.
  • Apt cache
  • Package configs and unneeded packages

Ubuntu Cleaner

How to Install Ubuntu Cleaner in Ubuntu:

The developer offers .deb packages in a PPA repository, available for download at the link below:

Download Ubuntu Cleaner (.deb)

Download the latest package and click install via Ubuntu Software.

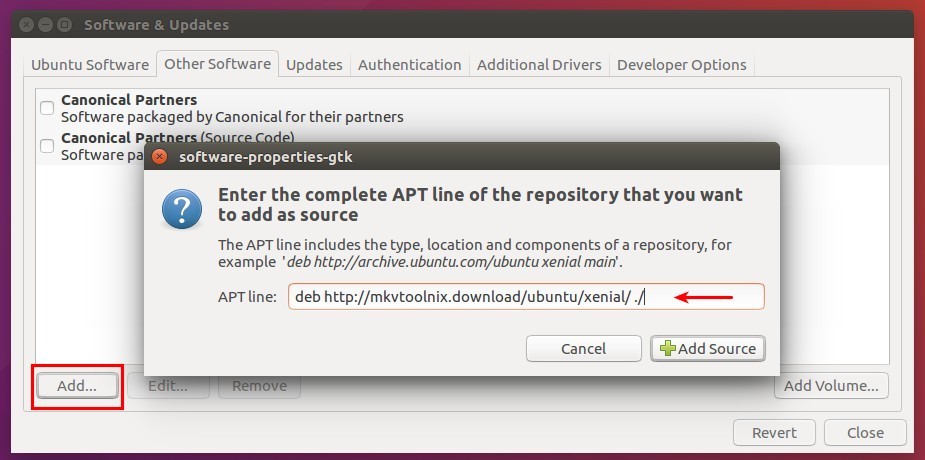
For those want to add the PPA for Ubuntu 16.04 and 14.04, run the commands below one by one in terminal (Ctr+Alt+T):

sudo add-apt-repository ppa:gerardpuig/ppa

sudo apt update

sudo apt install ubuntu-cleaner

Uninstall:

To remove Ubuntu Cleaner, simply run command in terminal:

sudo apt remove ubuntu-cleaner && sudo apt autoremove

The PPA can be removed by going to System Settings -> Software & Updates -> Other Software tab.

Audacious music player

Audacious audio player has reached the 3.8.1 release one day ago with new feature opus cover art support in the info bar, and following bug-fixes:

  • Fix randomly freezes in Windows.
  • Time value can become larger than the track length by dragging the progress bar beyond the end of the trough.
  • The ‘Do not load metadata for songs until played’ option appears twice in the QT interface preferences
Audacious GTK and Winamp like interface

Audacious GTK and Winamp like interface

How to Install Audacious 3.8.1 in Ubuntu:

The new release has been made into Webupd8Team PPA, available for all current Ubuntu releases and derivatives, e.g., Ubuntu 14.04, Ubuntu 16.04, Ubuntu 16.10, Linux Mint 17 and 18.

1. To add the PPA, open terminal (Ctrl+Alt+T) and run command:

webupd8ppa

2. Then upgrade Audacious player from a previous by launching Software Updater:

upgrade-audacious

Or install it for the first time via your package manager or using the commands:

sudo apt update

sudo apt install audacious audacious-plugins

Kxstitch cross stitch

Kxstitch, an open-source cross stitch pattern and chart creation software for KDE, has now reached the 2.0 release with KF5 port, a number of improvements and lots of new language translations.

Patterns can be created from scratch on a user defined size of grid, which can be enlarged or reduced in size as your pattern progresses. Alternatively you can import images from many graphics formats which will allow you to reduce the number of colours and to restrict the conversion to full stitches or optionally use fractional stitches.

You may also use an image as a background. These imported images can then be modified using the supplied tools to produce your final design.

Kxstitch cross stitch creation

Kxstitch Features:

  • Creation of new patterns
  • Editing of existing patterns – KXStitch is also capable of reading PC Stitch 5 files.
  • Use of various floss pallets, DMC, Anchor, Madeira, JP Coates
  • Creation of custom palettes and colours.
  • Use of standard stitches
  • Free use of backstitching
  • Importing of various picture formats
  • Printing of patterns and floss keys

How to Install Kxstitch 2.0 in Ubuntu 16.04, 16.10:

Due to lack of official deb binaries, I’ve made the 2.0 release into an Ubuntu PPA, available for Ubuntu 16.04, Ubuntu 16.10, Linux Mint 18, and derivatives.

You can either run commands in terminal (Ctrl+Alt+T) to add the PPA and install kxstitch:

  1. Run command to add the PPA:
    sudo add-apt-repository ppa:ubuntuhandbook1/kxstitch

    kxstitch-ppa-xenial

  2. Update the system package index:
    sudo apt update
  3. And finally install the software:
    sudo apt install kxstitch

or grab the .deb directly from THIS PAGE (amd64.deb for 64-bit, or i386.deb for 32-bit), and click install via Ubuntu Software.

neofetch ubuntu

NeoFetch, the cross-platform command-line system information tool, has reached the major 2.0 release. Here’s how to install it in Ubuntu 16.04, Ubuntu 16.10, and other releases higher than Ubuntu 12.04.

    Neofetch is a CLI system information tool written in BASH. Neofetch displays information about your system next to an image, your OS logo, or any ascii file of your choice. The main purpose of neofetch is to be used in screenshots to show other users what OS/Distro you’re running, what Theme/Icons you’re using and etc.

    Neofetch is highly customizable through the use of commandline flags or the user config file. There are over 50 config options to mess around with and there’s the print_info() function and friends which let you add your own custom info.

Neofetch 2.0 is the biggest release in a long time. The majority of the script has been rewritten, restructered and cleaned up. Every function and variable name follows a proper naming scheme and a large number of bugs were fixed.

  • New Operating System support: ChaletOS, DracOS, Haiku, GNU Hurd, Korora, Netrunner, Pardus, iPhone 7 and 7 plus.
  • ASCII art handling written.
  • Now display your OS’s ascii logo if the distro’s logo isn’t found
  • Wallpaper support for Cinnamon desktop.
  • Added support for HyperTerm
  • Prefer dedicated GPU over integrated GPU in Linux.
  • Improved documentation & wiki
  • More and more.

NeoFetch

How to Install NeoFetch 2.0 in Ubuntu:

For Ubuntu 12.04, Ubuntu 14.04, …, up to Ubuntu 17.04, the new release has been made into this PPA repsitory.

Run below commands one by one in terminal (Ctrl+Alt+T) to add the PPA to your system and install NeoFetch 2.0:

sudo add-apt-repository ppa:dawidd0811/neofetch

sudo apt update 

sudo apt install neofetch

Or directly download the “neofetch_2.0-1ubuntu1_all.deb” package from the link below and click install via Ubuntu Software:

Download NeoFetch 2.0 (.deb)

mkvtoolnix-icon

The free and open-source MKVToolNix MKV (Matroska) manipulation tool has reached the 9.6.0 release. Here’s how to install or upgrade it in Ubuntu 16.04, Ubuntu 14.04, and/or Ubuntu 16.10.

MKVToolNix 9.6.0 fixes one major bug in mkvmerge (an endless loop) when appending files. It mostly occurred when muxing MPLS playlists. Several other minor bug fixes and usability enhancements were implemented.

  • mkvmerge and mkvextract now support HDMV TextST subtitles.
  • MKVToolNix GUI has option to only show the list of often used languages/country codes/character sets.
  • mkvextract has been updated to add a “langidx” line to the .idx file upon extraction
  • multiplexer enhancement: added a column “source file’s directory” to the track list
  • multiplexer enhancement: added an option for selecting all tracks of the currently selected source files in the source file context menu

MKVToolNix-GUI

How to Install MKVToolNix 9.6.0 in Ubuntu:

The official MKVToolNix repository for Linux has been updated for Ubuntu 16.04, Ubuntu 14.04, Ubuntu 16.10 and derivatives.

1. To add the repository, first open terminal (Ctrl+Alt+T) and run command to setup the key:

wget -q -O - https://mkvtoolnix.download/gpg-pub-moritzbunkus.txt | sudo apt-key add -

mkvtoolnix-key

2. Go to System Settings -> Software & Updates -> Other Software tab, then click Add and paste following line:

deb http://mkvtoolnix.download/ubuntu/ xenial main

You may replace xenial (16.04) in the line with yakkety for Ubuntu 16.10, or trusty for Ubuntu 14.04 and their derivatives.

add-mkvtoolnix-repo

3. Finally upgrade the software from a previous release via Software Updater:

upgrade-mkvtoolnix

Or install it for the first time via command:

sudo apt update && sudo apt install mkvtoolnix mkvtoolnix-gui