Archives For March 31, 2017

It’s 2024 now! Ubuntu is still lacking the option to create new documents in the default Nautilus file manager. Though, the GNOME developer team is working on this function.

It’s easy to enable the option in Nautilus context menu. As it prompts in Templates folder, simply create an empty document under Templates folder, the file name will be displayed as sub-menu option of ‘New Document’ menu.


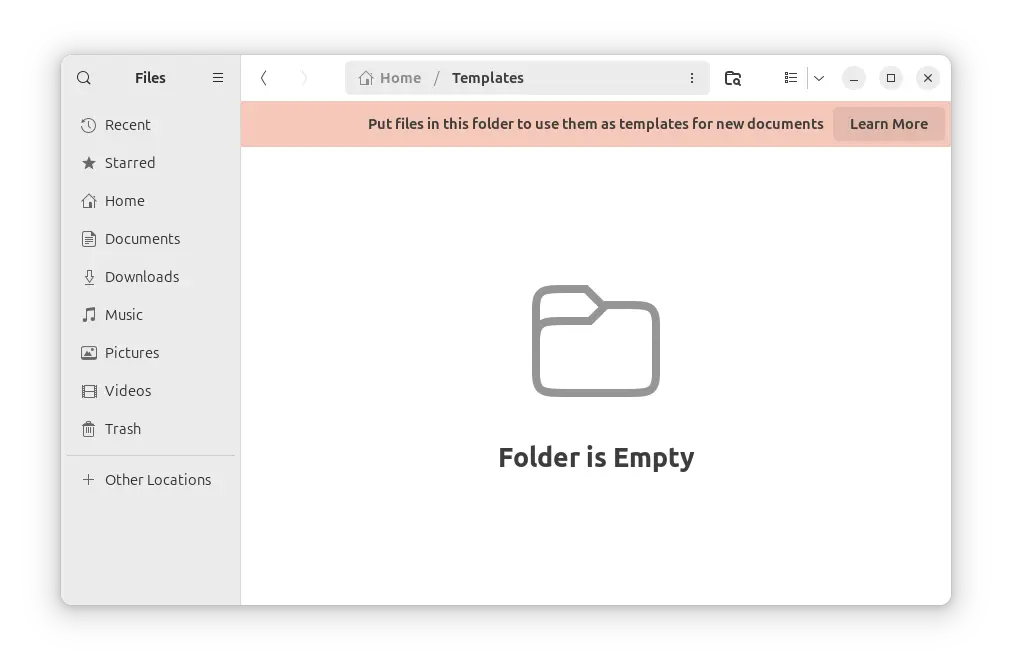
Meaning all you need to do is create an empty file and save it under user’s “Template” folder. The file-name will be displayed as sub-menu option of “New Documents” context menu.

Method 1: Use Text editor

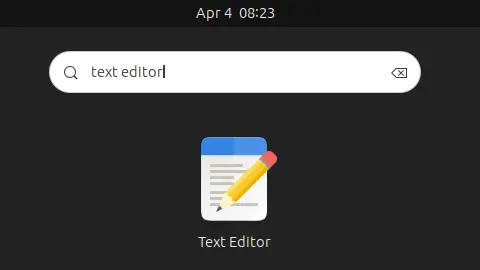
First, press Super (the Windows logo) key on keyboard to open ‘Activities’ overview. Then search for and open text editor.

When the text editor opens, you don’t have to input anything, just leave it blank, then press Ctrl+Shift+S to open the “save as” dialog and do:

  • Type filename, which will display as sub-menu option for ‘New Documents’ menu.
  • Choose location – Templates folder.
  • Finally, click Save.

Method 2: Run a single command

For those familiar with Linux command, this can also be done by running a single command.

Firstly, press Ctrl+Alt+T on keyboard to open a terminal window. When it opens, run command:

touch ~/Templates/Untitled\ Document

This command creates an empty file called ‘Untitled Document‘ in the Templates folder.

Tip: the backslash in the code tells that the space following it is part of the filename since the shell treats whatever comes after a space as a separate argument.

Finally, right-click on blank area in your file manager and see the magic!

Ubuntu 17.04

The final release of Ubuntu 17.04 Zesty Zapus was available for download earlier today on April 13.

After installing the new fresh Ubuntu Desktop, you may have some top things to do before it’s ready to use. And here are some of what I did.

1. Check for updates

First of first, check for updates via Software Updater and install kernel patches, security updates, and other system updates.

check updates

2. Install Media Codecs

Due to legal reasons, Ubuntu does not include some media codecs to play video and audio files via the default Totem media player and Rhythmbox music player.

Besides installing VLC, mplayer, MPV, or other media player that come with built-in codecs, you can manually install the multimedia codecs via command (open terminal via Ctrl+Alt+T):

sudo apt install ubuntu-restricted-extras

3. Enable DVD Playback

The previous codecs will enable playing normal DVDs. To play encrypted DVDs via VLC, run command to automatically download and install libdvdcss2 library:

sudo apt install libdvd-pkg && sudo dpkg-reconfigure libdvd-pkg

4. Install Unity Tweak Tool.

Unity Tweak Tool is the best and easy to use Unity Desktop configuration tool. It’s one of the must install applications available in Ubuntu Software App.

5. Some Unity Desktop Tweaks

  • Disable recording file and application usage.

    Go to System Settings -> Security & Privacy. At Files & Applications tab, switch off the option to record file and application usage, which will be available in the search dash.

  • Minimize Application when click on its icon in the Left launcher.

    Go to Unity Tweak Tool -> Launcher, check the box says “Minimize single window applications on click”

  • Move the Left Launcher to Bottom.

    Since Ubuntu 16.10, the Unity launcher can be moved from Left to Bottom. Also do this in Unity Tweak Tool -> Launcher:

6. Disable Guest Session from Login Screen

For my personal computer, I don’t need the Guest account. Simply remove it via command (open terminal via Ctrl+Alt+T):

sudo apt install gksu && gksudo gedit /etc/lightdm/lightdm.conf.d/50-no-guest.conf

Paste following lines when the command opens an empty file and save it. Restart to apply changes.

[SeatDefaults]
allow-guest=false

7. Auto power off when laptop lid is closed

There’s only “Suspend” and “Do nothing” options for laptop close actions. I’m always want to shutdown Ubuntu when I close the lid, so I edited the logind.conf file via command:

sudo apt install gksu && gksudo gedit /etc/systemd/logind.conf

Uncomment the line #HandleLidSwitch=suspend and change it to HandleLidSwitch=poweroff.

Tip: you can also change the value to HandleLidSwitch=hibernate to hibernate Ubuntu when lid is closed.

Restart or run command to apply the change:

systemctl restart systemd-logind.service

8. Install some useful applications:

  • MPV media player, available in Ubuntu Software.
  • GIMP, An advanced image editor, available in Ubuntu Software
  • Corebird, and GTK3 twitter client.
  • Shutter – Screenshot & annotation tool
  • And more and more…

upgrade Ubuntu 17.04

This is a quick tip for Ubuntu 16.10 desktop users how to upgrade to Ubuntu 17.04 Zesty Zapus.

Before getting started, you need to do some preparations:

1. Always make a backup of important data, bookmarks, and other user documents.

2. Remove or disable third-party repositories.

Launch Software & Updates utility, navigate to Other Software tab, and remove /disable all third-party repositories.

3. Restore to open-source drivers.

Also in Software & Updates utility, Additional Drivers tab, switch to the open-source drivers if proprietary drivers are in use. (Need restore after applied changes)

4. And it’s better to choose download from ‘Main Server’ in Software & Updates utility.

5. Make your system up-to-date by running command in terminal:

May need to restart if you have not update your system for a long time.

6. (Optional) Useless packages and software libraries may take a few more minutes upgrading your system. For me, Ubuntu Kylin and Plasma Desktop libraries take quite a few minutes in the upgrading process.

After all, launch Update Manager via the command below and it will prompt that Ubuntu 17.04 is available after checking for updates:

sudo update-manager -d

Click the Upgrade and confirm in the next dialog, follow the wizard util done.

KeePass2

For those prefer KeePass2 password manager to KeePassX, here’s how to install the latest KeePass 2.35 release in Ubuntu 16.10, Ubuntu 16.04, Ubuntu 14.04, Ubuntu 12.04.

While official Ubuntu repositories only provide an old version, the latest KeePass2 has reached the 2.35 release with a large list of new features and improvements. Here are some of them:

  • New KDBX 4 file format
  • Added Argon2 key derivation function
  • Added ChaCha20 (RFC 7539) encryption algorithm
  • open entry URLs with Firefox or Opera in private mode
  • support for importing mSecure 3.5.5 CSV, Password Saver 4.1.2 XML, and Enpass 5.3.0.1 TXT files.
  • And other more change, see the release note.

How to Install KeePass2 2.35 in Ubuntu:

For all current Ubuntu releases and derivatives, e.g., Linux Mint 17, 18, and Elementary OS Loki, KeePass2 can be easily installed from the Julian Taylor’s PPA.

1. Open terminal by pressing Ctrl+Alt+T or searching for “Terminal” from start menu. When it opens, run command to add the PPA:

sudo add-apt-repository ppa:ubuntuhandbook1/keepass2

Type user password (no visual feedback due to security reason) when it asks and hit Enter.

2. Then you can upgrade KeePass2 from an existing release via Software Updater:

upgrade KeePass2

Or just run following commands to check updates and install the latest release:

sudo apt-get update

sudo apt-get install keepass2

For those who don’t want to add the PPA, grab the DEB package from HERE.

How to Restore

For any reason you can easily remove the PPA and downgrade KeePass2 to the stock version in official Ubuntu repositories via ppa-purge tool:

sudo apt-get install ppa-purge && sudo ppa-purge ppa:jtaylor/keepass

Tip: For a list of plugins, e.g., KeeFox, KeeAgent, Keebuntu, and KeePassHttp, go to this PPA.

MuPDF Ubuntu 16.04

MuPDF, a lightweight PDF, XPS, and E-book viewer, has reached the 1.11 rc1 release with mainly bug-fixes and some new features.

The MuPDF viewer is small, fast, yet complete. It supports many document formats, such as PDF, XPS, OpenXPS, CBZ, EPUB, and FictionBook 2. It offers command line tools that allow you to annotate, edit, and convert documents to other formats such as HTML, SVG, PDF, and CBZ.

New features in MuPDF 1.11:

  • PDF portfolio support with command line tool “mutool portfolio”.
  • Add callbacks to load fallback fonts from the system.
  • Use system fonts in Android to reduce install size.
  • Flag to disable publisher styles in EPUB layout.
  • Improved SVG output.

How to Install MuPDF 1.11 in Ubuntu / Linux Mint:

Besides building the tool from source, there’s an unofficial PPA with the packages for Ubuntu 16.04, Ubuntu 16.10, Ubuntu 17.04, and their derivatives.

1. Open terminal by pressing Ctrl+Alt+T or searching for “Terminal” from start menu. When it opens, run command to add the PPA:

sudo add-apt-repository ppa:ubuntuhandbook1/apps

Type in password (no visual feedback due to security reason) when it asks and hit Enter.

2. Then install mupdf and mupdf-tools packages either via Synaptic Package Manager or by running following commands in terminal:

sudo apt-get update

sudo apt-get install mupdf mupdf-tools

If you have a previous release installed, simply launch Software Updater to upgrade the tool after checking for updates.

To use the PDF/XPS viewer, right-click on your file and select open with MuPDF. You can also set MuPDF as default in the Properties window.

Uninstall:

To restore MuPDF to the stock version available in your Ubuntu’s main archive, run command in terminal to purge the PPA:

sudo apt-get install ppa-purge && sudo ppa-purge ppa:ubuntuhandbook1/apps

KDE Plasma 5.8

For those who want to install the popular GTK theme ‘Arc’ in KUbuntu. There’s an open-source port for Plasma 5 desktop with a few additions and extras called Arc KDE.

The KDE port includes:

  • Aurorae Themes
  • Konsole Color Schemes
  • Konversation Themes
  • Kvantum Themes
  • Plasma Color Schemes
  • Plasma Desktop Themes
  • Plasma Look-and-Feel Settings
  • Wallpapers
  • Yakuake Skins
  • Extra tools

Ark Dark for Plasma

Arc KDE

To install the theme in KUbuntu 16.04, KUbuntu 16.10, KUbuntu 17.04, open terminal emulator and run following commands one by one:

1. Run command to add the official Arc-KDE PPA:

sudo add-apt-repository ppa:papirus/arc-kde

2. Then update and install the theme as well as Kvantum engine.

sudo apt-get update

sudo apt-get install arc-kde kvantum

For better looking, after apply the new desktop theme run kvantummanager to choose and apply Arc Dark Transparent (or another) theme.

For a more consistent and beautiful experience, install Papirus icon theme via commands:

sudo add-apt-repository ppa:papirus/papirus

sudo apt-get update

sudo apt-get install papirus-icon-theme

Tip: to fix the color of the menubar on Arc Dark GTK theme, run command:

sudo sh ~/.local/share/plasma/desktoptheme/Arc-Dark/fix-menubar.sh

Skype for Linux

A new beta release, Skype for Linux 5.1, was announced a few hours ago.

There are many new features and improvements coming with Skype for Linux Beta 5.1. However, only following changes are mentioned in the announcement:

  • Updated to Electron 1.6.2
  • Improved installer scripts that register the Skype update repository for you
  • Many smaller improvements and bugfixes

Skype for Linux Beta

How to Install Skype 5.1 in Ubuntu / Linux Mint:

Skype website offers DEB packages for download at the link below:

Download Skype for Linux

You can also add the official Skype repository to install and receive updates via Software Updater utility, by following the steps below:

1. Open terminal by pressing Ctrl+Alt+T or searching for “terminal” from the Dash. When it opens, run command:

dpkg -s apt-transport-https > /dev/null || bash -c "sudo apt-get update; sudo apt-get install apt-transport-https -y"

Type in your password when it prompts and hit Enter. The command will check if the ‘apt-transport-https’ package is installed.

2. Run command to install the GPG key:

curl https://repo.skype.com/data/SKYPE-GPG-KEY | sudo apt-key add -

3. Add Skype repository to your system:

echo "deb [arch=amd64] https://repo.skype.com/deb stable main" | sudo tee /etc/apt/sources.list.d/skype-stable.list

After adding the repository, you can install Skype for Linux either via Synaptic Package Manager or by running command:

sudo apt-get update && sudo apt-get install skypeforlinux

And future updates will be available in Software Updater along with other system updates.

How to Uninstall:

To remove the Skype repository, go to System Settings -> Software & Updates -> Other Software tab.

PPSSPP, a free and open-source Sony PSP emulator, has reached the 1.4 release a few days ago. Here’s how to install it in Ubuntu 14.04, Ubuntu 16.04, Ubuntu 16.10, and Ubuntu 17.04.

PPSSPP can run your PSP games on your PC in full HD resolution. It can even upscale textures that would otherwise be too blurry as they were made for the small screen of the original PSP.

All trademarks are property of their respective owners. The emulator is for educational and development purposes only and it may not be used to play games you do not legally own.

The latest PPSSPP 1.4 was released on March 31 that features:

  • Support Direct3D 11 (performs better than OpenGL or D3D9 on most hardware)
  • Audio quality improvement (linear interpolation)
  • Hardware spline/bezier tesselation in OpenGL, D3D11 and Vulkan (…)
  • Post-processing shaders in D3D11
  • Prescale UV setting removed, now the default (improves perf)
  • High DPI display fixes
  • Various fixes for UMD switching for multi-UMD games
  • New audio setting to improve compatibility with Bluetooth headsets
  • Various desktop gamepad compatibility fixes
  • Workaround for mipmap issue, fixing fonts in Tactics Ogre Japanese
  • Assorted minor compatibility fixes, code cleanup and performance improvements

How to Install PPSSPP 1.4 in Ubuntu via PPA:

The software has an official PPA for current Ubuntu releases and derivatives. Follow the steps below one by one to add it and install PPSSPP:

1. Open terminal by pressing Ctrl+Alt+T or searching for “Terminal” from start menu. When it opens, run command:

sudo add-apt-repository ppa:ppsspp/stable

Type in your password (no visual feedback due to security reason) and hit Enter.

2. After adding the PPA, you can either search for install ppsspp via Synaptic Package Manager, or run following commands to update package index and install ppsspp:

sudo apt-get update

sudo apt-get install ppsspp

Uninstall:

To remove the PPA, launch Software & Updates utility and navigate to Other Software tab. The PPSSPP package can be removed either via Synaptic Package Manager or by running command:

sudo apt-get remove ppsspp && sudo apt-get autoremove

Avidemux video editor

Avidemux video editor has reached the 2.6.19 release a few days ago. It features better support for HEVC in mpeg TS and 10bits codec.

Avidemux 2.6.19 changelog includes:

  • All filters with preview have better navigation dialogs
  • Delogo filter UI redone
  • Fixed changeFps/resampleFps seeking
  • HEVC support improved
  • Flv/Demux : Support large files (rcdrone)
  • Allow EAC3 as external audio track
  • General usability cleanup
  • Allow using the last read folder as default save folder
  • 2 pass encoding dialog cleanup
  • Dynamically enable/disable menu
  • Customizable keyboard shortcut
  • Allow reverting page up/down
  • Better support for 10bits
  • Translation updates
  • Updated ffmpeg libs to 3.0.7

avidemux 2.6 ubuntu 14.04

How to Install Avidemux 2.6.19 in Ubuntu:

The GetDeb repository has build the new release for Ubuntu 16.04, Ubuntu 16.10, and their derivatives.

1. To add the repository, open terminal via Ctrl+Alt+T or searching for “terminal” from start menu, and run command:

sudo sh -c 'echo "deb http://archive.getdeb.net/ubuntu $(lsb_release -sc)-getdeb apps" >> /etc/apt/sources.list.d/getdeb.list'

For Linux Mint 18, add the GetDeb repository via Software Sources -> Additional Repositories

2. Then refresh, search for and install avidemux2.6-qt package via Synaptic Package Manager.

Or run commands in terminal to check for updates and install Avidemux 2.6.19:

sudo apt-get update

sudo apt-get install avidemux2.6-qt

How to Uninstall:

To remove the package, either use Synaptic Package Manager or run command:

sudo apt-get remove avidemux2.6-qt && sudo apt-get autoremove

And remove the repository by going to Software & Updates -> Other Software tab.