Archives For March 31, 2022

This simple tutorial shows how to hide user list and/or enable touchpad tap clicking in login screen of Ubuntu 22.04 LTS.

GNOME, the default desktop environment, has some hidden keys to configure the login screen options. However, you need gdm (Gnome Display Manager) user privilege who handles the default login.

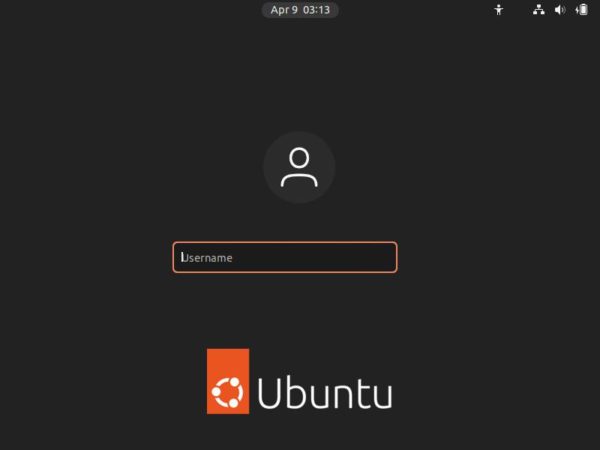
After following this tutorial, Ubuntu will no longer display usernames in login screen. Instead, you need to manually type user-name and then password to login.

Option 1: Single command to hide user list from login screen

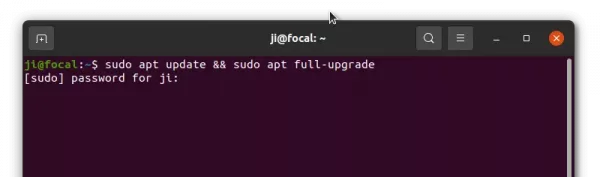
Firstly press Ctrl+Alt+T keyboard shortcuts to open terminal. When it opens, run the commands below as you need.

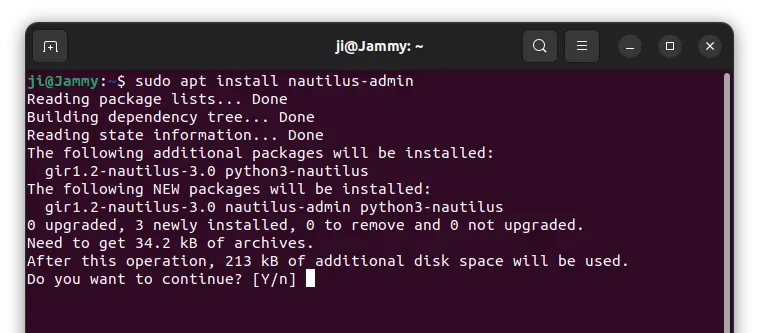
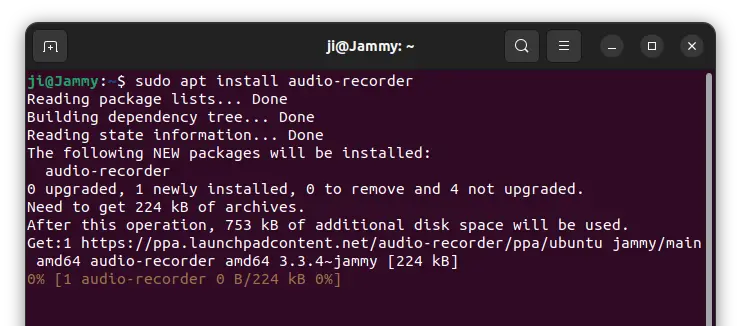
1.) Install dbus-x11 inter-process messaging system by running command:

sudo apt install dbus-x11

Without the package, you’ll get following output when running command in step 2.) to hide user list or enable tap to click.

dconf-WARNING **: 15:23:16.101: failed to commit changes to dconf: Failed to execute child process “dbus-launch” (No such file or directory)

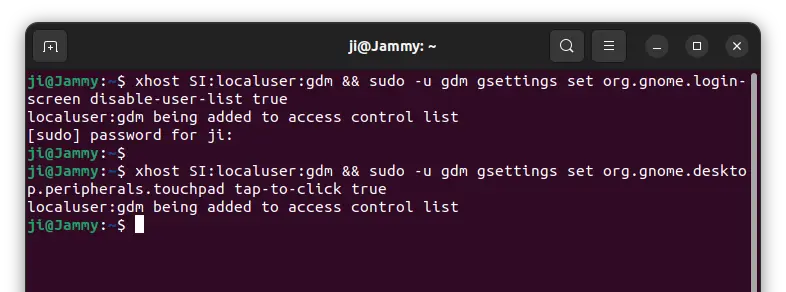
2.) To hide your usernames from login screen, use command:

xhost SI:localuser:gdm && sudo -u gdm gsettings set org.gnome.login-screen disable-user-list true

This command will first add user gdm into access control list. Then toggle the hidden ‘disable-user-list’ key via that user privilege.

For choice, you may also run the command below to enable tap-clicking in login screen.

xhost SI:localuser:gdm && sudo -u gdm gsettings set org.gnome.desktop.peripherals.touchpad tap-to-click true

To undo the changes, simply re-run the commands in step 2.) by replacing value ‘true‘ to ‘false‘.

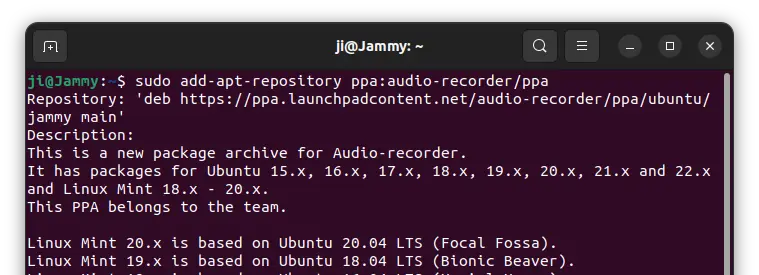
Option 2: Use a graphical tool to configure login screen

There’s a new configuration tool, gdm-settings, under development for Ubuntu, Debian, Fedora, Arch and other Linux using GNOME Desktop.

The tool provides an elegant user interface specifically for configuring the GDM login screen, including:

  • change login screen background. (Not work for Ubuntu 22.04 so far, at least in my case)
  • Change fonts, scaling factor.
  • Configure login screen top bar.
  • Configure sound, touchpad behavior, nightlight, and more.

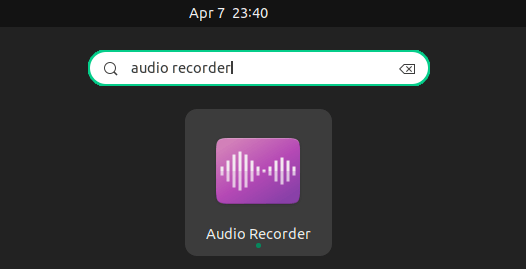
1.) Firstly, download gdm-settings from its project releases page:

So far, it’s AppImage package that works on most Linux!

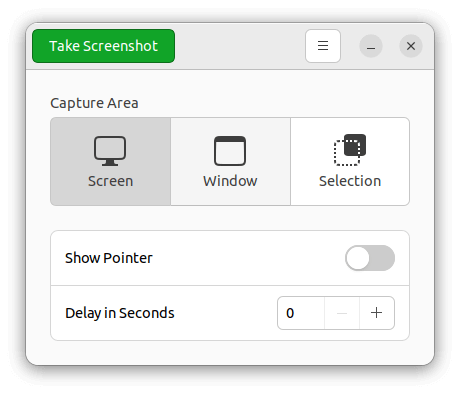
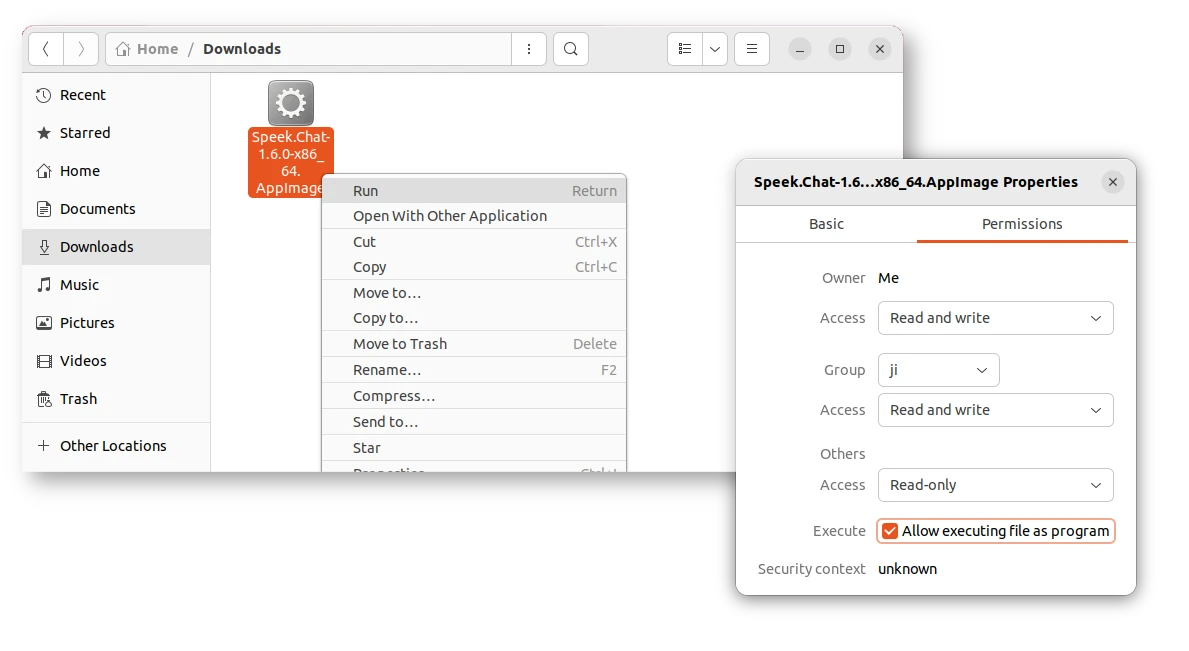
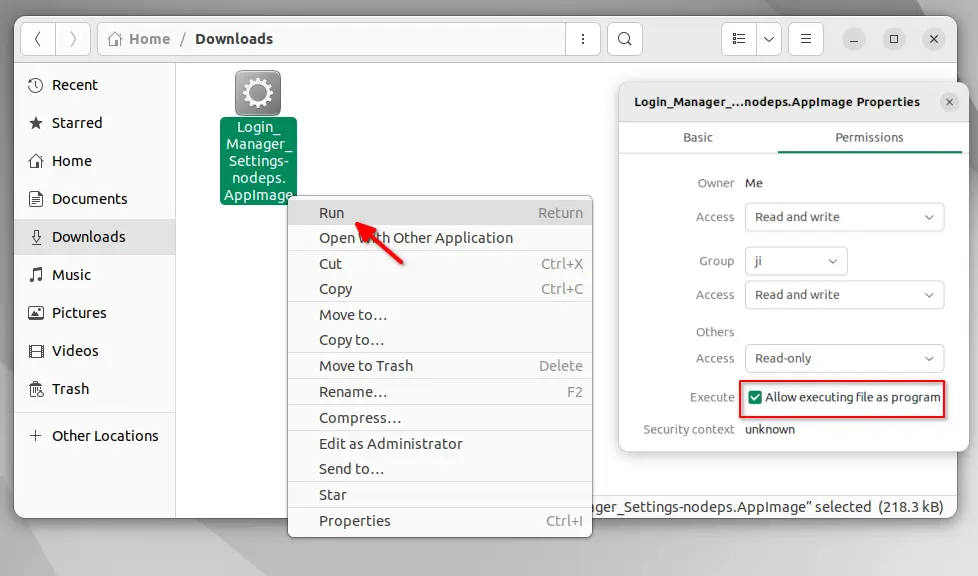
2.) Right-click on the ‘AppImage’ package, and open its “Properties” dialog. Then enable ‘Allow executing file as program‘ under Permissions tab. Finally, right-click and select run it to launch the tool.

3.) When it opens, enable ‘tap-to-click’ under Touchpad tab, and disable user list under Miscellaneous.

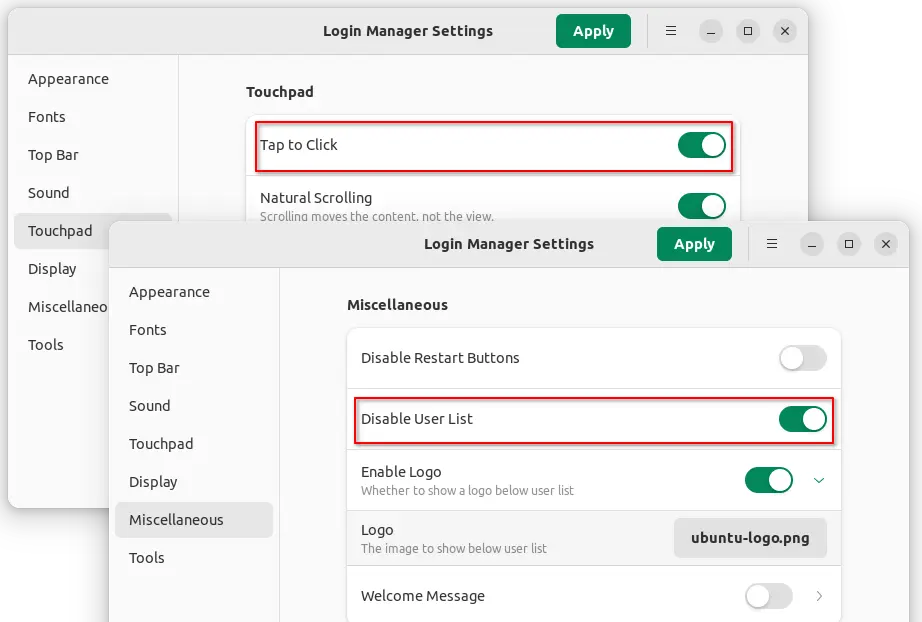
After clicking ‘Apply’ and typing user password for authentication, you’ll see the changes in next login.

Want to open folder or edit file as administrator (aka root in Linux)? Here’s how to do the trick by adding menu option in Ubuntu 22.04 file manager.

The ‘Files’ (aka nautilus) has an extension called nautilus-admin to do administrative operations. With it, you may right-click on folder and select “Open as Administrator“, or right-click on file and select “Edit as Administrator“.

Don’t like MS Windows, it however does not support running an app as root.

1. Open Terminal

Firstly, open terminal either by pressing Ctrl+Alt+T key combination on keyboard, or by searching from the ‘Activities’ overview screen.

2. Install nautilus-admin

When the terminal opens, paste the command below into it and hit Enter.

sudo apt install nautilus-admin

Type user password (no asterisk feedback) for sudo authentication and hit Enter to continue.

3. Apply change

Once installed the extension, you need to restart the file manager to apply change.

Not just close and re-open the file manager window, but you need to run command to quit the background service and let it start again automatically:

nautilus -q

That’s all. Enjoy!

This simple tutorial shows how to install the tiny sound recording app “Audio Recorder” in Ubuntu 22.04 and Ubuntu 24.04 LTS.

Audio Recorder” is a little open-source app that can record audio from your system’s sound card, microphone, browsers, webcams and any sound that your PC plays out.

The tool has a built-in timer that automates audio recording on given clock time or after time period, auto stop when the recorded file size exceeds a limit. And, it can be controlled via Rhythmbox, VLC, Audacious and other MPRIS2 compatible players. For Skype users, it can automatically record all your Skype calls without any user interaction.

Sounds can be saved as OGG audio, Flac, MP3, WAV, M4A, and OPUS. And, it has command line options to control app interface as well as recording actions.

UPDATE: THIS APP IS NO LONGER IN ACTIVE DEVELOPMENT! It does NOT work in Ubuntu 24.10 and later.

Install Audio Recorder in Ubuntu 22.04 | 24.04:

The PPA also contains old version packages for Ubuntu 16.04, Ubuntu 18.04, and Ubuntu 20.04

The app has been more than 10 years old! The developer team maintains an official PPA with all Ubuntu releases and their derivatives (e.g., Linux Mint) support. Somehow, it does not available in Ubuntu’s universe repository.

1. Add the PPA

First press Ctrl+Alt+T on keyboard to open terminal. When it opens, paste the command below and hit Enter:

sudo add-apt-repository ppa:audio-recorder/ppa

Type user password (no asterisk feedback) for sudo authentication and hit enter to continue.

NOTE: For Ubuntu 24.04 and 23.10, the run command below to add this PPA instead.

sudo add-apt-repository ppa:ubuntuhandbook1/audio-recorder

2. Install Audio Recorder package

After adding the PPA and updating the package cache (which is done automatically), just run the apt command below to install the tool:

sudo apt install audio-recorder

Some Ubuntu based systems need to run sudo apt update to manually refresh package cache after adding PPA. While it’s done automatically in Ubuntu.

Once installed, search for and open the tool from ‘Activities’ overview screen and enjoy!

How to Remove Audio Recorder:

To remove the Ubuntu PPA, either launch “Software & Updates” utility and remove the source from Other Software tab, or run the command below in terminal:

sudo add-apt-repository --remove ppa:audio-recorder/ppa

And to remove the sound recording app, simply use command:

sudo apt remove --autoremove audio-recorder

That’s all. Enjoy!

Ubuntu 22.04 finally removed the .deb package for Firefox web browser from it’s repository! Here’s how to install it back.

As you may know, Firefox in Ubuntu repository since 22.04 is a Snap package that runs in sandbox. It’s easy to remove it. But when you try installing the deb package via apt, it just install the Snap version back!!

Like Chromium, the Firefox deb in Ubuntu 22.04 + repository is an empty package that links to the Mozilla’s official Snap.

And, if you want to install the latest Firefox using the classic .deb package format, there are 2 easy ways:

  • Mozilla Team PPA maintained by Ubuntu Team members.
  • Mozilla’s new apt repository maintained by Firefox developer team!

(Optional) Remove the pre-installed Firefox Snap

It’s OK to keep the default Snap package. But it will cause duplicated Firefox icons after installing Firefox in .deb package format.

NOTE: Export bookmarks and backup other important data before removing it!

To remove it, press Ctrl+Alt+T on keyboard to open terminal. Then, run the command:

sudo snap remove firefox

Also, remove the empty Deb package by running command:

sudo apt remove firefox

Option 1: Install Firefox via “Mozilla Team” team PPA

The team described that it has assumed responsibility for Ubuntu’s official Firefox and Thunderbird packages.

And, the Firefox and Firefox ESR package maintainer for “Mozilla Team” team PPA, Rico Tzschichholz, is a well-known Ubuntu user who also maintains the official packages for LibreOffice, Plank dock, and unbound DNS server.

1. Add Mozilla Team PPA

In terminal (Ctrl+Alt+T), run the command below to add the PPA. Type user password (no asterisk feedback) when it asks and hit Enter to continue.

sudo add-apt-repository ppa:mozillateam/ppa

As the PPA description indicates, the PPA was previously created for Firefox ESR and Thunderbird. It now contains the latest Firefox too.

Add Mozillateam PPA

2. Set PPA priority:

The empty Firefox deb in Ubuntu’s official repository has version number 1:1snap1-0ubuntu2. Which is always higher than the PPA package version. Running package updates either via sudo apt upgrade or ‘Software Updater’ will automatically install that one which redirects to Snap.

To workaround the issue, you have to set a higher PPA priority. To do so, run the command below in terminal (Ctrl+Alt+T):

sudo gnome-text-editor /etc/apt/preferences.d/mozillateamppa

For Ubuntu 22.04 and earlier, replace gnome-text-editor in command with gedit, or use nano that works in all the desktop environments.

The command creates and opens empty config file for apt package manager. When it opens, add the lines below and save it:

Package: firefox*
Pin: release o=LP-PPA-mozillateam
Pin-Priority: 1001

Package: firefox*
Pin: release o=Ubuntu
Pin-Priority: -1

For nano text editor, press ctrl+s to save file, and ctrl+x to exit.

After saving the file, run sudo apt update command in terminal to apply changes.

sudo apt update

3. Install Firefox via apt

Tip: the commands in this step also installs Firefox for the old Ubuntu 16.04. Though sudo apt update need to be run first.

Finally, run the command below to install the latest Firefox package as deb:

sudo apt install firefox

Here -t 'o=LP-PPA-mozillateam' specifies to install Firefox from that PPA. It’s required until you set higher PPA package priority (see next step).

The -t 'o=LP-PPA-mozillateam' flag is no longer required after setup PPA priority.

For choice, you may install Firefox ESR instead. It’s another official Firefox package that moves slowly and targets for school or enterprise use.

sudo apt install firefox-esr

Option 2: Install Firefox via its official repository

Mozilla’s new apt repository contains 4 versions of Firefox packages: Firefox Stable, Firefox Beta, Firefox Development Edition, and Firefox Nightly. It’s a good choice for Ubuntu & Debian users.

1: Get Repository Key file

To add the new repository, you need to first download & install the key, so your system will trust the packages from it.

First, press Ctrl+Alt+T on keyboard to open terminal. When it opens, run command to make sure ‘/etc/apt/keyrings’ exist for storing the keys.

sudo mkdir -p /etc/apt/keyrings

Then, download & install the key by running the single command below in terminal:

wget -q https://packages.mozilla.org/apt/repo-signing-key.gpg -O- | sudo tee /etc/apt/keyrings/packages.mozilla.org.asc > /dev/null

After that, you can verify the new key file by listing the content of that directory via command ls /etc/apt/keyrings.

2: Add Mozilla’s apt repository

Also in a terminal window, run the single command below will create a config file and write the source repository.

echo "deb [signed-by=/etc/apt/keyrings/packages.mozilla.org.asc] https://packages.mozilla.org/apt mozilla main" | sudo tee /etc/apt/sources.list.d/mozilla.list > /dev/null

When done, you may verify by running cat /etc/apt/sources.list.d/mozilla.list to print the source file content.

3. Set apt repository priority:

Also you need to set higher priority for Mozilla’s repository, so Ubuntu will install Firefox from it rather than the snap package.

To do so, run command to create & edit the config file:

sudo gnome-text-editor /etc/apt/preferences.d/mozilla

Also, replace gnome-text-editor with gedit for Ubuntu 22.04 and earlier, or use nano command line editor that works in most desktop environments.

When file opens, add following lines and save it (For nano, press ctrl+s to save, and ctrl+x to exit).

Package: firefox*
Pin: origin packages.mozilla.org
Pin-Priority: 1001

Package: firefox*
Pin: release o=Ubuntu
Pin-Priority: -1

4. Install Firefox:

Finally, refresh your system package cache by running command in terminal:

sudo apt update

And, install Firefox from that repository via command:

sudo apt install firefox

You may also use firefox-beta, firefox-devedition, or firefox-nightly in last command to install other versions.

How to Restore Firefox Snap:

To restore the pre-installed Snap package, or uninstall the .deb package, first remove the repositories:

  • To remove the Mozilla Team PPA, launch ‘Software & Updates‘ utility and navigate to Other Software tab, finally remove the corresponding source line.
  • To remove the Mozilla apt repository, simply delete the source file, by running command in terminal:
    sudo rm /etc/apt/sources.list.d/mozilla.list

After that, either launch Software Updater to upgrade Firefox or use apt commands below. Both of which will automatically install back the pre-installed Snap package.

sudo apt update
sudo apt install firefox

That’s all. Enjoy!

Ubuntu 22.04 has a new in-shell screenshot UI for taking screenshots and recording desktop. The old default screenshot app (GNOME Screenshot) is no longer available out-of-the-box.

For those somehow sticking to the old screenshot tool, here’s how to install it back and configure keyboard shortcuts in Ubuntu 22.04.

old default Gnome Screenshot app

Install Gnome Screenshot:

Press Ctrl+Alt+T on keyboard to open terminal. When it opens, run the command below will install the app back from Ubuntu universe repository:

sudo apt install gnome-screenshot

Type user password (no visual feedback) for sudo authentication and hit Enter

Install Gnome Screenshot

After installation, you may search for and open the app from ‘Activities’ overview screen.

Or use the steps below to set up keyboard shortcuts for this tool.

Set shortcut keys for GNOME Screenshot:

By default, you may press Shift+Print to immediately capture the full-screen, and use Alt+Print to capture focused app window. And, Print key is used to bring up the in-shell screenshot UI. For choice, you may replace the shortcuts keys via Gnome Control Center.

1. Firstly, open system settings (aka, gnome-control-center) from system tray menu:

2. When it opens, navigate to ‘Keyboard‘ in the left. Then click ‘View and Customize Shortcuts‘ in bottom right.

3. If you want to re-bind Print, Alt+Print, Shift+Print shortcut keys via other screenshot actions, disable them (press Backspace in set shortcut dialog) in under ‘Screenshots’ shortcuts page.

4. Next, go back ‘Keyboard Shortcuts’ page, scroll down and select “Custom Shortcuts“. Then you may click ‘Add Shortcut’ (or ‘+’ icon) button to add new custom shortcuts.

  • Name: type name of the shortcut as you prefer.
  • Command:

    • gnome-screenshot --window – grab the current active window immediately.
    • gnome-screenshot --area – start area selection.
    • gnome-screenshot – capture the full-screen immediately.
  • Shortcut: click ‘Set Shortcut…’ and press the key combination to bind the keyboard shortcut.

For more command line options of Gnome Screenshot, run man gnome-screenshot in terminal.

That’s all. Enjoy!

Looking for a secure instant messaging app? Speek.Chat is a free open-source messenger based on Tor hidden network services.

No server, no metadata, no ID or phone number! With it, users are only identified via public keys. By sharing the key to others, they can send request to add you into contact list and then start chatting.

All messages and files are end-to-end encrypted and routed via the Tor network. No middleman server that could be compromised, taken down or leak user information. You can chat anonymous without exposing your identity (or IP) to anyone.

Speek.Chat messenger features:

  • Serverless, no metadata, anonymous.
  • Peer to peer encrypted using TLS/SSLv3, routed via Tor network.
  • Nothing is stored. All messages deleted on app close.

Get Speed.Chat

The app is available in Microsoft Store for Windows, and app store for macOS 10.12 or later.

For Linux, it provides the non-install Appimage available to download at the project releases page:

Grab the package from ‘Assets’ section, then right-click on it and go to file ‘Properties’. After adding permission to ‘Allow executing file as program‘, you can right-click and select run to launch the messenger.

If you don’t want to use it anymore, just remove the .appimage package and that’s all.

Ubuntu 22.04 Jammy Jellyfish now is in final beta stage! Here’s how you can upgrade to the new LTS from Ubuntu 20.04!

NOTE: the steps below now will upgrade to Ubuntu 22.04 Beta at the moment. Though, the beta will be upgraded to the final stable release automatically in next month by running regular updates.

What’s New in Ubuntu 22.04:

The new Ubuntu 22.04 LTS features Linux Kernel 5.15 and GNOME 42 desktop. It’s a long term support release with 5 years support. The Final Beta was announced with changes including:

  • Full dark/light mode via appearance settings.
  • 10 accent colors.
  • New screenshot UI (press Print-Screen to start it).
  • Switch Firefox to Mozilla’s Snap package.
  • Defaults to Wayland compare to Ubuntu 20.04.
  • LibreOffice 7.3, Thunderbird 91.
  • Python 3.10, Ruby 3.0, Mesa 22, PulseAudio 16, CUPS 2.4, PostgreSQL 14.2
  • See release note for more.

Preparation:

Before getting started, there are some things need to do first! They are important to prevent upgrade failure.

1.) Backup! Backup! Backup! The upgrade process may fail due to different reasons. So, it’s important to back your data, bookmarks, etc.

2.) Disable third-party PPAs. This can be done by launching ‘Software & Updates’ utility and navigate to ‘Other Software’ tab.

If possible, I’d recommend to purge PPAs which also downgrade these third-party software packages. Especially for ffmpeg, mesa, etc.

Disable or remove 3 party PPAs

3.) Also in ‘Software & Updates’ tool, navigate to ‘Updates’ tab. There choose ‘Notify me of a new Ubuntu version: For long term support versions‘.

4.) Remove proprietary drivers from ‘Additional Drivers’ tab, and use an open-source driver instead. You may skip this step if your PC does not have a dedicated GPU.

5.) Remove other Desktop Environments! If you have other desktops (e.g., KDE, XFCE, Cinnamon), it’s better to remove them, so to speed up the upgrade process.

6.) Disable User Extensions. Disable user installed Gnome Extensions via Gnome Tweaks tool!

Upgrade to Ubuntu 22.04:

NOTE: The upgrade process may fail! If you can’t afford to have a broken system, please do a clean install instead of upgrading it!

1.) Firstly, press Ctrl+Alt+T on keyboard to open terminal. When it opens, run the command below to install all available system updates:

sudo apt update && sudo apt full-upgrade

install all available system updates

And, restart your computer if you have not run system updates for a long time.

2.) Next, in terminal run the command below to run update manager to check distribution update:

update-manager -d -c

If there are still available updates or removals, click on ‘Install Now’ and re-run the command.

3.) Once you see the prompt for Ubuntu 22.04. Click on “Upgrade” button, and confirm in the next ‘Release Notes’ dialog.

4.) It will pop-up another dialog asks to confirm via ‘Start Upgrade’ button. Once you click on it, the ‘Distribution Upgrade’ wizard will pop-up indicates the upgrading process.

5.) Don’t go far away from your computer!! There will be a few more confirm dialogs, so you have to keep an eye on the screen.

If everything goes well, there will be a dialog asks to “Restart” to complete the upgrade.

Sadly, I went out when it was ‘Getting new packages‘. And the upgrade process failed at blank screen when I was back! So there’s no screenshot for this step.

Troubleshoot:

There may be various reasons that the upgrade failed. Here are the issues in my case.

As mentioned, the upgrade failed in my case and the laptop run into blank screen. And, I did following steps that successfully finish the upgrade.

1.) Force reboot and login. Press Ctrl+Alt+F2 (F3 ~ F6) and type username, then password to log into tty console if GDM (login screen) does not start. Or, select boot “Advanced -> recover mode -> drop root shell prompt” from boot-loader if Ubuntu refused to boot!

2.) Once logged in, try running command to configure unfinished packages:

sudo dpkg --configure -a

3.) And, try to fix broken dependencies via command:

sudo apt -f install

In my case, some third-party packages (e.g., libfilezilla12 from xtradeb PPA, and libreoffice-common from LibreOffice Fresh PPA) break the dependencies! And, the command failed with something look like:

trying to overwrite ‘…’, which is also in package libfilezilla12 0.27.1~extradeb1
Errors were encountered while processing:

E: Sub-process /usr/bin/dpkg returned an error code(1)

To fix the issue, just remove the package via command (replace package name ‘libfilezilla12’ accordingly):

sudo dpkg -P libfilezilla12

Then re-run the sudo apt -f install until it’s done successfully without error!

4.) Install all available system updates via command:

sudo apt full-upgrade

If everything goes well, clean up via command:

sudo apt remove --autoremove

And finally restart computer via reboot command.

5.) Some packages are however missing in my case after restart. They were fixed by manually installing the packages via the commands below.

  • No login screen or non-gnome login screen, run command and then reboot:
    sudo apt install gdm3 && sudo dpkg-reconfigure gdm3
  • Miss pre-installed extensions (left-dock, desktop icons, and appindicator), run command and then log out and back in:
    sudo apt install gnome-shell-extension-ubuntu-dock gnome-shell-extension-appindicator gnome-shell-extension-desktop-icons-ng