Archives For November 30, 1999

Want to create web apps into the portable Appimage package format? Appnativefy is a simple tool to do the job.

Appnativefy is a simple command line tool to make executable AppImage files from any website, it uses the Nativefier API in the backend, with AppImageKIt.

Appimage is an universal Linux package format. Different to other packages, you don’t need to install it. Just make it executable and run to launch program!

How to use appnativefy:

With Appnativefy, you can run a simple command to turn a website into single executable Appimage:

appnativefy --name "TYPE_PACKAGE_NAME" --url "URL_ADDRESS"

For instance, you can make youtube.com into appimage via command:

appnativefy --name "YouTube" --url "https://youtube.com"

You can add more flags at the end of the command to enable more options, for instance:

  • --services enables to sign-in using services such as Microsoft 365 and Google.
  • --favicon forces to use the favicon of the site while making the AppImage.
  • --widevine adds Widevine support to enable playing DRM enabled content.
  • For more, run appnativefy -h

For example, run below command will create appimage for Spotify with Widevine support, sign-in services enabled, and using the favicon.

appnativefy --name "Spotify" --url "https://open.spotify.com" --services --widevine --favicon

The app will create an appnativefy folder in users home directory that contains all generated Appimage packages.

How to install Appnativefy:

The software is available as a NPM package. To install it, firstly open terminal and run command to install dependencies:

sudo apt install nodejs npm wget

Then install the tool via npm command:

sudo npm install -g appnativefy

How to Remove Appnativefy:

To remove the command line tool, simply run command:

sudo npm uninstall -g appnativefy

If you don’t use nodejs and npm, remove them to free up a few dozens of MB disk space:

sudo apt purge --auto-remove nodejs npm

This is a simple tutorial shows how to set the priority of a certain package and/or apt repository in Ubuntu, Debian, Linux Mint.

In Ubuntu, we install software packages from different sources, including Ubuntu universe repositories (using Ubuntu Software), Ubuntu PPAs (e.g., LibreOffice, Kodi, GIMP, and more), apps’ own apt repositories (e.g, Chrome, VirtualBox, Opera, and more).

We can even install apps from other Linux Distributions. For instance, installing Linux Mint’s IPTV player, Web App Mananger, and Chromium Browser (in deb format) in Ubuntu is possible.

Why setting priority:

However, installing from mixed software sources may cause following questions:

  1. Lock a package in specified version.
  2. More than one repositories have the same package, but you want to install or receive package updates from a certain repository.
  3. Install only one or two packages from the repository, but refuse all others.

Create and set package priority:

By adding a rule file under /etc/apt/preferences.d/ directory, and pinning a priority will fix the issues.

Just open terminal from system app launcher, and run command to create and edit a config file (replace gedit for other system):

sudo gedit /etc/apt/preferences.d/99mint-repository

In the case, I created a 99mint-repository file and added following lines:

# Allow upgrading only webapp-manager from Ulyssa repository
Package: webapp-manager
Pin: release n=ulyana
Pin-Priority: 500

# Also allow upgrading chromium (Added by another post).
Package: chromium
Pin: release n=ulyana
Pin-Priority: 500

# Never prefer other packages from the Ulyssa repository
Package: *
Pin: release n=ulyana
Pin-Priority: 1

As you can see, each entry has 3 lines (exclude the description line started with # at the beginning), and separated with a blank line.

The three lines started with Package: at the beginning specified the packages: “webapp-manager”, “chromium”, and “*” (everything).

About the “Pin: ” line:

The second line specifies the pin definition. It can be Pin: version 1.0.99*, the “*” is a “wildcard”, that says the package with all versions beginning with 1.0.99.

You can also use release or origin to specified package source. For example:

Pin: release o=LP-PPA-team-xbmc
Pin: release l=linuxmint
Pin: origin packages.linuxmint.com

The parameters for release are: a (archive), c (components), v (version), o (origin) and l (label).

And you can find out the values for release and origin by running command:

apt-cache policy |more

About the number of Pin-Priority:

The value of the third line can be set to:

  • 1000 or higher. Install a version from the target release even if it would replace (downgrade) an installed package with a higher version.
  • 990 to 999. Install a version even if it does not come from the target release, unless the installed version is more recent.
  • 500 to 899. Install a version unless there is a version available belonging to the target release or the installed version is more recent.
  • 100 to 499. Install a version unless there is a version available belonging to some other distribution or the installed version is more recent.
  • 1 to 99. Install a version only if there is no installed version of the package.
  • -1 or lower. Prevent the version from being installed

After setting up the config file, refresh system package cache via sudo apt update command and done.

HP Linux Imaging and Printing

HPLIP, HP developed printer and scanner drivers for Linux, released version 3.21.2 with new Linux distributions and devices support.

According to the release note, HPLIP 3.21.2 add following new Distro’s support:

  • Fedora 33
  • Manjaro 20.2
  • Debian 10.7
  • RHEL 8.3
  • RHEL 7.7
  • RHEL 7.8
  • RHEL 7.9

The new release also added a lot of new printers support:

  • HP LaserJet Enterprise M406dn, M407dn
  • HP LaserJet Enterprise MFP M430f, MFP M431f
  • HP LaserJet Managed E40040dn
  • HP LaserJet Managed MFP E42540f
  • HP Color LaserJet Enterprise M455dn
  • HP Color LaserJet Managed E45028dn
  • HP Color LaserJet Enterprise MFP M480f
  • HP Color LaserJet Managed MFP E47528f
  • HP PageWide XL 3920 MFP
  • HP PageWide XL 4200 Printer
  • HP PageWide XL 4200 Multifunction Printer
  • HP PageWide XL 4700 Printer
  • HP PageWide XL 4700 Multifunction Printer
  • HP PageWide XL 5200 Printer
  • HP PageWide XL 5200 Multifunction Printer
  • HP PageWide XL 8200 Printer
  • HP Laserjet M207d, M208d, M209d, M210d, M212d, M211d, M209dw, M209dwe, M210dw, M210dwe, M212dw, M212dwe, M208dw, M207dw, M211dw
  • HP LaserJet MFP M234dw, MFP M234dwe, MFP M233d, MFP M232d, MFP M235d
  • HP LaserJet MFP M237d, MFP M236d, MFP M232dw, MFP M232dwc, MFP M233dw
  • HP LaserJet MFP M236dw, MFP M235dw, MFP M235dwe, MFP M237dwe, MFP M237dw
  • HP LaserJet MFP M232sdn, MFP M233sdn, MFP M236sdn, MFP M234sdn
  • HP LaserJet MFP M234sdne, MFP M235sdn, MFP M235sdne, MFP M237sdne, MFP M237sdn
  • HP LaserJet MFP M232sdw, MFP M233sdw, MFP M236sdw, MFP M234sdw
  • HP LaserJet MFP M234sdwe, MFP M235sdw, MFP M235sdwe, MFP M237sdwe, MFP M237sdw

How to Install HPLIP 3.21.2 in Ubuntu:

1. To install the software, download the package “hplip-3.21.2.run” from the link below:

HPLIP Download Page

2. Then open terminal either via Ctrl+Alt+T or by searching for “terminal” from app launcher. When it opens, run command to give executable permission:

chmod +x ~/Downloads/hplip-3.21.2.run

3. Finally run command to start installing the driver:

./Downloads/hplip-3.21.2.run

Follow the terminal output and answer the questions. If everything goes OK, plug or re-plug your HP devices and enjoy!

Due to Pyqt5 dependency issue, the package does not install in Ubuntu 20.04.
As a workaround, choose “custom” as the installation mode, answer “no” to disable ‘Graphical User Interfaces (Qt5)’, and say “no” when installing the python-reportlab package.

The Kodi media center 19.0 now is available to install via its official Ubuntu PPA.

Kodi 19.0 “Matrix” is a new major release for the open-source home theater software. Though it’s not officially announced at the moment of writing, the PPA packages has been updated, available for Ubuntu 18.04, Ubuntu 20.04, Ubuntu 20.10, Linux Mint 20.x and derivatives.

What’s New in Kodi 19.0:

There are many new features in the release. And here are some big changes:

  • AV1 Codec support.
  • New color for subtitles and ability to change opacity.
  • static HDR10 and dynamic Dolby Vision HDR support.
  • Move to Python 3 for addons.
  • New functions in the PVR.

How to Install Kodi 19.0 via PPA:

Open terminal either from system app launcher or by pressing Ctrl+Alt+T on keyboard. When it opens, run following commands one by one to get the new release packages.

1. Add Kodi PPA.

To add the official Kodi PPA, run command in terminal:

sudo add-apt-repository ppa:team-xbmc/ppa

Type user password when it asks, with no asterisk feedback, and hit Enter to continue.

2. Install / Update Kodi.

The Software Updater utility will prompt you to run a “partial upgrade” since the dependency packages switched from Python 2 to Python 3. So it’s recommended to install or upgrade Kodi by running terminal commands.

Firstly refresh system package cache, if you’re on Ubuntu 18.04, via command:

sudo apt update

Then install Kodi via command:

sudo apt install kodi

If you’re going to upgrade Kodi, the previous command may not update the add-ons, so I recommend to run apt upgrade instead:

sudo apt upgrade

How to Downgrade:

You can purge the Ubuntu PPA as well as downgrade Kodi to the stock version available in Ubuntu main repositories. To do so, run command:

sudo apt install ppa-purge && sudo ppa-purge ppa:team-xbmc/ppa

For those prefer installing app via apt method, there’s now an Ubuntu PPA that contains the latest VLC 3.0.12 deb packages.

VLC 3.0.12 was released a few weeks ago. It features native Apple Silicon support, RIST protocol, YouTube & Vocaroo scripts updates, and various bug-fixes.

The VideoLAN team offers the official Snap package which can be installed directly from Ubuntu Software. If you don’t like the Snap package however, you can now install the media player from the unofficial PPA.

1.) Add the VLC PPA:

Firstly open terminal from system app launcher. When it opens, run command to add the PPA:

sudo add-apt-repository ppa:savoury1/vlc3

Type user password when it asks, while no asterisk feedback, and hit Enter to continue.

For the MATE desktop users, run this command instead to add another PPA with patch from full-screen issue:

sudo add-apt-repository ppa:savoury1/vlc3-mate

2.) Add the dependency PPA:

Secondly, add the dependency PPA for updated media tools:

sudo add-apt-repository ppa:savoury1/ffmpeg4

3.) Install or update VLC:

Finally, either run command to install VLC media player:

sudo apt install vlc

Or open Software Updater and update the software packages:

Uninstall:

You can purge the Ubuntu PPA which also downgrade the installed packages to their stock versions:

sudo apt install ppa-purge && sudo apt install ppa-purge ppa:savoury1/vlc3

Keep an eye when purging the dependency PPA, as it may also remove some media packages.

sudo ppa-purge ppa:savoury1/ffmpeg4

Alternatively, you can just remove the Ubuntu PPAs via commands:

sudo add-apt-repository ppa:savoury1/vlc3
sudo add-apt-repository --remove ppa:savoury1/ffmpeg4

And remove VLC if you want by running command:

sudo apt remove --autoremove vlc

The Pencil2D team announced a new release of its 2D animation software with new feature and various bug-fixes.

Pencil2D is a free and open-source software to make 2D hand-drawn animations. It’s lightweight, easy to use, and works on Linux, Windows, Mac OS, and FreeBSD. It supports both bitmap and vector graphics, and allows to seamlessly switch between the two workflows.

By releasing version 0.6.6, Pencil2D gets crash recovery support. On app startup, it now opens the last edited project automatically. And the timeline now using the system palette colors.

Other changes in the release include:

  • Improved user interface overlapping issue at low screen resolutions by adding scrollbars
  • “Reset Windows” now resets all sub panels to their initial positions
  • Fixed that Check for updates not working on Windows.
  • Fixed a couple of issues regarding frame cache invalidation
  • Fixed misc tablet/mouse stroke issues
  • Fixed memory leaks
  • Fixed new layer naming
  • Fixed broken polyline tool

Download / Install Pencil2D:

The project offers official Linux binary through Appimage packge, which is available to download at the link below:

Download Pencil2D (.appimage)

Grab the package, and give executable permission in file Properties -> Permissions tab. Finally double click to run it to launch the software.

For choice, you can install Pencil2D via universal Flatpak package. See this tutorial for details.

TeXstudio released new 3.0.5 version a few days ago with important bug-fixes. Here’s how to install or update it in Ubuntu 16.04, Ubuntu 18.04, Ubuntu 20.04, Ubuntu 20.10 via PPA.

Changes in TeXstudio 3.0.5 include:

  • Fix crash when deleting all elements of a meta command in the ‘Configure’ dialog under ‘Build’ tab.
  • Fix large tooltips on Windows with ADWAITA style
  • Limit PDF render threads to 8 or to set value.
  • Add command line option --texpath to force a tex path
  • Fix touchpad scroll in x direction
  • Fix a seldom crash
  • Adapt speller dialog to find the same errors as the online checker
  • Fix replace in global search

How to Install TeXstudio 3.0.5 via PPA:

Besides using the non-install Appimage package, you can install the LaTeX editor from the official TeXstudio PPA in all current Ubuntu releases.

1. Open terminal either by pressing Ctrl+Alt+T on keyboard or by searching for ‘terminal’ from software launcher. When it opens, run command:

sudo add-apt-repository ppa:sunderme/texstudio

Type user password (no asterisk feedback) when it asks and hit Enter to add the PPA.

2. If you installed the editor from Ubuntu Software, remove the old packages before getting the new release from Ubuntu PPA:

sudo apt-get remove texstudio-doc texstudio-l10n

3. After adding the PPA, you can either upgrade it via Software Updater:

or run commands in terminal to install or upgrade the software:

sudo apt-get update && sudo apt-get install texstudio

Uninstall:

To remove the LaTeX editor, run command in terminal:

sudo apt-get remove --autoremove texstudio

And go to Software & Updates -> Other Software to remove PPA repositories.

Linux Kernel

Linux Kernel 5.11 was released a day ago on Valentine’s Day. Here’ how you can install it in Ubuntu and Linux Mint based systems.

Linus Torvalds announced the Kernel 5.11: “Nothing unexpected or particularly scary happened this week, so here we are – with 5.11 tagged and pushed out.
In fact, it’s a smaller-than-average set of commits from rc7 to final, which makes me happy. And I already have several pull requests lined up for tomorrow, so we’re all set for the merge window to start.
.”

New features in Linux Kernel 5.11 include:

  • Intel Integer Scaling support
  • Intel async page flipping support
  • Initial support for AMD Green Sardine and Van Gogh APUs
  • Intel WiFi 6GHz band support
  • NVIDIA RTX 30 “Ampere” Support
  • The OUYA game console and other new ARM hardware support
  • Improved USB4 and Thunderbolt support
  • Sound support for Intel Alder Lake
  • Fixed the frequency invariance performance regression for AMD.

How to Install Linux Kernel 5.11:

The Ubuntu Mainline Kernel Archive provides the new kernel packages via DEB files.

The mainline build kernels do not include any Ubuntu-provided drivers or patches. They are not supported and are not appropriate for production use.

For those prefer using a graphical tool, see this tool to install the latest Kernel.

To manually download the mainline kernel packages for Linux 5.11, go to the link button:

Download Kernel 5.11

Select generic for common system, and lowlatency for a low latency system (e.g. for recording audio):

  1. linux-headers-5.11.0-xxxxxx_all.deb
  2. linux-headers-5.11.0-xxx-generic(/lowlatency)_xxx_amd64.deb
  3. linux-modules-5.11.0-xxx-generic(/lowlatency)_xxx_amd64.deb
  4. linux-image-xxx-5.11.0-xxx-generic(/lowlatency)_xxx_amd64.deb

Alternatively you can download and install the kernel binaries via terminal commands ( open terminal via Ctrl+Alt+T):

cd /tmp/

wget -c https://kernel.ubuntu.com/~kernel-ppa/mainline/v5.11/amd64/linux-headers-5.11.0-051100_5.11.0-051100.202102142330_all.deb

wget -c https://kernel.ubuntu.com/~kernel-ppa/mainline/v5.11/amd64/linux-headers-5.11.0-051100-generic_5.11.0-051100.202102142330_amd64.deb

wget -c https://kernel.ubuntu.com/~kernel-ppa/mainline/v5.11/amd64/linux-image-unsigned-5.11.0-051100-generic_5.11.0-051100.202102142330_amd64.deb

wget -c https://kernel.ubuntu.com/~kernel-ppa/mainline/v5.11/amd64/linux-modules-5.11.0-051100-generic_5.11.0-051100.202102142330_amd64.deb

sudo dpkg -i *.deb

Once installed, restart your computer and enjoy!

Uninstall Linux Kernel 5.11:

Restart your machine and select boot with the previous kernel in boot menu ‘Grub2 -> Advanced Option for Ubuntu’. Then run command to remove Linux Kernel 5.11:

sudo dpkg --purge linux-image-unsigned-5.11.0-051100-generic

Wine Stable

The wine team announced the new wine development version 6.2 with a few new features and various bug-fixes.

According to the release note, Wine 6.2 updated Mono engine to version 6.0.0, with DirectX support.

Other changes include:

  • Support for NTDLL debugger APIs.
  • More WinRT support in WIDL.
  • Xbox One controller fixes on Mac.
  • Bug fixes to Paint.NET, Earth 2160, Foxit Reader, Google SketchUp 13, and many other applications.

How to Install Wine 6.2 in Ubuntu:

The Wine team has made in the Linux packages for Ubuntu 18.04, Ubuntu 20.04, and Ubuntu 20.10. And you can install it by doing the steps below one by one.

Open terminal either by pressing Ctrl+Alt+T on keyboard, or by searching for ‘terminal’ from system application menu. When it opens, run following steps one by one.

Install Wine Development version via following commands will replace the latest stable Wine release package if installed.

1.) Run command to enable 32 bit architecture (if you don’t have it):

sudo dpkg --add-architecture i386

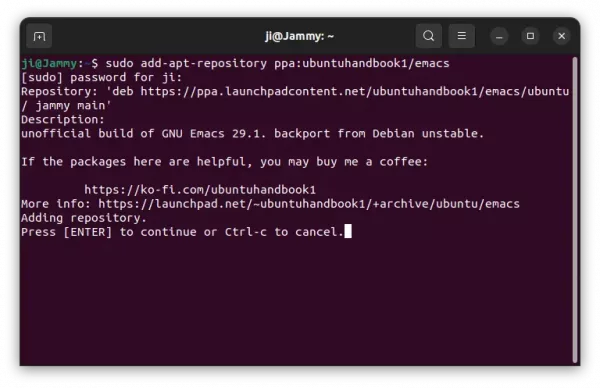
Type user password (no asterisk feedback) when it asks and hit Enter to continue.
2.) Install the repository key by running command:

wget -O - https://dl.winehq.org/wine-builds/winehq.key | sudo apt-key add -

3.) Add wine repository via command (for Ubuntu 20.04 and Linux Mint 20):

sudo apt-add-repository 'deb https://dl.winehq.org/wine-builds/ubuntu/ focal main'

NOTE: You may replace focal in the code with:

  • groovy for Ubuntu 20.10.
  • bionic for Ubuntu 18.04 and Linux Mint 19.x

4.) For Ubuntu 18.04 and Linux Mint 19.x only, libfaudio0 library is required to install from a third-party repository by running command:
sudo add-apt-repository ppa:cybermax-dexter/sdl2-backport

5.) Finally install Wine 6.2 via command:

sudo apt update && sudo apt install --install-recommends winehq-devel

Uninstall wine:

You may remove the PPA by launching Software & Updates utility and navigating to Other Software tab.

To remove wine 6.2, run command in terminal:

sudo apt remove --auto-remove winehq-devel

The Tilix terminal emulator released version 1.9.4 a few days ago. Here’s how to install it in Ubuntu 20.04, Ubuntu 20.10 via PPA.

Tilix, formerly Terminix, is a free and open-source terminal emulator that uses the VTE GTK+ 3 widget. It features terminal screen splitting and drop-down mode support.

After one year and a half of development, it finally announced the new release with minimal maintenance. And Tilix is looking for maintainers!

What’s new in Tilix 1.9.4:

  • Actually install Yaru color scheme
  • Give every tab the ${title} (instead of “Default”)
  • Add option to strip trailing whitespace on paste.
  • Add shortcut to “Unselect all”
  • Update metainfo data
  • Update to GtkD 3.9.0.
  • Bump minimum VTE version to 0.46
  • And various bug-fixes.

How to Install Tilix via Ubuntu PPA:

For request, you can now install the new release packages from the unofficial PPA, by doing the steps one by one:

1.) Open terminal from system app launcher and run command to add the PPA:

sudo add-apt-repository ppa:ubuntuhandbook1/tilix

Type your login password if asks, while no asterisk feedback, and hit Enter to continue.

2.) Then either install the terminal via command:

sudo apt install tilix

or upgrade via Software Updater if an old version was installed.

Uninstall Tilix:

To remove the Ubuntu PPA, either run command in a terminal window:

sudo add-apt-repository --remove ppa:ubuntuhandbook1/tilix

or use Software & Updates utility with Other Software tab.

You can alternatively purge the Ubuntu PPA, which also downgrade the terminal emulator package to the stock version. To do so, run command:

sudo apt install ppa-purge && sudo ppa-purge ppa:ubuntuhandbook1/tilix

And to remove Tilix, run command:

sudo apt remove tilix