For those don’t like to have the ‘date and time’ menu in the center of top panel, here’s how to move it to either left or right in Ubuntu 22.04 LTS.
Ubuntu, definitely the GNOME desktop, does not have option to configure the clock menu position. But, there are a few extensions can do the job. And, here I’m going to show you how to install and use them.
Tip: Extensions introduced in this tutorial should work on all Linux uses GNOME 42, e.g, Fedora 36, Arch Linux, Manjaro.
Step 1: Enable ability to install Gnome Extensions
Usually, we install Gnome shell extensions by visiting extensions.gnome.org and use the ON/OFF switch to install or remove an extension. Since Ubuntu 22.04, there’s also an “Extension Manager” app is available in system repository to make life easy.
Option 1: Prepare for installing extension through web browser
NOTE: the pre-installed Firefox in Ubuntu 22.04 is a snap package, which so far does not support this thing. You may either use another browser and go “Option 2”.
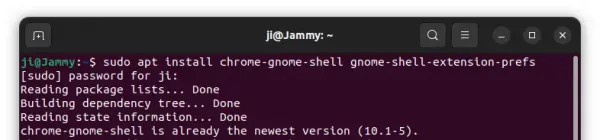
Press Ctrl+Alt+T on keyboard to open terminal. When it opens, run command to install the agent to enable the ability to install Gnome Extension via browser, and the app for managing them.
sudo apt install chrome-gnome-shell gnome-shell-extension-prefs
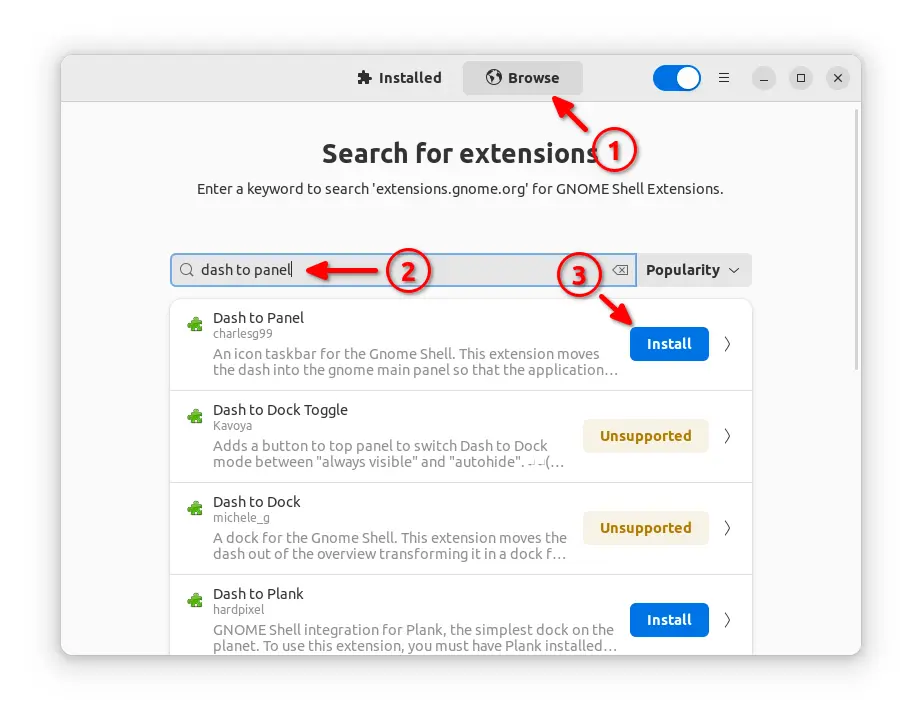
For the first time, you need to go to exensions.gnome.org and follow the “Click here to install browser extension” link to install the browser extension.
Option 2: Install Extension Manager
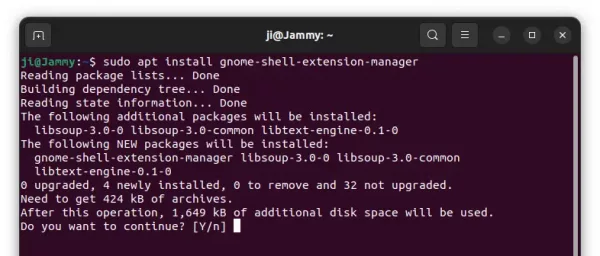
The Extension Manager app allows to search for, install, and manage extensions all in one. To install it in Ubuntu 22.04, press Ctrl+Alt+T on keyboard to open terminal and run command:
sudo apt install gnome-shell-extension-manager
After that, click on top left “Activities”, then search for and open the app to get start.

Step 2: Select install Extension to move Clock
There are a few extensions can do the trick in GNOME. Choose one from the options below that you prefer!
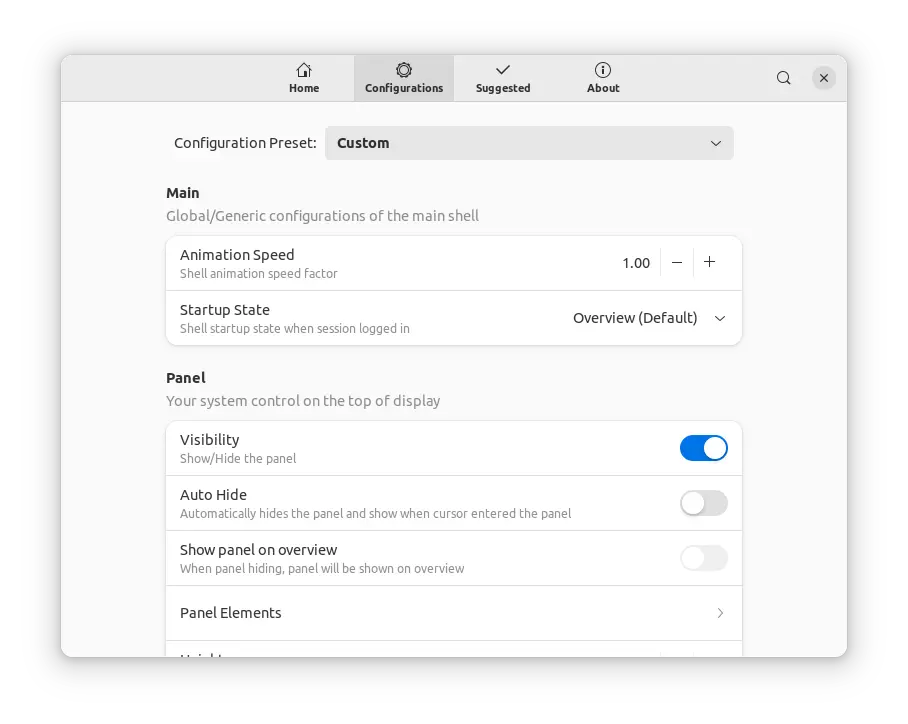
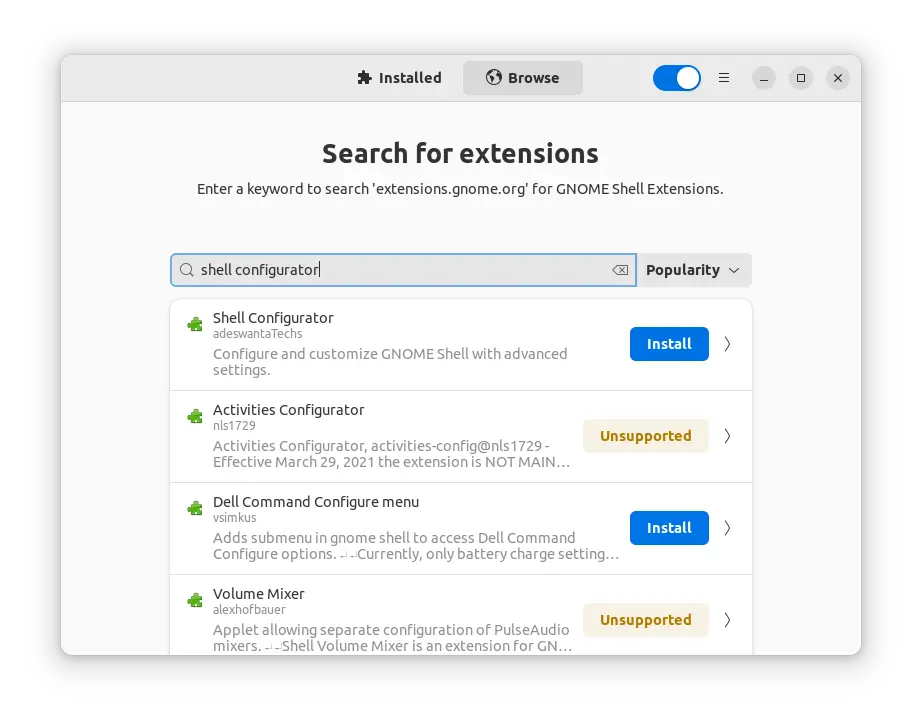
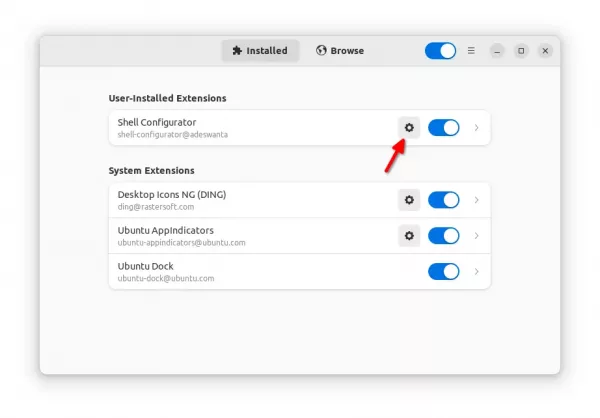
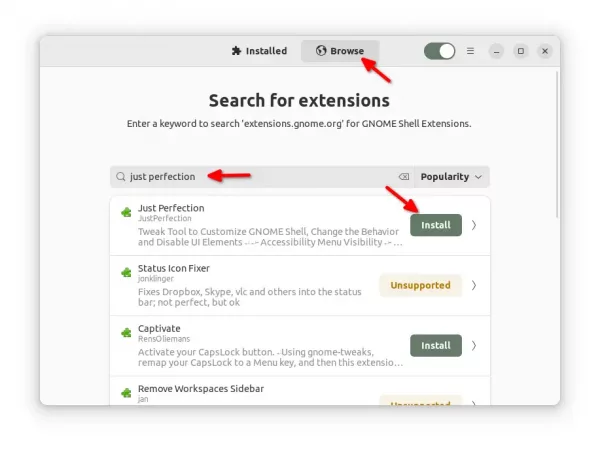
Option 1: Just Perfection
This is a tweak tool to customize GNOME Shell, change the behavior and disable UI elements. They provides many useful toggle options, including moving the clock menu position.
To install the extension, either search for and click install it via “Extension Manager”:
Or, use the ON/OFF switch by visiting the web page below in your browser:
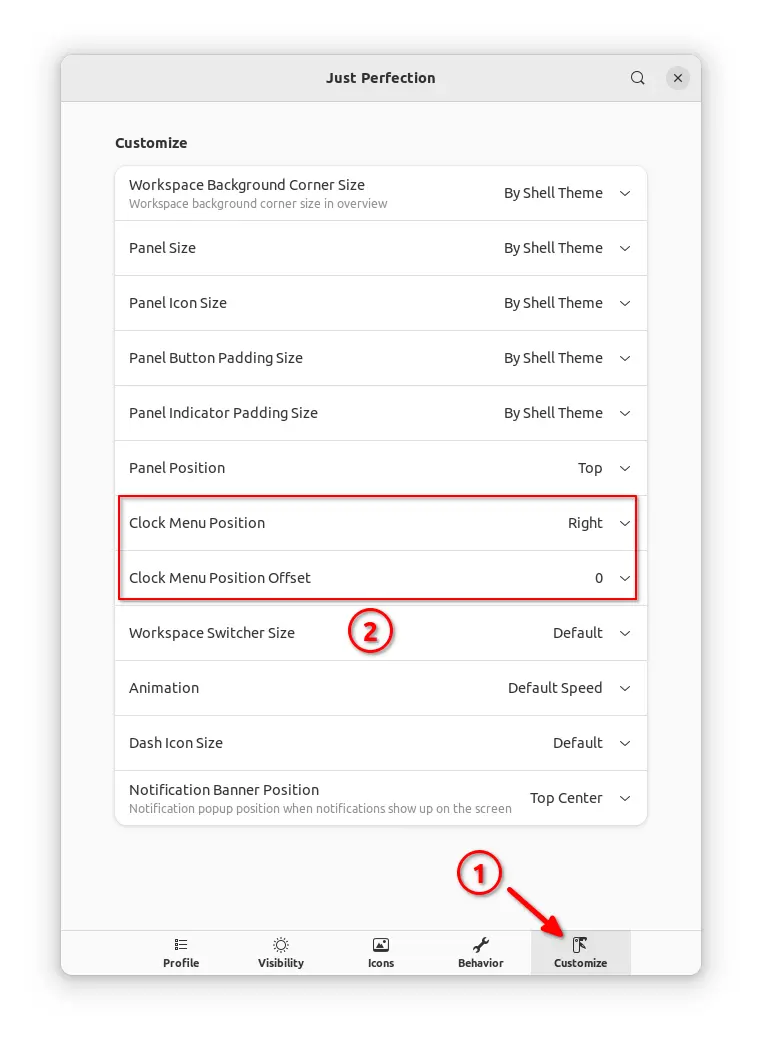
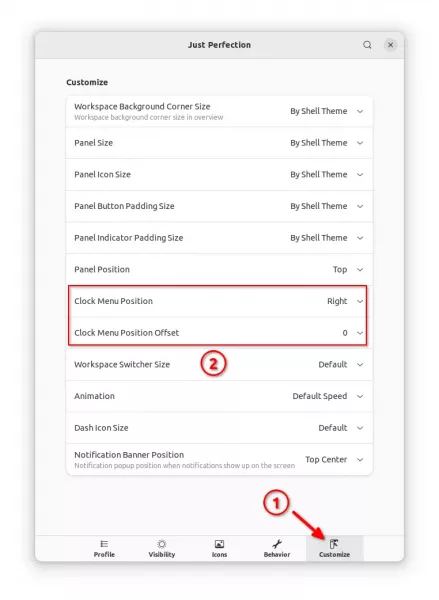
After installed it, open its ‘settings’ dialog either via “Extension Manager” under Installed tab or use “Gnome Extensions” app. Scroll down, and you’ll find the option to move clock position via “Customize” tab.
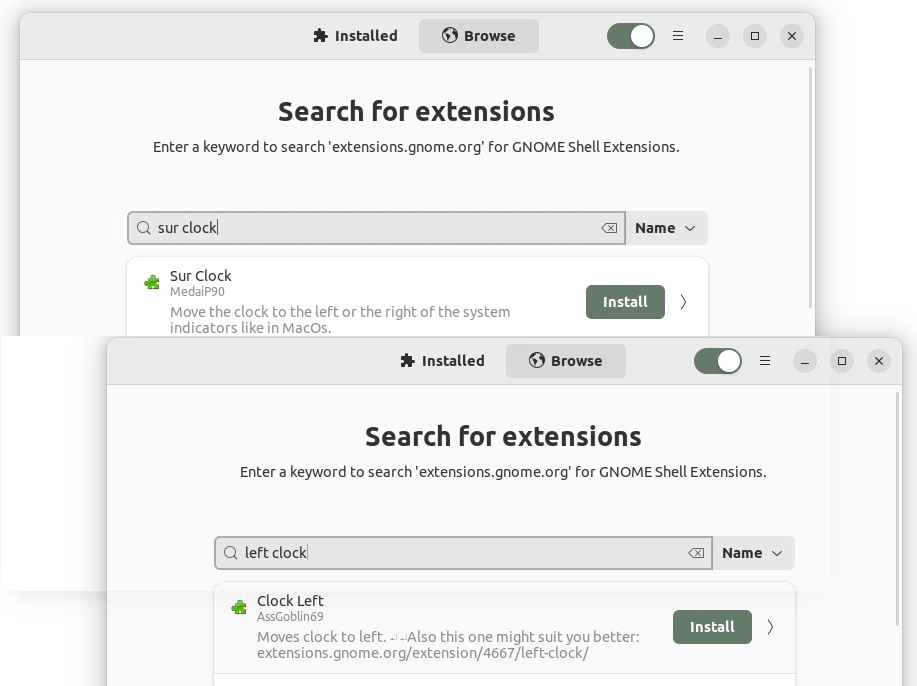
Option 2: Left Clock or Sur Clock
Just Perfection is a bit heavy if you don’t need the other options. There are a few other extensions that designed specially for moving clock position:
- “Clock Left” or “Left Clock” – Move clock to left and replace “Activities”.
- Sur Clock – Move clock to left or right via preference option.
To install one of the extension, simply search for and click install in “Extension Manager”:
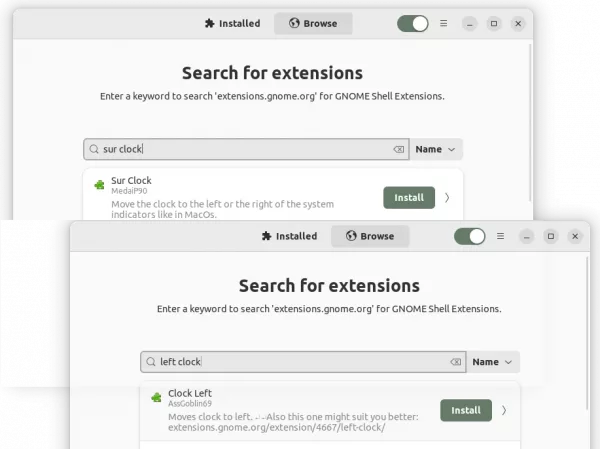
Or, use the ON/OFF switch in the link page to install: sur clock, left clock, and clock left.
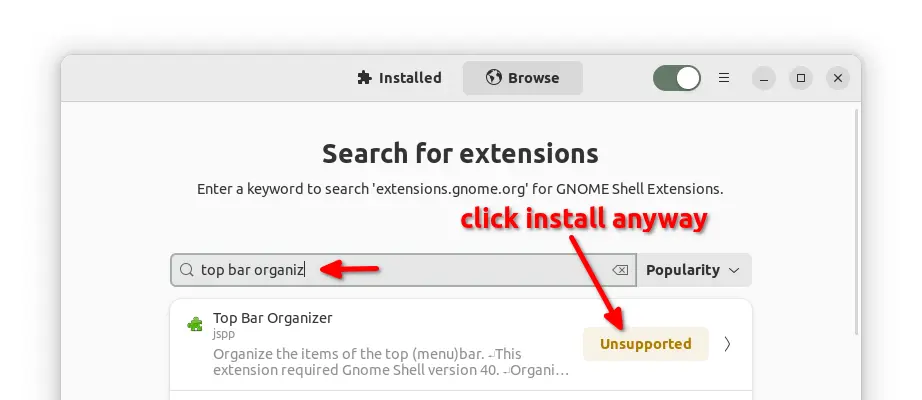
Option 3: Top Bar Organizer
NONE of the previous extensions will move clock to far right corner. If you insist, try “Top Bar Organizer”.
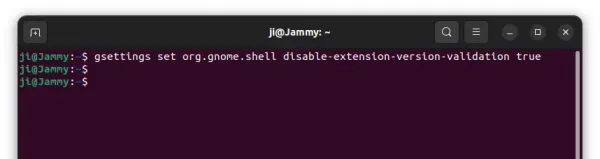
This extension is designed to organize all items on top-bar. It was created for GNOME 40, but no longer updated!! However, it works on current GNOME 42 desktop with few tweak.
1.) First, press Ctrl+Alt+T on keyboard to open terminal. And, run command to disable version validation, since it does not support Ubuntu 22.04:
gsettings set org.gnome.shell disable-extension-version-validation true
2.) Then, either search for and install it in “Extension Manager”:

Or, turn on the slider icon in the link page below to install it from web browser:
3.) The Extension preference does not work for GNOME 42. However, the dconf editor options do work.
First, run command to install dconf editor:
sudo apt install dconf-editor
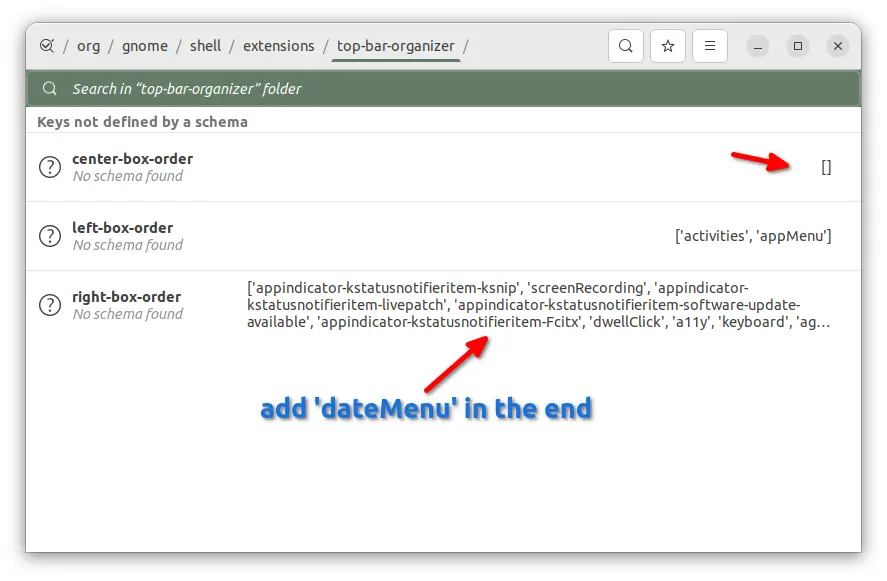
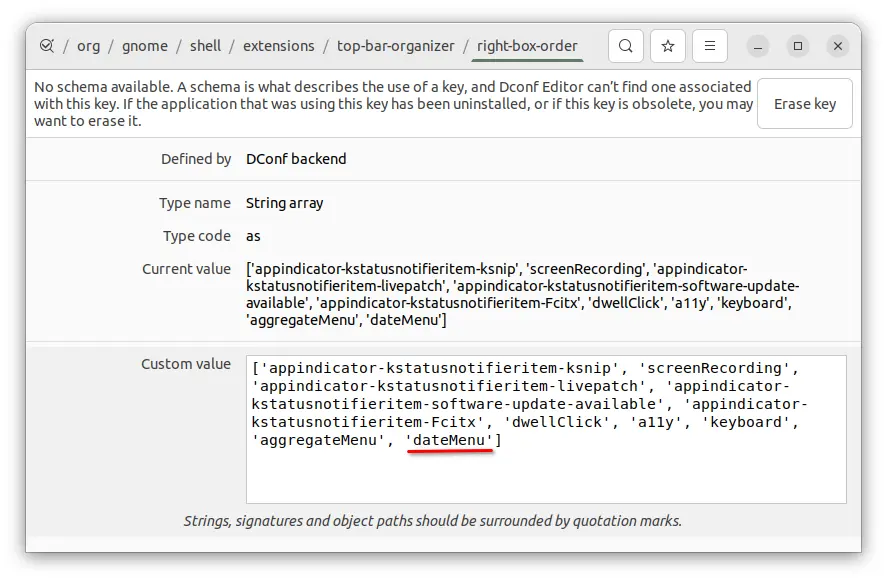
Then, search for and launch “Dconf Editor” from the overview screen. And, navigate to org/gnome/shell/extensions/top-bar-organizer.
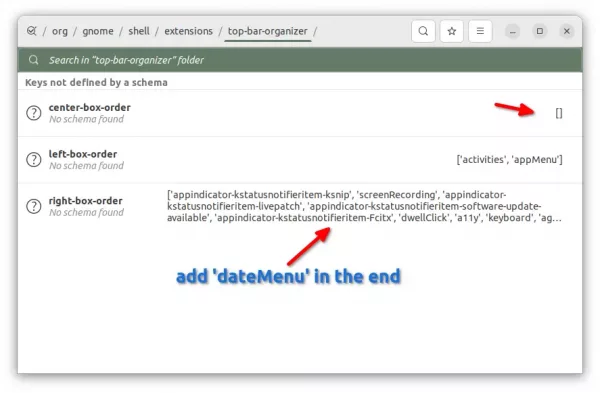
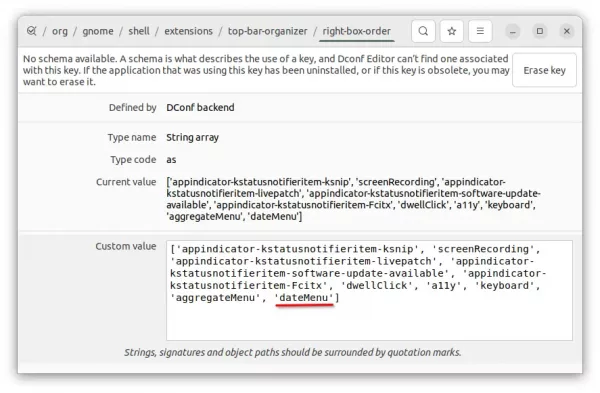
To make clock menu show in right corner, write ‘dateMenu‘ as value of right-box-order. And, put it to the end for far right.
NOTE: The change will persist even after removed the extension. To restore, erase the keys in Dconf Editor and restart GNOME Shell (log out and back in)