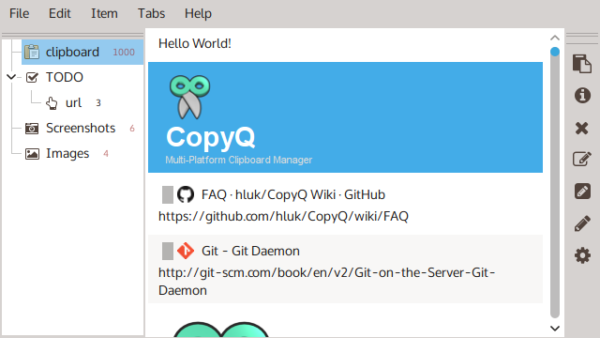
Archives For jimingkui

Visual Studio Code IDE

Microsoft Visual Studio Code 1.28 was released a few days ago. Here’s how to install it in Ubuntu 18.04.

VS Code 1.28 release highlights according to the announcement:

  • VS Code now ships custom icons reflect file type in your OS explorer.
  • Snippets can now be scoped to a project and shared with your team.
  • Editor Tab completion can now complete all kind of suggestions.
  • New command to go to the location of your last edit.
  • New command Save without Formatting to save a file without triggering any of the save participants
  • Rename a JS/TS file through it’s import path.
  • The new Convert to async function suggestion for JavaScript and TypeScript rewrites functions that use .then Promise chaining to use async and await
  • Git improvements: better delete conflict handling, new rebase on sync option.
  • Better Markdown folding: collapse code blocks, multi-line lists, and embedded HTML.

How to Install VS Code 1.28 in Ubuntu:

The easiest way is to install the community maintained Snap (run in sandbox) package from Ubuntu Software:

You can also install the official .deb package which is available for download at the link below:

Download VS Code (.deb)

Grab the deb and install it via either Gdebi package manager or command in terminal(Ctrl+Alt+T):

sudo dpkg -i ~/Downloads/code_*.deb; sudo apt -f install

For those who want to receive updates for VS Code via Software Updater utility, add the Microsoft repository via following steps (64bit only):

1. Open terminal (Ctrl+Alt+T) and run command to add the repository:

sudo sh -c 'echo "deb [arch=amd64] https://packages.microsoft.com/repos/vscode stable main" > /etc/apt/sources.list.d/vscode.list'

2. Download and install the repository key via commands:

curl https://packages.microsoft.com/keys/microsoft.asc | gpg --dearmor > microsoft.gpg

sudo mv microsoft.gpg /etc/apt/trusted.gpg.d/microsoft.gpg

3. Finally install the IDE via command:

sudo apt-get install code

Uninstall Visual Studio Code:

To remove the code editor, either use Synaptic Package Manager or run command:

sudo apt-get remove --autoremove code

And remove the Microsoft repository by launching Software & Updates utility and navigating to Other Software tab.

Want to split, merge, rotate, and/or delete pages in your PDF files? Here’s a tool make it easy to do the job in Ubuntu Desktop.

It’s PDF Mix Tool, a free and open-source tool written in C++ and depends only on Qt 6 and PoDoFo.

The app provides stupid simple user interface to operate PDF files in Linux. Simply choose an action you want to do in the left, then open/import PDF files, finally click Save/Extract/Generate button, and done!

So far, it support following actions:

  • Merge multiple PDF files into single.
  • Extract PDF pages into single or mutiple files.
  • Delete PDF pages.
  • Rotate PDF.
  • Edit PDF metadata.
  • Change PDF size, layout, margins, etc.
  • Extract PDF to Images.

PDF Merge

How to Install PDF Mix Tool

Some Linux Distributions (e.g., Fedora, Arch Linux, openSUSE) have made the app package into system repositories.

For Ubuntu, users may choose to install it via either Snap or Flatpak package.

Option 1: Snap package

NOTE: The Snap seems not working good in my case in Ubuntu 24.04 with Xorg.

The Snap package is quite easy to install, simply launch App Center (or Ubuntu Software) then search and install ‘PDF Mix Tool’.

Option 2: Flatpak package

For choice, the app can be also installed via Flatpak package that works in most Linux.

  • First, press Ctrl+Alt+T to open terminal and run command to install Flatpak daemon:
    sudo apt install flatpak
  • Then, install the app as Flatpak package via command:
    flatpak install https://dl.flathub.org/repo/appstream/eu.scarpetta.PDFMixTool.flatpakref

After installation, just search for and launch it from either GNOME overview or start menu depends on your desktop environment.

If the app icon is not visible, either log out and back in, or try running the command below to start it from terminal:

flatpak run eu.scarpetta.PDFMixTool

Uninstall PDF Mix Tool

To uninstall the software package, either use Ubuntu Software (or App Center) for the Snap package.

Or run the command below to uninstall Flatpak package:

flatpak uninstall --delete-data eu.scarpetta.PDFMixTool

Optionally, you may also run flatpak uninstall --unused to remove useless runtime libraries.

Guvcview (GTK UVC Viewer), a simple tool for capturing & viewing video from webcams and other v4l2 devices, reached 2.0.6 release earlier today.

Guvcview 2.0.6 is a small release with following changes:

  • Add support for resizing the render window from the command line
  • Update to new libavcodec API
  • And some bug fixes.

How to Install Guvcview 2.0.6 in Ubuntu 18.04:

The developer’s PPA so far contains the latest packages for Ubuntu 18.04, Ubuntu 18.10, Linux Mint 19.

1. Open terminal either via Ctrl+Alt+T or by searching for ‘terminal’ from software launcher. When it opens, run command to add the PPA:

sudo add-apt-repository ppa:pj-assis/ppa

Type user password (no asterisks feedback due to security reason) when it prompts and hit Enter.

2. If you’ve installed an old version from Ubuntu Software, remove it via command:

sudo apt-get remove --autoremove guvcview

3. Finally install the 2.0.6 packages from the PPA repository via command:

sudo apt-get install guvcview

Once installed, launch the UVC viewer from application menu. To check the software version, run guvcview -v command in terminal.

Uninstall:

To remove the software, open terminal (Ctrl+Alt+T) and run command:

sudo apt-get remove --autoremove guvcview

To remove the PPA, open Software & Updates and navigate to Other Software tab.

Pragha 1.4 Release Candidate, a lightweight continuation of the Consonance music player, was released a few days ago with new features, performance improvements and some fixes.

After 4 beta releases, Pragha 1.4 RC (1.3.99) may be the last before the 1.4 stable release. The new 1.4 RC features:

  • First implementation of Favorites as a playlist.
  • Sync favorites with Koel and Last.Fm.
  • New Visualizer plugin.
  • Use Alt+Return shortcut to edit the selected song.
  • Add progress indicator to the search entry while it works.
  • Remember last pane used on song info plugin.
  • Allows to customize the styles to the distro packagers.

How to Install Pragha RC in Ubuntu:

There’s an unofficial PPA that contains the latest Pragha packages for Ubuntu 16.04, Ubuntu 18.04, Ubuntu 18.10, and Linux Mint 18.x/19.

1. Open terminal either via Ctrl+Alt+T or by searching for “terminal” from app launcher. When it opens, run command to add the PPA:

sudo add-apt-repository ppa:ubuntuhandbook1/pragha

Type your user password (no asterisks feedback while typing due to security reason) when it prompts and hit Enter.

2. Then install the music player either via Synaptic Package Manager or by running commands:

sudo apt-get update

sudo apt-get install pragha

Uninstall Pragha:

To remove the music player, either use Synaptic Package Manager or run command in terminal:

sudo apt-get remove --autoremove pragha

And you can remove the PPA via Software & Updates utility under ‘Other Software’ tab.

To do a fresh Ubuntu install, I’m always first burning the ISO image into USB drive, and then boot up with the USB drive and install Ubuntu into hard disk.

I used to use Unetbootin to create the startup USB drive. However, it has been dropped from Ubuntu repositories since Ubuntu 18.04 LTS. And Unetbootin .bin package is not well burning the ISO image in my case.

In this quick tutorial, I’m going to tell you that the default Gnome USB Creator can do the job easier and more straightforward:

1. First download Ubuntu iso from releases.ubuntu.com, and plug-in your USB drive.

2. Search for and launch usb creator (Start Disk Creator) in application menu:

3. When it opens, click the Other button and choose the downloaded ISO image.

Finally click the Make Startup Disk button to start burning the ISO into selected USB drive.

That’s it! When everything’s done, boot the USB drive in your machine and try or install Ubuntu.

MuPDF Ubuntu 16.04

MuPDF 1.14.0, a lightweight PDF, XPS, and E-book viewer, was released today with new features, UI improvements and other changes.

Changes in MuPDF 1.14.0 include:

  • Added “Source Han Serif” CJK fallback font.
  • Added more scripts to the Noto fallback fonts.
  • Multi-page PNM support.
  • “mutool show” now supports a path syntax for selecting objects to show.
  • New annotation editing mode in mupdf-gl.
  • Can create, edit, and delete most annotation types.
  • Can create appearance streams for most annotation types, Tx form fields, Ch form fields.
  • And UI improvements, API changes, and other more.

How to Install MuPDF 1.14.0 in Ubuntu:

The unofficial PPA contains the most recent MuPDF packages for Ubuntu 16.04, Ubuntu 18.04, Linux Mint 18/19 so far.

MuPDF 1.14.0 package is delayed due to a building issue. I’ll update the PPA once a patch for the issue published.

UPDATE: The new release package now is ready to install via following steps in Ubuntu 16.04, Ubuntu 18.04, Ubuntu 18.10, and their derivatives.

1. Open terminal by pressing Ctrl+Alt+T or searching for “Terminal” from start menu. When it opens, run command to add the PPA:

sudo add-apt-repository ppa:ubuntuhandbook1/apps

Type in password (no asterisks feedback due to security reason) when it asks and hit Enter.

2. Then install mupdf and mupdf-tools packages either via Synaptic Package Manager or by running following commands in terminal:

sudo apt-get update

sudo apt-get install mupdf mupdf-tools

If you have a previous release installed, simply launch Software Updater to upgrade the tool after checking for updates.

To use the PDF/XPS viewer, right-click on your file and select open with MuPDF. You can also set MuPDF as default in the Properties window.

Uninstall:

To restore MuPDF to the stock version available in your Ubuntu’s main archive, run command in terminal to purge the PPA:

sudo apt-get install ppa-purge && sudo ppa-purge ppa:ubuntuhandbook1/apps

gnome shell

For Ubuntu 18.04 default Gnome desktop, this quick tutorial is going to show you how to integrates maximized application window with the top panel, by removing the title bar, and moving the title and buttons to the top panel.

All the work can be done via Gnome Shell extension called No Title Bar.

1. Open Ubuntu Software, search for and install No Title Bar extension.

2. The extension takes effect once you installed it. To tweak the appearance, click Extension Settings in Ubuntu Software.

The extension does not work for Gnome 3.30 at the moment, Ubuntu 18.10 users can build it from the source code.

Audacity audio editor and recorder 2.3.0 was released one day ago. Here’s how to install it in Ubuntu 18.10, Ubuntu 18.04, Ubuntu 16.04, Linux Mint 18 and 19.

New features in Audacity 2.3.0 according to the release note:

  • New feature – “Punch and Roll Recording”
  • Pinned-play-head can now be repositioned by dragging
  • Play-at-speed now can be adjusted whilst playing.
  • Toolbars controlling volume and speed can now be resized for greater precision
  • Macros (formerly ‘Chains’) substantially extended
    • New Macro palette
    • Macros can be bound to keyboard keys
  • New commands: New ‘Tools’ menu, and new ‘Scriptables’ commands
  • Nyquist gains AUD-DO command
  • Nyquist effects are now translatable and translated
  • More dialogs have help buttons now
  • Increased legibility of trackname display
  • Half-wave option for collapsed tracks
  • Sliding Stretch
  • Dialog (option) for entering labels
  • And numerous bug-fixes.

Audacity 2.3.0

How to Install Audacity 2.3.0 in Ubuntu:

Audacity 2.3.0 for Linux is considered ‘experimental’ and may crash. I’ve revert the PPA package to Audacity 2.2.2.

For Ubuntu 16.04 and higher, the new release package can be easily installed from this third-party PPA.

1. Open terminal via Ctrl+Alt+T or by searching for ‘terminal’ from app launcher. When it opens, run command:

sudo add-apt-repository ppa:ubuntuhandbook1/audacity

Type your password (no asterisks feedback while typing) when it prompts and hit Enter to add the PPA.

2. If you have a previous version installed, you can upgrade Audacity via Software Updater after adding the PPA.

upgrade audacity

or run following commands one by one to check updates and install (or upgrade) audacity 2.3.0:

sudo apt-get update

sudo apt-get install audacity

Uninstall:

To remove the PPA repository, launch Software & Updates utility and navigate to ‘Other Software’ tab.

To remove Audacity audio software, either use system package manager or run command in terminal:

sudo apt-get remove --autoremove audacity audacity-data

How to Install Thunderbird 60 in Ubuntu 18.04, 16.04

Last updated: September 27, 2018

Thunderbird email client 60 stable is finally available via Mozilla Team Stable PPA for Ubuntu 18.04, Ubuntu 16.04, Ubuntu 14.04, Ubuntu 18.10, and their derivatives.

Thunderbird 60 was released one month and a half ago with following exciting new features:

  • New application logo
  • New “Photon” UI with rectangular tabs
  • Optional ‘light’ and ‘dark’ themes
  • Supports WebExtensions
  • New “Add-on Options” in Tools menu
  • Calendar events now display location
  • Native notifications on Linux
  • Improved email attachment UX
  • Compose window has button to delete email recipient(s)
  • Set the update interval for individual RSS feeds
  • OAuth2 authentication for Yahoo and AOL
  • FIDO U2F support

How to Install Thunderbird 60 in Ubuntu via PPA:

Open terminal either via Ctrl+Alt+T keyboard shortcut or by searching for ‘terminal’ from software launcher. When it opens, do following steps to add the Mozilla Team PPA and install Thunderbird 60.

1. Paste the command in terminal and hit run to add the PPA:

sudo add-apt-repository ppa:mozillateam/ppa

Type your password (no asterisks feedback) when it prompts and hit Enter.

2. Then launch Software Updater and you’ll see the software updates after checking for update.

Or run following command one by one to refresh repository cache and install software updates:

sudo apt-get update

sudo apt-get dist-upgrade

Uninstall:

To downgrade Thunderbird to the stock version in Ubuntu universe repository, run command to purge the PPA:

sudo apt-get install ppa-purge && sudo ppa-purge ppa:mozillateam/ppa

HP Linux Imaging and Printing

HPLIP 3.18.9, HP developed Linux drivers for HP inkjet and laser based printers, was released today with new Linux Distros and new printers support.

HPLIP 3.18.9 added support for Linux Mint 19 and Debian 9.5. Also there are new supported printers:

  • HP PageWide 755dn
  • HP PageWide MFP 774dns
  • HP PageWide MFP 774dn
  • HP PageWide MFP 779dns
  • HP PageWide MFP 779dn
  • HP LaserJet Pro MFP M148dw
  • HP LaserJet Pro MFP M149dw
  • HP LaserJet Pro MFP M148fdw
  • HP LaserJet Pro MFP M149fdw
  • HP LaserJet Pro M118dw
  • HP LaserJet Pro M119dw
  • HP Scanjet Ent Flow 7500

Download / Install HPLIP 3.18.9 in Ubuntu:

To install the software, download the package “hplip-3.18.9.run” from the link below:

HPLIP Download Page

Then open terminal either via Ctrl+Alt+T or search for “terminal” from app launcher. When it opens, run command:

cd ~/Downloads/ && chmod +x hplip-3.18.9.run && ./hplip-3.18.9.run

Type your user password (no asterisks feedback) when it prompts and hit Enter.

Then follow the terminal prompts, answer some questions to build and install HPLIP on your system. When everything is done, plug/re-plug your printers and enjoy!