![]()
Looking for a MacOS Hand Mirror alternative app for Ubuntu? Here’s one for the GNOME desktop.
It’s CamPeek, an extension adds an icon on GNOME top-bar, allowing to one-click to preview your webcam. It’s lightweight and fast! And, it streams your webcam feed directly without recording or saving any data.
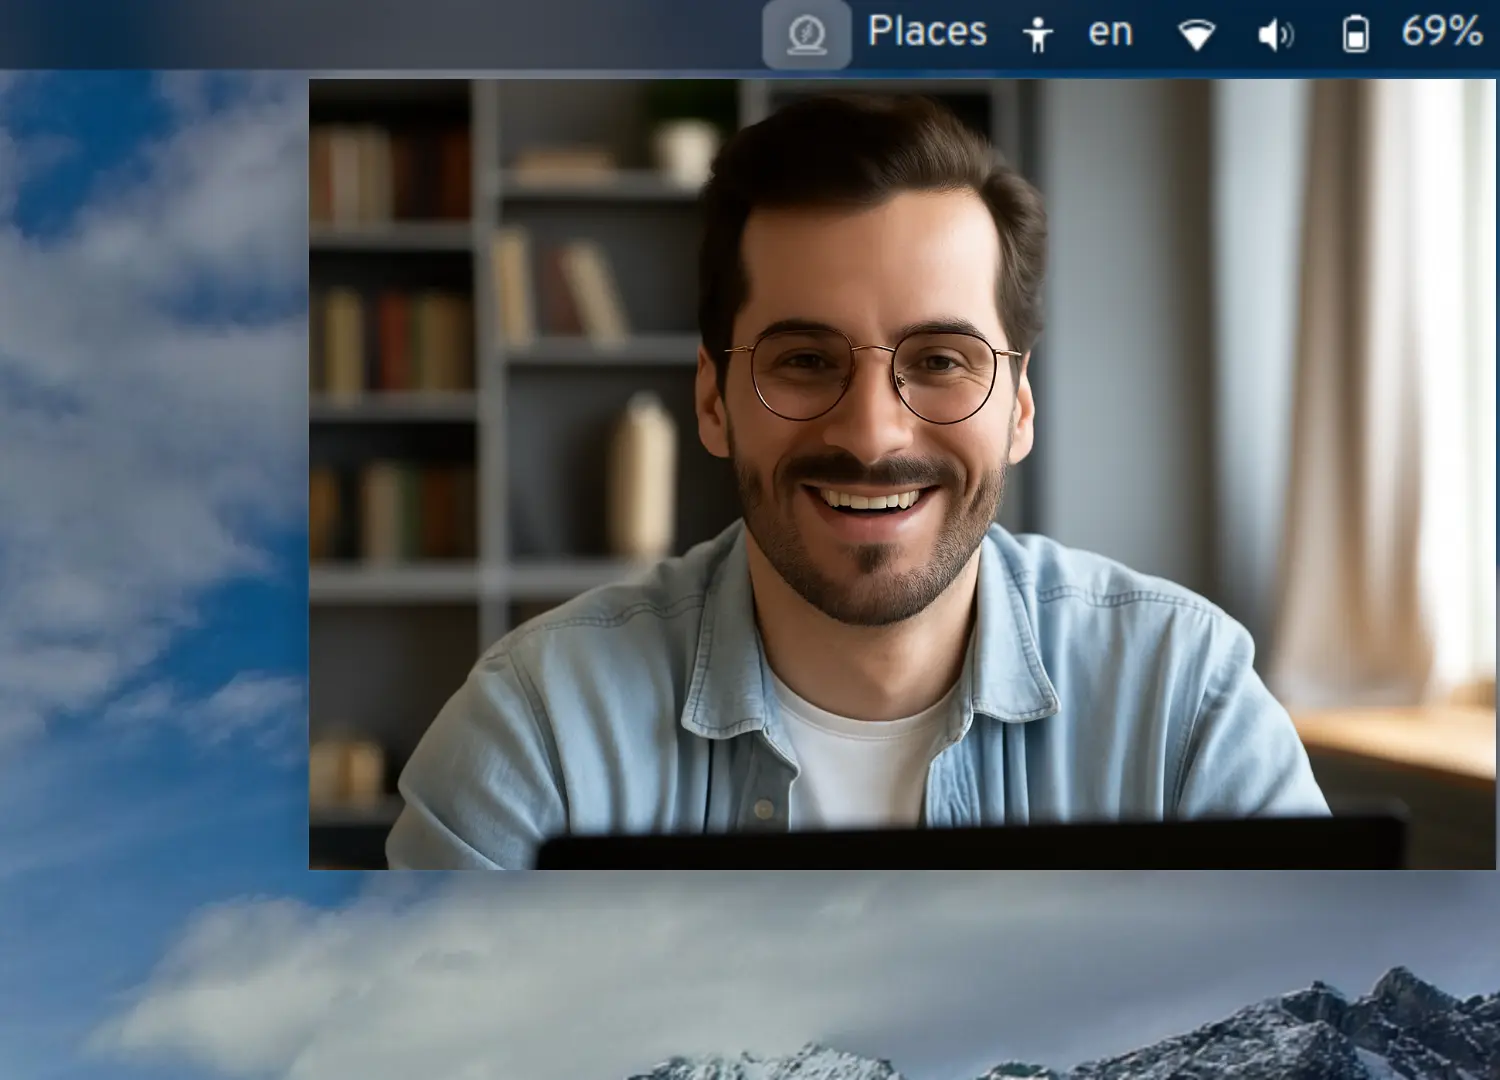
image from app’s Github project page