![]()
This quick tutorial is going to show beginners how to changes an application icon in Ubuntu Unity. It’ll work on Ubuntu 14.04, Ubuntu 13.10, Ubuntu 12.04 and future Ubuntu releases if Unity still to be the default desktop environment.
In Unity Desktop, application launchers are actually files stored in your computer, with a ‘.desktop’ extension. So besides changing the icon theme, you can edit the ‘.desktop’ to change the launcher icon for an specific application.
Below are the steps to change the application icon, Firefox Web browser as example, in Ubuntu 13.10 Unity:
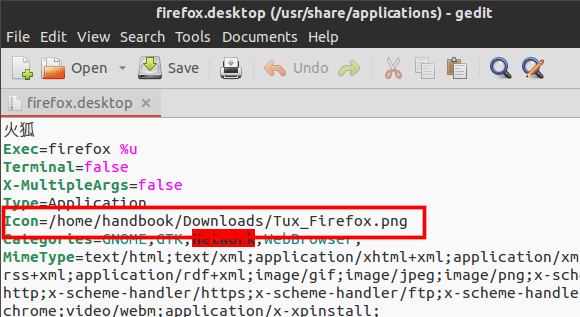
1. Edit the ‘firefox.desktop’
The ‘.desktop’ files are usually stored in “/usr/share/applications/”. For some applications that are installed in user’s directory, you may find the .desktop files in “~/.local/share/applications/” directory.
To edit the firefox.desktop, press Ctrl+Alt+T on keyboard to open terminal. When it opens, run:
cd /usr/share/applications

sudo gedit firefox.desktop

It will navigate to /usr/share/applications/ directory and open the firefox.desktop file via gedit editor. You can run ls |more to list all available files in that directory.
2. Change the value of Icon
In gedit window, scroll down to find out the line that starts with “Icon=” and change its value to the exact path to your NEW icon file. The image is usually .png file in 64×64 or 128×128.
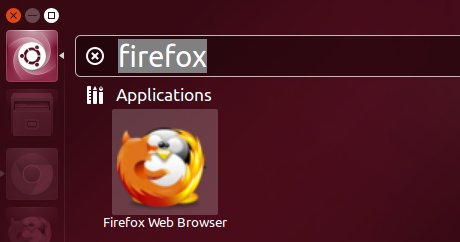
3. After saved the changes, open the unity dash and search the launcher and see the result:
![]()
That’s it. Enjoy!