Archives For November 30, 1999

The free open-source game chatting app Mumble released new major 1.4 version a day ago with exciting new features!

Mumble is a high quality and low latency voice over IP (VoIP) app designed for gamers. By releasing v1.4.230, the first stable in v1.4, it now uses new versioning scheme of the form major.minor.build. The third component of version numbers may now much higher and discontinuous. Because there are snapshot (beta) builds in between stable versions.

Mumber 1.4 introduced a new, general purpose plugin framework. Plugins are no longer restricted to positional data delivery and they can now be installed and updated at any time. See the documentation for more.

The release also added a “Search Dialog“, allows to search users or channels with regular expression support. User may open it either from menu or Ctrl+F keyboard shorcut.

Mumble 1.4 Search Dialog

User may now “listen to” a channel without joining it. Though listener will be visible in the channel’s user-list via an “ear” or a “listener”. In order to speech to people in listened channel, you have to either join the channel or shout to it.

Listen to a channel without joining it

To quickly find out who’s currently talking, “TalkingUI” is introduced in the release. It’s an optional floating window automatically resizes itself to the minimal size needed to display the information. It can be placed in the corner without taking too much of your screen. And, just like the main UI, it supports selection and context menu.

floating window indicates who’s currently talking

Other changes in Mumble 1.4 include:

  • Markdown support for text messages.
  • stereo audio (restricted to playback so far).
  • Set nicknames for users.
  • Join user’s channel” context menu option.
  • Reset all settings at once.
  • Disable text-to-speech for specific user.
  • Echo Cancellation for macOS (experimental).
  • Native PipeWire support.
  • Indicate “access-restricted” channels with a lock icon
  • And much more.

Download / Install Mumble:

Mumble is available to install in Windows, MacOS, Linux, as well as iOS and Android mobiles. Download it at the link below:

For Ubuntu / Linux Mint users, there’s an official PPA though not updated at the moment of writing.

It’s as well available to install in most Linux via universal Flatpak package.

Looking for an app to store your passwords? Secrets is a good choice for those using GNOME desktop.

“Secrets” is a free open-source password manager that integrates perfectly with GNOME desktop and provides a modern and easy to use user interface. It’s formerly Password Safe (nothing to do with pwsafe). Since v6.0, it’s called Secrets.

Secrets:

Secrets is a GTK4 app using libadwaita library to provide an adaptive UI. With it, user may create or open KeePass v4 format database in “.kdbx” files. And, it supports AES, Twofish, and ChaCha20 256-bit encryption algorithms.
Secrets add new or open database

The “.kdbx” file is used to store your passwords. While creating it, user may choose to secure it via password, key file, or password and key combination.

Secure database with password, key, or their combination

Then, each time you open the database or back from inactive, it asks for unlock the database before accessing your passwords.

Need to unlock when back from inactive

After creating / opening a database, user may add as many password entries or groups as possible. It allows to assign a color, icon, and add attachments for each entry. As well, it supports OTP tokens and expiration dates.

Assign color, icon, add attachments, & support one-time password, expiration date

All password entries are listed in the home of the database, with buttons to quickly copy username or password into clipboard. And, the data will be cleared from clipboard 30 seconds later.
Password Entries

Install Secrets:

Actually I don’t use a password manager app, because I use similar accounts and passwords in different websites. And, I wrote them down in plain text 😓. The Gnome Secrets looks really good. Maybe I’ll store passwords with it. The only downside however is that it’s only available via Flatpak package.

1. Open terminal by searching from ‘Activities’ overview. When it opens, run command to install the flatpak daemon:

sudo apt install flatpak

2. Next, install the app via command:

flatpak install https://dl.flathub.org/repo/appstream/org.gnome.World.Secrets.flatpakref

There will be hundreds of MB more install, if you’re first time installing GTK apps via Flatpak.

Once installed, search for and open it from ‘Activities’ overview and enjoy!

Uninstall Secrets:

To remove the app, simply open terminal and run command:

flatpak uninstall --delete-data org.gnome.World.Secrets

And run flatpak uninstall --unused to remove useless runtime libraries.

Linux Kernel 5.16 was released a few days ago. Here’s how to install it in Ubuntu 20.04, Ubuntu 21.10, and/or Linux Mint 20.x.

Kernel 5.16 comes with many new features. Here are some of them:

  • Initial DisplayPort 2.0 Support For AMD Radeon Driver.
  • Intel Protected Xe Path for Gen12 graphics.
  • Intel AMX support for Sapphire Rapids.
  • Raspberry Pi Compute Module 4 support.
  • Snapdragon 690 and other new Arm hardware support such as Rockchip RK3566 and RK3688.
  • Better support for the Sony PlayStation 5 controller.
  • Better support for HP Omen laptops.
  • Realtek RT89 WiFi driver
  • Support for 2021 Apple Magic Keyboard.
  • Apple M1 PCIe driver

How to Install Kernel 5.16 in Ubuntu 21.10:

NOTE: The Mainline Kernel PPA provides packages for Ubuntu 21.10. However, it does not include any Ubuntu-provided drivers or patches, which are NOT appropriate for production use.

The .deb packages for amd64, arm64, ppc64el and s390x are available to download at the link below:

For personal computers, select generic for common system, or lowlatency for a low latency system (e.g. for recording audio):

  • linux-headers-5.16.0-xxxxxx_all.deb
  • linux-headers-5.16.0-xxx-generic(/lowlatency)_xxx_amd64.deb
  • linux-modules-5.16.0-xxx-generic(/lowlatency)_xxx_amd64.deb
  • linux-image-xxx-5.16.0-xxx-generic(/lowlatency)_xxx_amd64.deb

Keep an eye on the date in package names. 64-bit build has two versions of same package with different package date.

For those familiar with Linux command, open terminal and run commands one by one to download & install the packages:

cd /tmp/

wget -c https://kernel.ubuntu.com/~kernel-ppa/mainline/v5.16/amd64/linux-headers-5.16.0-051600_5.16.0-051600.202201092355_all.deb

wget -c https://kernel.ubuntu.com/~kernel-ppa/mainline/v5.16/amd64/linux-headers-5.16.0-051600-generic_5.16.0-051600.202201092355_amd64.deb

wget -c https://kernel.ubuntu.com/~kernel-ppa/mainline/v5.16/amd64/linux-image-unsigned-5.16.0-051600-generic_5.16.0-051600.202201092355_amd64.deb

wget -c https://kernel.ubuntu.com/~kernel-ppa/mainline/v5.16/amd64/linux-modules-5.16.0-051600-generic_5.16.0-051600.202201092355_amd64.deb

sudo dpkg -i *.deb

Once installed, restart your computer and enjoy!

Uninstall Linux Kernel 5.16:

Restart your machine and select boot with the previous kernel in boot menu ‘Grub2 -> Advanced Option for Ubuntu’. Then run command to remove Linux Kernel 5.16:

sudo dpkg --purge linux-image-unsigned-5.16.0-051600-generic

Install Kernel 5.16 for Ubuntu 20.04:

The mainline kernel was build against Ubuntu 21.10, so it won’t install in Ubuntu 20.04 LTS. However, for those insist on installing the new kernel, this project is available along with an Ubuntu PPA. Use it at your own risk!

You may run command in terminal to add the PPA:

sudo add-apt-repository ppa:tuxinvader/lts-mainline

Once the Kernel 5.16 package is updated, use command to install it:

sudo apt install linux-generic-5.16

NOTE: Linux Kernel keeps rolling new releases regularly. The PPA package name varies according to the version number. It’s better to check the PPA page before running the apt command.

For Ubuntu 20.04+ and other Linux with GNOME desktop (e.g., Fedora workstation, Debian and Arch Linux), there’s an extension lets you quickly locate mouse pointer.

The extension is called “Jiggle“. It highlights the mouse pointer position when it moved rapidly by applying 3 cool animation effects: Cursor Scaling, Spotlight, and Fireworks.

Cursor Scaling animation. Original pointer can be turned off

Fireworks effect

spotlight animation

User may choose one of the three effects to function. And each has options to configure the shake threshold, speed, and other settings.

Choose effect & change the “Shake Threshold”, etc.

Install Jiggle extension in Ubuntu 20.04

The extension at the moments supports for Gnome 3.36, 3.38 and 40. Though it works on GNOME 41 as reported.

The Extension so far does not support Ubuntu 22.04, scroll down and see another method to highlight pointer position.

1. Install Gnome Extensions App:

Before installing the extension, press Ctrl+Alt+T on keyboard to open terminal. When it opens, run command to install the ‘chrome-gnome-shell’ and ‘gnome-shell-extensions-prefs’ packages:

sudo apt install chrome-gnome-shell gnome-shell-extension-prefs

The first package is required for installing Gnome Extensions from web browser in Ubuntu based system. The latter installs the app for managing extensions.

2. Install Jiggle:

Next, go to the extension web page via your web browser. And then turn on the toggle icon to install it:

If you don’t see the slider icon, install the browser add-on and refresh the page.

After installed the extension, search for and open ‘Gnome Extensions‘ from Activities overview screen.

Manage Gnome Extensions

Finally, open settings for ‘Jiggle’ and apply your favorite animation and enjoy!

Highlight pointer in Ubuntu 22.04:

Without installing an extension, there’s hidden option to quickly locate the pointer position by hitting Ctrl key on keyboard.

Firstly, open system settings either by searching from activities overview or use system tray menu option:

When it opens, navigate to Accessibility in the left, then turn on the option for “Locate Pointer” in the bottom right.

When done, press Ctrl on keyboard to quickly find your mouse pointer and enjoy!

Mozilla Firefox 96.0 was released today. The new release focuses on performance and security improvements.

Firefox 96.0 significantly reduced the main-thread load, improved noise suppression and automatic gain control for better overall experience.

It now enforces the Cookie Policy: Same-Site=lax by default which helps defend against Cross-Site Request Forgery (CSRF) attacks.

The release also fixed some issues, including video quality degradation issues on certain sites, issue where WebRTC downgrades screen sharing resolution, and video intermittently drops SSRC. As well, there are various security fixes.

And for developers, Firefox 96 adds WebP image encoder support for canvas.

Firefox Dark

How to Install Firefox 96 in Ubuntu Linux:

For Ubuntu 21.10+ using the pre-installed Firefox as Snap, it updates automatically and user should now have v96.0.

For those using the native .deb version, the best choice is wait! The official Ubuntu build will be available in next few days. At that time, open “Software Updater” to upgrade the Firefox package.

Firefox website also provides Linux package via portable tarball. Extract and run the executable file within the source will launch the web browser:

As you may know, Gnome control center (aka settings) has “Fractional Scaling” option since Ubuntu 20.04, allows to change scaling level for HiDPI displays.

By default, user may scale up to 125%, 150%, 175% and 200% to make Ubuntu (or other GNOME based Linux, such as Fedora) to be read easily. In this tutorial, I’m going to introduce “BetterScale”, a command line tool gives more scaling levels.

GNOME by default has 125%, 150%, 175%, 200% scaling levels

BetterScale:

BetterScale is a group of bash scripts that helps Gnome & Budgie x11 users perfectly scale their desktop. With it, user may scaling via 110%, 120%, 130%, 140%, 150%, 160%200% levels.

BetterScale uses a similar concept for scaling as macs do by enabling Gnomes experimental scaling support & increasing the graphics framebuffer. It makes your system easily readable while remaining fully clear, crisp and sharp.

BetterScale with more scaling levels

The tool uses xrandr to scale the framebuffer. Which means, it only works for GNOME / Budgie on Xorg. Ubuntu 21.10+ needs to switch to Xorg session at Login Screen for using the tool.

Install & Use BetterScale:

The tool is hosted on Github page. Ubuntu user may press Ctrl+Alt+T on keyboard to open terminal, and run command to grab the source:

git clone https://github.com/rbreaves/betterScale.git

Install git via sudo apt install git for those don’t have it.

Next, run cd command to navigate to the source folder:

cd betterScale

Finally, start the script via command:

./setup.sh

Grab and start BetterScale

When it starts, read the description and warning before hitting Enter.

And, it will ask if to install the fix for tearing & mouse flickering for intel GPU. Type “n” to skip it if you don’t have this issue, or answer “Y” and type user password to install the fix.

If you answered ‘Y’ to fix tearing and flicker, log out and back in. Then, re-run the script to get the scaling level selection screen and type number to choose your favorite scaling factor.

BetterScale with more scaling levels

How to Restore:

The tool is in quite earlier stage. It might not work sometimes. I tested it in Ubuntu 21.10 with normal HD display without system’s ‘Fractional Scaling’ enabled. It works mostly but NOT occasionally.

To restore the changes, simply re-run the script and select 10 to set scaling to 100%. Do it twice if it does not work properly!

And remove the “20-intel.conf” file via the command below if you’ve installed the fix for tearing and mouse flickering:

sudo rm -rf /usr/share/X11/xorg.conf.d/20-intel.conf

That’s all. Enjoy!

After more than half a year of development, the qBitTorrent app released version 4.4.0 with many new features and various bug-fixes.

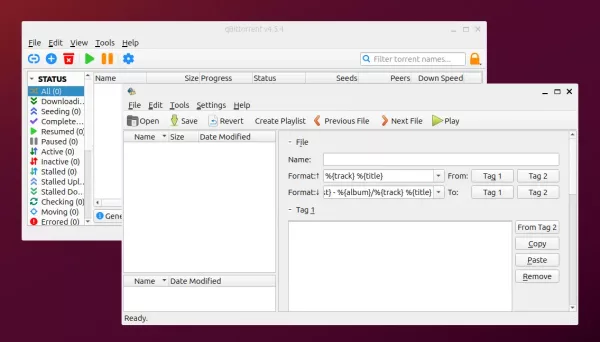
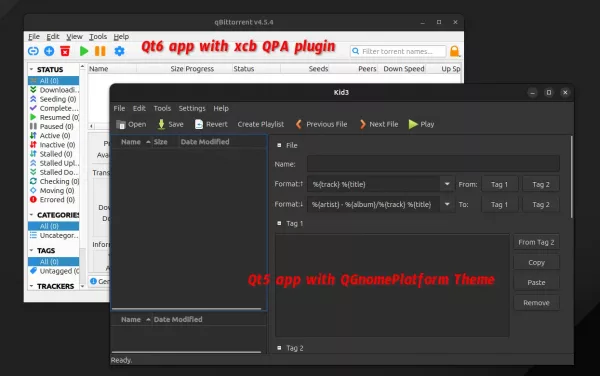
qBitTorrent 4.4.0 added Qt6 support. It offers better HiDPI compatibility for Windows 10+ and Linux using AppImage package. Though, it has known issue about text display on the progress bar. The Qt5 build is still the primary packages, though the next major release will probably drop Qt5 support.

The new release also supports BitTorrent v2 protocol and libtorrent 2.0.x, that use SHA-256 to provide a safer cryptographic hash function.

There are also some other new features, including announce to all trackers if IP changed, “Checking” filter in side pane, “Forced metadata downloading” state, “Skip hash check” option, double-click to show torrent options, temp folder per torrent/category, folder based UI themes, and more.

Other changes in qBitTorrent 4.4.0 include:

  • Remember last viewed page in options.
  • Add ‘Notification timeout’ option.
  • Add context menu to toggle content tab columns.
  • Add windows-clang support and update python installer URL for Windows.
  • Prolong wait time for shutdown for qbittorrent-nox for Linux.
  • Install vector program icon for Linux.
  • Add detection for OpenBSD, Haiku in configure script
  • Update Mac icons for Big Sur
  • Stick Unread row to top in RSS feed list
  • Setting to store/load fastresume/torrent files in an SQLite database
  • More tool-tips, web UI updates, and bug-fixes.

How to Install qBitTorrent 4.4.0:

For Windows, MacOS, Linux AppImage, and source tarball, go to the official download page:

For Linux, the AppImage package is the only way to get the Qt6 build. Just grab it from the link above, make executable in file “Properties” dialog under ‘Permissions’ tab. Finally, click run the package to launch the torrent client.

qBitTorrent is also available as native .deb package for Ubuntu based system via its official Ubuntu PPA. The package will be available in next few days. However, Ubuntu 20.04 is no longer supported because its system Qt5 library does not meet the minimum requirement.

It’s also available to install as universal Flatpak package. Though it takes more disk space due to run-time libraries, the Flatpak was built with GUI lock support.

The third point release of Linux Mint 20 is out! Unlike Ubuntu, it has different code names for each point releases. And, Linux Mint 20.3 codenamed ‘Una’.

The release still has Kernel 5.4 though user may install updated Ubuntu patched Kernels using ‘Update Manager’. And, it features Cinnamon 5.2, MATE 1.26, and XFCE 4.16 for each desktop editions.

XApp Updates:

Linux Mint now has a new Xapp “Thingy. It’s a Document Manager for user to quick access to favorite and recently opened documents and keeps track of the reading progress.

New Document Manager
‘Thingy’

Hypnotix IPTV Player now defauts to dark mode. And, it features a new search function, and Xtream AIP support.

The Sticky Notes also has a new search function and adds option to control the text size.

Theme updates:

Linux Mint 20.3 features full dark mode support. And some apps including Hypnotix, Celluloid, Pix, Xviewer and Gnome Terminal now default to dark.

The default “Mint-Y” theme now has rounded tittle bar corners and bigger buttons. Accents and feature colors removed on some widgets, and now only left on sliders, checkboxes, radios and the close button.

For those prefer the old look, the original Mint-Y theme is available as “mint-themes-legacy” package in the repositories.

Cinnamon 5.2:

The Cinnamon desktop has been updated to v5.2. It’s calendar applet features multi-calendar events, and online calendars and applications sync with evolution-data-server.

Calendar multi events support

There are also simplified animations, new radial shader effect added to clutter dialogs, new configuration options for windows list, notification and workspace switcher applets, and other improvements.

Other changes in Linux Mint 20.3 include:

  • Proper manga support for Xreader PDF reader.
  • Ctrl-Tab and Ctrl-Shift-Tab to navigate through tabs in Xed text editor.
  • Option to hide the menubar for Xed, Xreader.
  • xreader no longer shows toolbar in full-screen mode.
  • system reports run once a day instead of every hour.
  • WebApp manager shows which browser is used for each app.
  • Turn on/off bluetooth from its tray menu.
  • Sperb collection of new backgrounds.
  • Linux-firmware 1.187 and Flatpak 1.12.
  • HPLIP 3.21.8 and latest versions of ipp-usb and sane-airscan.

Download Linux Mint 20.3:

Linux Mint 20.3 is available to download in the official website below:

User may also upgrade to Linux Mint 20.3 by following this guide.

Ubuntu’s default LibreOffice office suite 7.2.5 was released today. User may install it from the official PPA in Ubuntu 18.04, Ubuntu 20.04, Ubuntu 21.04, Ubuntu 21.10 and Linux Mint 20.x

LibreOffice 7.2.5 comes with 90 bug-fixes, including many crashes when recent files are not accessible, inserting hidden field over input field, one click and three TAB presses, saving a calc file after delete some columns, and more. See the release note for details.

How to Install the Latest LibreOffice in Ubuntu:

The software is available to install as Snap, Flatpak, and AppImage. Though, I recommend the classic .deb package via its official PPA repository.

1. Add LibreOffice PPA:

Press Ctrl+Alt+T on keyboard to open terminal. When it opens, paste and run the command below:

sudo add-apt-repository ppa:libreoffice/ppa

Type user password (no asterisk feedback) when it asks and hit Enter to continue.

2. Update package cache:

For Ubuntu 18.04 and some Ubuntu based systems, user needs to manually update system package cache by running command:

sudo apt upgrade

3. Install/Upgrade Libreoffice:

Finally install the office suite via command:

sudo apt install libreoffice

Or upgrade the software package using Software Updater utility:

How to Restore:

To revert back the original office version, run command in terminal to install ppa-purge tool and purge the PPA repository.

sudo apt install ppa-purge && sudo ppa-purge ppa:libreoffice/ppa

There are a few extensions (e.g., Dash-to-dock and Dash-to-panel) to change the Gnome Shell ‘Dash’ appearance and behavior. Here I’m going to introduce the new extension called “Dash from Panel“.

GNOME Shell Dash:

The ‘Dash’ is the bottom bar in GNOME Activities overview screen, that shows favorite apps and running applications. Ubuntu by default uses ‘Dash-to-dock’ extension to bring the Dash out of overview screen as a left panel. And, there’s a ‘Dash-to-panel’ extension for choice to combine it with top-bar into single Microsoft Windows style bottom panel.


Dash from Panel

This is a new gnome shell extension. It does not change the default ‘Dash’, but only let it appear as dock at top when moving the cursor over top bar. So, user may access favorite and running app icons quickly without triggering ‘Activities’ overview.

The extension uses native GNOME Shell Dash to display as “dock”. And, it’s very light. As a new project, Dash from Panel so far lack options to configure the position, dock size and padding etc.

Install Dash from Panel:

The extensions so far support GNOME 40+. Users of Ubuntu 21.10+, Fedora 34+, and Arch Linux may install it via following steps.

1.) For Ubuntu user, press Ctrl+Alt+T on keyboard to open terminal. And run command to install the ‘chrome-gnome-shell‘ package first:

sudo apt install chrome-gnome-shell

2.) Go the extension page in your web browser via the link below and turn on the toggle icon to install it.

NOTE for Ubuntu 21.10+, the preinstalled Firefox is a Snap package that so far does not support installing Gnome Extensions. Use another browser or Firefox as Deb.

If you don’t see the toggle icon, install the browser extension and refresh the web page.

The extension works immediately after installation. User may manage the extensions later via ‘Gnome Extensions‘ app, which can be installed via:

sudo apt install gnome-shell-extension-prefs

And other systems may install it from Gnome Software.