Want to customize the startup, and shutdown animation screen with a single background image? Here’s how to do the trick in Ubuntu 22.04 and Ubuntu 23.04.
I’ve written a tutorial about how to disable the Manufacturer Logo in boot animation.
For request, this is a step by step guide shows how to create a basic plymouth theme with only a background image. And, it should work in all current Ubuntu releases, and even other Linux distributions.
Step 1: Create Plymouth Theme
As you may know, the startup, shutdown and restart animation screens are handled by Plymouth with themes.
Each Plymouth theme has its theme-name folder under /usr/share/plymouth/themes/ directory, which usually contains:
- theme-name.plymouth
- theme-name.script
- Image files (.png).
NOTE: In all commands/config files below, replace ‘mybootscreen’ with your desired name. Lazy men can just copy & paste without changing anything.
1. To create a Plymouth theme, first press Ctrl+Alt+T on keyboard to open a terminal window.
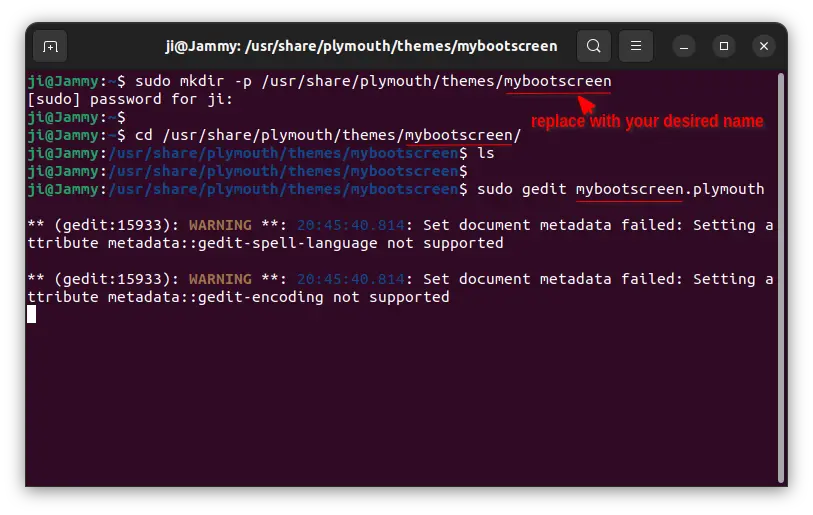
When terminal opens, run command to create a theme folder, named “mybootscreen“:
sudo mkdir -p /usr/share/plymouth/themes/mybootscreen
2. Then, run command to navigate to that folder as working directory:
cd /usr/share/plymouth/themes/mybootscreen
3. Now, create & edit the “theme-name.plymouth” file by running command:
sudo gedit mybootscreen.plymouth
replace gedit with gnome-text-editor for Ubuntu 24.04. Or, use nano that works in most Linux.

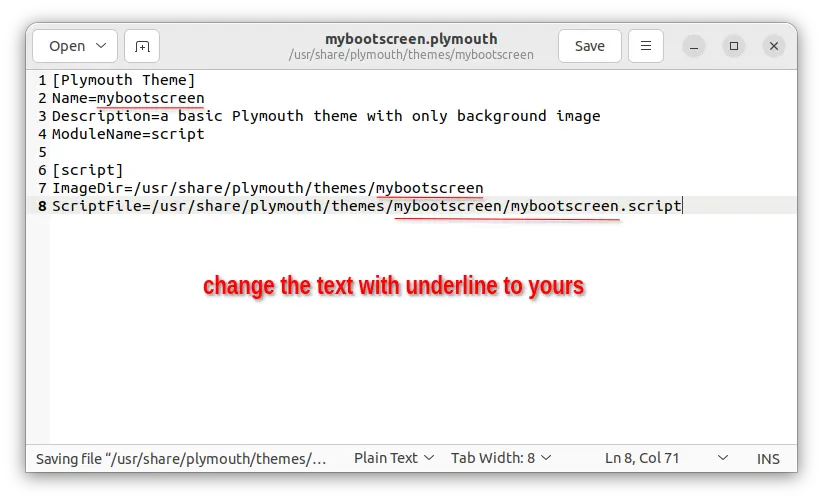
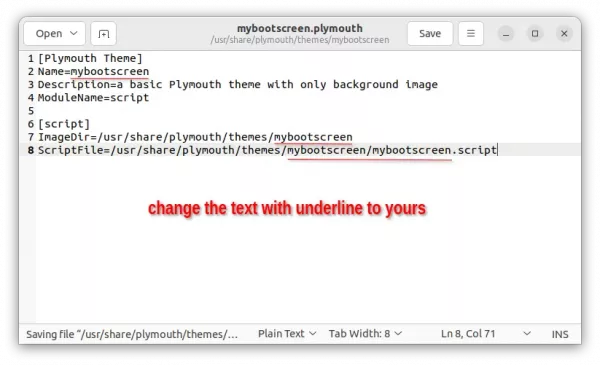
4. When file opens, paste following lines and save it!
[Plymouth Theme]
Name=mybootscreen
Description=a basic Plymouth theme with only background image
ModuleName=script

[script]
ImageDir=/usr/share/plymouth/themes/mybootscreen
ScriptFile=/usr/share/plymouth/themes/mybootscreen/mybootscreen.script
For nano text editor, press Ctrl+X, type Y and hit Enter to save file.
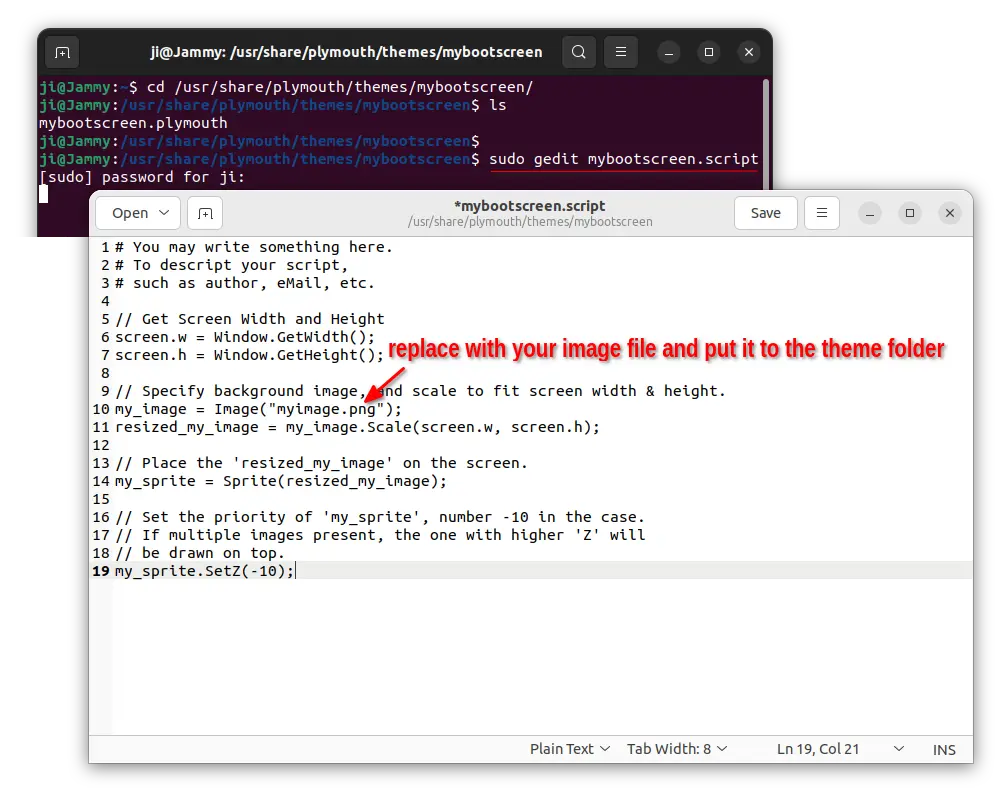
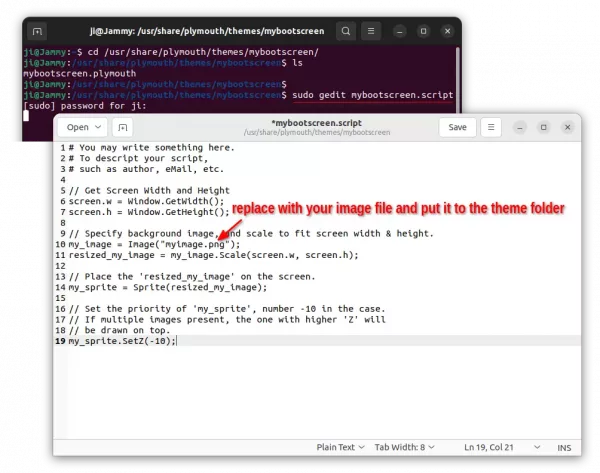
5. Next, create and edit the ‘theme-name.script’ file by running command:
sudo gedit mybootscreen.script
Also, replace gedit with gnome-text-editor or nano accordingly.
When file opens, paste the following lines and save it:
// Get Screen Width and Height
screen.w = Window.GetWidth();
screen.h = Window.GetHeight();

// Specify background image, and scale to fit screen width & height.
my_image = Image("myimage.png");
resized_my_image = my_image.Scale(screen.w, screen.h);

// Place the 'resized_my_image' on the screen.
my_sprite = Sprite(resized_my_image);

// Set the priority of 'my_sprite', number -10 in the case.
// If multiple images present, the one with higher 'Z' will
// be drawn on top.
my_sprite.SetZ(-10);
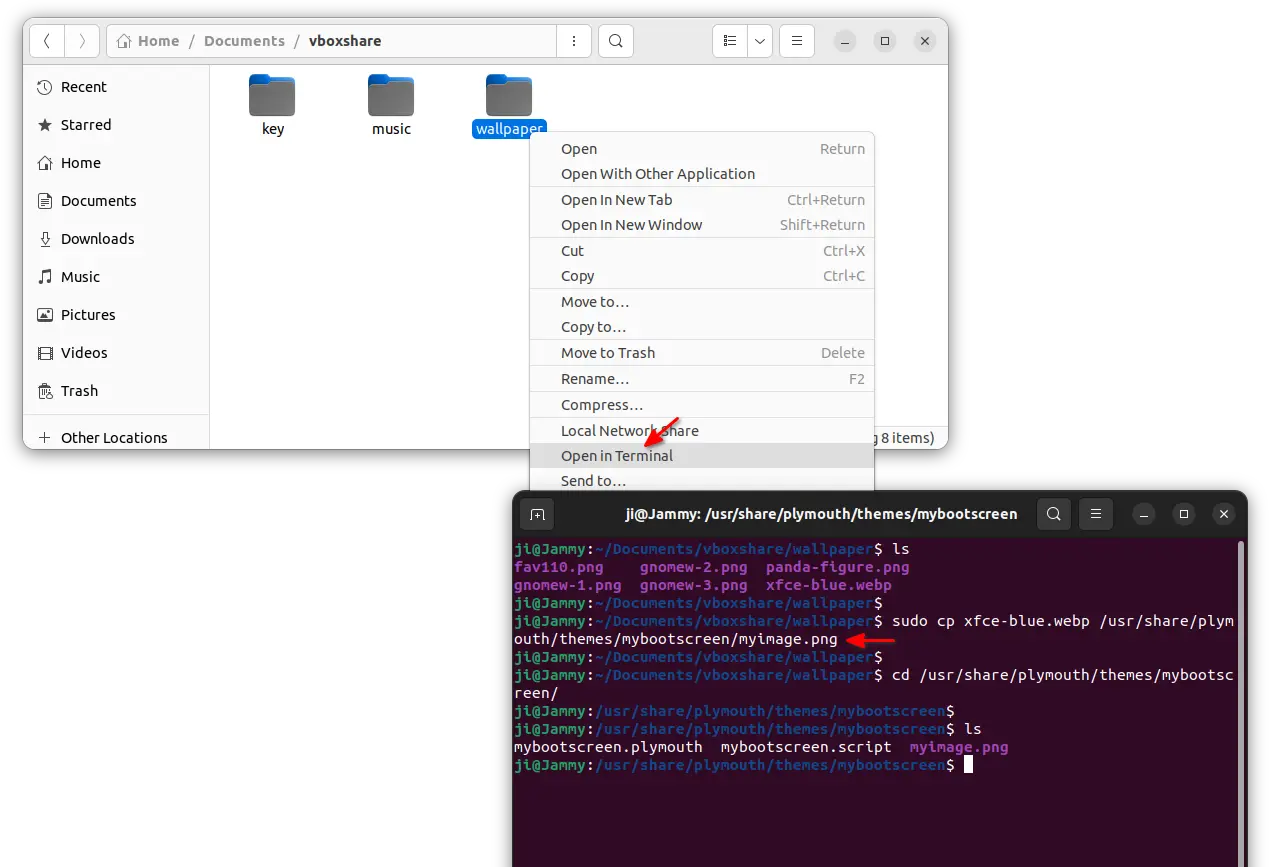
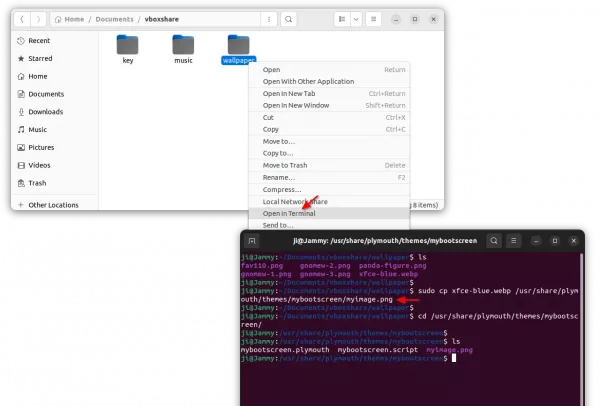
6. Copy or move your desired background image (PNG) to the ‘/usr/share/plymouth/themes/mybootscreen‘ directory.
To do so, you may right-click on the folder that contains your photo image, then select “Open in Terminal” to open that folder as working directory. Finally, run command to copy/move the file:
sudo cp your_image_file.png /usr/share/plymouth/themes/mybootscreen/myimage.png
Here you HAVE to replace “your_image_file.png” accordingly.
Step 2: Change file permissions
This step is optional if you did the previous step in local machine. In case you moved the theme folder to reimplement in another machine, try changing the theme folder permission by running command:
sudo chmod -R 755 /usr/share/plymouth/themes/mybootscreen
Step 3: Apply the Theme
This Step works only for Ubuntu based systems!
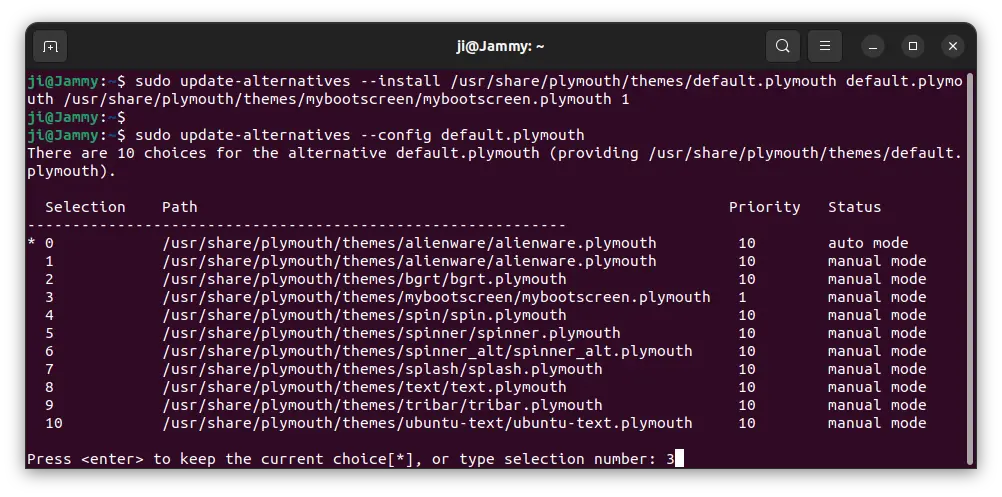
1. First, press Ctrl+Alt+T on keyboard to open a terminal window. When it opens, run command to install the theme you just created as an alternative:
sudo update-alternatives --install /usr/share/plymouth/themes/default.plymouth default.plymouth /usr/share/plymouth/themes/mybootscreen/mybootscreen.plymouth 1
2. Then, run command below to show the theme selection screen:
sudo update-alternatives --config default.plymouth
Type the number (number 3 in screenshot) for your theme and hit Enter!

Finally, reboot your machine to see the change!
Last words
You have to do ‘Step 1’ carefully. A small mistake can cause blank boot screen, though your system still boot and work without issue!