![]()
The first point release of Kodi 20 ‘Nexus’ is out today after almost 2 months of development.
As the title said, the new Kodi 20.1 includes mainly bug-fixes. It introduced a new algorithm to look to overcome some audio issues on Android devices. Fixed DVD playback folder structures over network sources (e.g. SMB/NFS/HTTP, etc.)
Other changes include:
- Assorted fixes to the new Savestate Manager to improve usability.
- An assortment of OSD improvements
- A number of performance improvements (memory reads, faster dialogs/savestates).
- Input fixes allow resetting multitap controller inputs
- Sync of some of the common controller types
- Fixes various overflows when using new chrono infrastructure.
- A fix for an issue on 32-bit systems that affected the sorting of items.
- Resolve PVR Channel Groups to correctly show channels ordered as provided by a PVR backend.
- A couple of fixes for WebVTT subtitles
How to Install Kode 20.1 in Ubuntu
Kodi website provides the downloads for all supported platforms.
For Ubuntu and Linux Mint users, the official PPA repository is one of the best choices to install the media play. So far, it supports Ubuntu 20.04, Ubuntu 22.04, Ubuntu 22.10, Ubuntu 23.04, Linux Mint 20/21.
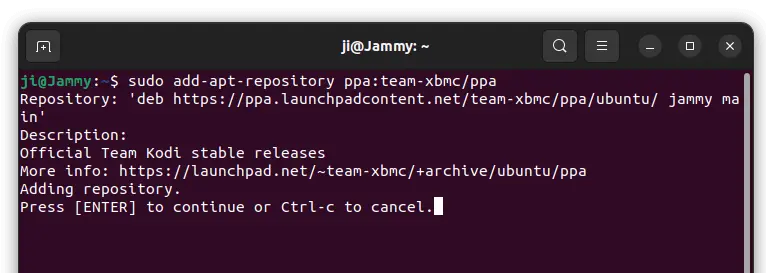
1. First, open terminal by pressing Ctrl+Alt+T on keyboard. When it opens, run command to add the PPA:
sudo add-apt-repository ppa:team-xbmc/ppa
Type user password (no asterisk feedback) when it asks and hit Enter to continue.
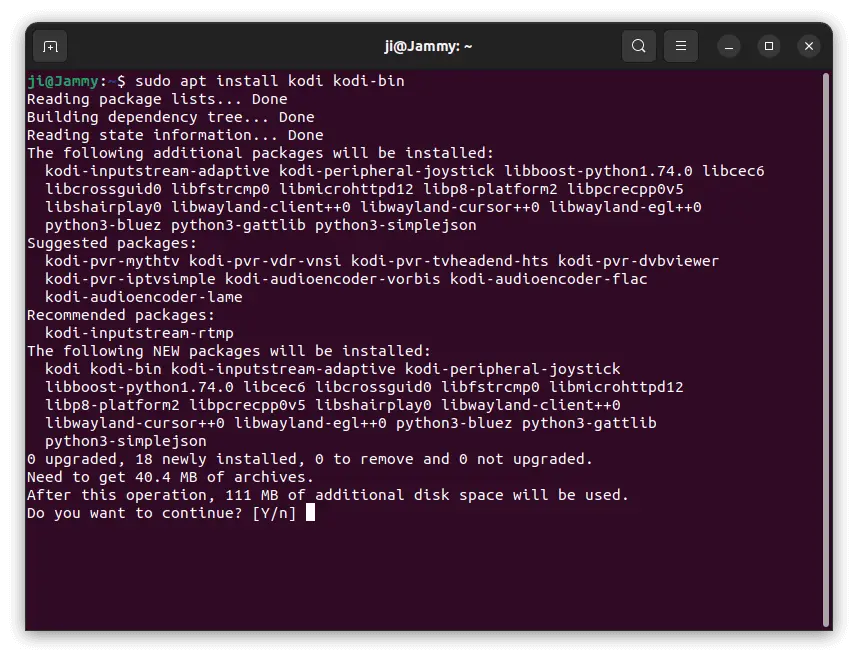
2. Software Updater may not upgrade the media center if an old version was installed in Ubuntu 22.04. Instead it show ‘Partial Updates’ issue.
As a workaround, either run apt install command below:
sudo apt install kodi kodi-bin
Or run sudo apt full-upgrade to install all available updates (you may still need to install kodi-bin manually). For Linux Mint, run sudo apt update before doing updates!
How to Uninstall:
For choice, you can either run command in terminal to purge the PPA, which will downgrade Kodi to stock version in system repository:
sudo apt install ppa-purge && ppa:team-xbmc/ppa
Or manually remove the software package via command:
sudo apt remove kodi kodi-bin --autoremove
And remove the PPA via command as you prefer:
sudo add-apt-repository --remove ppa:team-xbmc/ppa