Wine, the compatibility layer for running MS Windows apps in Linux and macOS, announced new stable 8.0 release after 1 year of development.
Wine 8.0 has finally completed PE conversion. All modules can be built in PE format. Meaning various features to be supported, such as copy protection, 32-bit applications on 64-bit hosts, Windows debuggers, x86 applications on ARM, etc.
Wow64 (Microsoft’s subsystem for running 32 bit applications on 64-bit Windows) is implemented for essentially all Unix libraries. Once the legacy calls removed, it will be possible to run 32-bit Windows applications on Linux without any 32-bit Wine libraries.
Other changes in Wine 8.0 include:
- Print Processor architecture implemented.
- Enable light theme for configuration by default.
- Convert the graphics drivers to run on the Unix side of the syscall boundary.
- Effects are supported in Direct2D.
- Direct3D improved with more graphics cards support.
- Greatly improved the controller hotplug support.
- Support Sony DualShock and DualSense controllers when the hidraw backend is used.
- Introduce Windows.Gaming.Input API with hotplug notifications, force feedback effects and haptics, as well as trigger rumble support.
- Mono engine updated to 7.4.0
How to Install Wine 8.0 in Ubuntu and Linux Mint
Winehq website now has a good tutorial teaching about how to install Wine packages in Ubuntu based systems. And, here is a re-write with more descriptions.
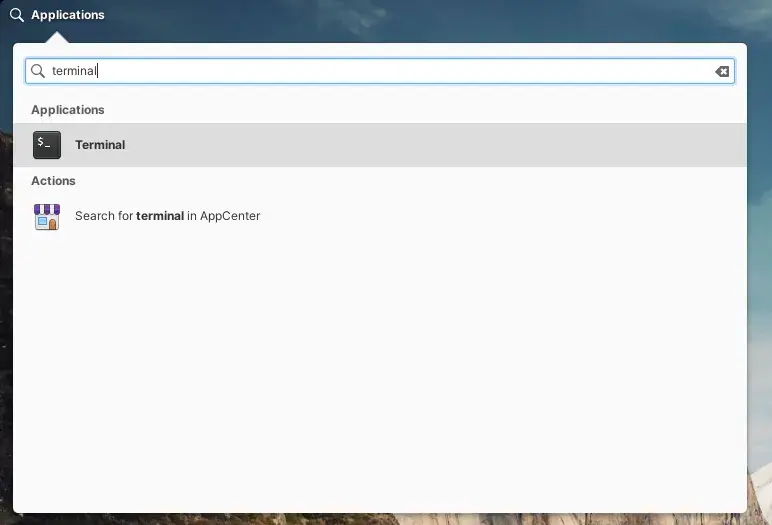
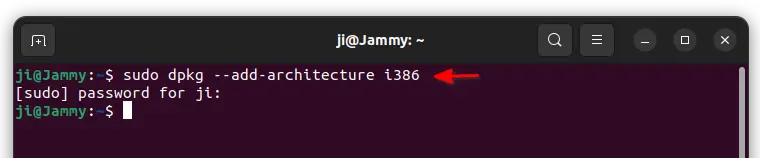
1. First, press Ctrl+Alt+T on keyboard to open a terminal window. When it opens, run command:
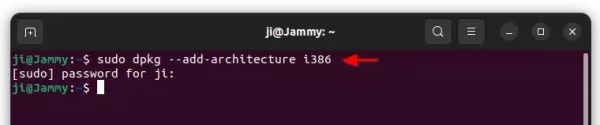
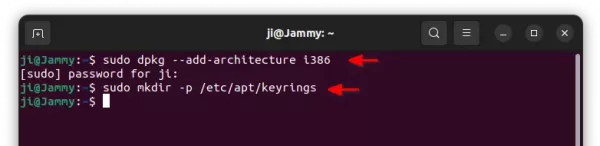
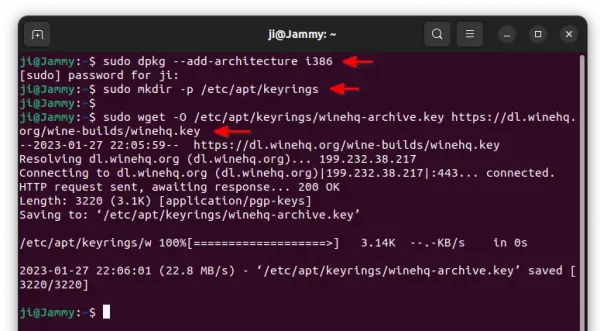
sudo dpkg --add-architecture i386
This command makes it possible to install 32-bit packages in 64-bit Ubuntu, since Wine at the moment still requires a lot of 32-bit libraries.
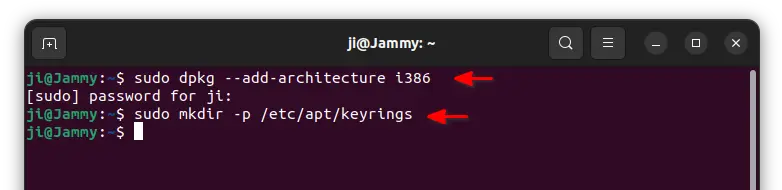
2. Then, run command in terminal to create “keyrings” folder under ‘/etc/apt’ directory for storing the keys. With -p flag, it ignores error if that folder already exist.
sudo mkdir -p /etc/apt/keyrings
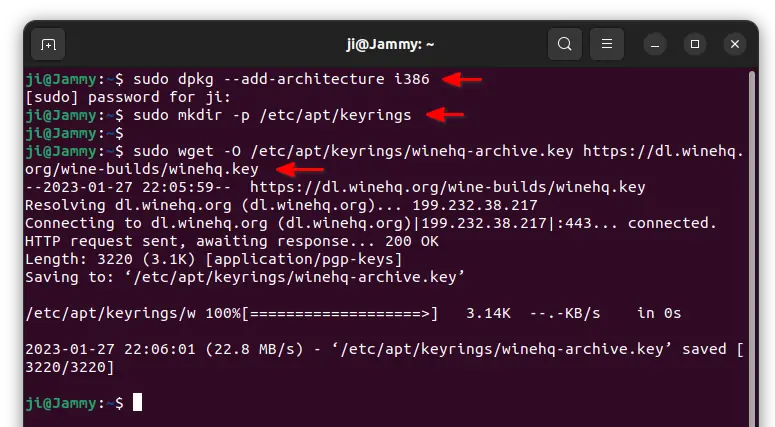
3. Next, use wget command line downloader to download the GPG key for winehq repository, and store in the folder you created in last step.
sudo wget -O /etc/apt/keyrings/winehq-archive.key https://dl.winehq.org/wine-builds/winehq.key
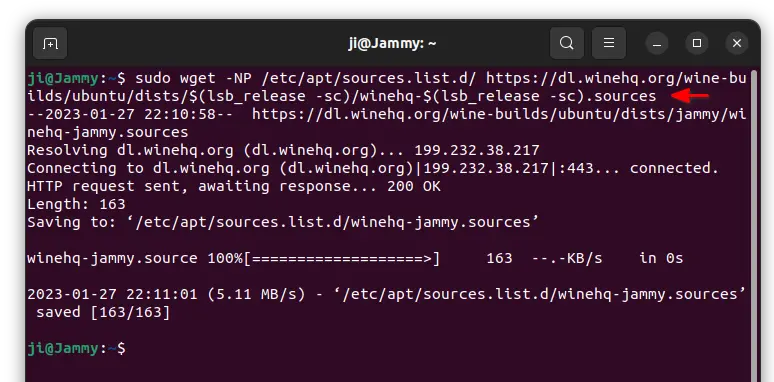
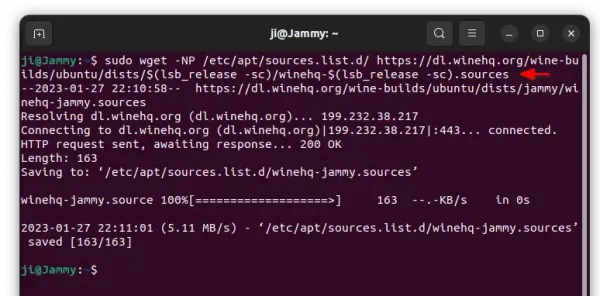
4. Now, run command to download the config file for Winehq apt repository and store in ‘/etc/apt/sources.list.d/’.
sudo wget -NP /etc/apt/sources.list.d/ https://dl.winehq.org/wine-builds/ubuntu/dists/$(lsb_release -sc)/winehq-$(lsb_release -sc).sources
IMPORTANT: This command is for Ubuntu 23.04, 22.04, 20.04, 18.04 only! For Linux Mint, Zorin OS, etc, you have to replace the “$(lsb_release -sc)” in command with the codename of Ubuntu version your system is based on:
- For Ubuntu 23.04 based system, use lunar.
- For Ubuntu 22.04 based system (e.g., Linux Mint 21), use jammy instead.
- For Ubuntu 20.04 based (e.g., Zorin OS 16.x), use focal.
- For Ubuntu 18.04 based system, use bionic
5. After setting up the Wine’s official apt repository, run the command below to fetch package index:
sudo apt update
In the output, there should be a output line indicates Get x https://dl.winehq.org/wine-builds/ubuntu xxxxx InRelease.
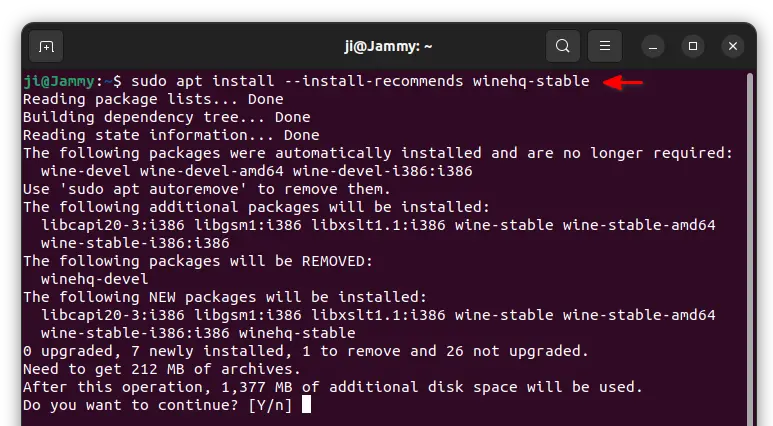
6. Finally, install Wine stable 8.0, as well as dependency libraries via command:
sudo apt install --install-recommends winehq-stable

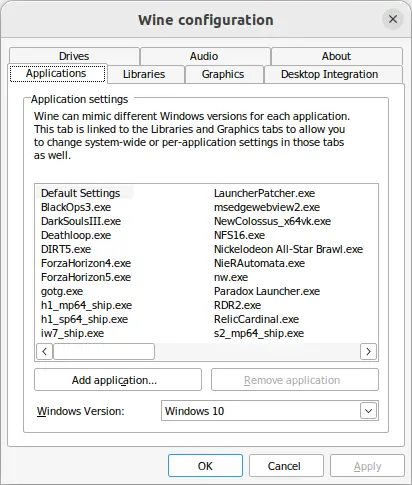
7. After successfully installed Wine packages, run command to generate the config files and open the configuration dialog.
winecfg
There you can verify Wine version and change the settings of this layer.
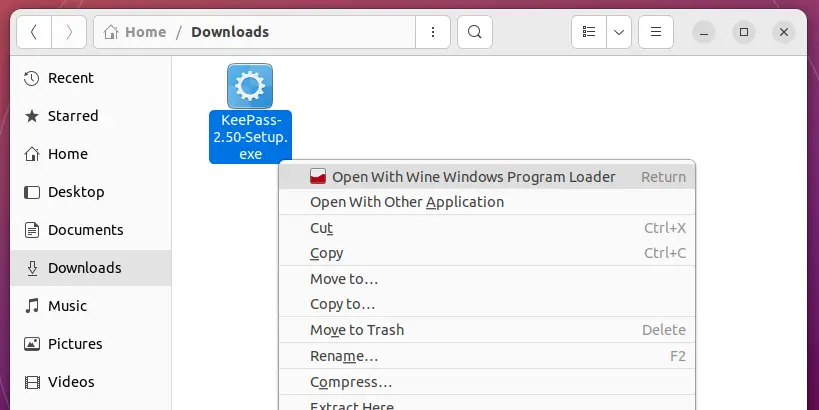
8 Finally, right-click on your EXE file in file manager and select “Open With Wine Windows Program Loader” (or select it from open with other applications dialog). See if Wine supports your Windows app.

How to Remove Wine 8.0
To remove the software package as well as dependency libraries, simply open terminal and run command:
sudo apt remove --autoremove winehq-stable
Also, remove the Wine apt repository by removing the source file:
sudo rm /etc/apt/sources.list.d/winehq-*.sources
And remove the key file via:
sudo rm /etc/apt/keyrings/winehq-archive.key
Finally, remember to refresh package index via sudo apt update command.