UPDATE: for Ubuntu 22.04, see this new tutorial instead!
Want to try out the Pipewire sound server? It’s easy to do this in Ubuntu 21.10 / Ubuntu 21.04, and here’s how!
PipeWire is a server for handling multimedia on Linux. Its most common use is for Wayland and Flatpak apps to implement audio and video playback and capture with minimal latency. And it offers seamless support for PulseAudio, JACK, ALSA, and GStreamer based applications.
Don’t do this in production machine! Replacing existing audio service in Ubuntu is possible but the experience is currently not guaranteed to be perfect or free of issues and bugs.
Use Pipewire to replace PulseAudio in Ubuntu 21.10 & Ubuntu 21.04:
Ubuntu now has better Pipewire support in recent releases. The service is even running out-of-the-box in Ubuntu 21.10.
1.) Update system
Firstly, press Ctrl+Alt+T on keyboard to open terminal and run command to install all available package updates (recommend for those still running Ubuntu 21.04).
sudo apt update && sudo apt upgrade
A system restart may be required if you haven’t done system package update for long period of time.
2.) Install the latest Pipewire libraries:
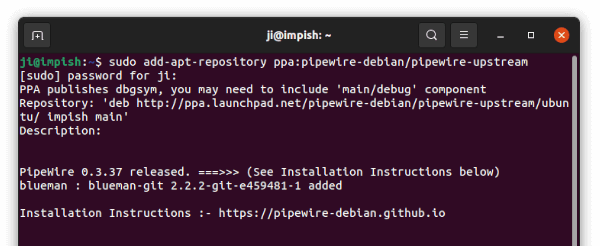
Thanks to the “PipeWire Upstream PPA“, it contains the latest Pipewire libraries to make all the things easy!
Open terminal and run the command below to add the PPA:
sudo add-apt-repository ppa:pipewire-debian/pipewire-upstream
Type user password when it asks, while no visual feedback, and hit Enter to continue.
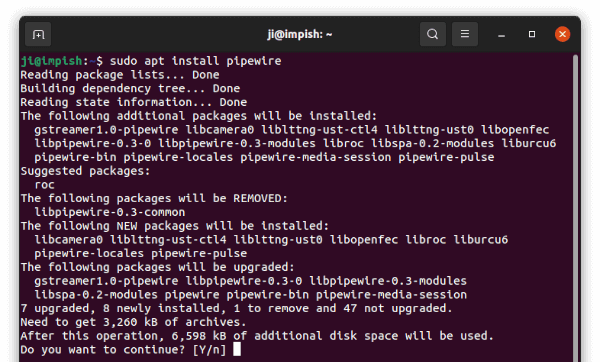
After adding PPA, run command to install pipewire:
sudo apt install pipewire
For GStreamer, JACK, Bluetooth support, install more libraries via command:
sudo apt install gstreamer1.0-pipewire libpipewire-0.3-{0,dev,modules} libspa-0.2-{bluetooth,dev,jack,modules} pipewire{,-{audio-client-libraries,pulse,media-session,bin,locales,tests}}
After installation, restart your system.
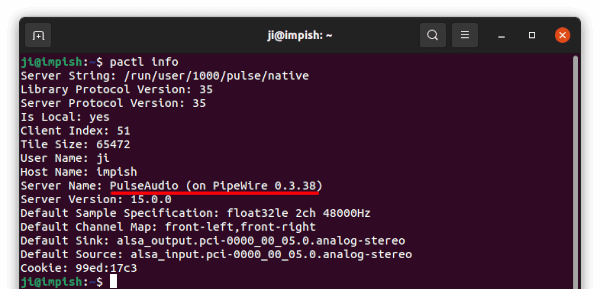
3.) Verify Pipewire:
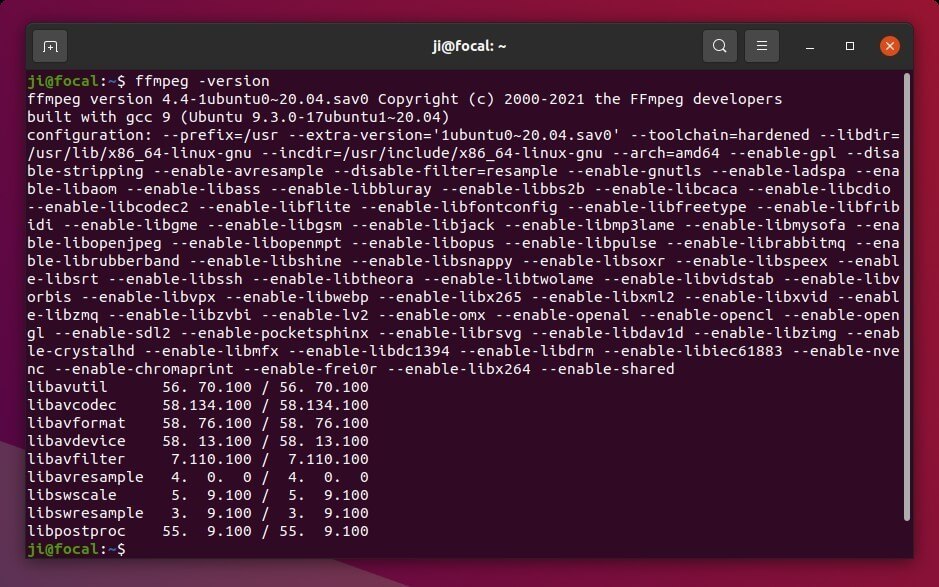
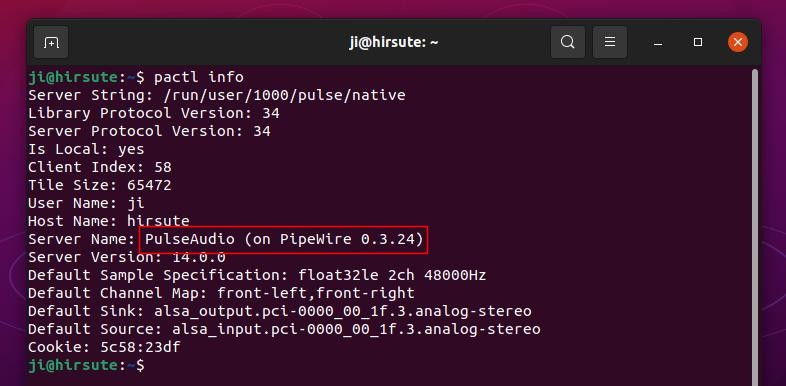
In next boot, open terminal and run “pactl info” command will tell that Pipewire is in use even without any configuration.
[OBSOLETE] Replace PulseAudio with Pipewire in Ubuntu 21.04:
Ubuntu 21.04 has enabled support for pipewire officially. And here’s how I enabled it in my laptop:
1.) Firstly, open terminal either from system application launcher or by pressing Ctrl+Alt+T on keyboard.
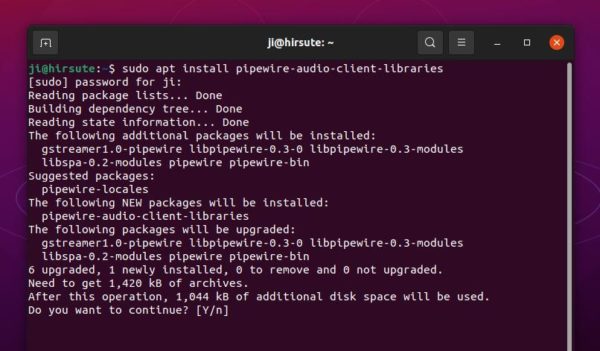
When it opens, run command to install the pipewire-audio-client-libraries package:
sudo apt install pipewire-audio-client-libraries
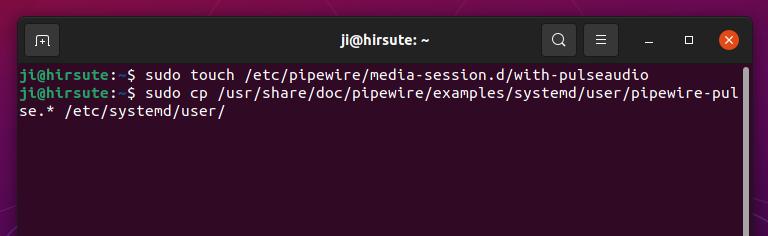
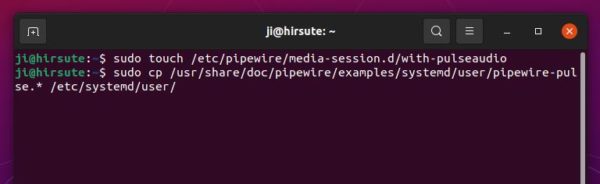
2.) Then create an empty file by running command:
sudo touch /etc/pipewire/media-session.d/with-pulseaudio
3.) Create pipewire-pulse service files by copying the example files:
sudo cp /usr/share/doc/pipewire/examples/systemd/user/pipewire-pulse.* /etc/systemd/user/
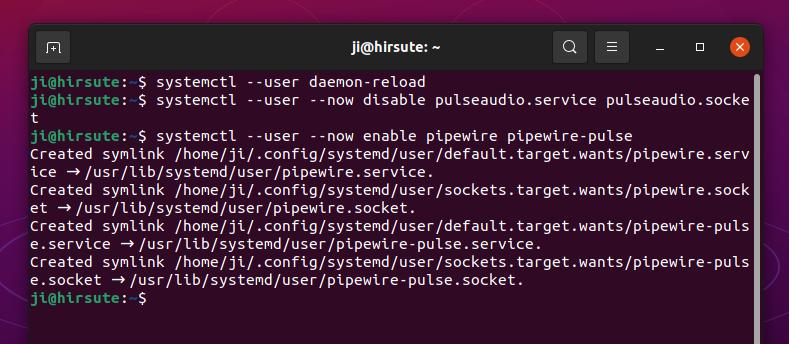
4.) You don’t have to remove the PulseAudio, just disable it and enable Pipewire:
- Run command to reload the new service files:
systemctl --user daemon-reload
- Disable PulseAudio service via command:
systemctl --user --now disable pulseaudio.service pulseaudio.socket
- And finally enable the Pipewire services:
systemctl --user --now enable pipewire pipewire-pulse

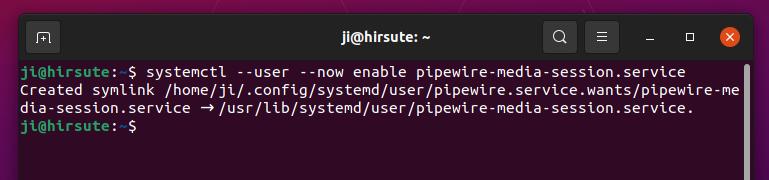
5.) I followed the previous steps via Debian Wiki, but it didn’t work. The system tray sound icon’s gone, and pactl info outputs “Connection failure: Connection refused”.
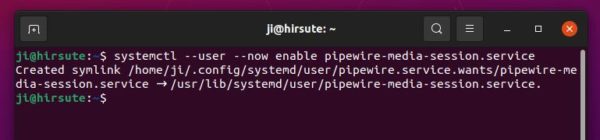
To workaround the issue, enable pipewire-media-session service may work by running command:
systemctl --user --now enable pipewire-media-session.service
If you’re trying to get it work in
Ubuntu 20.04, try “mask” the PulseAudio service before reboot, by running command:
systemctl --user mask pulseaudio
Finally reboot your machine.
And check if Pipewire is working, run pactl info command. And it’s working if you see “PulseAudio (on PipeWire 0.3.24)” in output.