Archives For Ubuntu Server

DrJava LogoAs you may know, DrJava is a lightweight programming environment for Java designed to foster test-driven software development. It includes an intelligent program editor, an interactions pane for evaluating program text, a source level debugger, and a unit testing tool.

This tutorial shows you how to install DrJava via getdeb repository in Ubuntu 13.04, Ubuntu 12.04, Ubuntu 12.10, Ubuntu 10.04 and their derivatives such as Linux Mint, Elementary, etc.

To get started, download and install the deb from the below link which will add the GetDeb repository to your system:

Download getdeb package

For Linux Mint, you can directly enable getdeb repository from Software Sources.

To install DrJava, click Reload button and search and install drjava package in Synaptic Package Manager. Or, run below command in terminal (Ctrl+Alt+T):

sudo apt-get update; sudo apt-get install drjava

DrJava Ubuntu

Update-20170107: The tutorial should also works on current Ubuntu releases, including Ubuntu 16.04, Ubuntu 16.10, Ubuntu 14.04 and their derivatives. To uninstall, simply run commands:

sudo apt-get remove drjava && sudo apt-get autoremove

And the getdeb repository can be removed by going to System Settings -> Software & Updates -> Other Software tab.

The latest Stable Linux Kernel 3.10.10 has been released. All users of the 3.10 kernel series are urged to upgrade as soon as possible. Here’s how to Install / upgrade in Ubuntu 13.04, Ubuntu 12.04 Precise and Ubuntu 12.10 Quantal.

Linux Kernel 3.10.10 Ubuntu

The Kernel 3.10.10 is a small release that includes a few updated drivers, fixes, as well as other small changes. See the changelog.

Install / Upgrade Kernel 3.10.10

The DEB packages for Debian / Ubuntu based systems are available. Press Ctrl+Alt+T on your keyboard to open terminal. When it opens, run below commands to download them:

for 32-bit system:

wget http://kernel.ubuntu.com/~kernel-ppa/mainline/v3.10.10-saucy/linux-headers-3.10.10-031010-generic_3.10.10-031010.201308291422_i386.deb

wget http://kernel.ubuntu.com/~kernel-ppa/mainline/v3.10.10-saucy/linux-headers-3.10.10-031010_3.10.10-031010.201308291422_all.deb

wget http://kernel.ubuntu.com/~kernel-ppa/mainline/v3.10.10-saucy/linux-image-3.10.10-031010-generic_3.10.10-031010.201308291422_i386.deb

for 64-bit system:

wget http://kernel.ubuntu.com/~kernel-ppa/mainline/v3.10.10-saucy/linux-headers-3.10.10-031010-generic_3.10.10-031010.201308291422_amd64.deb

wget http://kernel.ubuntu.com/~kernel-ppa/mainline/v3.10.10-saucy/linux-headers-3.10.10-031010_3.10.10-031010.201308291422_all.deb

wget http://kernel.ubuntu.com/~kernel-ppa/mainline/v3.10.10-saucy/linux-image-3.10.10-031010-generic_3.10.10-031010.201308291422_amd64.deb

After that, both 32-bit and 64-bit run below command to install the kernel:

sudo dpkg -i linux-headers-3.10.10-*.deb linux-image-3.10.10*.deb

Once properly installed, you can remove the downloaded packages for saving space.

(Optional) To remove this kernel, run below command:

sudo apt-get purge linux-image-3.10.10*

Want to use the Snow sabre icons on Ubuntu based system? Well, it’s easy and here I’ll show you how.

snow sabre icons ubuntu

As you may know, Snow sabre icons (Folders) was originally a Mac theme created by miniMac for his personal use on Mac. Here you can download the Snow Sabre icon theme (black & silver) from deviantart

For Ubuntu, Linux Mint, Elementary OS, etc. Download the package from the previous link and put the result folders into user’s $HOME/.icons folder.

snow sabre icons ubuntu

Or you can put the icon folders under /usr/share/icons for global use.

To apply the icon theme, go to gnome tweak tool -> Theme -> Icon Theme and select it in the drop-down box.

apply snow sabre icons

You may already know that there’s an utility in System Settings allows to change user privacy settings, such amazon search results in Unity Dash, recent document and record activity, etc.

Privacy settings

This simple tutorial shows you an indicator applet allows to quickly change privacy settings via the menu on top-panel. The Privacy Indicator menu allows to:

  • Enable / Disable Amazon online search results in Unity Dash
  • Clear recent documents
  • Enable / Disable and clear record activity
  • display username on panel

Privacy Indicator Ubuntu

Install Privacy Indicator:

You can install the indicator easily by using the DEB. Just download and double-click to install the below package:

indicator-privacy_all.deb

Or you can install it via command:

wget http://www.florian-diesch.de/software/indicator-privacy/dist/indicator-privacy_0.03-1_all.deb

sudo dpkg -i indicator-privacy_0.03-1_all.deb; sudo apt-get -f install

Once installed, open it from Unity Dash. Enjoy!

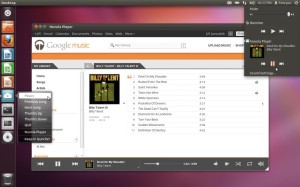
The Cloud Based Nuvola Music Player has reached 2.1.0. It brings new features for users as well as for service maintainers and many bug fixes.

As you may know, Nuvola Player runs a web interface of cloud music services – Google Play Music, Amazon Cloud Player, 8tracks, Grooveshark, Hype Machine, Pandora, Rido – in its own window and provides integration with a Linux desktop.

nuvola player ubuntu unity

The new release Nuvola 2.1.0 brings following changes:

  • Added information about format support.
  • New service Deezer.
  • Extensions: Almost all extensions are enabled by default.
  • Notifications extension: Added support for actions and resident notifications.
  • Last.fm extension: Added switches to disable scrobbling for particular services.
  • Added a few keyboard shortcuts: Go back Left and go forward Right.
  • Service selector is opened in a separate window and uses native GTK+ widgets instead of web view. GTK+ zoom level is respected and non-free screenshots are not loaded.
  • User interface: Added option to prefer dark GTK+ theme.
  • Context menu of a web view is populated with custom actions.
  • Removed UI modes “toolbar only” and “both toolbar and menubar”. Main menu reorganized.
  • MPRIS extension: Renamed to Remote Player Interface.
  • Install / Upgrade Nuvola Player in Ubuntu

    For Ubuntu and its derivatives, press Ctrl+Alt+T to open terminal. When it opens, run below commands one by one:

    sudo add-apt-repository ppa:nuvola-player-builders/stable
    
    sudo apt-get update
    
    sudo apt-get install nuvolaplayer