Archives For November 30, 1999

This is a picture guide for beginners to set static IP address on Ubuntu 13.04 Raring Ringtail, both wireless and wired connection.

Ubuntu by default uses DHCP (Dynamic Host Configuration Protocol) to obtain IP address when your computer is connected to a network. You may required to change to static IP address in some network environments. This tutorial will show you how to do this step by step.

Tutorial Objectives:

  • Setup Static IP Address in Ubuntu 13.04 (both wireless & wired)
  • Enjoy!

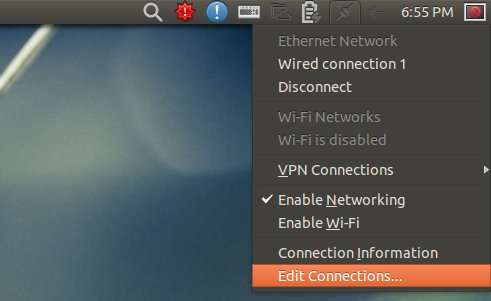
To get started, move your cursor to top-right corner network icon on panel. Click to expand the menu and choose Edit Connections…

edit network to static ip

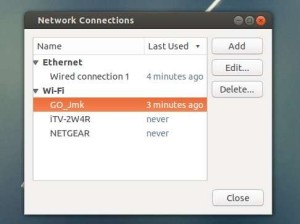
In next window, choose your wired connection or wifi network then click Edit button.

choose network connection

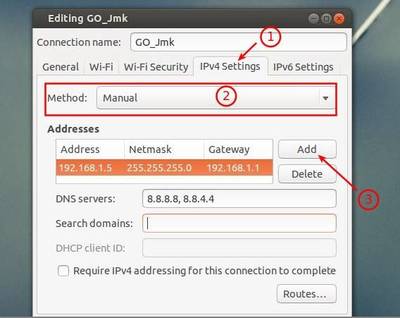
Then navigate to IPv4 Settings tab. Switch Method to “Manual” from the drop-down box. Click Add button and type in IP address, netmask and gateway. Finally click “Save” when everything’s done.

static ip address

Getdeb is an unofficial project which provides the latest open-source and freeware applications for Ubuntu Linux, and PlayDeb provides games. As Ubuntu based Linux distribution, Linux Mint users are available to install software from this repository.

Objectives:

  • Install / add / enable GetDeb & PlayDeb repository on Linux Mint
  • Enjoy!

To get started, go to Start menu, search and open Software Sources

software-sources

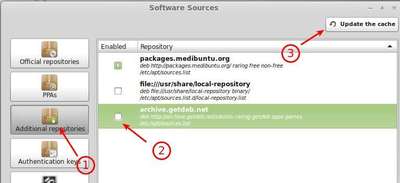
Navigate to Additional repositories, check the box where it says ‘archive getdeb.net’. Click ‘update the cache’ button to update package lists.

enable getdeb repository

That’s it!

If it is not there in your Linux Mint edition, click ‘Add a new repository’ and type in

deb http://archive.getdeb.net/ubuntu raring-getdeb apps games

In the line, change raring to yours based Ubuntu release code name.

Linux Mint 14 Nadia based on Ubuntu 12.10 quantal
Linux Mint 13 Maya based on Ubuntu 12.04 precise
Linux Mint 12 Lisa based on Ubuntu 11.10 oneiric
Linux Mint 11 Katya based on Ubuntu 11.04 natty
Linux Mint 10 Julia based on Ubuntu 10.10 maverick
Linux Mint 9 Isadora based on Ubuntu 10.04 lucid

And get the key by running below commands in terminal (Ctrl+Alt+T):

wget -q -O- http://archive.getdeb.net/getdeb-archive.key | sudo apt-key add -

Enjoy!

How to Install UltraStar Deluxe on Linux Mint

Last updated: July 17, 2013

UltraStar Deluxe is a free and open-source singing game. It allows up to six players to sing along with music using microphones in order to score points, depending on the pitch of the voice and the rhythm of singing.

Objectives:

  • Install UltraStar Deluxe on Linux Mint
  • Enjoy!

Linux Mint 13 users can install it from the official ppa repository, press Ctrl+Alt+T to open a terminal window.

Linux Mint Terminal

Then run below 3 commands one by one:

sudo add-apt-repository ppa:tobydox/ultrastardx

sudo apt-get update

sudo apt-get install ultrastar-deluxe

For Linux Mint 14 and 15 users, directly download and install the debs:

ultrastar-deluxe deb for 32-bit | 64 bit

ultrastar-deluxe data for all

Then install the 2 Debs and fix dependencies:

sudo dpkg -i ~/Downloads/ultrastar-deluxe*.deb; sudo apt-get -f install

Enjoy!

This simple tutorial will show you how to install the Spotify Client on Linux Mint 13, 14, 15 from the official repository.

Spotify is a digital music-streaming service that gives you on-demand access to millions of songs on all your devices. It works on Windows, Mac, Linux, Android, iOS, Windows Phone 7/8 (7 no longer updated), BlackBerry (GSM only), Symbian.

To install it from the official repository, press Ctrl+Alt+T to open terminal.

1.) Run below command to add the repository to Linux Mint:

sudo sh -c 'echo "deb http://repository.spotify.com stable non-free" >> /etc/apt/sources.list.d/spotify.list'

add spotify repository to linuxmint

2.) Install the public key:

sudo apt-key adv --keyserver hkp://keyserver.ubuntu.com:80 --recv-keys D2C1988

install spotify key linuxmint

3.) Finally update package lists and install spotify:

sudo apt-get update; sudo apt-get install spotify-client

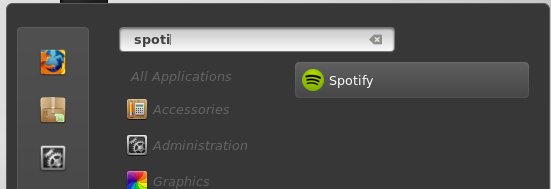
spotify in linuxmint

Enjoy!

How to Install uTorrent on Linux Mint 15

Last updated: July 16, 2013

Here’s a beginner’s guide to install and setup uTorrent server on Linux Mint 15. There’s no command in tutorial, just a few clicks!

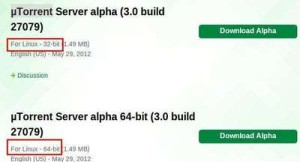
1.) First, download uTorrent server for Linux: www.utorrent.com/downloads/linux. You may check 32-bit or 64-bit by going to Start Menu -> System Tools -> System Settings -> System Info. Where “Distribution Linux Mint 15: olivia (i686)” means 32-bit. x86_64 means 64-bit system.

download-utorrent

2.) Decompress the package in Downloads folder, then navigate to the extracted folder.

utorrent-server-folder

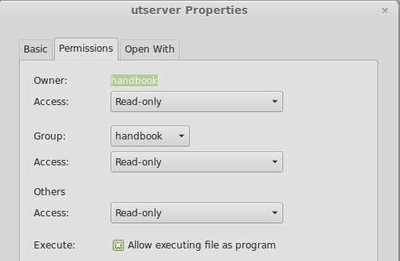
3.) Right-click on utserver and goto its Properties window. Make sure “Allow executing file as program” is checked.
utsever-executable-linuxmint

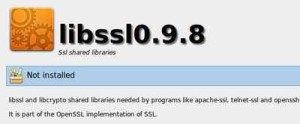
4.) Before running the utserver, install ssl share libraries from Start Menu -> Software Manager.

install ssl shared libraries

5.) Now double-click on utserver file to start it. That’s right you see nothing happens because the server is running as a background program.

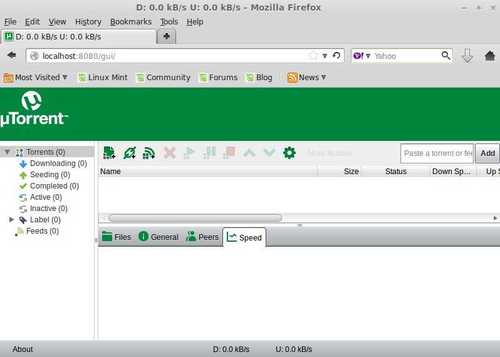
6.) Open your file browser and go to http://localhost:8080/gui/. Type:

username: admin
password: leave password empty

utorrent

Done!

Nixnote

This tutorial shows how to install NixNote (formerly NeverNote) on Ubuntu 22.04 and Ubuntu 20.04


NixNote, previously known as NeverNote is an open-source client for Evernote on Ubuntu Linux. It has following features:

  • Synchronizes with Evernote servers
  • Local data caching
  • Cross platform
  • Local-only and synchronized notebooks supported
  • Database may be encrypted locally

There’s a ppa repository contains the latest packages for Ubuntu and Linux Mint users. To install it, press Ctrl+Alt+T to open terminal, then follow the below steps:

1.) Copy and paste this command, and run. It adds the stable ppa repository to your system:

sudo add-apt-repository ppa:nixnote/nixnote2-stable

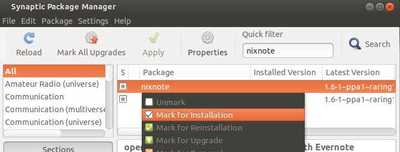
2.) If you’ve installed Synaptic Package Manager, open it and click Reload button to update package lists. Then search for and install nixnote:

nixnote-synaptic

or, run this command instead to update package cache and install the software:

sudo apt-get update; sudo apt-get install nixnote2

Uninstall Nixnote

To uninstall the app, open terminal (Ctrl+Alt+T) and run command:

sudo apt remove --autoremove nixnote2

Also remove the Ubuntu PPA by running command:

sudo add-apt-repository --remove ppa:nixnote/nixnote2-stable