Archives For November 30, 1999

GNOME 46 reached UI, ABI/API, and feature freeze stage today. Let’s see the top new features in this popular desktop environment.

GNOME 46 will be the default desktop environment for Fedora 40 Workstation, Ubuntu 24.04, and optional in Arch, Manjaro, etc Linux.

It continues polish the desktop appearance by redesigning the improving the core app experiences.

GNOME Files, aka Nautilus, to have explicit Global Search mode, allowing to find files and folders in all search locations. And a “Search Settings” button is available to filter search results.


Continue Reading…

This simple tutorial shows how to disable (or auto-delete) “recent” files tab in left side-bar of file manager in Ubuntu 24.04 & 22.04.

GNOME Files, aka Nautilus file manager, has a “Recent” tab in left side-bar, which include all the recent opened photos, videos, and documents.

It’s useful for user or applications to quickly re-open recent edited files. However, when working at a public place, it can be better to disable this feature since it may contain sensitive data.


Continue Reading…

GNOME announced the first alpha of the next 46 release few days ago on last Friday.

Let’s see what’s new in the desktop for next Ubuntu 24.04 LTS.

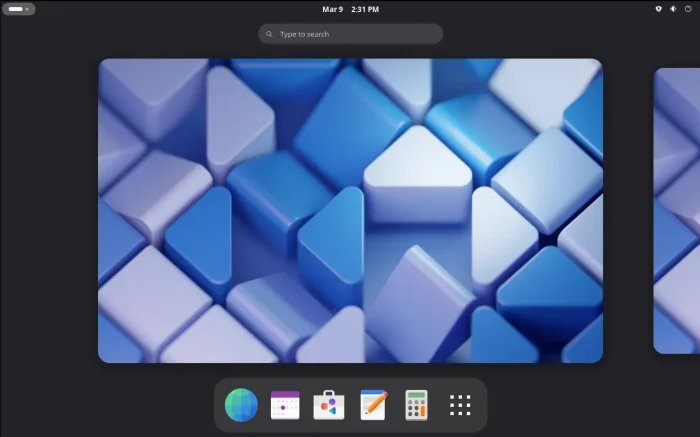
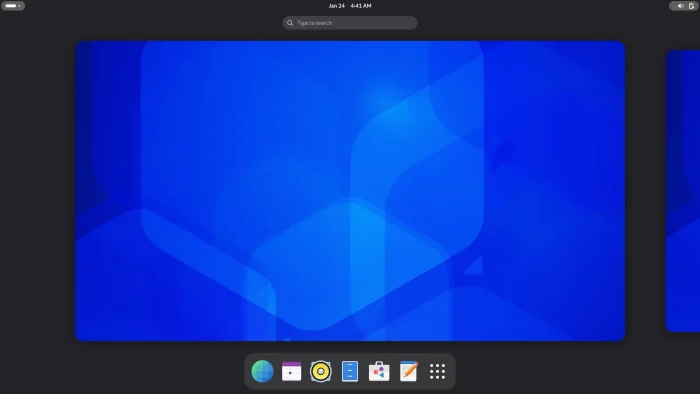
First of all, every Gnome release has a new default wallpaper. This time, it’s a blue background embrace the rounded triangle. And, in this release GNOME backgrounds now favors JPEG-XL as a format. I don’t have any photo images in .jxl format. But it seems that Gnome now supports for setting the file format as background wallpaper.

Gnome 46

GNOME Remote Desktop now supports headless remote login via GDM, through for RDP only. And, a systemd service is introduced for single user headless setups. As well, Gnome-Control-Center and classic session are allowing to run in headless mode.

Continue Reading…

Don’t remember how many tools, I’ve written about, for monitoring CPU, RAM, Network, and other system resources usage in Ubuntu. But, there’s a brand-new for GNOME, the default desktop environment.

It’s Astra Monitor, a free open-source tool provides highly customizable interface on Gnome top-panel, to monitor CPU, GPU, RAM memory, disk storage, network usage, as well as hardware temperature, voltage, and fan speed.

It supports displaying the data in real-time bar, history graph, percentage number, with user selected order, in left, center, or right corner of panel.

Aster Monitor on GNOME Panel

Besides having quick glance at system resource usage, user can also click on the indicator icon to pop-up a rich drop-down menu with detailed information. By moving cursor over the menu can also display even more about the hardware, resource load, processes, and so forth.
Continue Reading…

Gnome Files, aka the default Nautilus file manager in Ubuntu & Fedora workstation, keeps moving with new features!

In the passed few month, there are minor but beginner friendly features merged into this popular file manager. They include “Enter Location” menu option, sidebar toggle button in sidebar, and badge icon to folder icon in ‘properties’ dialog.

NOTE: The new features introduced in this post are merged to master branch but NOT released yet! They may be available in next GNOME versions, backport to current, or even removed!

Continue Reading…

Fedora workstation displays Fedora logo on the desktop for the default wallpaper, now there’s an extension that can do the similar job in Ubuntu 23.10, Arch, and Manjaro Linux with GNOME 45.

It’s “Logo Widget”, which allows to add any user selected image into desktop as background logo, resize and place it in top-left, top-center, top-right, center, bottom-left, bottom-center, or bottom-right of screen.

Background Logo in Ubuntu 23.10

Along with Activate Gnome, user can put both image and custom text in desktop as background logo/text. See the screenshot below.

Enable background logo in GNOME 45.

Ubuntu 23.10 users can firstly search for and install “Extension Manager” from App Center.

Install Extension Manager in Ubuntu Software/App Center

Then, launch “Extension Manager”, navigate to Browse tab, finally search and install the Logo Widget extension.

After installation, navigate back to “Installed” tab, click settings icon for the newly installed extension to open the configuration page.

Finally, choose logo image file (for Ubuntu logo, choose /usr/share/plymouth/ubuntu-logo.png), set position, size, opacity, etc and enjoy!

For Arch,Manjaro Linux, etc with GNOME 45, just open the link below to visit the extension page in EGO:

The, use the ON/OFF switch to install the extension, and install “Gnome Extensions” app to configure it.

If you don’t see the ON/OFF switch, click the link in the page to install browser extension and refresh!

For Ubuntu 23.10, Fedora 39, Arch and other Linux with GNOME Desktop 45, there’s now new system tray applet to monitor system resource utilization.

There are quite a few tools for monitoring system resource utilization. While, Gnome-Stats-Plus is a new one that adds real-time graphs in right-corner of top-panel, allowing users to keep a close eye on their system’s performance.

By moving mouse cursor over the indicator icon, it will show you a bigger graph with real-time and historical CPU load, memory usage, network speed, and swap area usage.

And, clicking on the icon will launch system monitor application.

How to Install the SystemStatsPlus indicator

The indicator is available as a Gnome shell extension, which so far supports only GNOME 45.

1. Install gtop library

First, open terminal (press Ctrl+Alt+T on keyboard) and run command to install the gtop system monitoring library:

sudo apt install gir1.2-gtop-2.0 libgtop2-dev

For Fedora run sudo dnf install libgtop2, and Arch can install it via sudo pacman -S libgtop command.

2. Install the Gnome Extension

Ubuntu 23.10 can first launch App Center, and use it to search & install “Extension Manager” app.

Install Extension Manager in Ubuntu Software/App Center

Then, launch “Extension Manager” and use it to search & install “SystemStatsPlus” extension under Browse tab.

For Fedora 39 and Arch Linux, simply open the extension web page via the link below:

Then, use the ON/OFF switch to install it. Install browser extension via the link in the page, if you don’t see the toggle switch, and refresh.

3. Restart Gnome Shell

The indicator applet should appear in top-panel immediately after installation. If NOT, try restarting Gnome Shell.

For the default Wayland session, just log out and back in to restart the shell.

In the classic Xorg session, user can press Alt+F2, type r in pop-up ‘Run a command’ box, and hit Enter.

Uninstall:

To uninstall the extension, either use “Extension Manager” or “Gnome Extensions” app (both available in Gnome Software).

Or, turn off the toggle switch in the extension web page via the link button above.

In Ubuntu 23.10 with default GNOME 45 desktop, there’s no longer app menu indicator in top-panel next to workspace indicator (previously ‘Activities’).

It’s an indicator menu for current running app window in focus, which has few basic options such as “New Window” and “Quite”.

GNOME has proposed to replace the app menu with a new way for indicating window focus. GNOME 45 takes the first step by removing it from top-panel.

For those who prefer the top panel app menu, it’s easy to get it back by using an extension. And, here’s how to do the trick step by step.

Get back App Menu Indicator in GNOME 45

NOTE: This tutorial should work in Ubuntu 23.10, Fedora 39, Manjaro, Arch, and other Linux with GNOME 45.

For Ubuntu 23.10, firstly launch App Center, then search for and install “Extension Manager” app.

Install Extension Manager in Ubuntu Software/App Center

Next, launch “Extension Manager”, and use it to search & install the “App menu is back” extension, under Browse tab.

After installing the extension, the app menu should be back in top-panel, next to the ‘pill and dot’ workspace indicator once you selected any app window.

For Fedora 39 and other Linux, just launch web browser and go to the extension page in EGO via the link below:

Then, use the ON/OFF switch in the page to install the extension. In case you don’t see the toggle switch, install web browser extension via the link it prompted and refresh the page.

That’s it. Enjoy!

This is a quick tutorial shows you how to quickly access the source of all your installed GNOME extensions in Ubuntu, Fedora Workstation, Debian and other Linux with GNOME.

Gnome extensions are usually installed to “.local/share/gnome-shell/extensions/” directory. While, system built-in extensions are available in “/usr/share/gnome-shell/extensions/“.

For developing or debugging purpose, you can open that folder every time to access the sources. However, GNOME has a built-in debugger and inspector tool that can also do the trick quickly.

Quick access source of extensions via Looking Glass

1. First, press Alt+F2 on keyboard to launch the ‘Run a command’ dialog box. Then, input lg and hit Enter.

2. The Gnome debugger and inspector tool, aka Looking Glass, will drop-down from the top.
There, just switch to “Extensions” tab, then, you’ll see all the installed extensions, either enabled or disabled.

And, each extension has 3 links:

  • View Source – open the source folder of extension in a new Nautilus window.
  • Web Page – open the extension web page in default web browser.
  • Show/Hide Errors

Looking Glass Indicator

To make life easier, there’s also an extension to add a panel indicator in top-right. So, you can access it easily by a single mouse click. Which, also has a drop-down menu:

  • Restart Shell (Xorg only).
  • Reload Theme.
  • Open Extensions Folder.
  • Open Themes folder.

To install the indicator, first search for and install “Extension Manager” from either Ubuntu Software or App Center.

Install Extension Manager in Ubuntu 22.04+

Then, launch and use “Extension Manager” to search and install “Looking Glass Button” under Browse tab.

The extension so far supports all current GNOME versions. For Fedora, Debian, etc without ‘Extension Manager’, just go to extension web page via the link below:

Then use ON/OFF switch to install it. If you don’t see the toggle switch, click the link in the page to install browser extension then refresh.

The new tiling assistant extension in Ubuntu 23.10 has indicator support! Here’s how to enable it and fix the missing icon.

Ubuntu 23.10 introduced a new system extension called “Tiling Assistant”. With it, user can easily tile window to half or quarter of screen either via mouse dragging or keyboard shortcut.

The extension also has an indicator applet on panel, allows user to select a layout to start tiling with ‘Super + Tab’ look like menu for all opened windows. See the short video:

The feature is useful, however lack of indicator icon on panel, possibly due to bug or building issue. This tutorial is going to show you how to enable the indicator as well as add back the icon, so it will look like the screenshot below:

Step 1: Enable the Indicator Applet

To enable the indicator, user can either run single command in terminal or use ‘Dconf Editor’ configuration tool.

Option 1: Press ‘Ctrl + Alt + T’ key combination on keyboard to open terminal. When terminal opens, run the single command below to do the job:

gsettings set org.gnome.shell.extensions.tiling-assistant show-layout-panel-indicator true

Option 2: Or, first search for and install “Dconf Editor” from App Center.

Then, launch “Dconf Editor” and navigate to org/gnome/shell/extensions/tiling-assistant. Finally, scroll down, find out and turn on ‘show-layout-panel-indicator’.

Step 2: Fix missing icon issue

As mentioned, the indicator is missing icon on panel. To fix it, you may install the community version of “Tiling Assistant” from EGO (extensions.gnome.org), then copy the icon files to use for system built-in extension.

1. First, open App Center, then search for and install “Extension Manager“.

Install Extension Manager in Ubuntu Software/App Center

2. Then, launch “Extension Manager” and use it to search and install “Tiling Assistant” community edition under Browse tab.

3. You do NOT need to turn on the new installed ‘Tiling Assistant’ extension. Here, we just need the icon file from it.

Press Ctrl+Alt+T on keyboard to open terminal, when terminal opens, run commands:

  • navigate to the user installed extension directory:
    cd ~/.local/share/gnome-shell/extensions/tiling-assistant@leleat-on-github/
  • after that, just copy the ‘media‘ sub-folder to system extension directory. To do so, run command:
    sudo cp -R media /usr/share/gnome-shell/extensions/[email protected]/

    Type user password (no asterisk feedback) when it asks and hit Enter.

Finally, use “Extension Manager” to turn off and turn back on ‘Ubuntu Tiling Assistant’ to apply change. And, remove the user installed ‘Tiling Assistant’ extension. Or, simply log out and back in.