Archives For November 30, 1999

This simple tutorial shows you how to enable DVD playback and install multimedia codecs in Ubuntu 13.10 Saucy, so that you can play encrypted DVDs, wmv, mpeg, mp3, divx, and more with the default player.

All you need to to is run below commands in terminal one by one and then restart your computer to take effect.

To get started, press Ctrl+Alt+T on your keyboard to open terminal. When it opens, run below commands to install multi-media codecs:

sudo apt-get install gstreamer0.10-plugins-ugly gstreamer0.10-ffmpeg libxine1-ffmpeg gxine mencoder libdvdread4 totem-mozilla icedax tagtool easytag id3tool lame nautilus-script-audio-convert libmad0 mpg321 gstreamer1.0-libav

install multi-media codecs

Then run command to install libdvdcss2 to enable DVD playback:

sudo /usr/share/doc/libdvdread4/install-css.sh

Done.

Enable Nautilus Preview in Ubuntu 13.04, 13.10

Last updated: August 4, 2013

Want to preview documents on Nautilus file browser? Well, here I’m going to show you how to do it. As well as preview files folders, you’ll be able to previewing Pictures, Movies, Music, and everything that can be opened in your system.

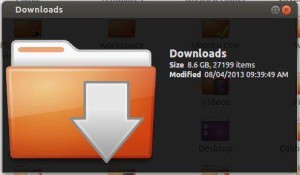
nautilus preview folder nautilus preview mp3
nautilus preview movie nautilus preview files

To get started, install the Sushi plugin for Nautilus in Ubuntu. You can search for and install the gnome-sushi from Ubuntu Software Center. Or just click the link below to bring up USC:

click to install sushi preview

That’s it!

You may need to install multi-media codecs to enable previewing movies. Press Ctrl+Alt+T to open terminal. When it opens, run below commands to install media codecs:

sudo apt-get install gstreamer0.10-plugins-ugly gstreamer0.10-ffmpeg libxine1-ffmpeg gxine mencoder libdvdread4 totem-mozilla icedax tagtool easytag id3tool lame nautilus-script-audio-convert libmad0 mpg321 gstreamer1.0-libav

Restart Nautilus to apply the changes:

nautilus -q

You’re done. Enjoy!

As you may know, Pinta is a Paint.NET-like image drawing and editing program which is free and open-source. It is lighter and simpler than popular open-source image editor GIMP.

pinta ubuntu

Pinta is available in Ubuntu Softare Center by default, but it’s a little old. In this tutorial I’ll show you how to install the latest stable and development version of Pinta in Ubuntu 13.10 Saucy, Ubuntu 13.04 Raring, 12.10 Quantal, 12.04 Precise and Linux Mint via PPA repository.

To get started, press Ctrl+Alt+T on your keyboard to open terminal. When it opens, run below commands:

To install the latest development version, run following 3 commands one by one in terminal:

sudo add-apt-repository ppa:pinta-maintainers/pinta-daily

sudo apt-get update

sudo apt-get install pinta

To install the latest stable version (support Ubuntu 12.10, 12.04, 11.10), run below commands instead:

sudo add-apt-repository ppa:pinta-maintainers/pinta-stable

sudo apt-get update

sudo apt-get install pinta

This simple tutorial is going to show you how to install and setup Google Authenticator to secure your Ubuntu SSH remote login by two-factor authentication.

Google provides this application for various smartphone platforms. With it, you can secure your account by logging in with a frequently-changing authentication code. So far, I’m using this in WordPress Login, Ubuntu Server SSH Login, Linode VPS Login. As I know, Google Authenticator also works on Amazon Web Services, App.net, Dropbox, and more.

Install Google Authenticator in Ubuntu:

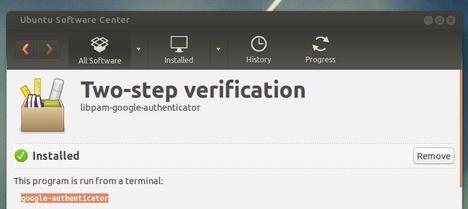
Since Ubuntu 12.04 Precise, the Google Authenticator PAM module is available in the universe repository by default. Just open Ubuntu Software Center, search for and install libpam-google-authenticator package

google authenticator ubuntu

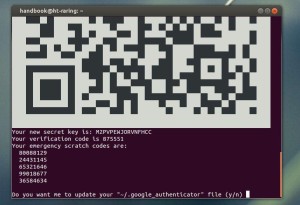
Once installed, press Ctrl+Alt+T to open terminal. Run below command to create a key and display a QR code which you can scan using the smartphone app. The emergency codes can be used when you don’t have your phone.

google-authenticator

google authenticator secret key

To enable two-step authentication for SSH login, add the line “auth required pam_google_authenticator.so” (witout quotes) into /etc/pam.d/sshd. To do so, run below command in terminal:

sudo sh -c 'echo "auth required pam_google_authenticator.so" >> /etc/pam.d/sshd'

Also add the line “ChallengeResponseAuthentication yes” (without quotes) to /etc/ssh/sshd_config, you can do it by running below command:

sudo sh -c 'echo "ChallengeResponseAuthentication yes" >> /etc/ssh/sshd_config'

Finally restart SSH service on Ubuntu:

sudo /etc/init.d/ssh restart

This tutorial shows you how to install Cisco VPN on Ubuntu 13.04 Raring or 13.10 Saucy. You don’t have to do anything special to install Cisco VPN client, because network manager supports Cisco IPSec VPNs after installed the vpnc plugin.

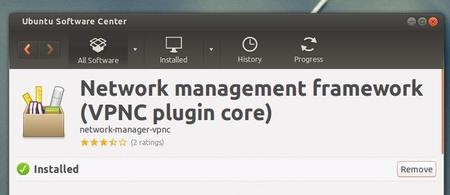
To get started, search for and install network-manager-vpnc package from Ubuntu Software Center. It installs the Cisco-compatible VPN client as well as the plugin for network manager.

Cisco VPN for network manager

Once installed, you can follow below steps to setup Cisco VPN for Ubuntu:

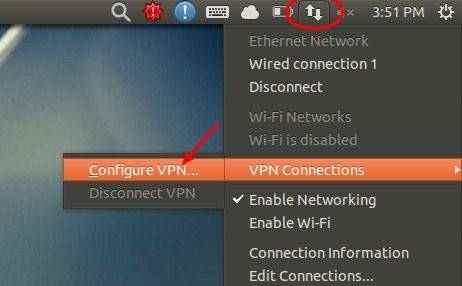
1.) Move your cursor to right-top corner system tray area, click on Network Manager icon and choose VPN Connections -> Configure VPN

setup Cisco VPN for Ubuntu

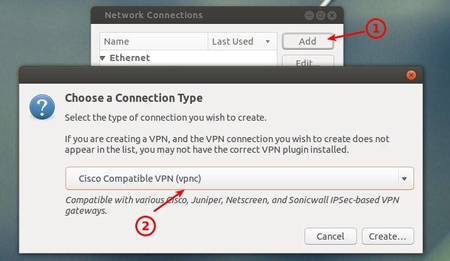
2.) In next window, click on Add button to add a new connection and then choose Cisco Compatible VPN (vpnc) from the drop-down menu.

setup cisco vpn connection

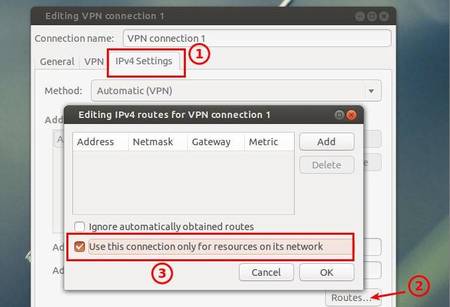
3.) Click on Create and you’re able to type in your Cisco VPN details in next window. After all, check off “Use this connection only for resources on its network” otherwise your traffic significantly slowed down

configure cisco vpn connection

Want to display weather on Ubuntu Desktop? Well, the best choice should be Typhoon since Stormcloud is not available in Ubuntu 13.04 due to dependency problem.

typhoon weather widget for ubuntu

Typhoon is a free and open-source weather application, which displays a HTC-like weather widget on your Ubuntu desktop. It uses Yahoo! weather service

Typhoon is a fork of discontinued Stormcloud 1.1 with some changes. It excludes the multiple locations feature because no one can live in more than one places in a specific time except electrons! It also removes ‘chameleonic background’ as it would make the app resource hungry.

Install Typhoon in Ubuntu:

To install this weather app for Ubuntu 13.10 Saucy, Ubuntu 13.04 Raring, 12.04 Precise, 12.10 Quantal and Linux Mint users. Press Ctrl+Alt+T to open terminal. When it opens, run below commands to add the Typhoon ppa:

sudo add-apt-repository ppa:apandada1/typhoon

Then update package lists and install it via:

sudo apt-get update; sudo apt-get install typhoon

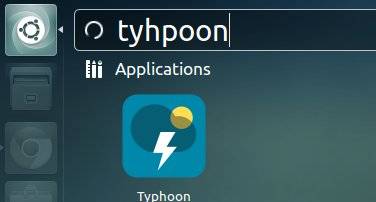
Once installed, open it from Unity Dash and enjoy!

typhoon for ubuntu

Typhoon project homepage: https://launchpad.net/typhoon

This simple tutorial shows you how to install Facebook Messenger App in Ubuntu 13.10 Saucy, 13.04 Raring, 12.04 Precise and 12.10 Quantal via PPA repository.

facebook messenger ubuntu

As you may know, Facebook Messenger is an instant messaging service and software application which provides text and voice communication. Integrated with Facebook’s web-based Chat feature and built on the open-source MQTT protocol.

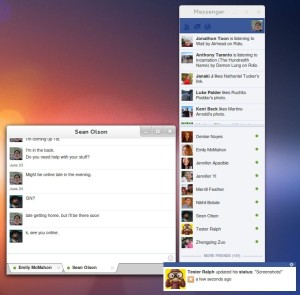
Here’s a Linux clone of Facebook Messenger for Windows. It gives you a chat sidebar, chat popup windows, and notification toasts outside of the browser. Ubuntu users can install it from a PPA created by Webupd8Team.

To get started installing this app, press Ctrl+Alt+T on your keyboard to open terminal. When it opens, run below commands to add the PPA:

sudo add-apt-repository ppa:nilarimogard/webupd8

Then update your package lists and install:

sudo apt-get update; sudo apt-get install fbmessenger

Project Homepage:https://github.com/oconnor663/linuxmessenger

How to Install Cool Reader 3 in Ubuntu 13.10

Last updated: July 31, 2013

This simple and brief tutorial shows you how to install Cool Reader 3 in Ubuntu 13.10 Saucy Salamander.

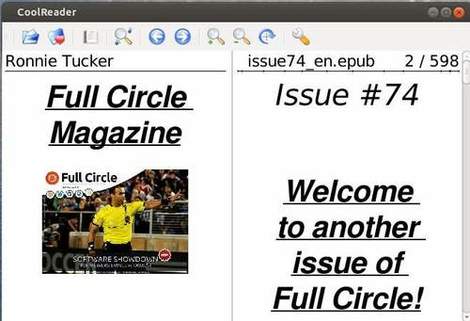
As you may know, CoolReader is fast and small cross-platform XML/CSS based E-Book reader for desktops and handheld devices. Supported formats: FB2, TXT, RTF, DOC, TCR, HTML, EPUB, CHM, PDB, MOBI. Platforms: Win32, Linux, Android. Ported on some eInk based devices.

CoolReader3

Without adding a ppa repository, we can directly download and install the Deb package to get Cool Reader on your Ubuntu system. To do so, first open System Settings -> Details to check out your OS type (32-bit or 64-bit).

Then press Ctrl+Alt+T on your keyboard to open terminal. When it opens, run below commands to download the reader:

For 32-bit system:

wget https://launchpad.net/~vovansrnd/+archive/coolreader/+files/cr3_3.0.59.2-1_i386.deb

For 64-bit system:

wget https://launchpad.net/~vovansrnd/+archive/coolreader/+files/cr3_3.0.59.2-1_amd64.deb

Once the downloading process finished, both 32-bit & 64-bit run below command to install Cool Reader 3:

sudo dpkg -i cr3_3.0.59.2-1_*.deb; sudo apt-get -f install

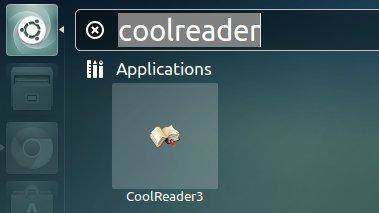
cool reader ubuntu 13.04 dash

This simple tutorial will show you how to install the QupZilla Web Browser from its ppa repository in Ubuntu 13.04 Raring Ringtail.

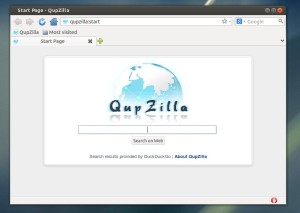
As you may know, QupZilla is a new and very fast QtWebKit browser. It aims to be a lightweight web browser available through all major platforms. This project has been originally started only for educational purposes. But from its start, QupZilla has grown into a feature-rich browser.

qupzilla web browser

News:QupZilla will be available in upcoming Ubuntu 13.10 Saucy’s default repository. Just search for and install it from Ubuntu Software Center

Install QupZilla:

Press Ctrl+Alt+T on your keyboard to open terminal. When it opens, run below command to add the ppa repository:

sudo add-apt-repository ppa:nowrep/qupzilla

add qupzilla ppa

Update package lists and install the browser:

sudo apt-get update; sudo apt-get install qupzilla

install qupzilla web browser

Once installed, you’ll be able to open it from Unity Dash.

qupzilla in ubuntu

This simple tutorial will show you how to install the Jitsi Video Calls and Chat & add its repository in Ubuntu 13.04 Raring, 12.04 Precise and 12.10 Quantal.

Jitsi call window

As you may know, Jitsi is an audio/video Internet phone and instant messenger written in Java. It supports some of the most popular instant messaging and telephony protocols such as SIP, Jabber/XMPP (and hence Facebook and Google Talk), AIM, ICQ, MSN, Yahoo! Messenger.

Jitsi contact

Install Jitsi:

The official download page provides the latest Deb installer for Ubuntu users

Press Ctrl+Alt+T on your keyboard to open terminal. When it opens, run below command to download it:

For 32-bit system:

wget https://download.jitsi.org/jitsi/debian/jitsi_2.2-latest_i386.deb

For 64-bit system:

wget https://download.jitsi.org/jitsi/debian/jitsi_2.2-latest_amd64.deb

Both 32-bit & 64-bit run below command to install the Deb:

sudo dpkg -i jitsi_2.2-latest_*.deb

It installs Jitsi as well as adds its repository to your system so that you’ll receive updates when a new release comes out.