Archives For November 30, 1999

Linux RSS Reader Liferea

Liferea 1.11.0, the first release of the new unstable release line, has been released with experimental InoReader and Reedah support.

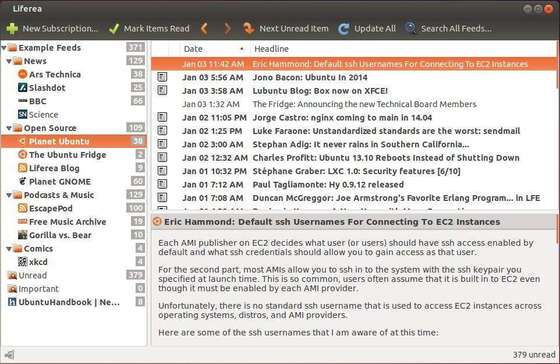
Liferea is an open source feed reader and news aggregator with an embedded graphical browser (supports playing video, audio). It’s a Linux native app comes with below distinguishing Features:

  • Read articles when offline.
  • Synchronizes with InoReader, Reedah (since 1.11), TheOldReader, TinyTinyRSS.
  • Permanently save headlines in news bins.
  • Match items using search folders.
  • Play Podcasts in Liferea

liferea ppa

According to the release note, the latest 1.11.0 also added tray icon plugin (removed build in tray icon support), category/folder support for TheOldReader, folder auto-removal for TinyTinyRSS & TheOldReader. And support for libindicate and libnotify has been removed (to be added as plugin maybe).

The new release has fixed below bugs:

  • Mistakenly claims “TinyTinyRSS source is not self-updating”
  • Crash on font resize at startup.
  • Honor preferences when opening links
  • Selecting last unread item in reduced feed list jumps to next feed
  • Fixed missing “Via” metadata type
  • Fixed incorrect new count reset handling in item_state.c and some of the node source implementations.
  • missing installation of liferea.convert file
  • liferea-add-feed doesn’t process feed:https//
  • startup race with LifereaHtmlView
  • Parsing errors not visible with dark themes
  • Do not use bold text for feeds/folders with unread items in the leftmost treeview
  • Liferea does not update feeds with TinyTinyRSS
  • subscription prop/source: not all fields and buttons visible
  • RTL comments appear incorrectly
  • Images do not autosize to fit the available space
  • Add TinyTinyRSS Enclosure Support
  • “Any of the following” search condition doesn’t work
  • Some dialogs scrolling areas do not request enough height
  • Doesn’t automatically update feed name and favicon for new feed
  • Update to new libxml2 buffer API
  • Avoid copying list in itemset_merge_items
  • Make Liferea use ETags and send If-None-Match
  • Support NOCONFIGURE for RPM builds

Known Bugs:

issue #48: Need to start Liferea twice simultaneously before it shows the window.

Install Liferea 1.11.0 in Ubuntu:

As an unstable release line it might have bugs. I’ve uploaded it into a new PPA, available for Ubuntu 14.10, Ubuntu 14.04 and Ubuntu 12.04.

To add the PPA, press Ctrl+Alt+T to open the terminal and run:

sudo add-apt-repository ppa:ubuntuhandbook1/liferea-unstable

If you want the latest stable release (1.10.10 so far), remove the previous PPA by running above command with parameter -r and then add the below one:

sudo add-apt-repository ppa:ubuntuhandbook1/apps

After added an appropriate PPA, install or upgrade Liferea via Synaptic or Software Updater after checking for updates. Or just run below commands one by one:

sudo apt-get update

sudo apt-get install liferea

(Optional) To purge the PPA as well as downgrade Liferea, run:

sudo apt-get install ppa-purge

sudo ppa-purge ppa:ubuntuhandbook1/liferea-unstable

Cinnamon Ubuntu 14.10

Cinnamon, one of the default desktop environments for Linux Mint, now is available in the official repositories of Ubuntu 14.10 Utopic Unicorn.

Which means you don’t have to add any third-party PPA, just search for and install cinnamon from Ubuntu Software Center. Available version is v2.2.14.

Cinnamon in Ubuntu Software Center

Cinnamon is a GTK+ 3-based desktop environment. The project originally started as a fork of the GNOME Shell. It was initially developed by (and for) the Linux distribution Linux Mint.

As the description says:

Cinnamon is a desktop environment which provides advanced innovative features and a traditional user experience.

The desktop layout is similar to GNOME 2. The underlying technology is forked from gnome-shell. The emphasis is put on making users feel at home and providing them with an easy to use and comfortable desktop experience.

Once you installed it from Software Center. Log out current session and select log in with cinnamon in the greeter:

Cinnamon session in greeter

Enjoy!

cinnamon-ubuntu1410

install Skype 4.3 in Ubuntu

The latest skype for Linux 4.3 was released in the middle of June with updated UI, new cloud-based Group chat experience. Now it’s available in the Canonical Partners repository for Ubuntu 14.10, Ubuntu 14.04, Ubuntu 12.04 and their derivatives.

From now on, enable Canonical Partners repository via Software & Updates utility, then you are able to upgrade to Skype 4.3 by running regular system updates via Software Updater

Skype 4.3 in Ubuntu 14.04

What’s New in Skype 4.3:

  • An updated UI
  • Our new cloud-based Group Chat experience
  • More reliable file transfer support when using multiple devices at once
  • Greater accessibility by blind and visually impaired users
  • PulseAudio 3.0 and 4.0 support
  • Lot of bug fixes
  • Skype 4.3 release note.

Install / Upgrade to Skype 4.3:

1. Open Software & Updates or Software Sources from Unity Dash, go to Other Software tab and enable Canonical Partners repository.

Enable canonical partners repository

2. To install Skype, just search for and install it from Ubuntu Software Center.

To upgrade Skype, open Software Updater, after checking for updates, you’ll see Skype 4.3 available for update:

Upgrade to Skype 4.3

If you are familiar with command line, just run:

sudo apt-get update; sudo apt-get install skype

Skype 4.3 Ubuntu 14.04

Lightweight Software Center Alternative

App Grid is an Ubuntu Software Center alternative that aims to be lightweight, fast, clean and simple.

Every day we use USC (Ubuntu Software Center) to install, remove, buy, and manage applications, but it works really slow and freezes frequently in my old laptop.

App Grid provides a clean and simple interface and delivers stunning startup speed, and swift reactions throughout. It has almost all features that USC provides: install, launch, remove button, screenshots, a short description along with user comments, Ubuntu One login and more.

App Grid Main Window

App Grid app description

Install App Grid in Ubuntu:

This project provides an official PPA for Ubuntu 14.10, Ubuntu 14.04, and Ubuntu 12.04.

To install it, press Ctrl+Alt+T on keyboard to open the terminal. When it opens, run the commands below one by one:

sudo add-apt-repository ppa:appgrid/stable

sudo apt-get update

sudo apt-get install appgrid

If you don’t want to add the PPA, grab the .deb package directly from Launchpad Page.

remove shutdown log out dialog box

Every time you click the Shutdown option in Ubuntu Unity, it pops up a dialog box that asks for your confirmation whether to shutdown or not.

If you find this is annoying, this quick tutorial will show you how to disable the Shutdown and Log Out confirmation dialog box.

Disable shutdown log out dialog box

1. Search and launch the dconf Editor from Unity dash.

2. Navigate to apps -> indicator-session.

3. Check the value box after “suppress-logout-restart-shutdown”

Disable Shutdown Dialog box

After that, you’ll see Restart option available in system menu and all shutdown, restart or log out options will be implemented immediately without confirmation when you click on one of them.

Restart in system tray menu

Remove Confirmation Dialog Box When you’re at Login Screen:

Previous steps will not work if you are logged out and try to shutdown or restart your computer at the Unity Greeter (LightDM login screen).

To make it work, you need to start dconf Editor with lightdm user privilege:

1. Press Ctrl+Alt+T on keyboard to open the terminal. When it opens, run below command and type in your user password to get the root (super user) privilege:

sudo -i

2. After that, in this terminal window run command to allow user lightdm to create a connection to the X server:

xhost +SI:localuser:lightdm

3. Next switch to user lightdm in this terminal window:

su lightdm -s /bin/bash

4. Finally launch dconf Editor and do the changes:

dconf-editor

Disable shutdown dialog box when logged out

That’s it. Enjoy!

Nomacs Ubuntu 14.10

Nomacs image viewer has finally reached v2.0 with plugins support and other new features. It’s available in its official PPA for Ubuntu 14.10, Ubuntu 14.04, and Ubuntu 12.04.

Nomacs is small, fast image viewer that handles the most common image formats including RAW images. Additionally it is possible to synchronize multiple viewers. A synchronization of viewers running on the same computer or via LAN is possible. It allows to compare images and spot the differences (e.g. schemes of architects to show the progress).

Nomacs features:

  • VIEWING: most common formats (including RAW), thumbnail preview, framless view, slideshow, and more.
  • EDITING: crop, resize, rotate, drag and drop images, color adjustments, multi page TIFF export, and more.
  • SYNCHRONIZATION: synchronize multiple instances.

See the video about the viewer:

New features in Nomacs 2.0:

  • nomacs now supports plugins (windows only for now)
  • Recent Files/Folders on start-up
  • Threaded file loading/saving
  • UPnP support that allows for detecting nomacs in WLAN networks
  • Remote control via WLAN/LAN
  • Fading for fullscreen/slideshow
  • Option for syncing all actions
  • Auto file updating (without locks)
  • Full exif support on linux (fixes issue #192)
  • White list to automatically connect with your computers
  • Gamma correction on down sampling (fixes #322)
  • New (improved) cacher
  • Improvements in the Thumbnail Preview

Install Nomacs 2.0 in Ubuntu:

Press Ctrl+Alt+T on keyboard to open the terminal. When it opens, run the commands below one by one:

sudo add-apt-repository ppa:nomacs/stable

sudo apt-get update

sudo apt-get install nomacs

The above will add the nomacs stable PPA and install the latest packages in your system.

Don’t like Ubuntu PPAs? Grab the .deb package directly from the Launchpad Page.

HotShots screen capture tool

 
HotShots is a screen capture tool with some editing features. It is particularly suitable for writing documentation (as used in the following chapters) but you can use it to highlight some details on a map image or what ever you want.

Because HotShots is written with Qt. Compare to Shtter, it has few dependencies and uses lower computer resources.

hotshots 2.1 ubuntu

Features:

  • Grab current screen, all monitors (in case of multi-monitors configuration), current window or a part of the desktop.
  • Save the screenshot in multiple formats (PNG, JPG, BMP, …).
  • Automatically save the screenshot to clipboard, disk or launch the editor tool.
  • Automatically scale the screenshot to a given size.
  • Use “system” shortcuts to take a screenshot.
  • Add automatically some “post-effects” to the screenshot (drop shadow, rotation, border, …).
  • Add annotation items (text, arrows, rectable, …) to the snapshot.
  • Can be minimized to system tray and work in background.
  • Can be launch at system start-up (Windows).
  • Export edited image in multiple formats (PNG, JPG, BMP …).
  • Save/Restore edited image in proprietary format.
  • Send image directly to printer or to web service.

Install HotShots in PPA:

HotShots does not provide .deb package or apt repository for Ubuntu user so far, but you can always install the latest release from the launchpad PPA, works for Ubuntu 14.10, Ubuntu 14.04 and Ubuntu 12.04.

To add the PPA, press Ctrl+Alt+T on keyboard to open the terminal. When it opens, paste the command below and hit enter:

sudo add-apt-repository ppa:ubuntuhandbook1/apps

After that, update package lists and install the screen capture:

sudo apt-get update

sudo apt-get install hotshots

Once installed, open it from Unity dash or application menu and enjoy!

Mailnag Email Notifier Ubuntu

Mailnag is a mail notification daemon for Gnome 3 and Unity that checks POP3 and IMAP servers for new mail.

On mail arrival it performs various actions provided by plugins. Mailnag comes with a set of desktop-independent default plugins for visual/sound notifications, script execution etc. and can be extended with additional plugins easily.

Mailnag email notifier Ubuntu 14.04

This notifier has an official PPA, available for Ubuntu 14.10 and Ubuntu 14.04, which contains the latest Mailnag packages as well as Gnome Shell and Unity plugin.

Press Ctrl+Alt+T on keyboard to open the terminal. When it opens, run the commands below one by one to add the PPA and install the notifier:

sudo add-apt-repository ppa:pulb/mailnag

sudo apt-get update

sudo apt-get install mailnag

For the default Unity desktop, you also need the plugin:

sudo apt-get install mailnag-unity-plugin

For Gnome Shell, run:

sudo apt-get install gnome-shell-mailnag

Once installed, open the configuration window from Unity Dash or Menu, add your email account and enable the plugin for your desktop environment.

Mailnag configuration

Corebird Native Gtk twitter client

UPDATE 2024: Corebird is discontinued and does NOT WORKS ANYMORE!!

Never heard of Corebird? It’s a native GTK+ Twitter client for Linux which has a modern and responsive design that looks kinda similar to the official Twitter app for Mac.

Corebird is a free and open source project created by Timm Bäder, AKA “baedert”. It carries the whole essential twitter features, such as Streaming of Tweets, Mentions/Notifications, Favorites, Direct Messaging, Lists, Filters and an integrated search.

With the advantage of the latest GTK+3 features, the application makes use of the new Header Bars. With the gstreamer and gstreamer plugins, corebird allows to view any videos (i.e. no vines and no twitter gifs).

The application is well intergrated with with GNOME Desktop. It supports GNOME Shell Application Menu and displays the number of Twitter notifications on the lockscreen.

Screenshots (ubuntu 14.04 64-bit):

corebird-ubuntu Corebird Twitter Client in Ubuntu
corebird twitter client in Ubuntu 14.04 Corebird Twitter Client in Ubuntu 14.04

Install Corebird in Ubuntu via PPA:

I’ve successfully built this twitter client into my PPA, available for Ubuntu 14.10 and Ubuntu 14.04.

Corebird depends on gtk+3 (>= 3.12), so Ubuntu 14.04 user need to add GNOME3 and GNOME3 Staging PPA. As the Staging PPA is for test use, it might break your system, use it at your own risk!!

1. (For Ubuntu 14.04 only) Press Ctrl+Alt+T on keyboard to open the terminal. When it opens, run the commands below one by one to add the required PPAs:

sudo add-apt-repository ppa:gnome3-team/gnome3

sudo add-apt-repository ppa:gnome3-team/gnome3-staging

2. (For both Ubuntu 14.10 & 14.04) Add my PPA and install corebird:

sudo add-apt-repository ppa:ubuntuhandbook1/corebird

sudo apt-get update

sudo apt-get install corebird

Or grab the .deb package directly from HERE.

Once installed, remove Gnome 3 Staging PPA via:

sudo add-apt-repository -r ppa:gnome3-team/gnome3-staging

Project page

Pale Moon Browser

Pale Moon is an open source web browser based on Firefox that’s optimized for performance. It focuses on efficiency and ease of use, by leaving out unnecessary features and making optimizations, while maintaining compatibility with Firefox extensions and themes.

Features:

  • Optimized for modern processors
  • Firefox sourced: As safe as Mozilla’s flagship browser
  • Supported by a friendly, active community of users
  • Familiar, efficient, fully customizable interface (no Australis!)
  • Smooth and speedy page drawing and script processing
  • Increased stability: experience fewer browser crashes
  • Support for Firefox extensions (add-ons) and themes
  • Uses slightly less memory because of disabled optional code
  • Support for SVG, Canvas and downloadable fonts
  • Extensive support for HTML5, CSS3 and WebGL
  • More customization and configuration options than Firefox
  • Able to use existing Firefox profiles with the migration tool

This browser, even though close to Firefox in the way it works, offers a different set of features than its sibling. For example, if you need accessibility features or integration of Windows’ parental controls, then Pale Moon may not be a good browser choice for you.

Pale Moon Browser in Ubuntu

Install Pale Moon in Ubuntu:

1. Download the latest installer:

Download Pale Moon installer

2. Extract the package and go into the result folder. Run the installer script from that folder:

run-pale-moon-installer

Can’t find the Run option in the context menu? Go to the file browser’s menu Edit -> Preferences. Under Behavior tab, check the box where it says “Run executable text files when they are opened”.

run-executable-files

After that, restart Nautilus to apply changes by pressing Alt+F2 and running nautilus -q in the pop-up ‘run a command’ box.

3. Type in your user password when prompt and choose Install, Uninstall, or Upgrade the browser:

Pale Moon installer

It will ask you some questions and finally download & install the browser in your system. Once Pale Moon is properly installed, you should see the below window:

PaleMoon-install-complete

Open the browser from Unity Dash and enjoy!