Archives For October 31, 2013

remove keyboard indicator


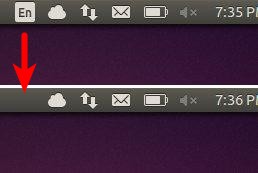
Since Ubuntu 13.10, there’s an indicator applet on top panel which allows to quickly switch between keyboard layouts for various languages.

If you find that the keyboard indicator is useless, you can easily remove the applet from top panel by following the steps below:

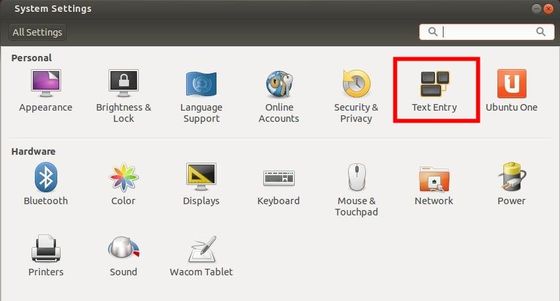
1. Open System Settings from Unity Launcher or from top-right corner shutdown menu. Then click on Text Entry

System Settings Text Entry

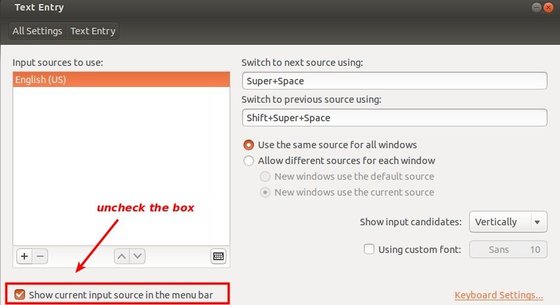
2. In the bottom of the window you’ll see “Show current input source in the menu bar” which is enabled by default. Uncheck the box and the indicator applet will disappear instantly.

remove keyboard indicator

That’s it. Enjoy!

virtualbox 4.3.4

The latest Virtualbox 4.3.4 was released recently. Now it works with Linux Kernel 3.13. This tutorial shows you what’s new and how to install or upgrade to Virtualbox 4.3.4 in Ubuntu 13.10, Ubuntu 13.04, Ubuntu 12.04, Linux Mint.

What’s New in Virtualbox 4.3.4:

  • VMM: fix for a bug in the Local APIC emulation causing a BSOD when booting certain guests (4.3.0 regression;)
  • VMM: fixed loading of saved states if VT-x/AMD-V was disabled (4.3.2 regression;)
  • VMM: fixed single-stepping inside the guest for certain instructions (VT-x only;)
  • VMM: fixed a performance issue involving APIC accesses after rebooting a VM (4.3.0 regression; VT-x only;)
  • VMM: fixed TPR patching to be enabled for 32-bit guests even when the chosen guest type is 64-bit (4.3.0 regression; AMD-V only)
  • VMM: fixed occasional VINF_EM_TRIPLE_FAULT errors on hosts without the unrestricted guest execution feature
  • GUI: don’t bother the user with the BPP warning if no Guest Additions are installed
  • GUI: fixed machine-window paint artifacts on VM reboot / guest-screen resize
  • GUI: make sure the assigned license and description are attached to the exported appliance
  • GUI: fixed bugs in close VM action restrictions handling
  • GUI: fixed incorrect wizards text colors for some unusual look and feel styles
  • GUI: should restore seamless mode as soon as possible after VM reboot or shutdown
  • GUI: fixes for medium enumeration
  • GUI: the OS X hot corners were not accessible while a VirtualBox VM is running (Mac OS X hosts only;)
  • GUI: fixed an old bug which bared the host from cleanly shutdown / reboot if the VM selector window is open (Mac OS X hosts only;)
  • Host-only Networking: fixed creating of host-only network interfaces (4.3.0 regression;)
  • NAT: don’t run into an infinite loop in case the host cannot access any DNS server (4.3.0 regression;)
  • NAT: don’t re-connect the cable if the DNS information changes and the cable was disconnected before (4.3.0 regression;)
  • NAT: fixed several issues with automatically starting / terminating of NAT networks on VM start / stop and configuration changes
  • VBoxNetDHCP: don’t block prevent VBoxSVC from terminating
  • 2D Video acceleration: fix crashes on presentation mode switches
  • BusLogic: allow to run VMs with more than one BusLogic SCSI controller enabled
  • Keyboard: fixed a VM crash if a VM was resumed from a saved state where at least one key was pressed
  • VBoxSVC: fixed a heap corruption under certain conditions (4.3.0 regression)
  • VBoxSVC: fixed a race leading to a hang during initialization
  • OVF: fixed import logic for OVF appliances containing multiple VMs
  • OVF: improved logic for finding an appropriate image format during OVF import
  • API: block the removal of the current snapshot if it has child snapshots (only relevant for VMs without snapshottable hard disks, their presence always prevented removal), which resulted in VM configuration corruption
  • API: mark VM configurations with snapshots but without current snapshot as inaccessible, as this combination is nonsense
  • API: fixed information for some automatically generated events (only with XPCOM, Windows host was not affected), which caused errors when getting some of the attributes over the webservice
  • SDK: extended the functionality coverage for the C bindings
  • Guest Control: various bug fixes and improved VBoxManage help
  • Windows hosts: another attempt to fix the massive DPC latency
  • Mac OS X hosts: properly sign the kernel extensions for Mavericks hosts
  • Mac OS X hosts: fixed a bug where the VirtualBox dock icon was not properly removed from the dock after a VM terminated preventing Mavericks hosts from shutting down
  • Mac OS X hosts: fixed minor installer issue
  • Linux hosts / guests: Linux 3.13 compile fixes
  • Linux guests: build the vboxvideo kernel module correctly on OL/RHEL 6.1 guests
  • Linux guests: make 3D work on Slackware 14.1
  • Guest Additions/3D: fixed an occasional dead-lock
  • Windows Additions/3D: fixed possible memory leaking
  • Windows Additions/XPDM: use separate tables containing valid video modes for each virtual monitor
  • Windows Additions: fixed automatic logins for Vista and newer Windows guests
  • Download & Install Virtualbox 4.3.4:

    You can either download the DEB from Linux download page, or install it from official repository:

    (Hate Linux commands? Well, go to this page for graphical way)

    1. Press Ctrl+Alt+T on keyboard to open terminal. When it opens, run commands below to add VBox repository:

    sudo sh -c 'echo "deb http://download.virtualbox.org/virtualbox/debian $(lsb_release -sc) contrib" >> /etc/apt/sources.list.d/virtualbox.list'

    2. Get the key:

    wget -q http://download.virtualbox.org/virtualbox/debian/oracle_vbox.asc -O- | sudo apt-key add -

    3. Update & install:

    sudo apt-get update; sudo apt-get install virtualbox-4.3

    Linux Kernel 3.11 end of life

    Linux Kernel 3.11 hits the end of its life after released Kernel 3.11.10. Greg KH recommends users to move to Kernel 3.12 series to keep receiving updates.

    Linux Kernel 3.11.10 is a small release includes USB fix and Bluetooth update. See the change log for details

    If you would like to upgrade to this kernel. Follow the steps below one by one

    1. Press Ctrl+Alt+T on keyboard to open terminal. When it opens, run commands below to download the DEB:

    For 32 bit system:

    wget http://kernel.ubuntu.com/~kernel-ppa/mainline/v3.11.10-saucy/linux-headers-3.11.10-031110-generic_3.11.10-031110.201311291453_i386.deb
    
    wget http://kernel.ubuntu.com/~kernel-ppa/mainline/v3.11.10-saucy/linux-headers-3.11.10-031110_3.11.10-031110.201311291453_all.deb
    
    wget http://kernel.ubuntu.com/~kernel-ppa/mainline/v3.11.10-saucy/linux-image-3.11.10-031110-generic_3.11.10-031110.201311291453_i386.deb

    For 64 bit system:

    wget http://kernel.ubuntu.com/~kernel-ppa/mainline/v3.11.10-saucy/linux-headers-3.11.10-031110-generic_3.11.10-031110.201311291453_amd64.deb
    
    wget http://kernel.ubuntu.com/~kernel-ppa/mainline/v3.11.10-saucy/linux-headers-3.11.10-031110_3.11.10-031110.201311291453_all.deb
    
    wget http://kernel.ubuntu.com/~kernel-ppa/mainline/v3.11.10-saucy/linux-image-3.11.10-031110-generic_3.11.10-031110.201311291453_amd64.deb

    2. Install the kernel via:

    sudo dpkg -i linux-headers-3.11.10-*.deb linux-image-3.11.10-*.deb

    Once installed, restart your computer and done.

    If for some reason the kernel does not work properly, boot into previous kernel (Grub -> Advanced) and run command to remove Linux Kernel 3.11.10:

    sudo apt-get purge linux-headers-3.11.10-* linux-image-3.11.10-*

    Links:

    Linux Kernel 3.11.10 DEB download page

    Linux Kernel 3.12 series

    Linux Kernel 3.10 series Long Term Support

    Linux Kernel 3.10.21 LTS

    The latest LTS kernel now is at Linux Kernel 3.10.21. Greg Kroah-Hartman announced this release hours ago and urged users to upgrade as soon as possible.

    Linux Kernel 3.10.21 is a big release that includes PowerPC, ARM, USB, KVM, x86 fixes, numerous updated drivers, including i915, acpi, PowerPC, as well as other improvements. See the changlog for details.

    Install / Upgrade Linux Kernel 3.10.21

    If you’re now on Kernel 3.10 series, follow the steps below to upgrade to this kernel in Ubuntu 13.10, Ubuntu 13.04, Ubuntu 12.04, Linux Mint and their derivatives.

    1. Press Ctrl+Alt+T on keyboard to open terminal. When it opens, run commands below one by one to download the DEB packages:

    For 32 bit system:

    wget http://kernel.ubuntu.com/~kernel-ppa/mainline/v3.10.21-saucy/linux-headers-3.10.21-031021-generic_3.10.21-031021.201311291435_i386.deb
    
    wget http://kernel.ubuntu.com/~kernel-ppa/mainline/v3.10.21-saucy/linux-headers-3.10.21-031021_3.10.21-031021.201311291435_all.deb
    
    wget http://kernel.ubuntu.com/~kernel-ppa/mainline/v3.10.21-saucy/linux-image-3.10.21-031021-generic_3.10.21-031021.201311291435_i386.deb

    For 64 bit system:

    wget http://kernel.ubuntu.com/~kernel-ppa/mainline/v3.10.21-saucy/linux-headers-3.10.21-031021-generic_3.10.21-031021.201311291435_amd64.deb
    
    wget http://kernel.ubuntu.com/~kernel-ppa/mainline/v3.10.21-saucy/linux-headers-3.10.21-031021_3.10.21-031021.201311291435_all.deb
    
    wget http://kernel.ubuntu.com/~kernel-ppa/mainline/v3.10.21-saucy/linux-image-3.10.21-031021-generic_3.10.21-031021.201311291435_amd64.deb

    2. Install the kernel via:

    sudo dpkg -i linux-headers-3.10.21-*.deb linux-image-3.10.21-*.deb

    Restart your computer and boot with this kernel.

    If for some reason this kernel does not work properly on your machine. Boot with previous kernel (Grub -> Advanced) and run command below to remove Linux Kernel 3.10.21:

    sudo apt-get purge linux-headers-3.10.21-* linux-image-3.10.21-*

    Linux Kernel  3.12.2

    Latest Linux Kernel 3.12 series now is at Kernel 3.12.2. All users of this kernel series are urged to upgrade as soon as possible, here’s how to do it in Ubuntu 13.10, Ubuntu 13.04, Ubuntu 12.04 and Linux Mint.

    Linux kernel 3.12.2 is a pretty big release that includes PowerPC, ia64, ARM, s390 and x86 fixes, numerous updated drivers, including USB, SCSI, Wireless, Bluetooth, ACPI and Nouveau, some filesystem improvements (NFS, Btrfs and XFS), sound improvements, as well as other bugfixes. More details in official announcement.

    Install / Upgrade Kernel 3.12.2:

    The DEB packages are made into Ubuntu Kernel page. You can download them at this page. Or follow the steps below to download and install this kernel:

    1. Press Ctrl+Alt+T on keyboard to open terminal. When it opens, run commands below one by one to download the DEBs:

    For 32 bit system:

    wget http://kernel.ubuntu.com/~kernel-ppa/mainline/v3.12.2-trusty/linux-headers-3.12.2-031202-generic_3.12.2-031202.201311291538_i386.deb
    
    wget http://kernel.ubuntu.com/~kernel-ppa/mainline/v3.12.2-trusty/linux-headers-3.12.2-031202_3.12.2-031202.201311291538_all.deb
    
    wget http://kernel.ubuntu.com/~kernel-ppa/mainline/v3.12.2-trusty/linux-image-3.12.2-031202-generic_3.12.2-031202.201311291538_i386.deb

    For 64 bit system:

    wget http://kernel.ubuntu.com/~kernel-ppa/mainline/v3.12.2-trusty/linux-headers-3.12.2-031202-generic_3.12.2-031202.201311291538_amd64.deb
    
    wget http://kernel.ubuntu.com/~kernel-ppa/mainline/v3.12.2-trusty/linux-headers-3.12.2-031202_3.12.2-031202.201311291538_all.deb
    
    wget http://kernel.ubuntu.com/~kernel-ppa/mainline/v3.12.2-trusty/linux-image-3.12.2-031202-generic_3.12.2-031202.201311291538_amd64.deb

    2. Install all downloaded packages via:

    sudo dpkg -i linux-headers-3.12.2-*.deb linux-image-3.12.2-*.deb

    It automatically update the grub so you’ll start with this kernel in next normal boot.

    If for some reason this kernel does not work properly, boot into the previous kernel (Grub -> Advanced) and run commands below to remove Linux Kernel 3.12.2:

    sudo apt-get purge linux-headers-3.12.2-* linux-image-3.12.2-*

    gimp 2.8.10 ubuntu

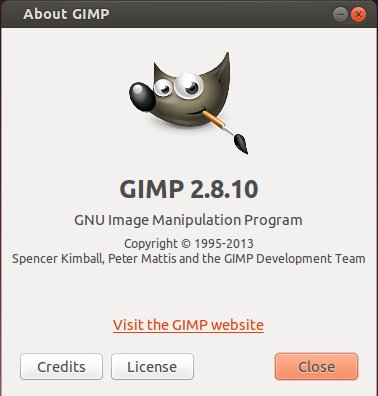
    The popular image editing tool GIMP (GNU Image Manipulation Program) now is at version 2.8.10 stable. You can easily upgrade to the latest released via PPA. Here’s how to do it in Ubuntu 14.04 Trusty, Ubuntu 13.10 Saucy, Ubuntu 13.04 Raring, Ubuntu 12.10 Quantal, Ubuntu 12.04 Precise and their derivatives such as Linux Mint, Pear OS, Elementary OS Luna.

    See What’s New in GIMP 2.8.10:

    Core:

    • Set manifest as Windows 8 compatible

    GUI:

    • Indicate if a file was exported in the Quit dialog
    • Add shortcuts and hint labels to the close and quit dialogs that make closing and quitting easier and more consistent
    • Rename the File->Export menu labels to match Save/Save as
    • Fix keyboard shortcuts on OSX Mavericks
    • Don’t open lots of progress popups when opening many files
    • Correctly restore the hidden state of docks in single window mode

    Libgimp:

    • Fix exporting an image consisting of a single layer group
    • Don’t attempt to pick transparent colors

    Plug-ins:

    • Fix crash in LCMS plugin if RGB profile was missing

    General:

    • Fix compile on NetBSD (missing -lexecinfo)
    • Bug fixes
    • Translation updates

    Install GIMP via PPA:

    We can easily and always get the latest version of GIMP from otto06217’s PPA because the maintainer promised the PPA will never die.

    To add the PPA, press Ctrl+Alt+T on keyboard to open terminal. When it opens, run commands below:

    sudo add-apt-repository ppa:otto-kesselgulasch/gimp

    After that, check for updates via Software Updater as usual. Or run commands below instead:

    sudo apt-get update; sudo apt-get install gimp

    Install Gimp 2.8.10 Ubuntu

    save ubuntu backlight settings

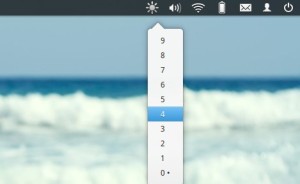
    Want to control screen brightness through an indicator applet on panel? Well, you may want this app if your Fn key does not work properly.

    Brightness indicator allows to change screen brightness by using the indicator menu or the scroll wheel of your mouse over the indicator icon. It’s inspired by the original Gnome brightness applet.

    brightness control indicator

    UPDATE: PPA has updated for Ubuntu 13.10, and Ubuntu 14.04. Run below commands one by one in terminal:

    sudo add-apt-repository ppa:indicator-brightness/ppa
    
    sudo apt-get update
    
    sudo apt-get install indicator-brightness

    The PPA does not update the packages for Ubuntu 13.10 Saucy, but we can use the one for old releases. To get started installing this applet, follow the steps below:

    1. Press Ctrl+Alt+T on keyboard to open terminal. When it opens, run command below to download DEB for raring:

    wget https://launchpad.net/~indicator-brightness/+archive/ppa/+files/indicator-brightness_0.4~bzr11~raring1_all.deb

    2. Then install the deb as well as the dependencies:

    sudo dpkg -i ndicator-brightness_0.4~bzr11~raring1_all.deb; sudo apt-get -f install

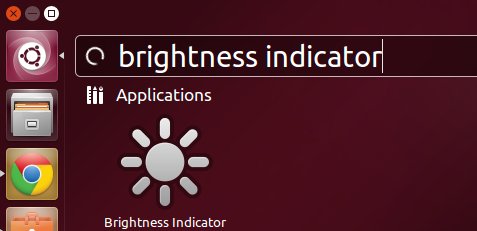
    Alternatively, download the package from launchpad page. Install the required package python-appindicator from Ubuntu Software Center and then double-click to install the brightness indicator package.

    install brightness indicator ubuntu 13.10

    Linux Deepin 2013

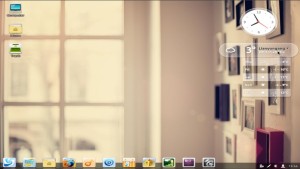
    Linux Deepin 2013, Ubuntu 13.04 Raring based Linux distribution was released today. It brings Game Center, Face Recognition, Deepin Terminal and other new features, improvements as well as bug fixes.

    As you may know, Linux Deepin (previously Hiweed Linux) uses a highly customized GNOME Shell as the default desktop environment. It was initially created for Chinese users only, but there are now ISO images for English language.

    What’s New in Linux Deepin 2013:

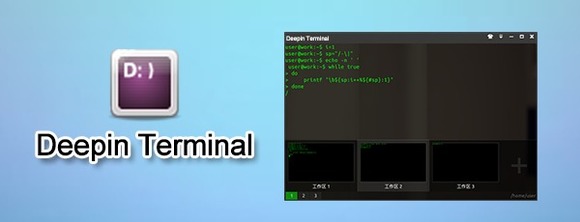
    Deepin Terminal is shipped as the default terminal emulator for Linux Deepin 2013. The features of Deepin Terminal include vertical and horizontal split, workspace switching, SSH connection tool, font resizing and background transparency adjustment, etc.

    Linux Deepin Terminal

    Linux Deepin Terminal

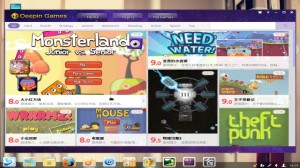
    Deepin Game Center is a platform for online flash games. It aspires to give flash game lovers a one-stop experience. Unfortunately, games are mostly in Chinese.

    Linux Deepin Game Center

    Linux Deepin Game Center

    Other changes:

    • In Linux Deepin 2013, you can choose to log in using face recognition.
    • An improved Deepin Software Center
    • The improved notification center no longer prompt for blacklisted application
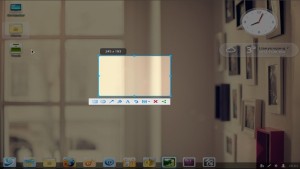
    • Resize, move DSnapshot selected area using arrow keys.
    • notification center no longer prompt for blacklisted applications.
    • the default color of window manager changed from blue to black.
    • Improved power management
    • the “Windows” key to bring up launcher
    • Improved automount of removable devices
    • Files dragged from removable devices to hard disk will be copied rather than moved.
    • Various bug fixes.

    Download: Linux Deepin 2013

    Screenshot Tour:

    Linux Deepin boot splash Linux Deepin Login Screen
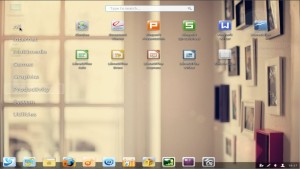
    Linux Deepin Desktop Linux Deepin Game Center
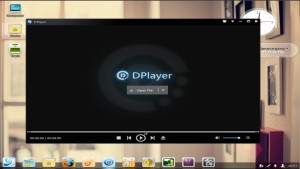
    Linux Deepin Launcher Linux Deepin Movie Player
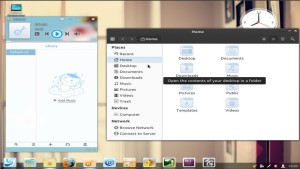
    Music Player and File browser Deepin screenshot tool
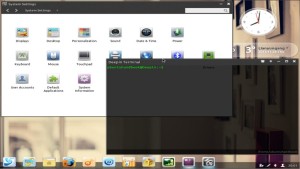
    Deepin system settings and terminal

    tethered shooting in ubuntu

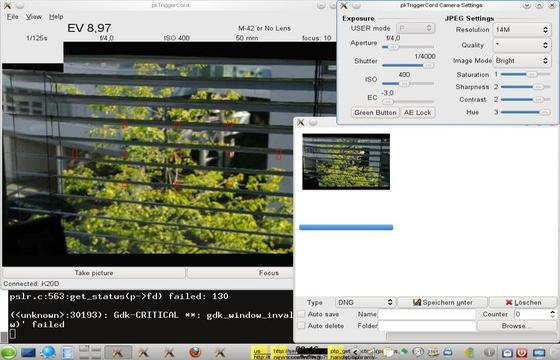
    This tutorial shows you a tethered camera control tool pkTriggerCord which is base on PKRemote. After you connect the camera to your PC with the USB cable, you can control the camera from pkTriggerCord, such as read status information, change settings, and take pictures. The pictures are stored in the camera’s buffer and can be downloaded to the PC. Pictures are not written on the SD card of the camera.

    Currently supported Cameras are:

    • Pentax K-x
    • Pentax K10D (Samsung GX-10)
    • Pentax K20D (Samsung GX-20)
    • Pentax K200D
    • Pentax K-7
    • Pentax K-r
    • Pentax K-5
    • Pentax K-m / K2000
    • Pentax K-30
    • Pentax K-01 (bugs)
    • Pentax K-5 II / K-5 IIs NEW

    pkTriggercord tethered shooting

    Install pkTriggerCord in Ubuntu via PPA:

    Press Ctrl+Alt+T on keyboard to open terminal. When it opens, run commands below one by one to install the tool from PPA:

    sudo add-apt-repository ppa:dhor/myway
    
    sudo apt-get update
    
    sudo apt-get install pktriggercord

    This will install pktriggercord on Ubuntu 13.10, Ubuntu 13.04, Ubuntu 12.10 and Linux Mint 16, 15, 14.

    Once installed, open the GUI interface from Unity Dash. Or run man pktriggercord-cli to check out command line tool usage.

    For RPM package and source code, go to pktriggercord project homepage

    supertuxkart 0.8.1
     

    SuperTuxKart, a Free 3D kart racing game recently released v0.8.1 with Wiimote support, new karts, modes and track.

    This tutorial is going to show you how to install this new release in Ubuntu 13.10, Ubuntu 13.04, Ubuntu 12.04 and enjoy the game.

    New features in SuperTuxKart:

    • New track ‘STK Enterprise’
    • Updated tracks ‘Old Mine’, ‘Around the Lighthouse’ and ‘Zen Garden’
    • New modes ‘Soccer’ and ‘Egg Hunt’
    • New karts ‘Xue’ and ‘Sara’
    • Updated ‘Beastie’ kart
    • Wiimote support (for most Wiimotes; check supertuxkart.net/wiimote for instructions and compatibility)
    • Added tutorial
    • Added new ‘SuperTux’ difficulty
    • New bubblegum shield defensive weapon
    • New combined speedometer and nitro meter
    • Added ability to filter add-ons
    • Updated nitro models
    • Added ability to save and resume Grand Prix
    • Improved skid marks and particle effects

    SuperTuxKart 0.8.1 official video:

    Install SuperTuxKart 0.8.1:

    First check out system type (32 bit or 64 bit) under System Settings -> Details. Then download the portable version from the official download page for Linux.

    Then extract the package and run executable from result folder/bin/

    To create a launcher for SuperTuxKart 0.8.1, press Ctrl+Alt+T on keyboard to open terminal. When it opens, run command below to install required packages:

    sudo apt-get install gnome-panel --no-install-recommends

    Then run command to bring up new launcher dialog:

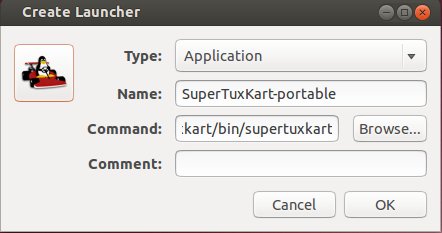
    sudo gnome-desktop-item-edit /usr/share/applications/ --create-new

    In pop up window, type:

    • Name: SuperTuxKart-portable
    • Command: /home/YOURUSERNAME/Downloads/SuperTuxKart/bin/supertuxkart ### You may change the code to PATH to your GAME folder
    • Icon: choose from /home/YOURUSERNAME/Downloads/SuperTuxKart/data/ folder.

    create launcher supertuxkart

    Once done, you can launcher the game from Unity Dash.