Archives For May 31, 2018

CopyQ, an advanced clipboard manager with editing and scripting features, reached the 3.5.0 release a few hours ago.

CopyQ 3.5.0 release highlights:

  • Icon for global shortcuts in Shortcut configuration tab
  • Simpler icons (smaller installation footprint)
  • Faster copying and pasting from the application
  • Faster and simpler invocation for commands run automatically
  • More compact Process Manager dialog
  • Scriptable function select() waits for clipboard to be set
  • Image masks for colorizing icons (“icon-mask” and “icon-busy-mask”)
  • Improved logging and updated icons (Font Awesome 5.0.13)
  • X11: Faster clipboard/selection synchronization
  • And various bug-fixes.

Install Copyq 3.5.0 in Ubuntu:

The software has an official PPA repository that contains the latest packages for Ubuntu 14.04, Ubuntu 16.04, Ubuntu 17.10, Ubuntu 18.04 so far.

1. To add the PPA, open terminal from application launcher and run command:

sudo add-apt-repository ppa:hluk/copyq

Input your password (no visual feedback while typing) when it prompts and hit Enter to continue.

2. After added the PPA repository, install CopyQ either via Synaptic package manager or by running commands in terminal:

sudo apt-get update

sudo apt-get install copyq

Once installed, start the clipboard manager from application launcher and you’ll see the icon in system tray area.

Uninstall:

To remove the software, either use Synaptic package manager or run command:

sudo apt-get remove --autoremove copyq

To remove PPA repositories, launch Software & Updates and navigate to Other Software tab.

Cinnamon

For those who want to try out the latest Cinnamon Desktop 3.8, without downloading Linux Mint 19, here’s how to install Cinnamon 3.8.x via PPA in Ubuntu 18.04.

Cinnamon 3.8 will be included in the upcoming Linux Mint 19. This Gnome based desktop environment has received better support for GTK+ 3.22 and client-side decorated windows, fully ported to Python 3, backported various changes from upstream GNOME, and more.

For Ubuntu 18.04 LTS, a stable PPA has built the Cinnamon 3.8 packages, so the desktop can be easily installed via following steps.

1. Open terminal either via Ctrl+Alt+T keyboard shortcuts, or by searching for ‘Terminal’ from app launcher. When it opens, run command:

sudo add-apt-repository ppa:embrosyn/cinnamon

Input your password (no visual feedback) when it prompts and hit Enter. Read the PPA description and finally hit Enter to add the PPA.

2. Then run command to install Cinnamon Desktop 3.8:

sudo apt-get install cinnamon

3. Finally restart your computer. When you’re at Gnome login screen, click on your username and then click the gear button to select ‘Cinnamon‘ desktop session.

Uninstall:

To remove Cinnamon desktop, open terminal and run command:

sudo apt-get remove --autoremove cinnamon cinnamon-*

And launch Software & Updates then navigate to Other Software tab to remove PPAs.

The latest Mesa 3D graphics library 18.1.1 now can be easily installed in Ubuntu 18.04 LTS via PPA.

For those sticking to the open-source drivers and need graphics performance improvements (e.g. for playing games), Canonical’s Timo Aaltonen has pushed Mesa 18.1.1 in the x-updates PPA.

1. Open terminal either via Ctrl+Alt+T or by searching for ‘Terminal’ from software launcher. When it opens, run command:

sudo add-apt-repository ppa:ubuntu-x-swat/updates

Type your password (no asterisks while typing due to security reason) when it prompts and hit Enter to continue.

2. After adding the PPA, do system update via command:

sudo apt-get dist-upgrade

apt-get update is not required any more in Ubuntu 18.04 since adding PPA automatically refreshes system repositories.

3. Finally check your driver version via command:

glxinfo | grep "OpenGL version"

Uninstall:

To restore changes and downgrade to the default drives shipped in Ubuntu 18.04, run command:

sudo apt-get install ppa-purge && sudo ppa-purge ppa:ubuntu-x-swat/updates

gnome shell

Ubuntu used to show media playback controls in the Sound menu of system tray. The functionality has been removed since Ubuntu switched to Gnome Desktop.

In Ubuntu 18.04, you can easily re-enable the feature via a Gnome Shell extension called Media Player Indicator.

1. To install the extension, open Ubuntu Software, search for and install Media Player Indicator:

Once installed, all MPRIS Version 2 capable media players, including VLC, SMPlayer, Audacious, Clementine, Rhythmbox, and more, will be listed in the system tray menu after you launched the media players.

2. To configure the Gnome extension, launch the settings via either Ubuntu Software or Gnome Tweak Tool:

MKVToolNix 24.0.0, free and open-source Matroska software, was released 2 days ago. Here’s how to install it in Ubuntu 18.04, Ubuntu 16.04, Ubuntu 17.10.

MKVToolNix 24.0.0 “Beyond The Pale” release highlights:

  • mkvmerge: MP4 reader: improved the detection of edit lists consisting of two identical entries, each spanning the file’s duration as given in the movie header atom.
  • mkvmerge: JSON identification: the “display unit” video track property is now reported as ‘display_unit’.
  • mkvmerge, mkvextract: AVC/h.264: empty NALUs will now be removed.
  • mkvextract: VobSub extraction: empty SPU packets will now be dropped during extraction
  • mkvmerge: E-AC-3 parser: fixed determining the number of channels for streams that contain an AC-3 core with dependent E-AC-3 frames.
  • Updated Niels Lohmann’s JSON library to v3.1.1.
  • Updated pugixml library to v1.9.
  • Various bug-fixes.

How to Install MKVToolNix 24.0.0 in Ubuntu:

The official apt repository offers the latest packages for Ubuntu 16.04, Ubuntu 17.10, and Ubuntu 18.04 so far.

Open terminal via Ctrl+Alt+T or by searching it from app launcher. When it opens, do following steps:

1. Run command to add the repository:

sudo sh -c 'echo "deb https://mkvtoolnix.download/ubuntu/ $(lsb_release -sc) main" >> /etc/apt/sources.list.d/bunkus.org.list'

Replace $(lsb_release -sc) with xenial for Linux Mint 18.x. And input your password (no visual feedback while typing) when it prompts and hit Enter.

2. Then install the key:

wget -q -O - https://mkvtoolnix.download/gpg-pub-moritzbunkus.txt | sudo apt-key add -

3. Finally either upgrade the software via Software Updater (Update Manager):

or run command to install the software packages:

sudo apt-get update

sudo apt-get install mkvtoolnix mkvtoolnix-gui

Uninstall:

To remove the repository, launch Software & Updates utility and navigate to Other Software tab.

To remove MKVToolNix, use Synaptic Package Manager or run following command:

sudo apt-get remove --autoremove mkvtoolnix mkvtoolnix-gui

HP Linux Imaging and Printing

A new monthly release of HPLIP, HP developed Linux drivers for HP inkjet and laser based printers, was announced earlier today.

HPLIP 3.18.6 is a small release that only adds 3 new printers support:

  • HP DesignJet Z6810 42in PostScript
  • HP DesignJet Z6810 60in PostScript
  • HP DesignJet Z6610 60in PostScript

Download / Install HPLIP 3.18.6 in Ubuntu:

To install the software, download the package “hplip-3.18.6.run” from the link below:

HPLIP Download Page

Then open terminal via Ctrl+Alt+T or search for “terminal” from app launcher. When it opens, run command:

cd ~/Downloads/ && chmod +x hplip-3.18.6.run && ./hplip-3.18.6.run

Input your password (no visual feedback while typing) when it prompts and hit Enter.

Then follow the terminal outputs, answer some questions to build and install HPLIP on your system. When everything is done, plug/re-plug your printers and enjoy!

For those who are still sticking to the Scribus 1.4 stable series, here’s how to install the latest stable Scribus 1.4.7 in Ubuntu 18.04, Ubuntu 17.10, Ubuntu 16.04, and/or Ubuntu 14.04.

Scribus 1.4.7 was announced a few weeks ago along with the 1.5.4 preview release:

“Scribus 1.4.7 is almost exclusively a bugfixing and update release and will be the last iteration of the Scribus 1.4.x line. All future development efforts will go into the upcoming new stable version 1.6.x.”

How to install Scribus 1.4.7 in Ubuntu

The official PPA repository has built the packages for all current Ubuntu releases.

1. Open terminal either via Ctrl+Alt+T or by searching for “terminal” from app launcher. When it opens, run command to add the PPA:

sudo add-apt-repository ppa:scribus/ppa

Input your password (no visual feedback) when it prompts and hit Enter

2. Then upgrade Scribus using Software Updater:

or run commands in terminal to install or upgrade the desktop publishing software:

sudo apt-get update

sudo apt-get install scribus

Uninstall:

You can remove the PPA repository via Software & Updates utility -> Other Software tab.

To remove Scribus, run command in terminal:

sudo apt-get remove --autoremove scribus

Avidemux video editor

Avidemux video editor 2.7.1 was released a few days ago with new encoder support and various improvements. Here’s how to install it in Ubuntu 18.04, Ubuntu 17.10, Ubuntu 16.04.

Avidemux 2.7.1 release highlights:

  • Add LibVA based HW accelerated H.264 encoder (Intel/Linux)
  • Fix last frames of video not retrieved from decoder
  • Fix keyframe-based navigation in field-encoded MPEG-2 video
  • Fix crash in the Matroska demuxer with high bitrate audio
  • Fix too short duration reported for MKV and MP4 with B-frames
  • Fix PTS delay calculation in the Matroska demuxer
  • Fix audio delay ignored by the Mp4 demuxer
  • Allow to force display aspect ratio in the configuration of the MP4 muxer
  • Fix crash in the AVI muxer on switch to OpenDML
  • Add PNG export, fix wrong colors with some colorspaces
  • Add feature to export selection as JPEG images
  • Fix AVI with H.264 / HEVC without B-frames being not seekable
  • Make AVI with H.264 / HEVC containing B-frames seekable by decoding the entire video
  • Implement fade-in / fade-out transition for “Add logo”
  • Add Opus encoder
  • Allow LPCM in FFmpeg-based muxers

How to Install Avidemux in Ubuntu:

For Ubuntu 16.04, Ubuntu 17.10, Ubuntu 18.04, you can install the new Avidemux packages via the unofficial PPA.

Sorry that the package names are still avidemux2.6 due to lack of time and my poor language skill.

1. To add the PPA, open terminal either via Ctrl+Alt+T or by searching for ‘terminal’ from app launcher. When it opens, run command:

sudo add-apt-repository ppa:ubuntuhandbook1/avidemux

Input your password (no visual feedback while typing) when it prompts and hit Enter.

avidemux ppa

2. Then install avidemux2.7-qt5 package either via Synaptic Package Manager or by running commands:

sudo apt-get update

sudo apt-get install avidemux2.7-qt5 avidemux2.7-plugins-qt5

Uninstall:

For any reason remove the software via command:

sudo apt-get remove --autoremove avidemux2.7-qt5 avidemux2.7-plugins-qt5

To remove the PPA, launch ‘Software & Updates’ utility and navigate to ‘Other Software’ tab.

How to Reset Gnome Desktop in Ubuntu 18.04

Last updated: June 5, 2018

gnome shell

This quick tutorial shows you how to reset Gnome Shell to its original status in Ubuntu 18.04 LTS.

Note following steps will reset most settings to its original status in the default Gnome 3 desktop, but no guarantee of ALL Gnome appearances.

1. As you may already know, there’s a graphical tool Gnome Tweaks that allows to tweak advanced Gnome 3 settings. And it can be installed in Ubuntu Software:

2. Gnome Tweaks offers an option “Reset to Defaults“. It resets desktop theme, icons, fonts, show desktop icons, and some application window settings.

3. Some changes (e.g., Gnome extensions, favorites applications on left launcher, and some dconf database changes) won’t revert back via the Gnome Tweaks option.

If need, you can run command in terminal (Ctrl+Alt+T) to reset all the settings:

dconf reset -f /org/gnome/

That’s it. Enjoy!

Linux Kernel

Linux Kernel 4.17 was finally announced yesterday. Linus Torvalds wrote in lkml.org:

So this last week was pretty calm, even if the pattern of most of the stuff coming in on a Friday made it feel less so as the weekend approached.

And while I would have liked even less changes, I really didn’t get the feeling that another week would help the release in any way, so here we are, with 4.17 released.

No, I didn’t call it 5.0, even though all the git object count numerology was in place for that. It will happen in the not _too_ distant future, and I’m told all the release scripts on kernel.org are ready for it, but I didn’t feel there was any real reason for it. I suspect that around 4.20 – which is I run out of fingers and toes to keep track of minor releases, and thus start getting mightily confused – I’ll switch over. That was what happened for 4.0, after all.

As for the actual changes since rc7 – the shortlog is appended – it’s mostly drivers, networking, perf tooling, and a set of nds32 fixes. With some random other stuff thrown in. Again, the shortlog is obviously only the last calm week, the overall changes since 4.16 are much too big to list in that format.

The big 4.17 stuff was mentioned in the rc1 email when the merge window closed, but I guess it’s worth repeating how 4.17 is actually a slightly smaller kernel than 4.16, thanks to the removal of a number of effectively dead architectures (blackfin, cris, frv, m32r, metag, mn10300, score, and tile). Obviously all the other changes are much more important, but it’s always nice to see spring cleaning like that.

…..

Linux Kernel 4.17 release highlights:

  • AMDGPU DC enabled by default for the new display code stack.
  • Intel Cannonlake graphics support enabled by default.
  • Improved AMDKFD support for pre-Vega discrete GPUs.
  • Clean up lots of code for obsolete CPU architectures
  • A significant power-savings improvement on some hardware
  • And many more other changes.

How to Install Linux Kernel 4.17 in Ubuntu:

A graphical tool UKUU makes it easy to install the latest Kernels in Ubuntu.

For those who don’t want to use any third-party tool, here’s how to manually download and install Kernel 4.17 in Ubuntu (tested in Ubuntu 18.04, though it should work on all current Ubuntu releases).

The mainline kernels do not include any Ubuntu-provided drivers or patches. They are not supported and are not appropriate for production use.

The mainline kernel PPA has made the new kernel binaries for Ubuntu, available for download at the link below:

Download Kernel 4.17 (.deb)

Depends on your OS type, download and install the packages in turns:

  1. linux-headers-4.17.0-xxxxxx_all.deb
  2. linux-modules-4.17.0-xxx-generic(/lowlatency)_xxx_amd64(/i386).deb
  3. linux-image-xxx-4.17.0-xxx-generic(/lowlatency)_xxx_amd64(/i386).deb

Select generic for common system, and lowlatency for a low latency system (e.g. for recording audio), amd64 for 64bit system, i386 for 32bit system, or armhf, arm64, etc for other OS types.

To get the Kernel 4.17 from the command console, run the commands below one by one:

For 64-bit OS:

cd /tmp/

wget -c http://kernel.ubuntu.com/~kernel-ppa/mainline/v4.17/linux-headers-4.17.0-041700_4.17.0-041700.201806041953_all.deb

wget -c http://kernel.ubuntu.com/~kernel-ppa/mainline/v4.17/linux-modules-4.17.0-041700-generic_4.17.0-041700.201806041953_amd64.deb

wget -c http://kernel.ubuntu.com/~kernel-ppa/mainline/v4.17/linux-headers-4.17.0-041700-generic_4.17.0-041700.201806041953_amd64.deb

wget -c http://kernel.ubuntu.com/~kernel-ppa/mainline/v4.17/linux-image-unsigned-4.17.0-041700-generic_4.17.0-041700.201806041953_amd64.deb

sudo dpkg -i *.deb

for 32-bit OS:

cd /tmp/

wget -c http://kernel.ubuntu.com/~kernel-ppa/mainline/v4.17/linux-headers-4.17.0-041700_4.17.0-041700.201806041953_all.deb

wget -c http://kernel.ubuntu.com/~kernel-ppa/mainline/v4.17/linux-modules-4.17.0-041700-generic_4.17.0-041700.201806041953_i386.deb

wget -c http://kernel.ubuntu.com/~kernel-ppa/mainline/v4.17/linux-headers-4.17.0-041700-generic_4.17.0-041700.201806041953_i386.deb

wget -c http://kernel.ubuntu.com/~kernel-ppa/mainline/v4.17/linux-image-4.17.0-041700-generic_4.17.0-041700.201806041953_i386.deb

sudo dpkg -i *.deb

After installed these .debs, restart and enjoy!

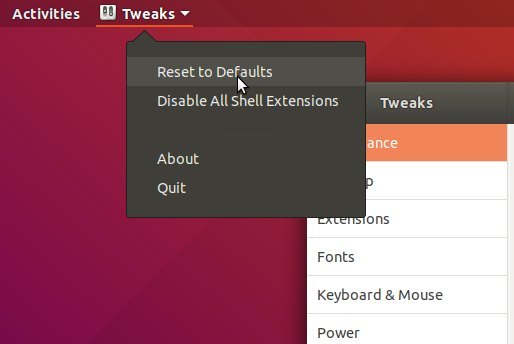
Uninstall Linux Kernel 4.17:

Start/restart your machine and select boot with the previous kernel in ‘Grub2 -> Advanced Option for Ubuntu’. Then use Ubuntu Tweak, or run command to remove Linux Kernel 4.17.0:

sudo dpkg --purge linux-image-unsigned-4.17.0-041700-generic linux-image-4.17.0-041700-generic