Archives For August 31, 2020

Visual Studio Code IDE

Visual Studio Code IDE 1.49 was released a few days ago. Here’s how to install it in Ubuntu 20.04, Ubuntu 18.04.

Visual Studio Code 1.49 release highlights include:

  • Format modified text – Limit formatting to just the code you’ve changed.
  • Add support for changing text casing during global Search and Replace.
  • Display pending changes per repository in the Source Control repositories view
  • Debug Console now supports quickly filter and find debugging output.
  • Improved JS debugger Auto Attach – “Smart” Auto Attach to Node.js scripts or test runners.
  • TypeScript optional chaining refactoring – Convert multiple checks to a concise optional chain.
  • JSDoc @deprecated tag support – IntelliSense clearly shows APIs marked as deprecated.
  • Notebook UX updates – Cell Status bar contributions, enhanced notebook diff editor.

How to Install VS Code 1.49 in Ubuntu:

The official .deb package is available to download at the link below:

Download VS Code (.deb)

Grab the deb and install it via either Gdebi package manager or command in terminal (Ctrl+Alt+T):

sudo dpkg -i ~/Downloads/code_*.deb; sudo apt -f install

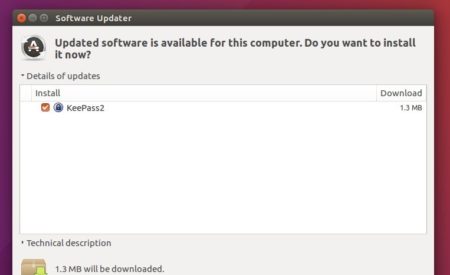
For those who want to receive updates for VS Code via Software Updater utility, add the Microsoft repository via following steps (64bit only):

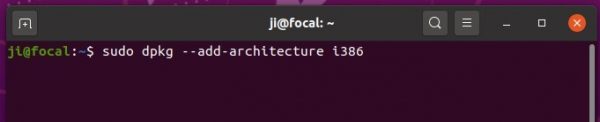
1. Open terminal (Ctrl+Alt+T) and run command to add the repository:

sudo sh -c 'echo "deb [arch=amd64] https://packages.microsoft.com/repos/vscode stable main" > /etc/apt/sources.list.d/vscode.list'

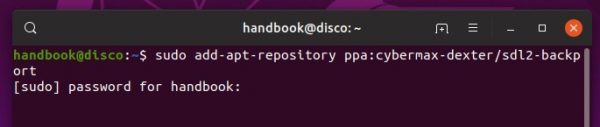
2. Download and install the repository key via commands:

curl https://packages.microsoft.com/keys/microsoft.asc | gpg --dearmor > microsoft.gpg

sudo mv microsoft.gpg /etc/apt/trusted.gpg.d/microsoft.gpg

3. Finally install the IDE via command:

sudo apt-get install code

Uninstall Visual Studio Code:

To remove the code editor, either use Synaptic Package Manager or run command:

sudo apt-get remove --autoremove code

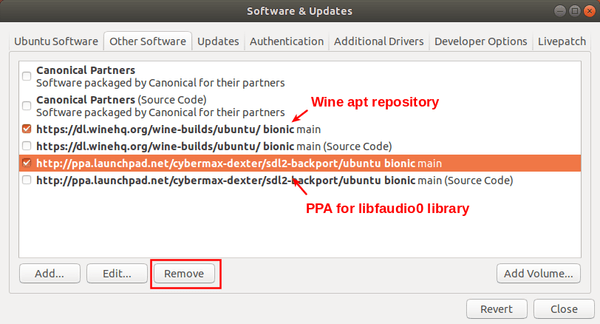
And remove the Microsoft repository by launching Software & Updates utility and navigating to Other Software tab.

Oracle Java 15 was released a few days ago. The installer script has been made into PPA for Ubuntu 16.04, Ubuntu 18.04, Ubuntu 20.04, and their derivatives.

See the release note for what’s new in Oracle Java 15.

The “Linux Uprising” team ppa has made the installer script, which automatically downloads and installs Oracle JDK 15 package, and sets Java 15 as the default Java version (setting JAVA_HOME, etc.) on 64-bit Ubuntu based system.

1.) Open terminal and run command to add the PPA:

sudo add-apt-repository ppa:linuxuprising/java

Type user password (no asterisk feedback) when it asks and hit Enter to continue.

2.) After adding PPA, refresh system package cache and install the script:

sudo apt update

sudo apt install oracle-java15-installer

Once the package is installed, you have to accept the license (press Tab to highlight) before starting the download process.

And after installed Oracle Java 15, check via java --version command:

(Optional) To uninstall the PPA repository, run command in terminal:

sudo add-apt-repository --remove ppa:linuxuprising/java

And remove Oracle Java 15 if you want by running command:

sudo apt-get remove oracle-java15-installer

opera web browser

Opera web browser 71 was released one day ago. The new version features more options for tab searching and history searching, custom shortcuts for Messengers & Workspaces.

Opera 71 release highlights:

  • Add Show more (Show less) button in ‘Search in tabs’ result.
  • Add date filtering to the history searching options.
  • Add Delete History Below button to delete history items you’ve found.
  • Ability to create your own keyboard shortcut for each messenger or workspace.
  • Updated to Chromium 85, see changelog for more.

How to Install Opera 71 in Ubuntu:

Snap Package:

The Opera team offers official snap package (runs in sandbox), available to install directly from Ubuntu Software:

Deb package:

Also the native Ubuntu .deb package is available for downloading at the link below:

Download Opera for Linux

Grab the .deb package, and double-click to install it.

You may also add the official apt repository via following steps to receive future software updates.

1. Open terminal (Ctrl+Alt+T) and run command to add the opera repository:

sudo sh -c 'echo "deb http://deb.opera.com/opera-stable/ stable non-free" >> /etc/apt/sources.list.d/opera.list'

2. Get the key:

wget -O - http://deb.opera.com/archive.key | sudo apt-key add -

Finally either install Opera via following command or upgrade the browser via Software Updater:

sudo apt update

sudo apt install opera-stable

Uninstall:

For the Opera snap package, simply remove it from Ubuntu Software.

For the Opera apt repository, launch Software & Updates and navigate to Other Software tab.

To remove traditional opera package, either use your system package manager or run command in terminal:

sudo apt remove --autoremove opera-stable

For GNOME fans, there’s now a GTK 4 BitTorrent client that has a stylish user interface looks native in Ubuntu, Fedora Workstation or other Linux with GNOME desktop.

The software was originally written in Vala as a GTK3 app. By the 2.0 release (in beta at the moment), it’s rebuilt from scratch using Rust. Along with libadwaita library, it has an adaptive UI that fits well in small displays (e.g., Linux mobile or tablet).

Fragments adaptive UI

Fragments is based on Transmission, the out-of-the-box BitTorrent client in Ubuntu. Besides deep integration with GNOME desktop, the key features so far include:

  • Automatic clipboard detection. Click or copy a magnet link, it will handle the downloads automatically.
  • Control remote Fragments or Transmission sessions.

Say you have a Linux machine running as a ‘download server’ either with desktop environment or not. After setting up the remote access functionality in Transmission GTK or CLI, user may use Fragments’ menu option ‘Add Remote Connection‘ to remote control the server via RPC protocol.

Fragments add remote session

Once connected, the header-bar turns purple and it displays ‘Remote Control “Name”‘ as subtitle indicates that you’re in control of the remote session. A little server icon appears in header-bar, allows to switch between local and remote sessions.

As well, it displays statistics about current session, such as overall network usage, and allows to select encryption type and toggle dark mode, and more.

How to Install Fragments in Ubuntu & other Linux:

The software is available as Flatpak package. Open terminal by searching from ‘Activities’ overview screen. When it opens, run following commands one by one:

1.) Install Flatpak framework if you don’t have it installed via command:

sudo apt install flatpak

2.) Add flathub, the main repository hosts a large list of flatpak packages:

flatpak remote-add --if-not-exists flathub https://flathub.org/repo/flathub.flatpakrepo

3.) Finally install the BitTorrent client via command:

flatpak install flathub de.haeckerfelix.Fragments

The last command will install the latest stable release. For those want to try out the 2.0 Beta with newest features, run command below instead:

flatpak install https://dl.flathub.org/beta-repo/appstream/de.haeckerfelix.Fragments.flatpakref

Once installed, search for and open it from ‘Activities’ overview and enjoy!

How to remove Fragments BitTorrent Client:

To uninstall the app, simply run command in a terminal window:

flatpak uninstall --delete-data de.haeckerfelix.Fragments

That’s all. Enjoy!

Battle For Wesnoth in Ubuntu

Battle for Wesnoth 1.14.14 was released one day ago as the latest maintenance release for the turn-based strategy game.

In the new release, translations for add-on titles and descriptions now are used in Add-on client when available, and provided via Add-on server at upload time in the .pbl.

Other changes in Wesnoth 1.14.14 include:

  • Translation updates.
  • 5p – The Wilderlands: Player 5’s units are sorted when cycling through them with the »n« key.
  • Fixed disabled buttons using the pressed highlight color.
  • Made wmllint recognize [remove_time_area] in order to avoid spurious warnings about unit ids.
  • Files created by the scenario editor include a boilerplate warning about hand-editing them.

How to Install Wesnoth 1.14.14 in Ubuntu:

The latest Wesnoth package is available as Flatpak package for Ubuntu 18.04 and higher, and most other Linux desktops.

1.) If you’re first time installing a Flatpak package in Ubuntu, setup your system by running commands in terminal (Ctrl+Alt+T):

  • Install flatpak framework via command:
    sudo apt install flatpak

  • Add Flathub repository via command:
    flatpak remote-add --if-not-exists flathub https://flathub.org/repo/flathub.flatpakrepo

2.) Then you can install Battle for Wesnoth flatpak package by running command:

flatpak install flathub org.wesnoth.Wesnoth

To update the package, simply run flatpak update org.wesnoth.Wesnoth command.

Uninstall Wesnoth:

To remove the flatpak package, simply run command in terminal:

flatpak uninstall org.wesnoth.Wesnoth

Wine 5.17 Released with Initial NDIS Network Driver

Last updated: September 12, 2020

Wine Stable

Wine 5.17, a new development release of the compatibility layer allows to run Windows apps on Linux and Mac OS, was released with new features and various bug-fixes.

Wine 5.17 release highlights:

  • ADVAPI32 library converted to PE.
  • Beginnings of an NDIS network driver.
  • Still more restructuration of the console support.
  • Various bug fixes.

How to Install Wine 5.17 in Ubuntu:

Open terminal either by pressing Ctrl+Alt+T on keyboard, or by searching for ‘terminal’ from system application menu. When it opens, run following steps one by one.

1.) Run command to enable 32 bit architecture (if you haven’t already):

sudo dpkg --add-architecture i386

Type user password (no asterisk feedback) when it asks and hit Enter to continue.

2.) Install the repository key by running command:

wget -O - https://dl.winehq.org/wine-builds/winehq.key | sudo apt-key add -

3.) Add wine repository via command (for Ubuntu 20.04 and Linux Mint 20):

sudo apt-add-repository 'deb https://dl.winehq.org/wine-builds/ubuntu/ focal main'

NOTE: You may replace focal in the code with:

  • bionic for Ubuntu 18.04 and Linux Mint 19.x
  • xenial for Ubuntu 16.04

4.) Add PPA for the required libfaudio0 library:

For Ubuntu 18.04 and Linux Mint 19.x only, libfaudio0 library is still required to install from a third-party repository by running command:

sudo add-apt-repository ppa:cybermax-dexter/sdl2-backport

5.) Finally install Wine 5.17 via command:

sudo apt update && sudo apt install --install-recommends winehq-devel

NOTE: installing the latest development release will automatically remove the stable version (if installed).

And for the unmet dependencies issue installing 32-bit libraries, try running command:

sudo apt-get install libgnutls30:i386 libldap-2.4-2:i386 libgpg-error0:i386 libxml2:i386 libasound2-plugins:i386 libsdl2-2.0-0:i386 libfreetype6:i386 libdbus-1-3:i386 libsqlite3-0:i386

(Optional) After successfully installed Wine 5.17, you may remove the PPAs by launching Software & Updates utility and navigating to Other Software tab.

KeePass2

KeePass Password Safe 2.46 was released a day ago with new features, improvements and bug-fixes.

KeePass 2.46 release highlights include:

  • Secure connections (e.g. for WebDAV) now support TLS 1.3, when running on .NET 4.8 +.
  • Add keyboard shortcuts Ctrl+*, Ctrl+/ for the ‘Expand Recursively’, ‘Collapse Recursively’ group command.
  • The {VKEY ...} command now supports some flags
  • Add option to protect KeePass windows against certain screen capture operations.
  • Added command line parameter ‘-wa-enable:’ for enabling specific Mono workarounds.
  • With the KPUInput plugin on Wayland, it can auto-type the default sequence and manually selected sequences of the currently selected entry.
  • Generic CSV Importer improvements, and bug-fixes.

How to Install KeePass 2.46 in Ubuntu:

Julian Taylor’s PPA maintains KeePass2 packages for Ubuntu 16.04, Ubuntu 18.04, and Ubuntu 20.04.

NOTE the PPA is not updated for v2.46 at the moment of writing, check the PPA link before getting started.

1. Open terminal either via Ctrl+Alt+T or by searching for “Terminal” from app launcher. When it opens, run command to add the PPA:

sudo add-apt-repository ppa:ubuntuhandbook1/keepass2

Type user password (no visual feedback due to security reason) when it asks and hit Enter.

2. Then upgrade KeePass password safe via Software Updater if you have a previous version installed:

upgrade KeePass2

Or run commands to install / upgrade the software:

sudo apt-get update && sudo apt-get install keepass2

Uninstall:

The PPA repository can be removed via Software & Updates utility under Other Software tab. To remove KeePass password safe, simply run command:

sudo apt-get remove --autoremove keepass2

Want to change CPU frequency scaling in Ubuntu 20.04? There’s a gnome shell extension can do the job.

CPU Power Manager is a Gnome-Shell extension for intel-pstate driver. If you have an Intel Core i CPU, the extension will offer an indicator menu for changing CPU frequency scaling.

To install the extension, simply do following steps one by one:

1.) Open terminal and install chrome-gnome-shell package if you’re first time installing a Gnome shell extension:

sudo apt install chrome-gnome-shell

2. Go to extension page in your web browser. If you don’t see the toggle icon, click link to install browser extension:

3. Finally refresh the web page (see the link in step 2), toggle on and install the extension.

Once installed, you’ll see the indicator applet in system tray area. To make it work, you have to click “Attempt installation” option, type user password and hit Enter.

(Optional) To remove this gnome shell extension, either go to link in step 2 and turn it off, or use Extensions tool.

digiKam 5.6.0

digiKam photo management software 7.1.0 was released a few days ago with some new features and plenty of bug-fixes.

digiKam 7.1.0 release highlights include:

  • Better Canon CR3 metadata support.
  • New Batch Queue Manager plugin to fix Hot Pixels automatically.
  • New Batch Queue Manager plugin to apply texture over images.
  • Improve the IPTC compatibility with UTF-8 characters encoding.

digiKam 5.0 beta splash screen

Download / Install digiKam:

Non-install single executable .appimage package is available in the download page.

digiKam is also available as Flatpak package, you can get it either from flathub repository, or by running following commands one by one in Ubuntu:

1. Open terminal from system application launcher. When it opens, run command to install flatpak framework:

sudo apt install flatpak

2. Then add Flathub repository which hosts a large list of flatpak packages:

flatpak remote-add --if-not-exists flathub https://flathub.org/repo/flathub.flatpakrepo

3. Finally run command to install digiKam flatpak package:

flatpak install flathub org.kde.digikam

Already installed the flatpak package? You may update the application via:

flatpak update org.kde.digikam

For any reason, you can remove the package via command:

flatpak uninstall org.kde.digikam

GTK+ Twitter App Cawbird 1.2.0 Released (PPA)

Last updated: September 8, 2020

Cawbird, an open-source fork of Corebird Twitter client, released version 1.2.0 a few days ago with many improvements and bug-fixes.

Cawbird 1.2.0 release highlights include:

  • Resolved major accessibility issue with timelines.
  • Added ability to add and read descriptions on images
  • App window can be reduced to a narrower width and has a “responsive” layout for tweets
  • Improved thumbnail and image loading to reduce resource usage.
  • Image gallery loop back.
  • Made “Replying to” on Tweet info page list all users.
  • Reworked @-mention completion so it works with multilingual text.
  • And various bug-fixes.

How to Install Cawbird 1.2.0 in Ubuntu:

The software developer maintains Ubuntu 20.04, Ubuntu 18.04, as well as other Linux packages via the repository at the link below:

Download Cawbird

Select Ubuntu, then click ‘Grab binary packages directly‘ and download the .deb package for your system.

Finally install the .deb via Gdebi package installer (available in Ubuntu Software) and enjoy!

You can also add the repository to receive future updates via Software Updater (Update Manager), by running following commands one by one in terminal:

echo 'deb http://download.opensuse.org/repositories/home:/IBBoard:/cawbird/xUbuntu_20.04/ /' | sudo tee /etc/apt/sources.list.d/home:IBBoard:cawbird.list

curl -fsSL https://download.opensuse.org/repositories/home:IBBoard:cawbird/xUbuntu_20.04/Release.key | gpg --dearmor | sudo tee /etc/apt/trusted.gpg.d/home:IBBoard:cawbird.gpg > /dev/null

sudo apt update

sudo apt install cawbird

For Ubuntu 18.04 and Linux Mint 19.x, replace xUbuntu_20.04 in the commands with xUbuntu_18.04.