Archives For November 30, 2020

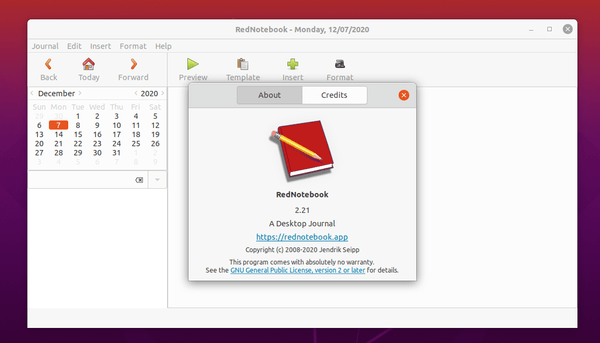
RedNotebook, modern desktop diary and personal journal software, released version 2.21 today.

RedNotebook 2.21 features updated MathJax to version 3, resulting in much faster rendering / preview times; The release also fixed date references in CEF-based HtmlView.

How to Install RedNotebook 2.21 via PPA:

The official RedNotebook PPA has been updated for Ubuntu 20.10. For Ubuntu 18.04 and Ubuntu 20.04, just wait for PPA update or install the package for Ubuntu 20.10.

1.) Open terminal and run command to add the PPA:

sudo add-apt-repository ppa:rednotebook/stable

Type user password (no asterisk feedback) for sudo prompts and hit Enter to continue.

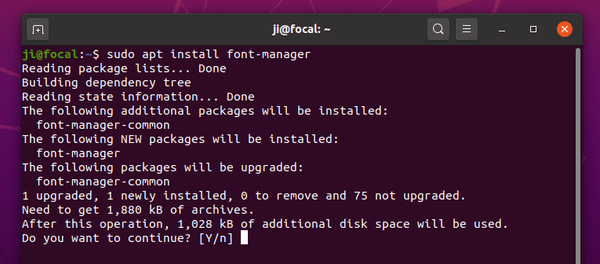
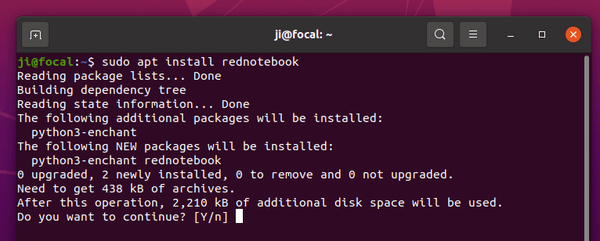
2.) Then install the daily journal app via command:

sudo apt install rednotebook

Uninstall RedNotebook:

To remove the PPA repository, either go to Software & Updates -> Other Software tab, or run command in terminal:

sudo add-apt-repository --remove ppa:rednotebook/stable

And remove the desktop diary app via command:

sudo apt remove rednotebook

This simple tutorial shows how to install IntelliJ IDEA 2020.3 via its official Linux tarball via PPA.

For those don’t like Snap and Flatpak packages, IntelliJ IDEA offers official Linux tarball in its download page. You can download the package, extract, and run the executable file to launch the IDE.

To make things easy, an installer script was made to automatically download the tarball from Jetbrains website, extract the source to /opt/ directory for global use, and finally create an app shortcut so you can launch the program from system application menu.

And there’s an Ubuntu PPA contains the latest installer scripts for IntelliJ IDEA 2020.3 both community and ultimate editions.

UPDATE: The PPA has been updated to contain script to install “IntelliJ IDEA 2024.1” for Ubuntu 22.04, Ubuntu 20.04, Ubuntu 18.04, and Ubuntu 16.04.

1.) Open terminal from system application menu. When it opens, run command to add the PPA:

sudo add-apt-repository ppa:mmk2410/intellij-idea

Type user password (no asterisk feedback) and hit Enter. The PPA supports all current Ubuntu releases and derivatives.

2.) Then refresh package cache and install the script:

sudo apt update

sudo apt install intellij-idea-community

Replace intellij-idea-community with intellij-idea-ultimate for ultimate edition.

If everything goes OK, you’ll be able to launch the IDE from application launcher.

How to Remove the Package:

To remove the PPA, either go to Software & Updates > Other Software, or run command in terminal:

sudo add-apt-repository --remove ppa:mmk2410/intellij-idea

And to remove IntelliJ IDEA, run command to remove the installer script which also removes the IDE packages:

sudo apt remove intellij-idea-community intellij-idea-ultimate

HP Linux Imaging and Printing

HPLIP, HP developed printer and scanner drivers for Linux, released version 3.20.11 a few days ago.

Different to previous releases, HPLIP 3.20.11 does not include new HP printers support. It only adds support for Ubuntu 20.10 and Debian 10.6. And it fixed usb print issue for ipp supported printers for Ubutnu 20.04, Ubuntu 20.10 and Linux Mint 20.

There are also known issues that ppd browsing is failing sometimes while doing hp-setup in Ubuntu 20.10. Basically few times it is failing to fetch ppd list from cups server. So you might face the same issue while testing. And hp-toolbox will not work for ippusbxd printers in Ubuntu 20.04, Ubuntu 20.10 and LinuxMint 20.

And not sure if it’s only me or for everyone, while it works on Ubuntu 20.10, HPLIP 3.20.11 does not install on my Ubuntu 20.04 since it tries to install the old python-pyqt5 as dependency library.

How to Get HPLIP 3.20.1 in Ubuntu:

1. To install the software, download the package “hplip-3.20.11.run” from the link below:

HPLIP Download Page

2. Then open terminal either via Ctrl+Alt+T or by searching for “terminal” from app launcher. When it opens, run command to give executable permission:

chmod +x ~/Downloads/hplip-3.20.11.run

3. Finally run command to start installing the driver:

./Downloads/hplip-3.20.11.run

Follow the terminal output and answer some questions. If everything goes OK, plug or re-plug your HP devices and enjoy!

Want to watch live TV on Ubuntu Linux? Try Hypnotix, a new IPTV player developed by Linux Mint team.

Hypnotix is a player application which streams from IPTV providers, which can be configured via a local M3U playlists, remote M3U URLs or the Xtream API.

The player uses libmpv for video playback, and it’s configured to ship with Free-IPTV as default IPTV provider. You can easily remove it and set your own providers via software preferences dialog.

Hypnotix can handle live TV channels but also VOD libraries for movies and TV series.

Content can be organized by categories and/or seasons. And you can watch TV in either left and right mode or full-screen mode.

How to Install Hypnotix in Ubuntu:

Hypnotix is available out-of-the-box in Linux Mint 21.x, other Linux can the source code by visiting its project page:

Besides building from the source tarball, there’s also a third-party PPA contains the package for Ubuntu 22.04, Ubuntu 20.04, Ubuntu 24.04. If you don’t know how to use the PPA, see this step-by-step guide instead.

No patience with common video editors (e.g., Kdenlive and Openshot) as they can take hours to export a video after trimming / cutting it? Try LosslessCut.

LosslessCut is a cross platform tool for lossless trimming / cutting of video and audio files. The software is extremely fast, it does the job in seconds without losing quality because it simply cuts the data stream and directly copies it over.

With LosslessCut, you can do:

  • Losslessly trim or cut out parts of video/audio
  • Lossless merge/concatenation of arbitrary files (identical codec parameters)
  • Lossless stream editing: Combine arbitrary tracks from multiple files
  • Losslessly extract all tracks from a file
  • Remux into any compatible output format
  • Take full-resolution snapshots from videos in JPEG/PNG format
  • Apply a per-file timecode offset in the preview
  • Change rotation/orientation metadata in videos
  • Powerful timeline with zoom and frame/keyframe jumping
  • Auto-saves per project cut segments to file
  • View ffmpeg last command log so you can modify and re-run modify recent commands on the command line
  • Give labels to cut segments
  • Segment panel showing segments with details, export/import cut segments as CSV
  • Video thumbnails and audio waveform
  • Cut out commercials from a recorded TV show
  • Replace audio track
  • Include a subtitle into a video
  • Extract audio, video, oro subtitle track from video

How to Get LosslessCut in Ubuntu:

There’s no .deb binary package for the software so far. You can either download the appimage or Linux tarball from the link below:

You can choose:

  • grab the .appimage package, give executable permission in file Properties, finally run it to launch the software.
  • or download the Linux tarball, extract and run the executable file to open the video editor.

Launch Lossless Cut executable from portable Linux tarball

The software is also available in Ubuntu Software as Snap package. The package version is however lag behind.

For those OK with Linux universal Flatpak package, LosslessCut can be also installed via the flathub repository.

Going to free up Ubuntu system disk space? Try clearing the systemd journal logs, it may free up a few GB of space.

NOTE: This tutorial is tested and works in my case in Ubuntu 24.04, Ubuntu 22.04, and Ubuntu 20.04

By using the Disk Usage Analyzer tool, I found that /var/log/journal takes more than 4 GB system space in my Ubuntu 20.04.

Systemd has its own logging system called the journal, and the log files are stored in /var/log/journal. As long as I don’t need the logs for any debugging, it’s safe to delete these files. And following steps will show you how.

1. First open terminal from system app launcher, and you may run command to check out the current disk usage of all journal files:

journalctl --disk-usage

2. If you decide to clear the logs, run command to rotate the journal files. All currently active journal files will be marked as archived, so that they are never written to in future.

sudo journalctl --rotate

3. Now clear the journal logs by choosing one of following commands:

  • Delete journal logs older than X days:
    sudo journalctl --vacuum-time=2days
  • Delete log files until the disk space taken falls below the specified size:
    sudo journalctl --vacuum-size=100M
  • Delete old logs and limit file number to X:
    sudo journalctl --vacuum-files=5

4. You can also edit the configuration file to limit the journal log disk usage (100 MB for example).

Run command in terminal to edit the file via Gedit text editor (For 24.04+, replace gedit with gnome-text-editor or use nano that works in most desktops):

sudo -H gedit /etc/systemd/journald.conf

When the file opens, un-comment (remove # at the beginning) the line #SystemMaxUse= and change it to SystemMaxUse=100M.

Finally, save the file (for nano, press Ctrl+S then Ctrl+X) and reload systemd daemon via command:

systemctl daemon-reload

That’s all, Enjoy!

Want to install Google Fonts in Ubuntu? The GTK+ Font Manager now adds support for Google Fonts integration.

Font Manager is a simple font management tool for GTK+ desktop environment. By releasing version 0.8.0, it adds support for downloading and managing Google Web Fonts, so that you can use Google Fonts for off-line use on your desktop.

Font Manager 0.8 changelog:

  • Fix FTBFS with Vala 0.50+
  • Add Google Fonts integration via G button on header bar.
  • Require WebKitGtk and libsoup
  • Allow saving compare lists contents
  • Add GNOME Shell search provider
  • Update Unicode data to 13.0
  • Update vendor data

How to Install Font Manager 0.8.0 in Ubuntu 20.04:

The software has an official staging PPA contains the latest packages for Ubuntu 20.04 and Ubuntu 20.10.

1. Open terminal from your system application launcher. When it opens, run command to add the PPA:

sudo add-apt-repository ppa:font-manager/staging

Type user password (no asterisk feedback) for sudo prompts and hit Enter to continue.

2. Then upgrade the font manager, if an old version was installed, via Software Updater. Or run command in terminal to install it:

sudo apt install font-manager

Uninstall Font Manager

To remove the PPA repository, either go to Software & Updates -> Other Software tab, or run command in terminal:

sudo add-apt-repository --remove ppa:font-manager/staging

And remove the font manager if you want via command:

sudo apt remove font-manager font-manager-common