![]()
This simple tutorial shows how to enable Secure Shell (SSH) in Ubuntu 22.04, so you can login remotely and transfer data securely via the cryptographic network protocol.
Ubuntu uses OpenSSH to provide Secure Shell services. The client is pre-installed with out-of-the-box support for connecting to remove SSH server. The server package is available in system repository but not installed by default.
1. Install SSH Server:
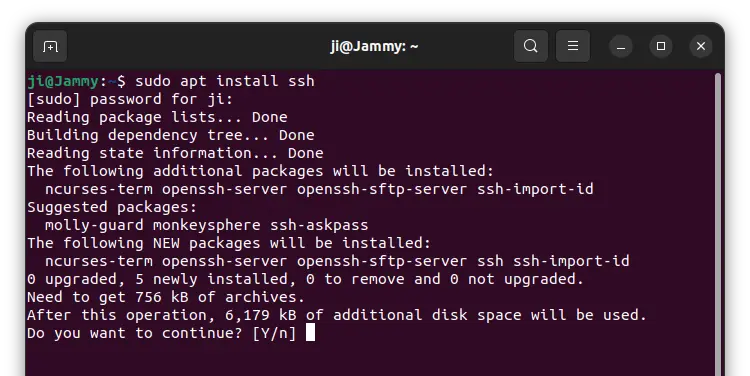
Firstly, connect to your Ubuntu server, or press Ctrl+Alt+T on keyboard to open terminal in Ubuntu desktop.
When it opens, run the command below to install the server package:
sudo apt install ssh
Type user password for sudo authentication, though there’s no asterisk feedback
Once installed the service should run automatically. If not, use commands below to enable and start it:
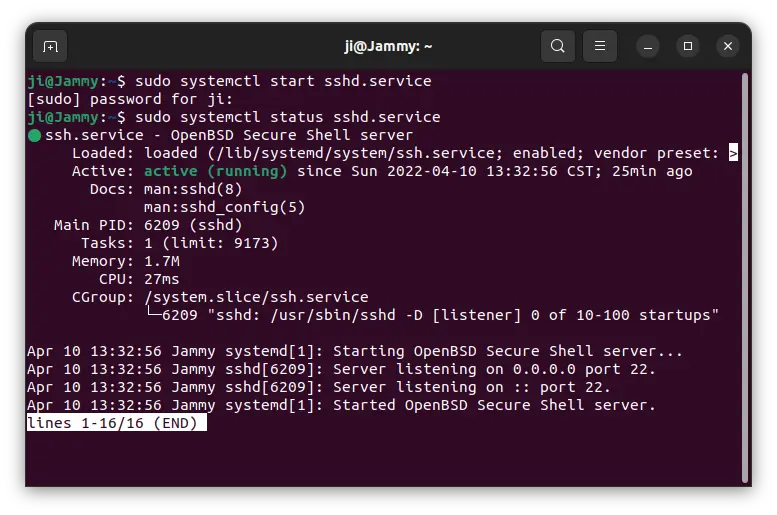
sudo systemctl enable sshd && sudo systemctl start ssh
And, check the service status using command:
systemctl status ssh.service
2. Configure SSH Server:
After step 1, you should be able to connect to this Ubuntu server or desktop remotely via ssh and/or scp commands.
You may however configure it to listen on a different port, specify which users allowed to login, change the authentication methods, etc.
To do so, edit the “/etc/ssh/sshd_config” via the command below:
sudo nano /etc/ssh/sshd_config
For Ubuntu Desktop, replace nano with gedit to edit the config file with a graphical interface.
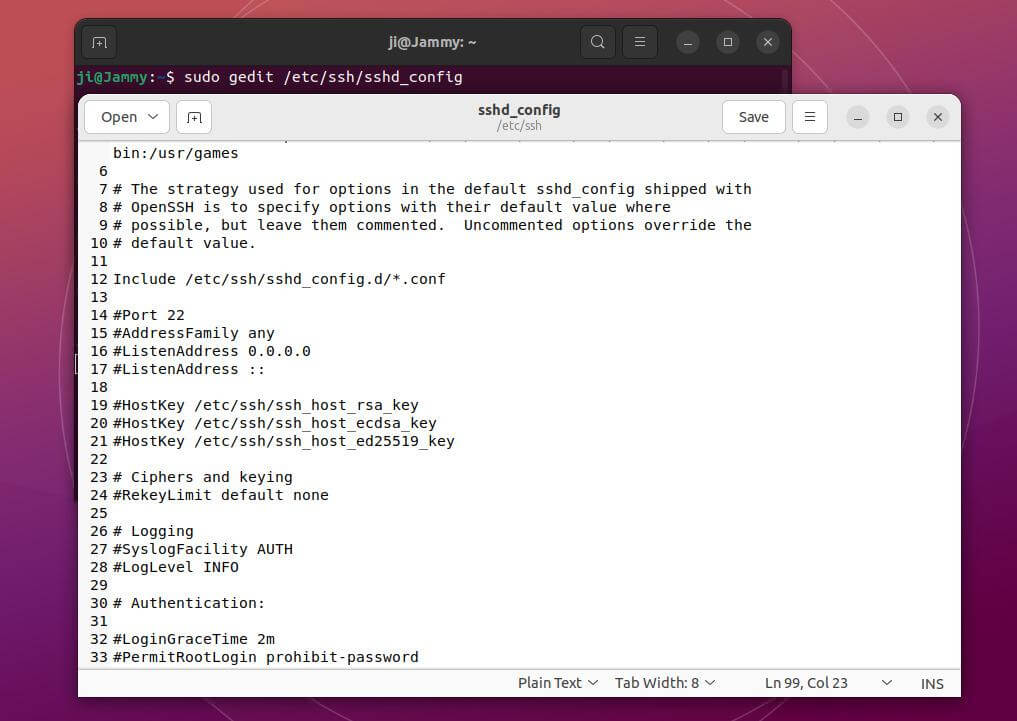
When the file opens, by removing ‘#‘ at the beginning and changing the number after ‘Port’ will change the listening port; Enable “PermitRootLogin prohibit-password” (remove # at the beginning will enable it) will allow root login via authentication key. To allow password login, change the value to ‘yes’, and you need to enable “PasswordAuthentication yes”.
For more configurations, see this document. And, if you want to setup an authentication key to login without password, try this tutorial.
After saving the file, remember to restart the SSH service to apply changes:
sudo systemctl restart sshd
3. Login or transfer data via SSH:
After setup the remote SSH server, you may run the command below to login remotely:
ssh server_user@server_ip -p 22890
Change the port number 22890 to yours or skip the -p flag if the default port is in use.
And, copy data from local to server via scp command:
scp -P 22890 /PATH/TO/FILE server_user@server_ip:/PATH/TO/DESTINATION
Or, grab data from server to local machine’s current directory via command:
scp -P 22890 server_user@server_ip:/PATH/TO/FILE ./