Archives For November 30, 1999

MusicBrainz Picard 2.0 stable was released today many fixes and new features and much needed upgrades!

MusicBrainz Picard 2.0 release highlights:

  • Add Retina and Hi-DPI display support.
  • Add DSF file support
  • Add keyboard shortcut for deleting scripts from options > scripting page
  • Support only 64 bit Picard builds from 2.0
  • Update dependencies minimal requirements: Python 3.5, PyQt 5.7, and Mutagen 1.37.
  • And numerous bug-fixes, UI and performance improvements.

How to Install MusicBrainz Picard 2.0 in Ubuntu:

The official PPA has built the music tagger for Ubuntu 17.10, Ubuntu 18.04, and Ubuntu 18.10.

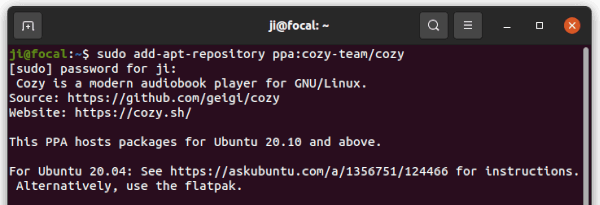
1. Launch terminal either via Ctrl+Alt+T keyboard shortcut or searching for ‘terminal’ from software launcher. When it opens, run command to add the PPA:

sudo add-apt-repository ppa:musicbrainz-developers/stable

Type your user password (no asterisks feedback) when it prompts and hit Enter to continue.

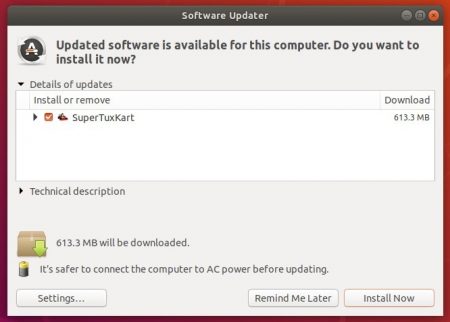
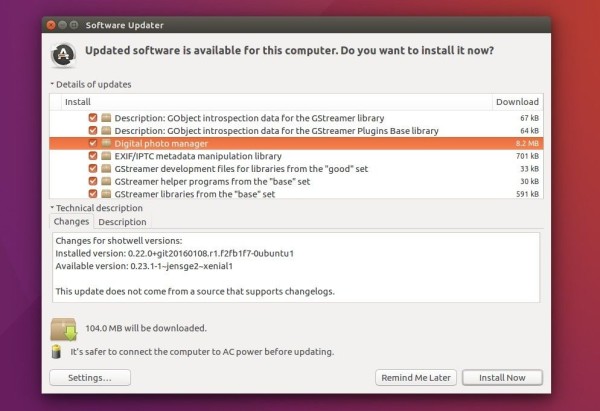
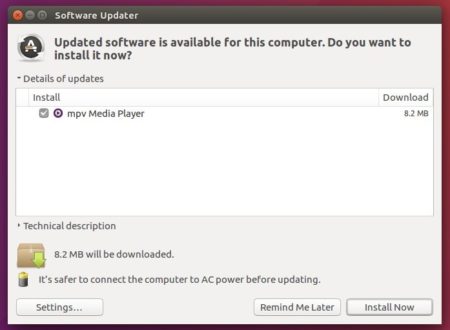
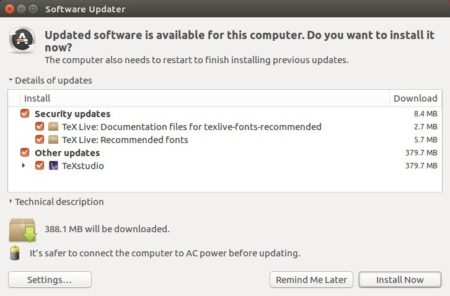
2. If a previous version was installed, upgrade the software via Software Updater:

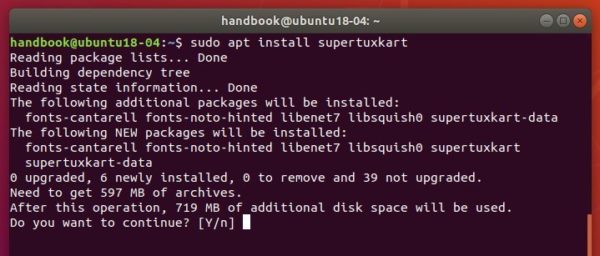
or run following commands one by one in terminal to install or upgrade to MusicBrainz Picard 2.0:

sudo apt-get update

sudo apt-get install picard

Uninstall:

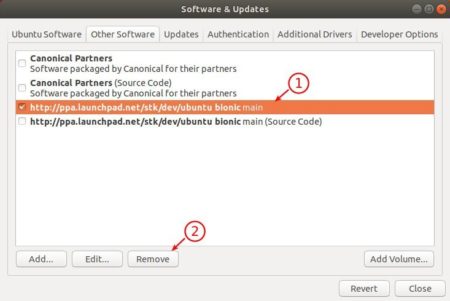
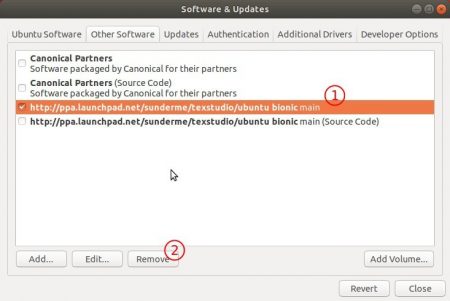
To remove the PPA, launch Software & Updates and navigate to Other Software tab.

To remove MusicBrainz Picard music tagger, run command in terminal:

sudo apt-get remove --autoremove picard

wireshark

Wireshark network packet analyzer 2.6 stable series now is available to install in all current Ubuntu releases via the stable PPA.

Wireshark 2.6 was released 3 months ago in Apirl. It mainly features:

  • Support for HTTP Request sequences
  • Support for MaxMind DB files. Support for GeoIP and GeoLite Legacy databases has been removed.
  • The Windows packages are now built using Microsoft Visual Studio 2017.
  • The IP map feature (the “Map” button in the “Endpoints” dialog) has been removed.

Install Wireshark 2.6 via PPA in Ubuntu:

So far the PPA contains Wireshark 2.6.1 for Ubuntu 18.04, Ubuntu 17.10, Ubuntu 16.04, Ubuntu 14.04.

1. Open terminal by either pressing Ctrl+Alt+T or searching for ‘terminal’ from app launcher. When it opens, run command:

sudo add-apt-repository ppa:wireshark-dev/stable

Type your user password (no asterisks feedback due to security reason) when it prompts and hit Enter.

2. If you’ve the previous Wireshark 2.4.x installed on your system, remove it first via command:

sudo apt-get remove --autoremove wireshark

3. Finally run following commands one by one in terminal to install Wireshark 2.6:

sudo apt-get update

sudo apt-get install wireshark

Uninstall:

To remove the software, open terminal and run command:

sudo apt-get remove --autoremove wireshark wireshark-*

And remove the PPA by launching Software & Updates -> Other Software tab.

Nvidia Linux driver

For Ubuntu 18.04 users plagued by screen tearing issue while using NVIDIA proprietary drivers, this quick tutorial may help you via enable PRIME Synchronization on Optimus.

Screen tearing usually happens on Ubuntu Linux laptop that uses Prime to switch between NVIDIA and Intel drivers.

1. Open terminal (either via Ctrl+Alt+T or by searching for ‘terminal’ from software launcher) and run command to create a new config file:

sudo gedit /etc/modprobe.d/nvidia-drm-nomodeset.conf

Type your password (no asterisks feedback) when it prompts and hit Enter.

2. When the file opens after running the previous command, add following line and save the file.

options nvidia-drm modeset=1

3. Finally update intramfs and reboot your machine.

sudo update-initramfs -u

To check if previous changes work after reboot, run command:

sudo cat /sys/module/nvidia_drm/parameters/modeset

It should output ‘Y’.

In addition, to get much SMOOTHER Nvidia window dragging experience, you can also do:

1. Set maximum performance in Nvidia X Server Settings -> PowerMizer.

2. If you have MORE than enough RAM, set swap tendency to a MUCH lower value by running command to edit sysctl.conf:

sudo gedit /etc/sysctl.conf

and add following 2 lines when the file opens:

via: ubuntuforums

gnome shell

After doing a fresh install of Ubuntu 18.04 on my old ASUS laptop, I found that the touchpad right-click does not work. This is because Ubuntu 18.04 by default acts right-click when you perform two-finger click on touchpad.

While my laptop touchpad does not have physical buttons, I have to do two-finger click to perform right-click.

So following steps will show you how to make right-click (clicking on the bottom right area of the touchpad) working again in touchpad without a physical button in Ubuntu 18.04.

1. Open Ubuntu Software, search for and install Gnome Tweaks.

2. Launch Gnome Tweaks and navigate to Keyboard & Mouse settings page.

Under Mouse Click Emulation, simply click enable the second option: “Area – Click the bottom right of the touchpad for right-click and the bottom middle for middle click.”

That’s it. Enjoy!

Looking for how to create desktop slideshow in Ubuntu 18.04? Here I’ll show you some best wallpaper changing software for Ubuntu Linux.

1. Shotwell

For just the basic automatic wallpaper changing feature, you don’t need to install any software.

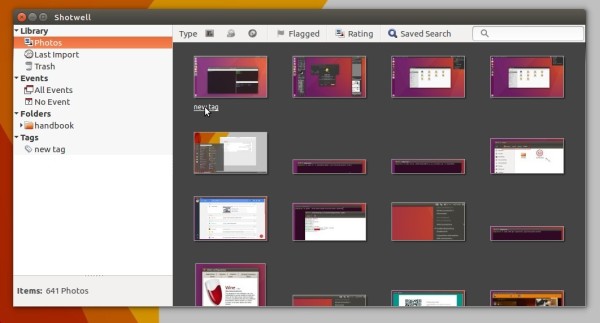
Just launch the pre-installed Shotwell photo manager, choose the pictures you need (you may need to import them first), then go to Files -> Set as Desktop Slideshow.

Finally set the time interval in next dialog and done!

2. Wallch

Wallch was my favorite wallpaper changing software though it’s not under active development. Besides changing local wallpapers, Wallch also features:

  • Display live earth as desktop background.
  • Download and display picture of the day (wikipedia).
  • Wallpaper clocks
  • Live website as desktop background.

Wallch can be easily installed in Ubuntu Software:

3. Variety

Variety is an open-source wallpaper changer that use local images or automatically download wallpapers from Unsplash and other online sources, allows you to rotate them on a regular interval, and provides easy ways to separate the great images from the junk. Variety can also display wise and funny quotations or a nice digital clock on the desktop.

Variety can be easily installed in Ubuntu Software. For the latest release, go to Variety website.

4. Wallpaper Downloader

This is a wallpaper downloading software that automatically downloads pictures from Devianart, Bing daily wallpaper, Wallhaven.cc, etc., with given keywords, resolution, time interval. And of course, it provides ability to change wallpaper every x minute.

Wallpaper Downloader can be installed easily in Ubuntu Software.

These are the applications that I’ve ever used to create desktop slideshows in Ubuntu desktop.

If you know any other great wallpaper changing software, feel free to tell me in the comment.

gnome shell

This quick tutorial is going to show you how to change the transparency level of the Gnome 3 desktop top panel in Ubuntu 18.04 LTS, though

It’s easy to configure top panel transparency via a Gnome Shell extension called Dynamic Top Bar. With the extension, you can easily configure top panel transparency if app is not full screen:

  • top panel transparency style: transparency or gradient.
  • transparency level.
  • Show or hide button shadow, Activities button text.

1. Open Ubuntu Software, search for and install Dynamic Top Bar

2. Once installed, go to extension settings via the install page (Ubuntu Software) or Gnome tweak tool (install it via Ubuntu Software).

That’s it. Enjoy!

How to Install Pidgin 2.13.0 in Ubuntu 18.04

Last updated: July 12, 2018

Pidgin internet messenger

This quick tutorial shows how to install the latest Pidgin internet messenger 2.13.0 in Ubuntu 18.04.

Pidgin 2.13.0 was released a few months ago with better support for dark themes and various bug-fixes. While Ubuntu 18.04 ships with an old version in its main repository, you can install or upgrade to Pidgin 2.13.0 via this unofficial PPA.

The PPA packages also contain an IRC connection flood patch for this bug.

Install Pidgin 2.13.0 via PPA in Ubuntu 18.04:

Open terminal either via Ctrl+Alt+T or by searching for ‘terminal’ from software launcher. When it opens, run command to add the PPA:

sudo add-apt-repository ppa:kip/pidgin

Type your user password (no asterisks feedback) when it prompts and hit Enter.

Then you can upgrade the internet messenger via Software Updater:

or run command in terminal to install Pidgin 2.13.0:

sudo apt-get install pidgin

Uninstall:

For any reason you can easily purge the PPA which also downgrade Pidgin to the stock version in Ubuntu 18.04 repository:

sudo apt-get install ppa-purge && sudo ppa-purge ppa:kip/pidgin

RedNotebook is a free cross-platform desktop diary and journal software written with Python and GTK+3. It lets you format, tag and search your entries. You can also add pictures, links and customizable templates, spell check your notes, and export to plain text, HTML, Latex or PDF.

The software has an official stable PPA that contains the latest packages for Ubuntu 18.04 and Ubuntu 16.04 so far. And below will show you how to add the PPA and install RedNotebook.

1. Open terminal either via Ctrl+Alt+T keyboard shortcuts or by searching for ‘terminal’ from software launcher.

2. Copy and paste following command into terminal and hit run to add the RedNotebook PPA:

sudo add-apt-repository ppa:rednotebook/stable

Type your password (no asterisks feedback due to security reason) when it prompts and hit Enter.

3. Finally check updates and install the desktop journal software by running following 2 commands one by one:

sudo apt update 

sudo apt install rednotebook

Ubuntu 18.04 users can skip sudo apt update command since it’s already done while adding PPA.

Uninstall:

To remove RedNotebook desktop journal, open terminal and run command:

sudo apt remove --autoremove rednotebook

And remove the PPA via Software & Updates utility -> Other Software tab.

For those looking for Time Machine like backup software, Cronopete is a Linux backup utility modeled after Apple’s time machine.

“The name comes from anacronopete (“who flies through time”), which is a time machine featured in the novel from Enrique Gaspar y Rimbaud, and published in 1887 (eight years before than H.G. Wells’Time Machine).”

Install Cronopete backup tool in Ubuntu:

The software project page so far offers packages for Ubuntu 18.04, Ubuntu 17.10, and other Linux.

Download Cronopete

Grab the package for Ubuntu bionic (for Ubuntu 18.04), or package for Ubuntu artful (for Ubuntu 17.10).

Then install it via:

  1. Install Gdebi package installer from Ubuntu Software.
  2. Right-click on downloaded .deb package, then go to open with Other Application -> Gdebi package installer.
  3. Finally click install the Cronopete package.

Or open terminal (Ctrl+Alt+T) and run command to install the package:

sudo dpkg -i ~/Downloads/cronopete-*.deb; sudo apt-get -f install

Once installed, open the settings dialog from your system app launcher and enjoy!

Enable store backups in a folder:

When you click ‘Change destination’ button to choose a folder to save backups, you’ll be prompted to enable folder backend. And this can be done by:

  1. Install Dconf Editor via Ubuntu Software.
  2. Launch Dconf Editor and navigate to /org/rastersoft/cronopete
  3. Scroll down and enable enable-folder-backend

Uninstall:

To remove Cronopete backup tool, open terminal via Ctrl+Alt+T and run command:

sudo apt-get remove --autoremove cronopete

This quick tutorial shows you how to install the latest GNU Octave in all current Ubuntu releases via Flatpak packages.

Since there’s no stable PPA contains the latest Octave packages, Flatpak package is the easiest way to get the numerical computation software running on Ubuntu.

Similar to Snap, Flatpak is an universal Linux package format that runs in sandbox.

1. First open terminal (Ctrl+Alt+T) and make sure Flatpak support is enabled by running command:

sudo apt-get install flatpak

Old Ubuntu 16.04 & Ubuntu 18.04 need to add the Flatpak PPA first to install Flatpak framework.

sudo add-apt-repository ppa:flatpak/stable

2. Then add the Flathub repository, the best place to get Flatpak apps:

flatpak remote-add --if-not-exists flathub https://flathub.org/repo/flathub.flatpakrepo

3. Finally install most recent GNU Octave as Flatpak package from the Flathub repository:

flatpak install flathub org.octave.Octave

It will take a few minutes downloading the flatpak package as well as dependency platform if you’re first time installing it.

Like normal applications, you can launch Octave from Gnome app launcher:

The flatpak co-exists with traditional Octave package. You can alternatively run it in command line:

flatpak run org.octave.Octave

Uninstall

You can remove the Octave flatpak package by running command:

flatpak uninstall --delete-data org.octave.Octave

And remove flatpak support if you want:

sudo apt-get remove flatpak