Archives For November 30, 1999

irc client for command line

The command-line irc client f-irc has reached version 1.32. This release sanitizes user interface logic. A crash in /LIST has been fixed. The user menu now automatically retrieves full names. Joining a channel from the list shows the topics as well. DCC did not work. This release can let the channel list be sorted. Improved search in channel and user input scrollback windows.

F-IRC client

The source tarball is available in its official web page.

For Ubuntu 14.04, Ubuntu 13.10, Ubuntu 12.10, Ubuntu 12.04, Linux Mint and their derivatives, you can install this client from my PPA.

Press Ctrl+Alt+T on keyboard to open the terminal. When it opens, run below commands one by one:

sudo add-apt-repository ppa:ubuntuhandbook1/apps

sudo apt-get update

sudo apt-get install f-irc

This will add the PPA, update your system packages list and install f-irc client.

Once installed, run man f-irc to get help.

Keystroke Visualizer

Keystroke is a Qt based keystroke visualization tool for Linux. This is a new KDE project just created a few days ago. It is helpful when creating screencasts where you want to show what you are typing. E.g. when using vim.

See the video:

This keystroke visualization tool only works on K Desktop Environment (KDE). For Ubuntu users, you can easily install it by running the commands below one by one in terminal (Press Ctrl+Alt+T to open the terminal):

sudo add-apt-repository -y ppa:samrog131/ppa

sudo apt-get update

sudo apt-get install keystroke

This will install the tool in (K)ubuntu 14.04, (K)ubuntu 13.10, (K)ubuntu 12.10, and (K)ubuntu 12.04.

Once installed, search for and run keystroke-gui in the start menu and then type anything to see the magic!

keystroke visualization tool KDE

keystroke on github

DeadBeef 0.6.1

DeaDBeeF music player has recently released a new version with lots of bug fixes. This is the first update after deadbeef added the gui layout designer.

Deadbeef 0.6.1 changelog:

  • fixed crash in AAC plugin when mp4 file reports 0 samples (e.g. radio rips)
  • fixed libsupc++ linking issues
  • fixed support for gcc<4.5
  • changed description of hotkeys plugin in configure
  • fixed 100% CPU load issues with certain hotkeys
  • fixed opening files from command line into default playlist
  • don’t allow spawning multiple instances of converter
  • fixed EQ drawing past the bottom margin
  • fixed progress dialog while loading playlists
  • fixed M3UINF parser
  • reverted MP3 bugfixes which introduced incorrect duration calculation
  • fixed ungrabbing deleted global hotkeys
  • added config option to help debug buffering/streaming
  • ffmpeg plugin can now handle dynamic data format changes
  • fixed rare buffering problem which was causing stuttering for some users
  • fixed running without X and/or without GUI plugin
  • fixed mp3 duration rounding bug
  • fixed incorrect scroll/cursor after deleting playlists
  • added support for loading plugins from ~/.local/lib{32|64}/deadbeef, depending on running deadbeef build version
  • fixed bug imposing 256 byte limit on file pathes in archives
  • fixed column autoresize issues
  • removed libstdc++ hacks from C++ plugins
  • fixed “Remove from disk” menu item not being hidden by corresponding option
  • fixed applying “Pin group titles” config on startup (patch from Christian Boxdörfer)
  • improved charset detection in CUE files, not longer allowing invalid utf-8 to go through
  • paused network streams don’t attempt to prebuffer until played
  • unpausing network streams always restarts them
  • prevent loading playlists from archives (treat them like folders)
  • hide the “Hotkeys” tab from preferences if hotkeys plugin is not available
  • don’t build shellexecui if not building shellexec
  • fixed memleak when drag-dropping pls/m3u playlists from file managers
  • prevent passing non-utf8 filenames to progress dialog
  • fixed crash when opening invalid VTX files
  • fixed crash when opening invalid WMA files
  • don’t delete replaygain info from FLACs when writing tags
  • fixed really old buffer overflow bug in dnd handler (kudos to Megabaks)

Install DeadBeef:

Deb, Arch, and source packages are available at official download page.

You can also run the commands below one by one in terminal (Ctrl+Alt+T) to install it from PPA. Supports Ubuntu 13.10, Ubuntu 12.04, Ubuntu 12.10 and their derivatives.

sudo add-apt-repository ppa:starws-box/deadbeef-player

sudo apt-get update

sudo apt-get install deadbeef
customized deabeef music player in Ubuntu 13.10

customized deabeef music player in Ubuntu 13.10

android emulator ubuntu

Want to emulate Nexus, Galaxy, or other Android Phone/Tablet on Ubuntu Desktop? Well, you may already know the handy tool Genymotion.

Genymotion is a complete set of tools that provides a virtual environment for Android. It can be very useful for developers, testers, salesman or even gamers. Genymotion is free for personal use. For full features, you need to buy a license.

Features:

  • OpenGL acceleration to achieve the best 3D performance
  • Enable full screen option and improve your experience
  • Be precise in your UI development with the “pixel perfect” functionality
  • Start multiple virtual device at the same time
  • Override virtual device identifiers
  • Directly command virtual devices sensors with Genymotion Shell
  • Fully compatible with ADB. You can control your virtual device from the host
  • Manage sensors: Battery level / status, GPS, Rotation, Camera

Since 2.1:

  • supports copy/paste from the host to the virtual device, or from the virtual device to the host using Android builtin copy/paste feature.
  • Android 4.4 support

Screenshots:

Create a new virtual device

list of installed devices

 
Nexus 4 4.4.2 emulator

Install Genymotion:

1. This Android Emulator requires Virtualbox, so first search for and install virtualbox in Ubuntu Software Center.

2. Register https://cloud.genymotion.com/ (free).

3. Download the installer after your login the website. Not sure Linux 32 bits or 64 bits? Go to System Settings -> Details and you’ll see the OS type:

System-type-32bit-64-bit

4. If you save the installer in the default Downloads folder, press Ctrl+Alt+T to open terminal. When it opens, run below commands one by one:

cd ~/Downloads/

chmod +x genymotion-2.1.0_x64.bin

./genymotion-2.1.0_x64.bin

It first navigate to Downloads folder, then give executable permission, and finally start the installer. Of course you need to change the file-name to yours.

install genymotion android emulator

5. According to the previous picture genymotion has been installed to “/home/handbook/Downloads/genymotion”.

So run below command to start it:

/home/handbook/Downloads/genymotion/genymotion

charging ipad air

If you have an Apple mobile device and want to charge it through the USB port in Ubuntu Linux machine, you’ll find a little app called ipad_charge which was originally developed by Ondrej Zary from Rainbow-Software.

This simple app supports following devices:

  • iPad / iPad2 / iPad3 / iPad4 / iPad Mini
  • iPod Touch 2G/3G/4G
  • iPhone 3GS/4/4s/5

The developer of super-wingpanel has done a little tweak on the code so that iPad air is supported now. This build has been made into PPA for Ubuntu 14.04, Ubuntu 13.10, Ubuntu 12.10, Ubuntu 12.04, Linux Mint and their derivatives.

Install ipad-charge:

Press Ctrl+Alt+T on keyboard to open the terminal. When it opens, run below commands one by one:

sudo apt-add-repository ppa:heathbar/ipad-charge

sudo apt-get update

sudo apt-get install libusb-1.0-0 ipad-charge

After that, your iPad should be automatically detected and charging enabled when you plug it in. However, if it’s not you may have to troubleshoot.

Troubleshooting:

If the udev rules are not automatically enabling charging when you plug in your device, you can run the program manually.

ipad-charge

If your iPad is still not charging you can find the device IDs of all Apple products with this command.

ipad-charge -l

If more than one is listed, you may have to run it with your iPad unplugged, then plugged in to find the correct ID. Once you determine the ID, report the ID to the links below.

via: ipad_charge on github

Fotoxx faster workflow


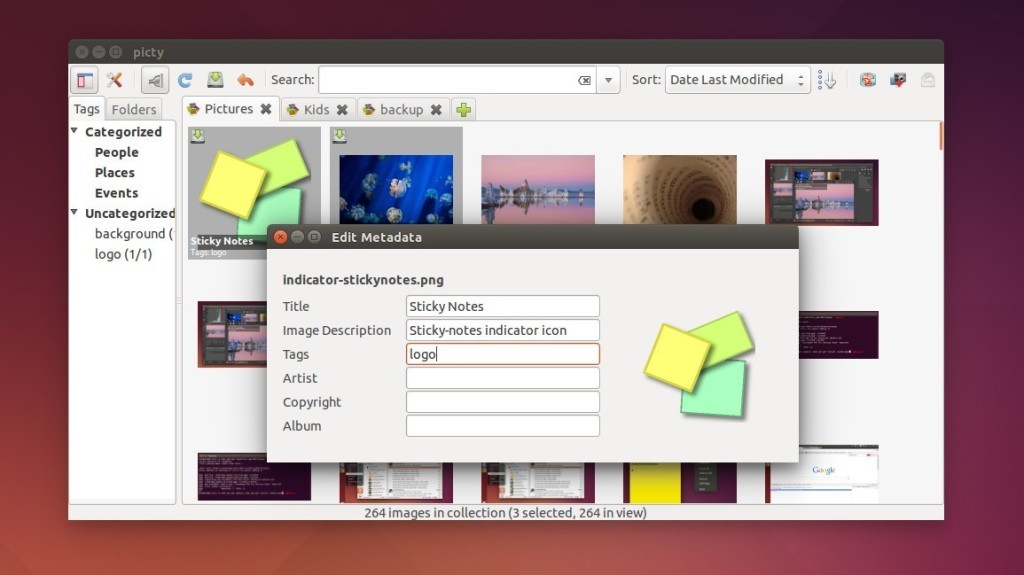
Fotoxx, a free and open source photo editing software has reached version 14.02 recently with improvements and bug fixes.

As you may know, Fotoxx is a Linux program for photo editing and collection management. The goal is to meet most user needs while remaining fast and easy to use.

Version 14.02 changelog:

  • Index Image Files (aka Synchronize) runs faster. Intermixing image files with
    100K other files under /home/user/… has little effect on speed.
    Startup time is also faster for the normal case of few new image files.
  • Retouch Combo: sliders were added for fast adjustment of overall brightness,
    contrast and color. The curves can then be hand-tuned if needed.
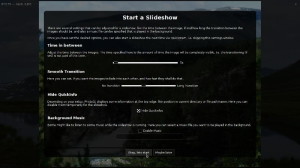
  • Slide Show: a new transition type simulates turning a book page.
  • Slide Show: images are clipped to exactly fit the monitor if the difference
    in aspect ratio is less than a predefined limit.
  • Slide Show: optionally show captions/comments above each image.
  • The batch Rename and Convert functions were combined for convenience.
  • Batch Convert has a new option to automatically sharpen images.
  • Paint/Clone: a “shadow” paintbrush tracks the source of copied pixels.
  • Retouch Combo, Trim/Rotate and Resize can recall prior settings for easier application to multiple images needing similar treatments.
  • Mashup: resizing/rotating an overlay image with the mouse is smoother.
  • Editing in a selected area: edge blending was made a bit smoother.
  • Search Images: select a gallery (thumbnails) report or a tabular report for
    listing desired metadata along with a thumbnail image.
  • Block metadata edits for image types not supporting this (e.g. bmp, gif).
  • Bugfix: Texture function converted RGB 0/0/0 pixels into illegal values.
  • Bugfix: Bogus error message about exceeding geotag limits.
  • Bugfix: Trim function left temporary image remnants on the window.

Download:

The official download page provides the DEB packages for Ubuntu and its derivatives.

Fotoxx Download Page

Fotoxx 14.01 ubuntu 13.10

Enable Global Menu in Elementary OS Luna

Last updated: February 10, 2014

Global Menu in Elementary OS Luna

Want to try the Ubuntu Unity-Style Global Menu in Elementary OS Luna? Well, it’s easy to accomplish this via super wingpanel.

Super Wingpanel, wingpanel from the elementaryos project with some additional features:

  • auto hide / intellihide / intellislim
  • slim mode a la wingpanel-slim

First take a look at the result:

global menu in elementary os Luna

global menu in elementary os luna

NOTE: Super Wingpanel is not stable at the moment, use it at your own risk!

To install this tool, press Ctrl+Alt+T on your keyboard to open the terminal. When it opens, run the commands below one by one:

sudo apt-add-repository ppa:heathbar/super-wingpanel-daily

sudo apt-get update

sudo apt-get install super-wingpanel

To get it working, indicator-appmenu and dconf-tools are needed. Install them via:

sudo apt-get install indicator-appmenu dconf-tools

To enable Global Menu:

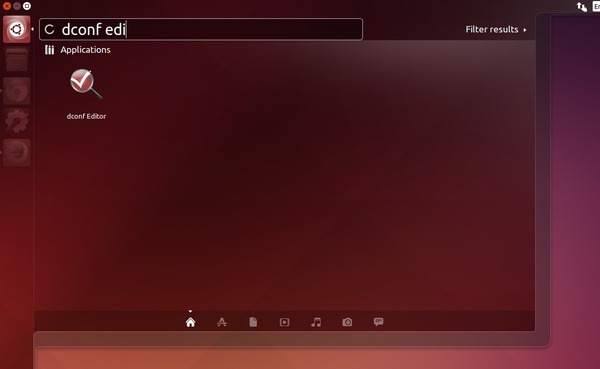
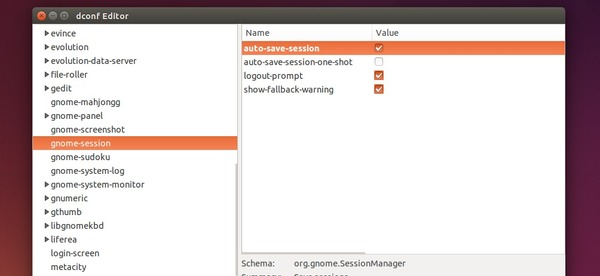
1. Open dconf Editor from the Applications menu.

2. Navigate to org -> pantheon -> cerbere, enable appmenu and super wingpanel by changing the value of monitored-process to:

[‘plank’, ‘slingshot-launcher –silent’, ‘env UBUNTU_MENUPROXY=0 super-wingpanel’]

enable super wingpanel

3. Navigate to org -> pantheon -> desktop -> super-wingpanel, change the value of blacklist to:

[”]

enable-super-wingpanel1

Log out and back in. Done.

LibreOffice 4.2

This is a beginners’ guide about how to install or upgrade to the latest official build of LibreOffice in Ubuntu or Linux Mint.

As you may know, the open-source office suite LibreOffice 4.2 has been released recently which is focusing on performance and interoperability, and improving the integration with Microsoft Windows. See what’s new in LibreOffice 4.2

To install LibreOffice 4.2 in Ubuntu:

1. Press Ctrl+Alt+T on keyboard to open the terminal. When it opens, run the command below to remove the previous installation:

sudo apt-get remove --purge libreoffice*

Remove LibreOffice

2. Check out your system type, 32 bit or 64 bit, by going to System Settings -> Details

System-type-32bit-64-bit

3. Download:

LibreOffice_4.2.0_Linux_x86_deb.tar.gz (32 bit)

LibreOffice_4.2.0_Linux_x86-64_deb.tar.gz (64 bit)

Go to this page when a new release is out.

4. Right on the downloaded package and extract it. After that, you’ll see the result folder: LibreOffice_4.2.0.4_Linux_x86-64_deb.

extract libreoffice package

5. In previous terminal window (or press Ctrl+Alt+T to open a new one), run the command below to navigate to LibreOffice folder:

cd ~/Downloads/LibreOffice_4.2.0*

You may replace “LibreOffice_4.2.0*” with your full folder name.

6. Now install all the debian packages under DEBS:

cd DEBS && sudo dpkg -i *.deb

Install LibreOffice DEB

After that, you can Launch LibreOffice 4.2 from Unity Dash or Menu.

Linux Kernel 3.13.1

Greg KH has announced the first update of Linux Kernel 3.13. If you are using the first release in the Linux kernel 3.13.x branch, you should consider an update to this build.

Linux Kernel 3.13.1 is a very small release. See the changelog:

  • staging: comedi: fix result of memdup_user for user chanlist
  • GFS2: Increase i_writecount during gfs2_setattr_chown
  • ALSA: hda – Explicitly keep codec powered up in hdmi_present_sense
  • mm: Make {,set}page_address() static inline if WANT_PAGE_VIRTUAL
  • extcon: gpio: Request gpio pin before modifying its state
  • staging: comedi: addi_apci_1032: fix subdevice type/flags bug
  • staging: comedi: adl_pci9111: fix incorrect irq passed to request_irq()
  • serial: amba-pl011: use port lock to guard control register access
  • md/raid5: fix long-standing problem with bitmap handling on write failure.
  • md/raid5: close recently introduced race in stripe_head management.

Install:

The DEB packages of this release are available in this page. Download & install them in turn:

  1. linux-headers-3.13.1-xxxxxx_all.deb
  2. linux-headers-3.13.1-xxx-generic_3.13.1-xxx_i386/amd64.deb
  3. linux-image-3.13.1-xxx-generic_3.13.1-xxx_i386/amd64.deb

For command line:

1. Download the DEBs:

For 32 bit system:

wget http://kernel.ubuntu.com/~kernel-ppa/mainline/v3.13.1-trusty/linux-headers-3.13.1-031301-generic_3.13.1-031301.201401291035_i386.deb

wget http://kernel.ubuntu.com/~kernel-ppa/mainline/v3.13.1-trusty/linux-headers-3.13.1-031301_3.13.1-031301.201401291035_all.deb

wget http://kernel.ubuntu.com/~kernel-ppa/mainline/v3.13.1-trusty/linux-image-3.13.1-031301-generic_3.13.1-031301.201401291035_i386.deb

For 64 bit system:

wget http://kernel.ubuntu.com/~kernel-ppa/mainline/v3.13.1-trusty/linux-headers-3.13.1-031301-generic_3.13.1-031301.201401291035_amd64.deb

wget http://kernel.ubuntu.com/~kernel-ppa/mainline/v3.13.1-trusty/linux-headers-3.13.1-031301_3.13.1-031301.201401291035_all.deb

wget http://kernel.ubuntu.com/~kernel-ppa/mainline/v3.13.1-trusty/linux-image-3.13.1-031301-generic_3.13.1-031301.201401291035_amd64.deb

2. Install all the packages:

sudo dpkg -i linux-headers-3.13.1-*.deb linux-image-3.13.1-*.deb

Once installed, restart your computer and done.

If you’re using a proprietary video driver, you may need to re-build or re-install to get it work with the new kernel.

If for some reason this kernel release doesn’t work properly for you, reboot into previous kernel (Grub -> Advanced -> select previous kernel) and run this command to remove Linux Kernel 3.13.1:

sudo apt-get remove linux-headers-3.13.1-* linux-image-3.13.1-*

luminance hdr icon by ginjaninja405

Luminance HDR, an open source graphical user interface application that aims to provide a workflow for HDR imaging, now is at version 2.4.0.

This release introduces a few new features: automatic anti-ghosting, FITS support, integration with Windows Task Bar, improved I/O with TIFF 32 bit (which will make possible to export to third party software for high-quality post processing), redesigned merge algorithms.

luminance hdr 2.4 Ubuntu

To install this build in Ubuntu 13.10 or Linux Mint 16, press Ctrl+Alt+T on your keyboard to open the terminal. When it opens, run below commands one by one:

sudo add-apt-repository ppa:dhor/myway

sudo apt-get update

sudo apt-get install luminance-hdr

These commands will also install the previous version 2.3.1 in Ubuntu 13.04, Ubuntu 12.10 and Ubuntu 12.04.

Luminance HDR website.