iTALC is a free and open-source classroom management tool for teachers. It lets you view and control other computers in your network in several ways. It supports Linux and Windows and it even can be used transparently in mixed environments!
iTALC has been designed for usage in school. Therefore it offers a lot of possibilities to teachers, such as
- see what’s going on in computer-labs by using overview mode and make snapshots
- remote control computers to support and help other people
- show a demo (either in fullscreen or in a window) – the teacher’s screen is shown on all student’s computers in realtime
- lock workstations for moving undivided attention to teacher
- send text messages to students
- powering on/off and rebooting computers per remote
- remote logon and logoff and remote execution of arbitrary commands/scripts
- home schooling – iTALC’s network-technology is not restricted to a subnet and therefore students at home can join lessons via VPN-connections just by installing iTALC client

Install iTALC:
The default version in Ubuntu repository is old. I’ve upload the latest iTALC 2.0.1 packages into PPA for Ubuntu 13.10, Ubuntu 13.04, Ubuntu 12.10, Ubuntu 12.04 (Debian package belongs to Mike Gabriel).
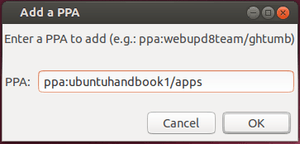
1. To get started installing it, press Ctrl+Alt+T to open terminal and run command to add the PPA:
sudo add-apt-repository ppa:ubuntuhandbook1/apps
After that, install the client and master after checking for updates:
sudo apt-get update

sudo apt-get install italc-master italc-client
For student, just install italc-client. For Ubuntu 14.04, you can directly install the latest packages from Ubuntu Software Center.
2. The installation process should create the authentication key pairs. If not, you can generate them on teacher’s machine manually by running below command:
ica -role teacher -createkeypair
This will create the private & public folder under /etc/italc/keys directory.
3. The public folder need to be sent to the students machines.
a.) For a student machine running with Ubuntu (ssh enabled), run below command in teacher’s machine to copy & paste the key pairs:
scp -r /etc/italc/keys USERNAME@IP_ADDRESS:/tmp
Then in the student machine, run below commands to move the keys to proper location:
sudo rm -rf /etc/italc/keys

sudo mv /tmp/keys /etc/italc/
b.) For a student machine running with Windows, copy the keys folder to Windows client and do:
Open the keys folder that was copied to the Windows client and navigate to keys/public/teacher.
In the keys/public/teacher folder, there will be a file called key. Rename that file to italc_dsa_key.key.txt.
Go to Start -> Search & open iTALC Management Console -> Authentication tab -> click the Launch key file assistant
When prompted, select Import Public Key Of Master Computer, navigate to the file where the italc_dsa_key.key.txt file is housed, click Next, and finish the wizard.
4. Finally start iTALC GUI in teacher’s machine, create classroom and add computer… For more, see the documentation