WebcamStudio is a virtual webcam software that can be used with Skype or a flash website like UStream, to create a professional looking broadcast, including banners, animations, transit animations and icons, etc.
This tool is not meant as a video editor but as a live video mixer giving you the possibilities to change the look of the broadcast on the fly.
Some of the features include:
Install WebcamStudio from GetDeb:
The getdeb repository provides the latest version for Ubuntu 13.04, Ubuntu 12.04 and a little old version of Ubuntu 10.04, Ubuntu 11.10, Ubuntu 12.10, and Linux Mint.
For Ubuntu users, download and double-click the below package to add the GetDeb repository:
download getdeb package
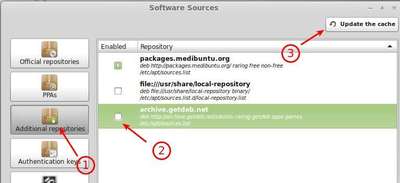
For Linux Mint users, enable the repository from Start menu -> Software Sources -> Additional Repositories
After that, install the WebcamStudio via your package manager. Or run below command in terminal (press Ctrl+Alt+T to open it):
sudo apt-get update; sudo apt-get install webcamstudio